In this tutorial, I will demonstrate how to create a very nice abstract effect, using the super cool Travelator filter. I will make use of some of the Quartz Composer filters in order to show the many different exciting effects that can be achieved with them.
Step 1
Open Pixelmator and create a new document. Let’s go ahead and use a size of 1920×1200 pixels. Next, fill the background layer with black.
Step 2
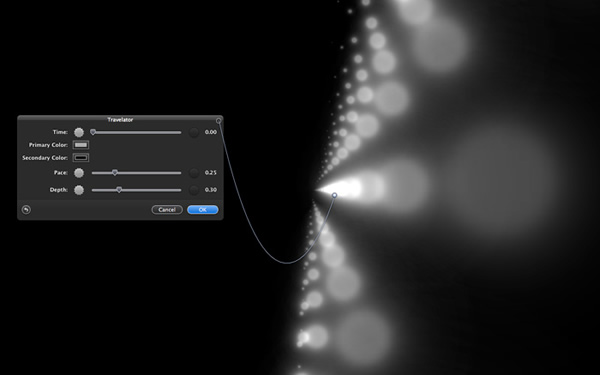
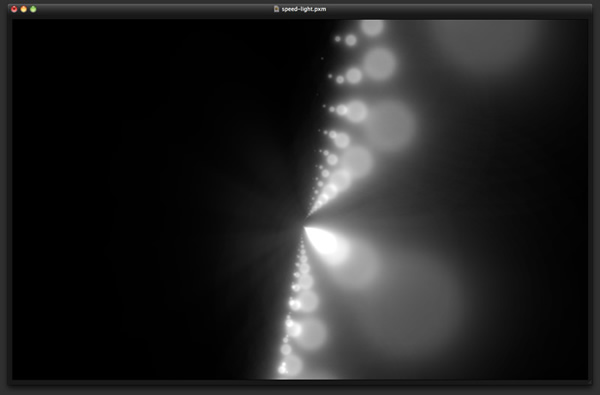
Add another layer and go to Filter > Quartz Composer > Generator > Travelator. Use 0.25 for the pace and 0.30 for the depth. Also, move the controller to the center of the document.
Step 3
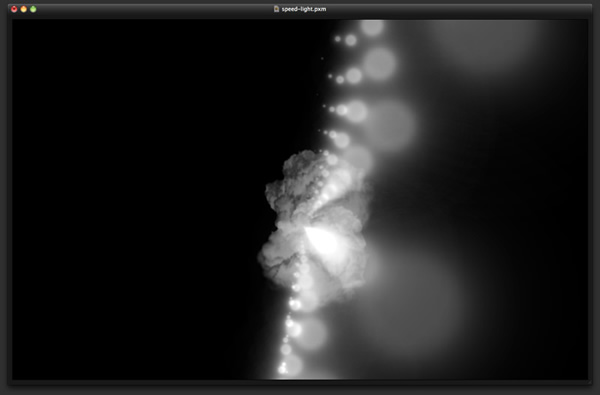
Add another layer on top of the others, and using the Paint Bucket Tool (N), fill the new layer with black. After that, go to View > Show Brushes. Select the smoke brush, then use the Brush Tool (B) and the color white, paint some smoke in the center of the design. Use the image below as a reference.
Step 4
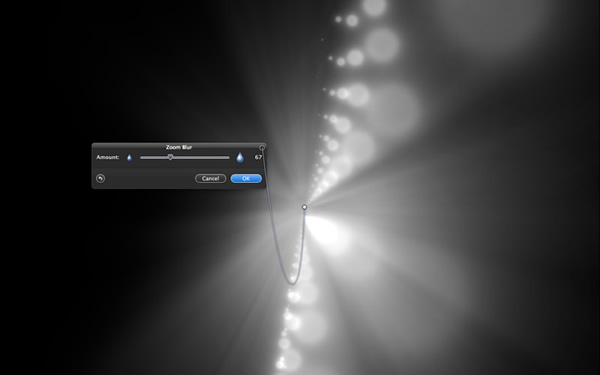
Go to Filter > Blur > Zoom Blur. Enter 70 as the amount, and once again move the controller to the center of the image. These steps will create a nice flare effect.
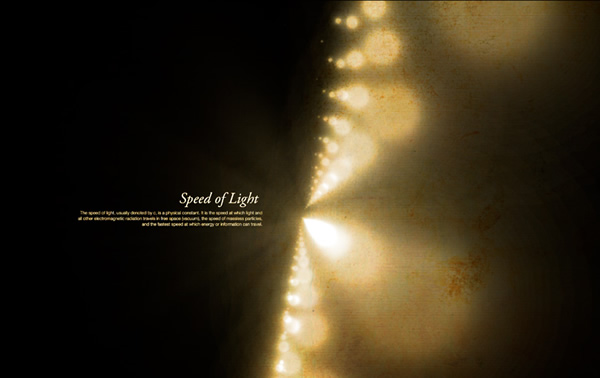
Step 5
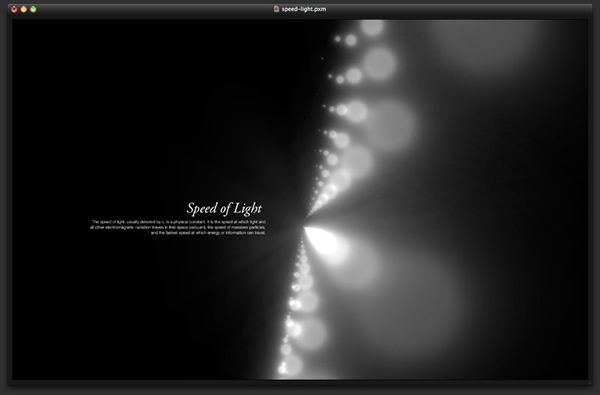
Change the opacity of the layer created in the previous step with the flare to 20%. Also, change the Blending option to Screen.
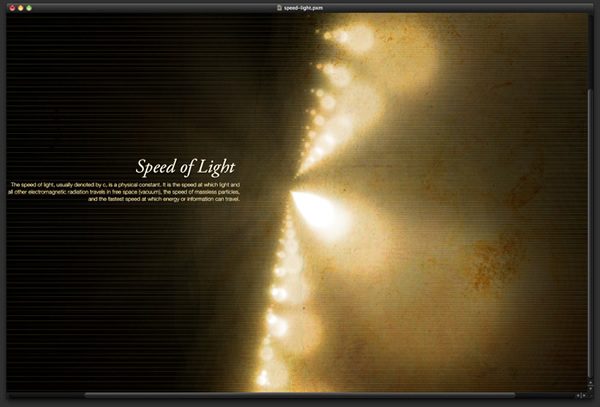
Step 6
Use the Type Tool (T) to add text. First, I added the title “Speed of Light,” in Adobe Garamond Italic with a 42 pt font size. Next, I included a short paragraph using Helvetica Neue Light in 14 pt font. Use the image below to compare the alignment.
Step 7
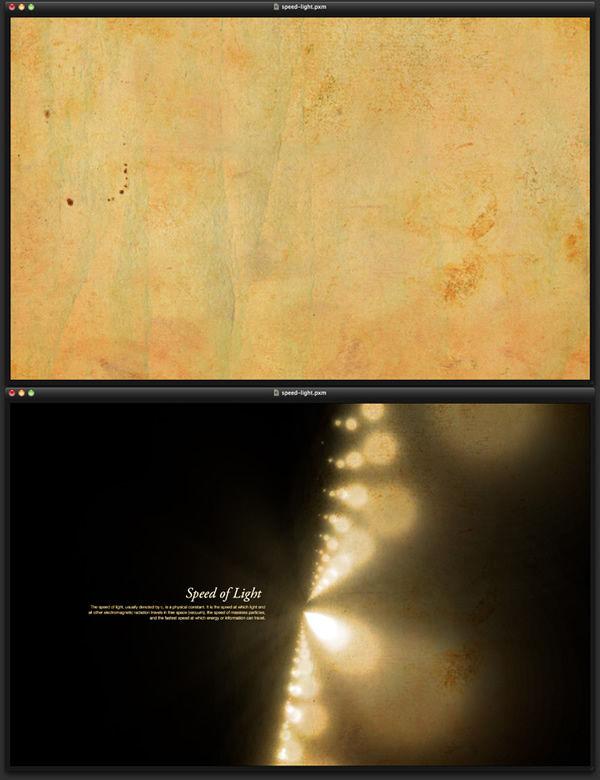
Now, let’s import a texture of old paper. I utilized a texture (courtesy of Shutterstock). Insert this texture on top of the other layers, and then change the Blending option to Overlay.
Step 8
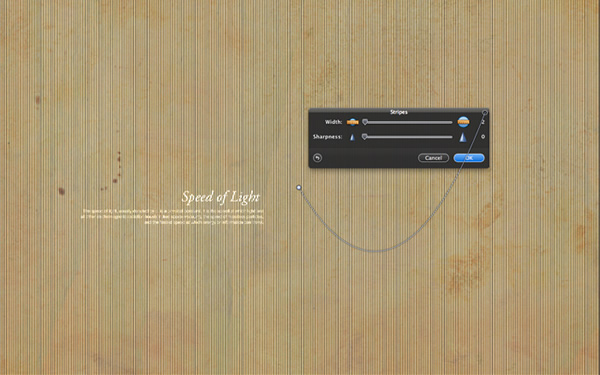
Add another layer, this time underneath the text layers, then go to Filter > Generator > Stripes. Use 2 for the width and 0 for sharpness.
Step 9
Go to Edit > Transform > Rotate 90º CCW. Then go to Edit > Free Transform. Resize the width so that it fills the whole screen.

Step 10
Change the stripes layer Blending to Color Dodge and the opacity to 10%.
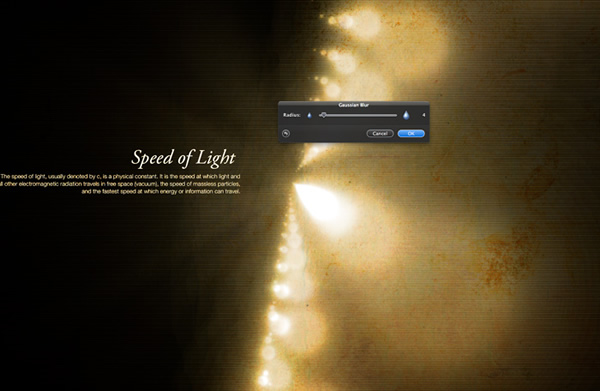
Step 11
Go to Filter > Blur > Gaussian Blur. Use 5 as the Radius. The blur will lessen the intensity of the stripes.
Conclusion
This tutorial was very simple, and only a few filters were used; nevertheless, the outcome is beautiful. The next tutorials I will prepare for Pixelmator will focus on exactly that, simplicity in terms of procedure that yields stunning results.
Download the Pixelmator File
Click here to download the Pixelmator file used for this tutorial