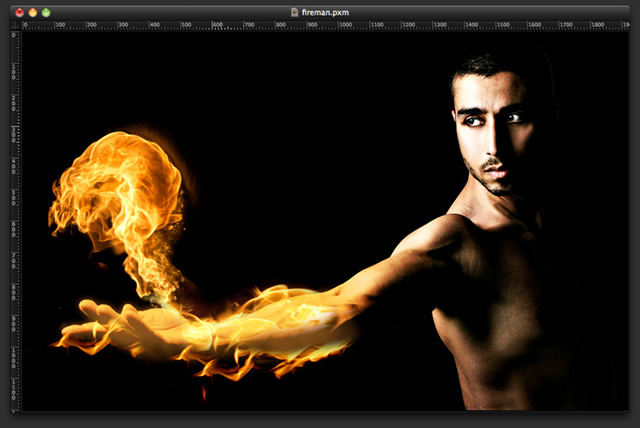
In this tutorial, I will show you how to create a “human torch” effect. I created this effect a few months ago in Photoshop for a tutorial for Digital Arts Magazine, and I have decided to try it in Pixelmator. The process is very similar, and the result is equally beautiful.
Step 1
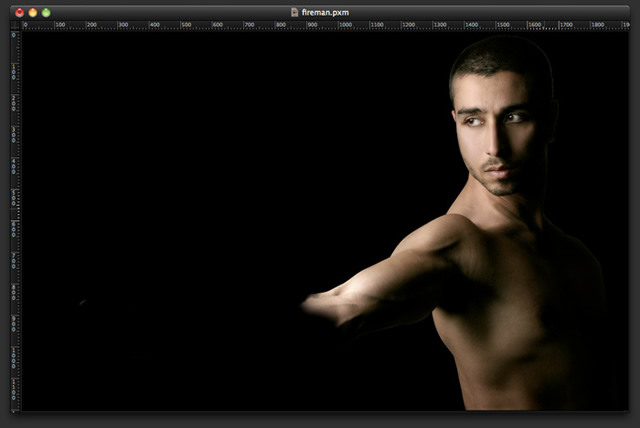
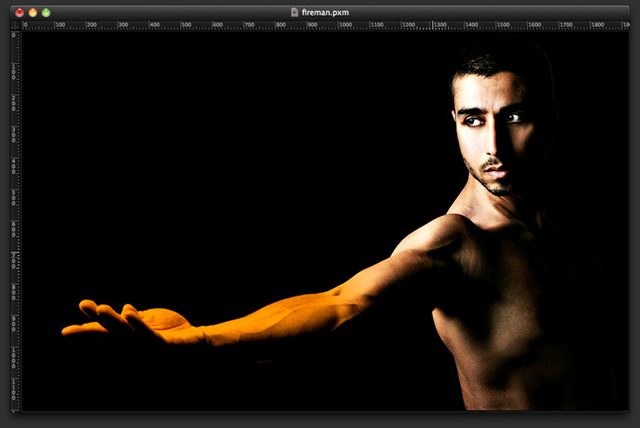
Open Pixelmator and place a photo of the guy who will become the torch man. I used a picture from Shutterstock. It can be found here

Step 2
With the Lasso Tool (L), extract the background from the image; you only need the guy and a black background. Always keep an extra copy of this layer because you will need to use the original several times throughout the whole process. Next, select one of the layers; go to Layer > Add Layer Mask. Then, using the Brush Tool (B), with black for the color, paint over the mask layer in order to erase part of the arm. Use the image below for reference
Step 3
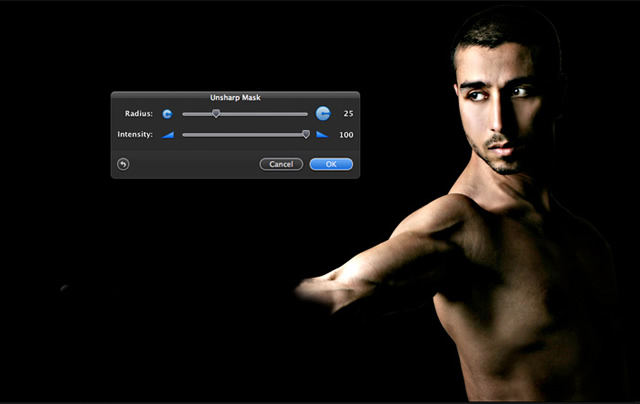
Duplicate the layer and go to Filter > Sharp > Unsharp Mask. Use 25 for the Radius and 100 for the Intensity.
Step 4
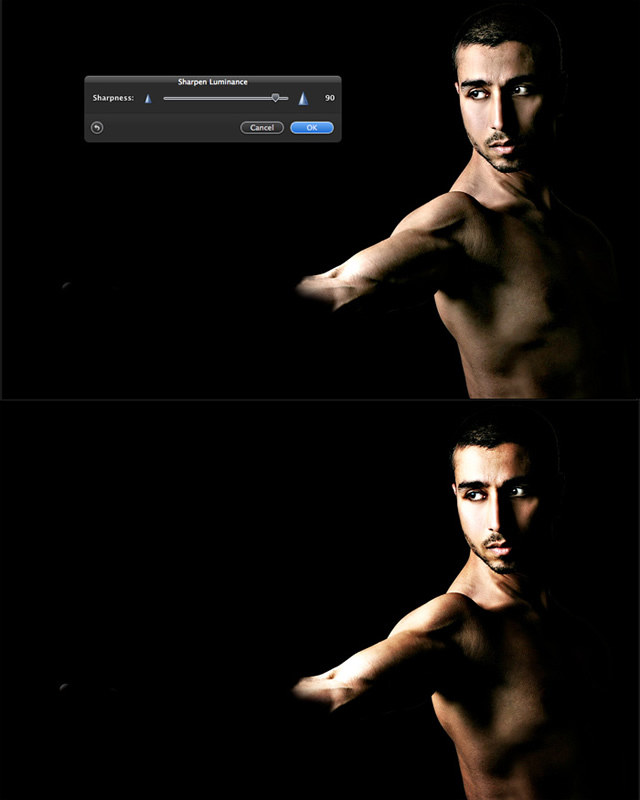
Duplicate the layer again and go to Filter > Sharpen Luminance. Use 90 for the Sharpness. After that, change the Blending to Hard Light and the Opacity to 60%.
Step 5
Now, duplicate the layer of the Step 3, then delete the layer mask so that the arm is in the picture again.
Step 6
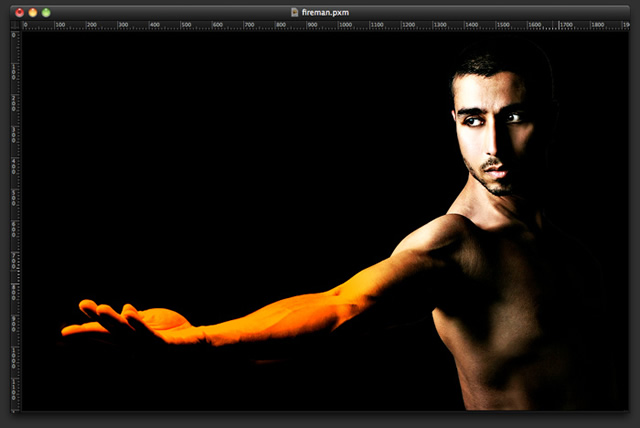
Add a new layer on top of the hand’s layer and change the Blending to Multiply. With the Brush Tool (B), paint the layer with orange.
Step 7
Duplicate the orange layer and change the Blending to Overlay.
Step 8
Add another layer and fill it with black. Change the Blending to Color Dodge and then use the Brush Tool (B) to add white paint over the arm—just to create some highlights.
Step 9
To increase the realism of the composition, use some stock photos of fire. You can find some high-quality free stock photos at sxc.hu. I used a picture from Shutterstock, and you can download it here: http://www.shutterstock.com/pic-2933444/stock-photo-fire.html.The idea is pretty simple. With the Lasso Tool (L), select parts of the flames and copy them in your composition. Use Screen for the Blending to make the flames match the photo.
Step 10
Now import another photo—this time, a fireball. You can find the one I used at http://www.shutterstock.com/pic-1242072/stock-photo-a-fireball-shoots-across-a-black-background.html
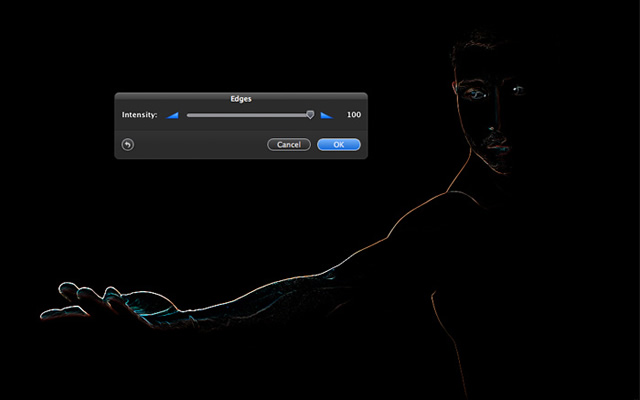
Step 11
Duplicate the layer of the guy’s arm. Then go to Filter > Stylize > Edges. Use 100 for the Intensity.
Step 12
Change the Blending to Color Dodge and delete the other parts of the layer, leaving only the hand and arm. The purpose of this step is to add a white stroke to the arm. Next, go to Filter > Blur > Gaussian Blur. Use 4 for the Radius.

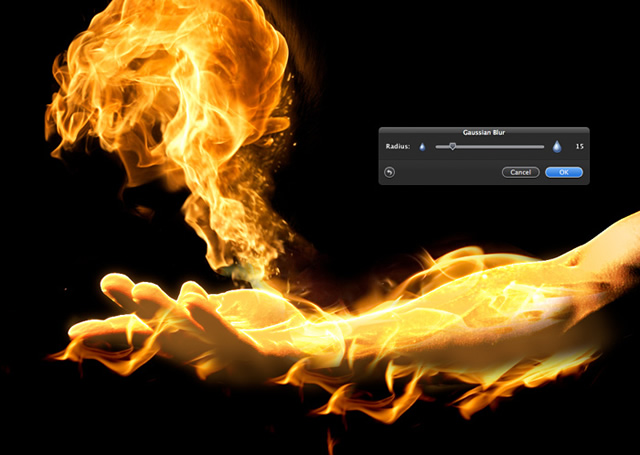
Step 13
Duplicate the stroke layer; then, once again, go to Filter > Blur > Gaussian Blur. This time, use 15 for the Radius. Keep the Color Dodge for the Blending.
Step 14
Add a new layer, on top of all the others, and fill it with black. Change the Blending to Screen. Then, with the Brush Tool (B), select a dark orange/brown (e.g., #926721) for the color; paint over the fireball. With the Eraser Tool (E), you can erase some parts over the fireball to make the fire more visible.
Step 15
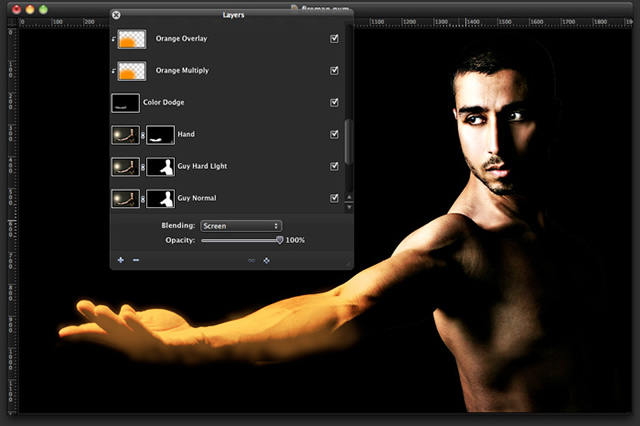
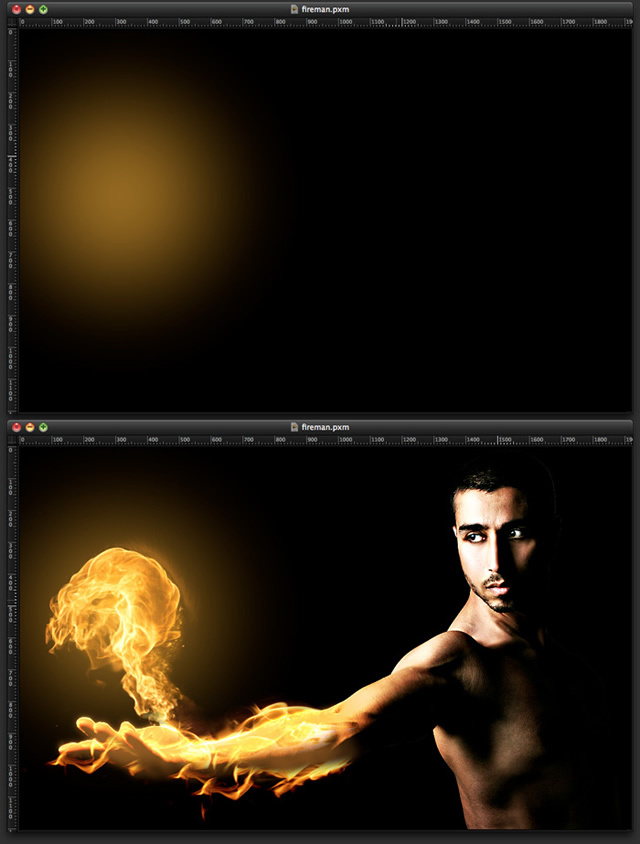
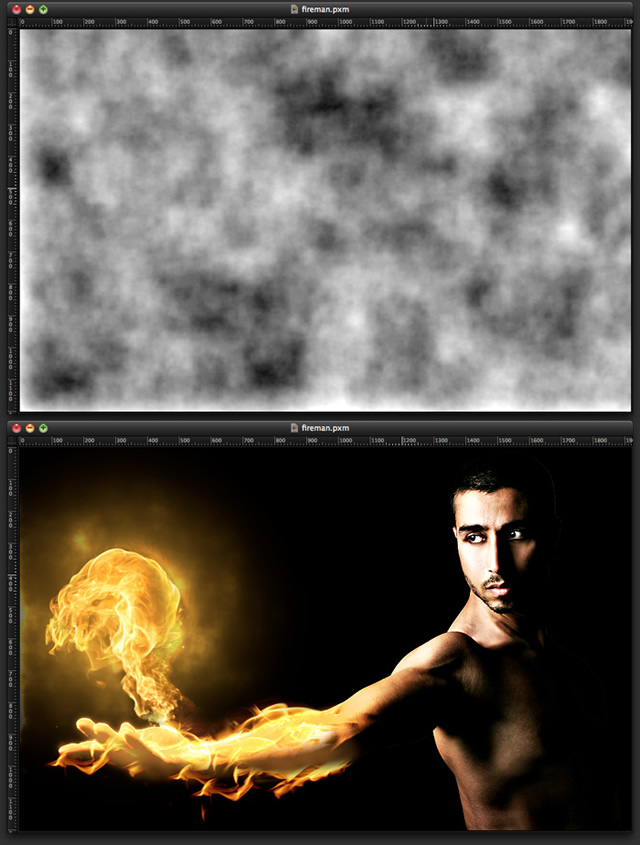
Create a new layer on top of the others and go to Filter > Generator > Clouds. Use black and white for the colors. Next, change the Blending to Color Dodge. With the Eraser Tool (E), delete nearly the entire layer; leave only the areas where the orange light is visible. Use the image below for reference.
Step 16
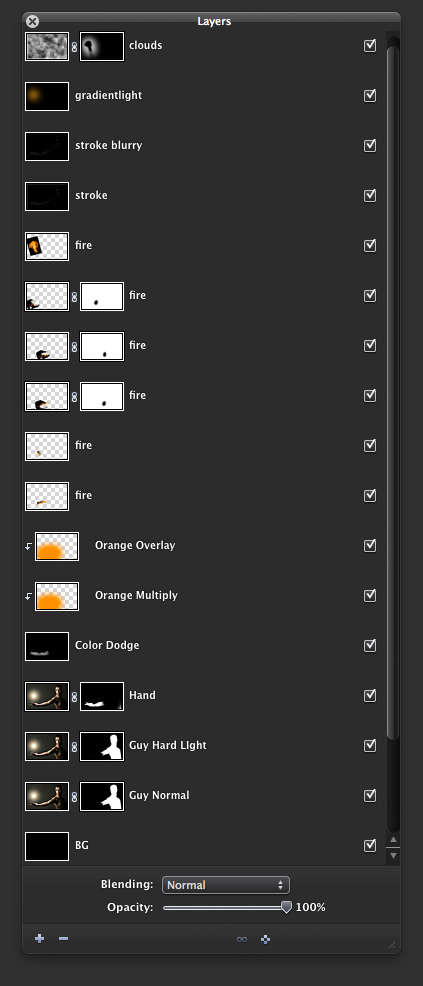
This is the proper order of the layers:
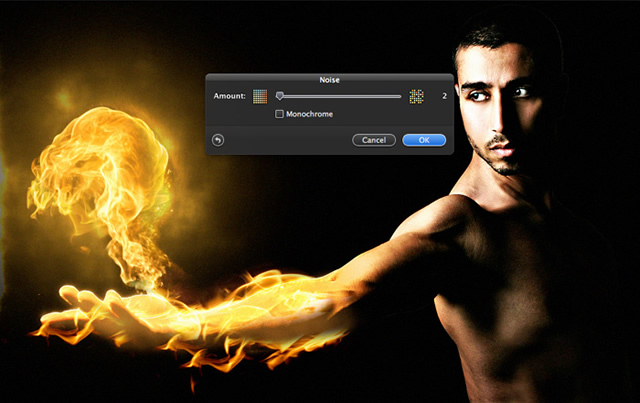
Step 17
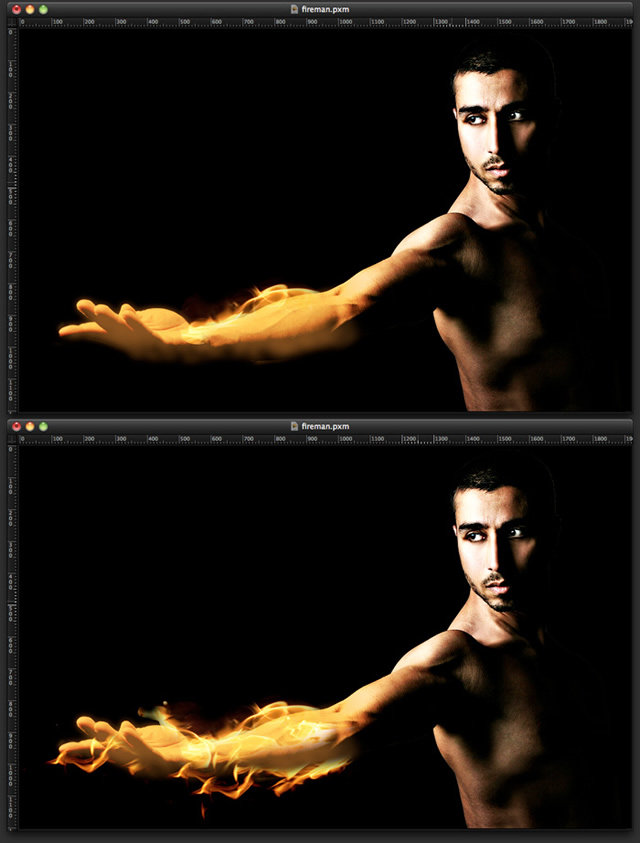
Select all layers and duplicate them, then go to Layer > Merge Layers. Next, go to Filter > Stylize > Noise. Use 2 for the Amount.
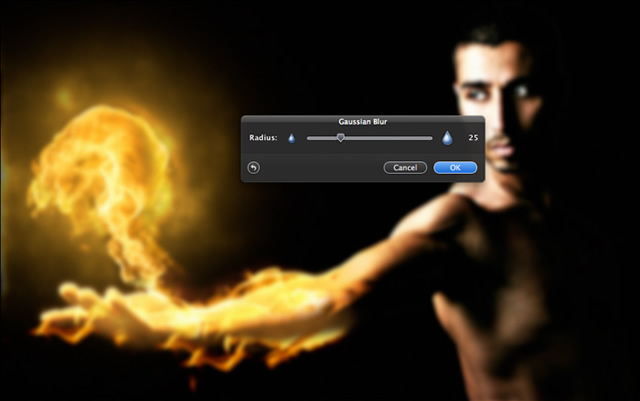
Step 18
Duplicate the layer and go to Filter > Blur > Gaussian Blur. Use 25 for the Radius. Next, change the Blending to Screen and the Opacity to 70%. Then, with the Eraser Tool (E), delete the dark parts of the layer. The blur of this layer will create a nice glow, but it must be subtle; therefore, delete most of the layer, leaving only the areas that are close to the face and the fire.
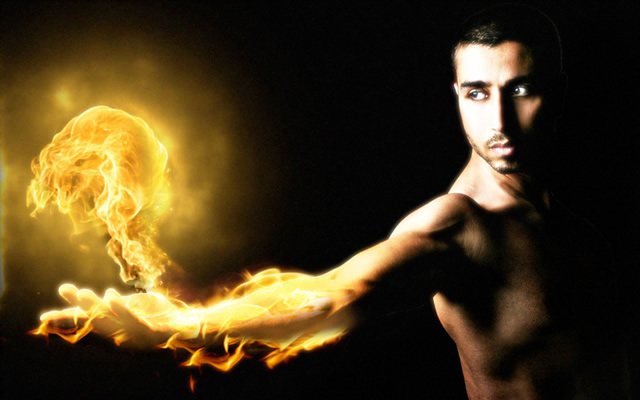
Conclusion
By using a few stock photos and playing with the blending modes, we created a very nice fire effect. The purpose of this tutorial was to demonstrate that you can do nearly anything in Pixelmator. Just mess around with the tools and learn to understand the filters and tools.
Download the Pixelmator file


![Neon light effect in Photoshop [revisited]](/sites/default/files/styles/square_1x1/public/originals/hero_neon.png?itok=lP4mbIak "Neon light effect in Photoshop [revisited]")


