by abduzeedo
I've recently written about Google's newly launched visual design language called Material Design. The goal of this new design is to create a visual language that synthesizes classic principles of good design with the innovation and possibility of technology and science. The idea is to create a UI that has the best of both worlds, digital and physical. Some of the imagery they presented in the spec share some common characteristics, like depth, paper style effects and vibrant colors. I decided to take a pass and try to create an image inspired by the Material Design styleguide.
So in this tutorial I will show you how to create a simple composition in Photoshop inspired by the Material Design styleguide. The whole process will take over one hour or even more if you get into the details.
Step 1
Open Photoshop and create a new document. I am using 2880x1800 pixels, the resolution of my Macbook Pro.

Step 2
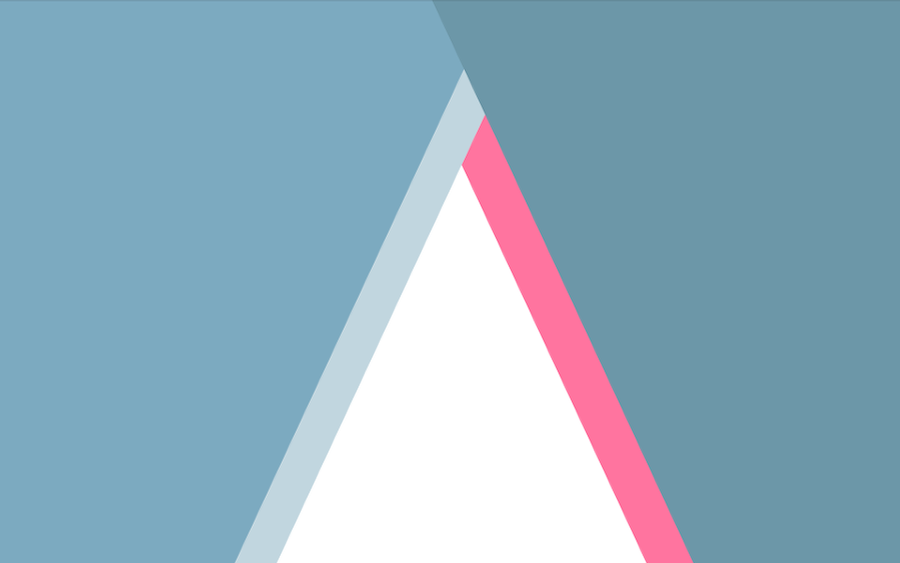
With the Rectangle Tool (U) create a rectangle and rotate it. For the colors I am using the Material Design color palette called Blue Grey (http://www.google.com/design/spec/style/color.html#color-ui-color-palet…). The colors I will use will come from the palette, the only different one will be the accent color.

Step 3
Again with the Rectangle Tool (U) add another rectangle and rotate it again to create the outer part of the A.

Step 3
Duplicate the rectangle from the previous step and move it a little bit to the right to create a second pane for the left part of the A.

Step 4
Do the same for the right part, but this time use pink for the accent color.
Step 5
Keep adding rectangles until you have the form you like. Remember to keep the idea of pieces of paper stacked.


Step 6
For the textures I used to different techinques. The first one is by using images and clip masking. The other one is by using patterns and layer styles. For this step we will use clip masking. Search for paper textures you want to use and paste in the document.
Step 7
Change the Blend Mode to Color Burn and move the order of the layers.

Step 8
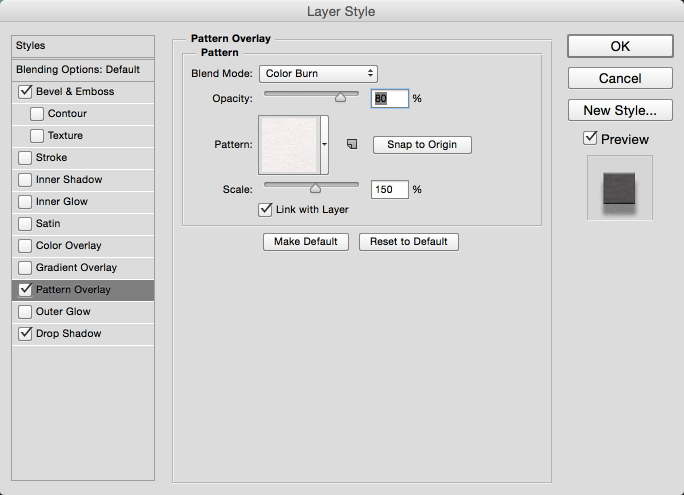
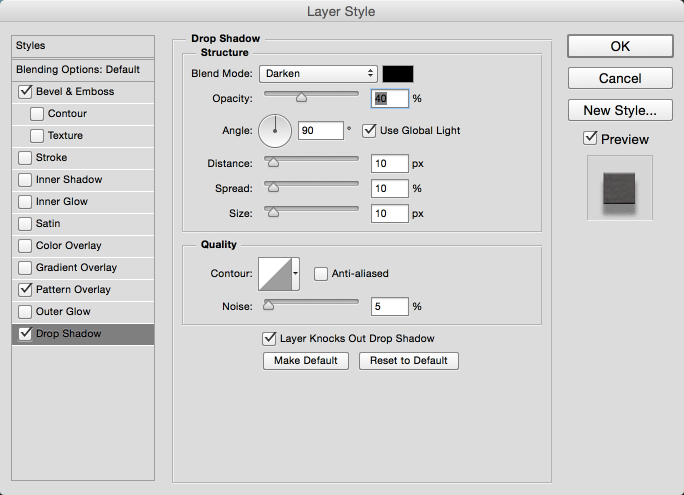
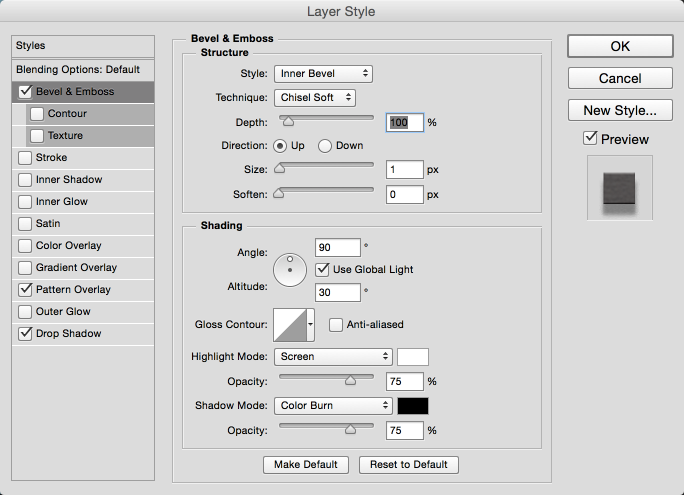
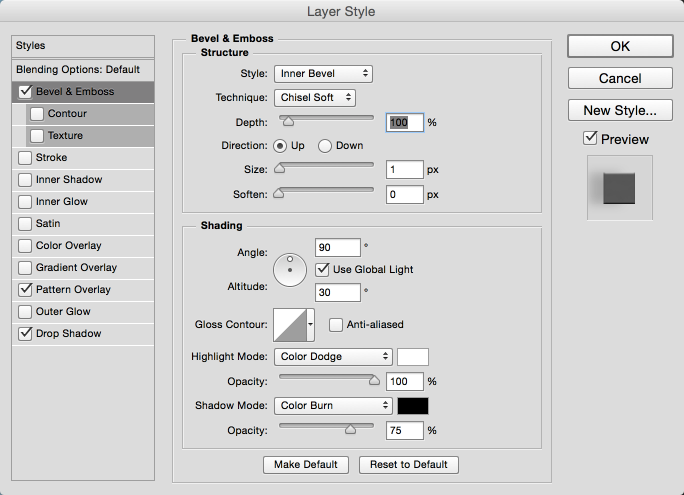
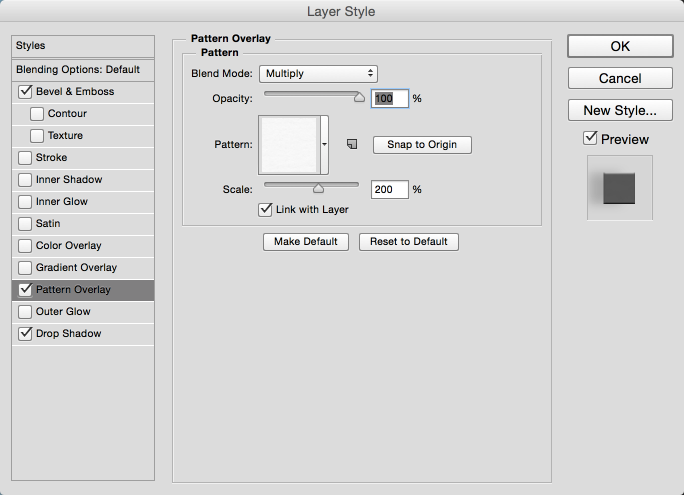
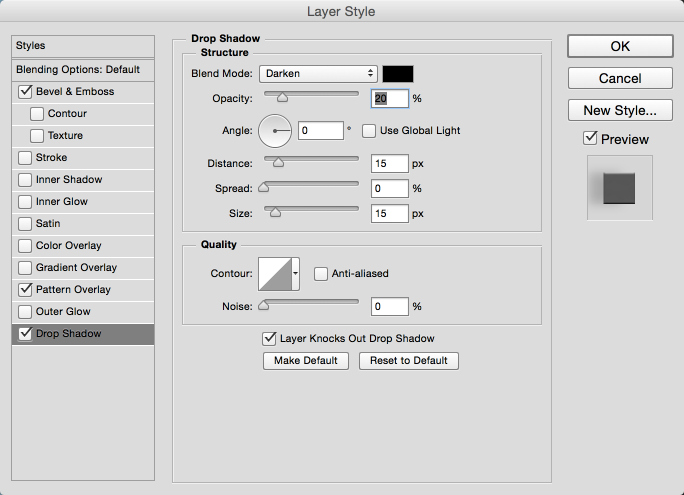
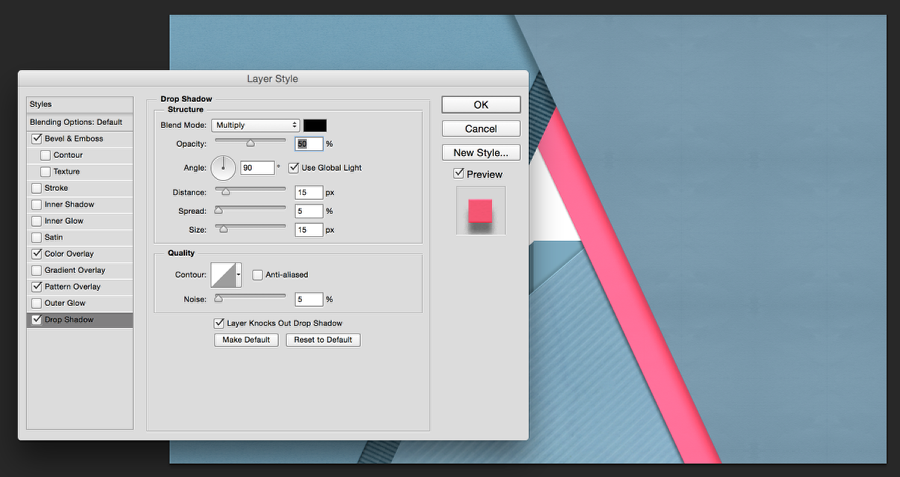
For the Layer Styles, I used Bevel and Emboss, Pattern Overlay and Drop Shadow. Use the values below to see how I did. The biggest change for the other layers will be the Drop Shadow values.
Step 9
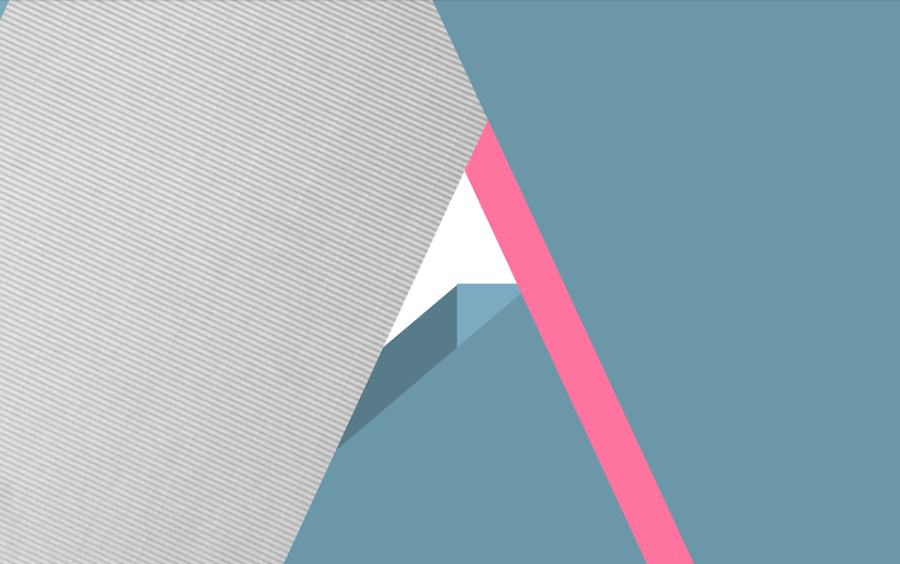
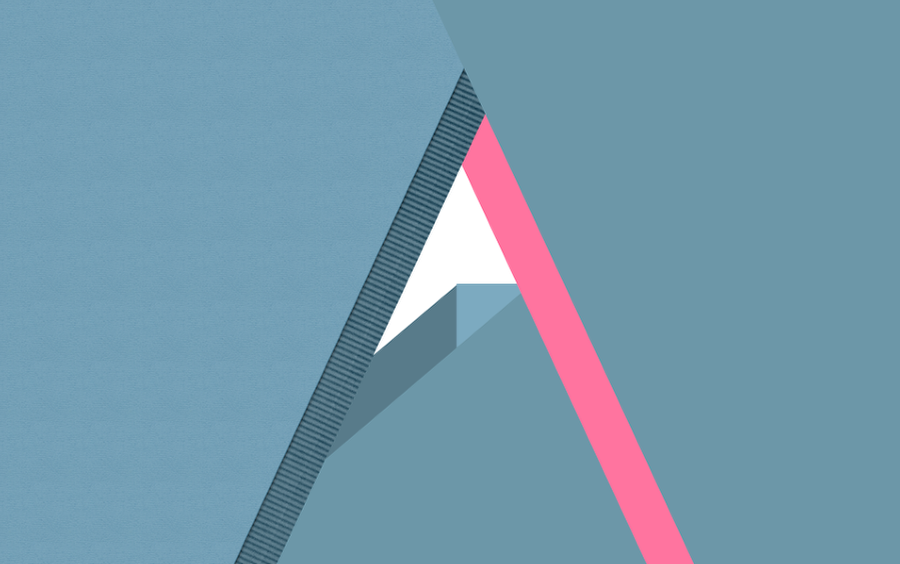
Here's the first sheet of paper with the effects.
Step 10
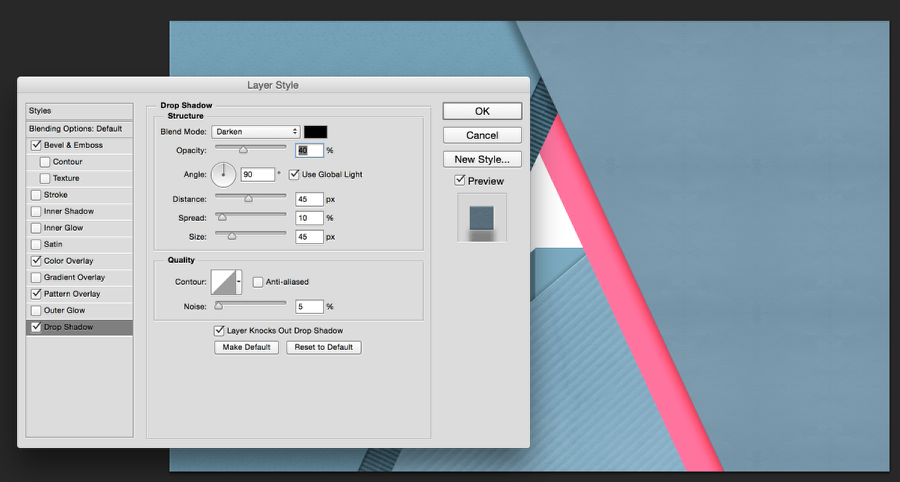
Repeat the same process for the other sheets of paper. The main difference will be the drop shadow values.
Conclusion
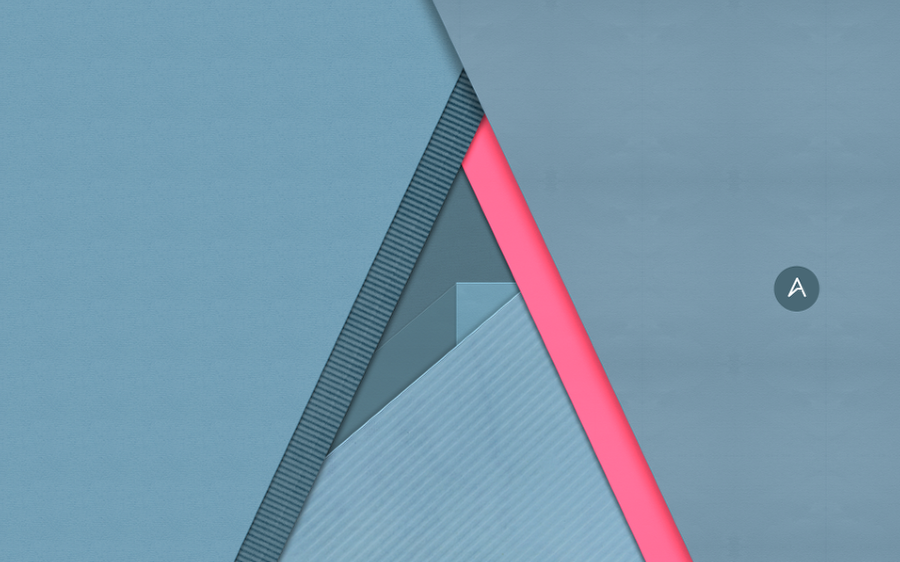
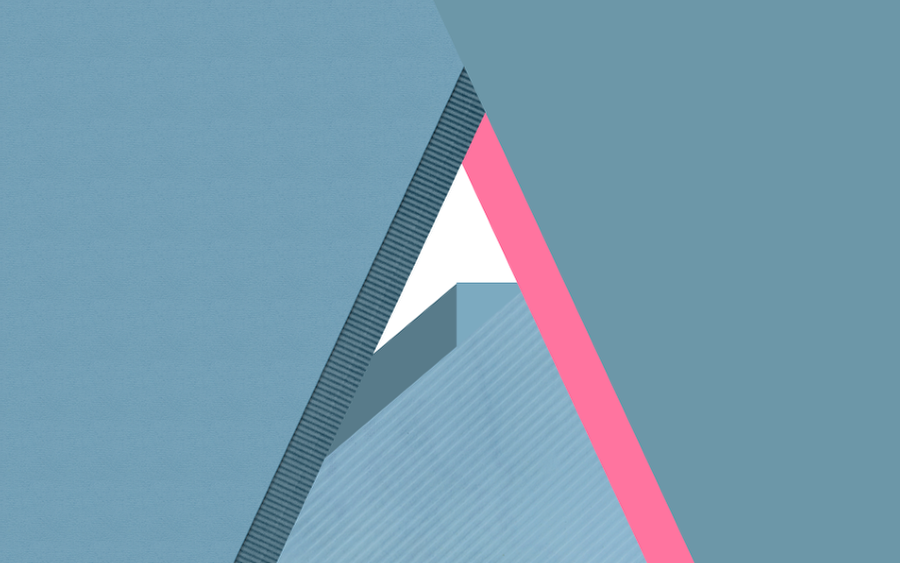
After all these steps you will end up with something similar to the image below. It's important to play with some values for shadow, bevel and also blend modes depending on the colors you choose. The palette I chose is not super vibrant so it's a bit different than if I used a more vibrant and saturated tone. The shadows also make a huge difference. Some will have to be more subtle while one or two will be long and strong. Those details will create the depth you want for the composition.
Now it's up to you. I will keep playing with mine trying to improve the realism of the shadows and edges of the paper. I hope you have fun creating your own version. I also would like to thank Shutterstock for some of the textures I used in this tutorial.