by abduzeedo
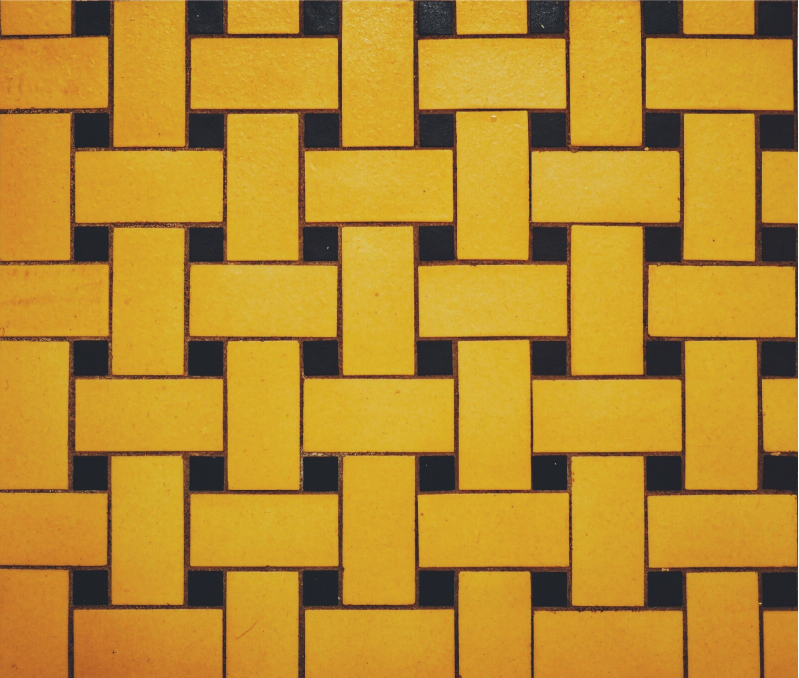
I have been taking a lot of pictures since I decided to do a photo a day project this year. I got a good camera and started taking pictures of pretty much everything that inspired me. I was in Bloomington, Indiana and I was really amazed by the pattern of the bathroom floor. I took a photo and decided to recreate it as a pattern in Illustrator.
So in this little tutorial, I will show you how to create vector patterns in Illustrator. The process is quite simple but you will be able to create really amazing patterns for future projects.
Step 1
Using the photo I took for inspiration and reference I imported it to Illustrator.
Step 2
Using the Rectangle Tool, start recreating the basics of that pattern.

Step 3
Once you have the basic shapes right, start playing with colors and shadows. For the colors, I used Adobe Kuler (https://kuler.adobe.com/create/color-wheel/) for reference. Note that at this step you are still creating the basic title.

Step 4
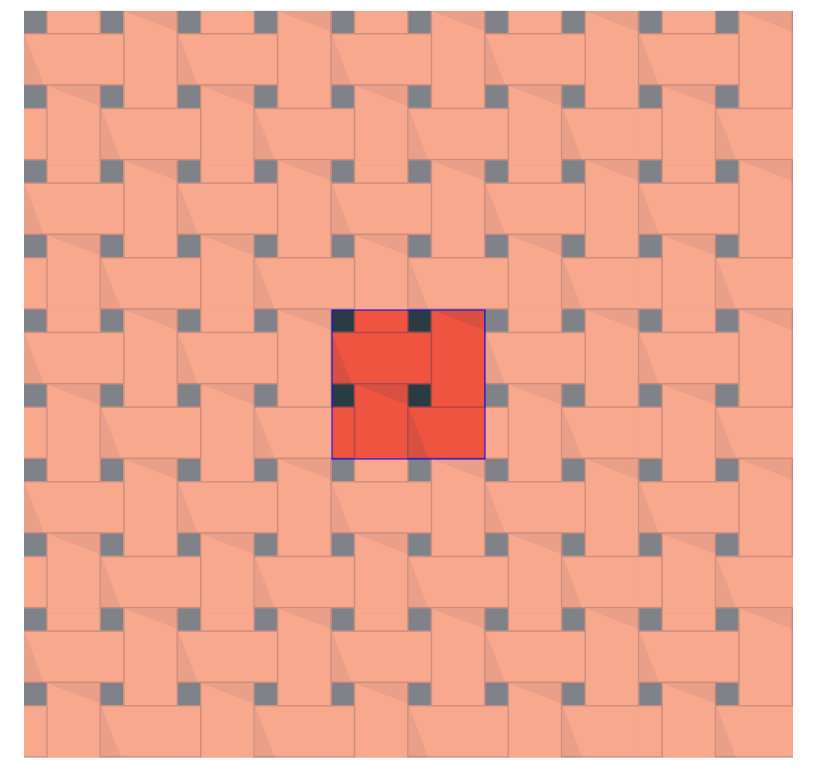
Now in order to make the pattern you have to make sure that your artwork is tile-able. Below you can see the final form I ended up getting to make sure that the pattern will be scaleable.

Step 5
Select your design and go to Object>Pattern>Make. Use the default settings and click Done. Your patter will be added to the Swatch panel. You can always double click to edit it. You can change colors and pretty much everything.
Conclusion
Here's the final design. The hard shadows and the vector style give it a really nice feel. The form is the same as the photo I took, but just with a more modern feel and it does look really cool as a wallpaper for your computer, tablet, and phone. Now it's up to you. Take pictures of patterns you see on the streets, you never know when you might need some references.