by abduzeedo
Following my series of tutorials on Retro effects, I will show you how to create a text effect in Photoshop based on the DVNO clip by Justice and of course some 8 and 16 bits video game opening screens. We will play basically with some basic filters like Gaussian Blur, also with Blend Modes to the light effects.
Step 1
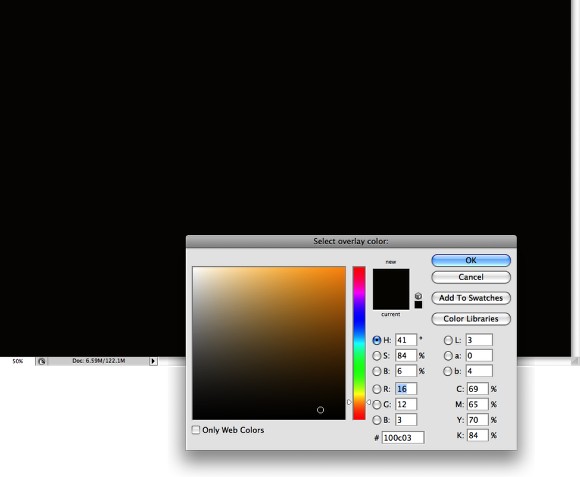
Create a new document in Photoshop, I used 1920x1200 pixels. Then fill the background layer with a very dark brown. I used #100c03 for the color.
Step 2
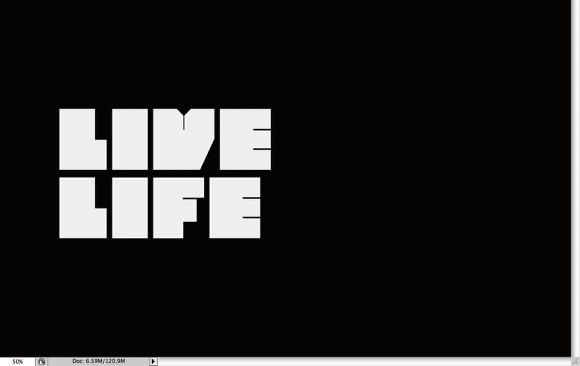
With the Horizontal Type Tool (T) add the text you want in 2 or more lines. It's good if the words end with E or F, later on you will understand.
Step 3
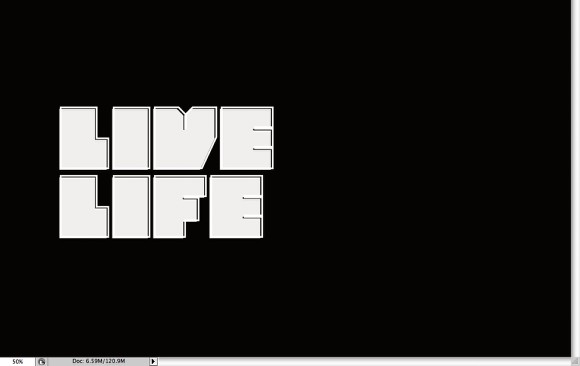
Duplicate the layer and go to Layer>Layer Styles>Stroke. Use 4 pixels and white. Then go to Layer>Layer Style>Create Layer. A new layer will be created, but it will be with the whole word, so holding Command (MAC)/Control (PC), click over the original text to create a marquee selection. After that just make sure that you have the stroke layer selected and delete the marquee selection.
Step 4
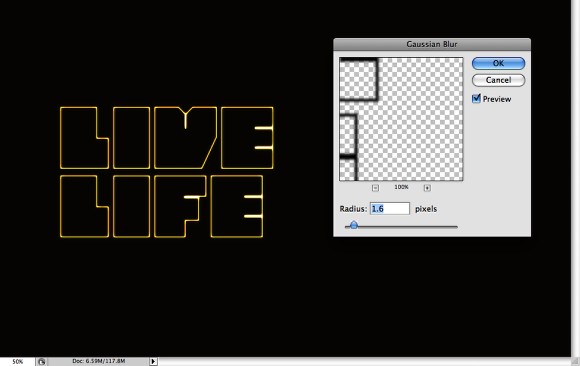
Group the stroke layer and the word layer. They will be inside a folder. Then change the Blend Mode of the folder to Color Dodge. Also move the stroke layer to the top and right so, they won't be aligned, that will create a nice depth. After that go to Fillter>Blur>Gaussian Blurr. For the Stroke use 1.6 for the Radius.
Step 5
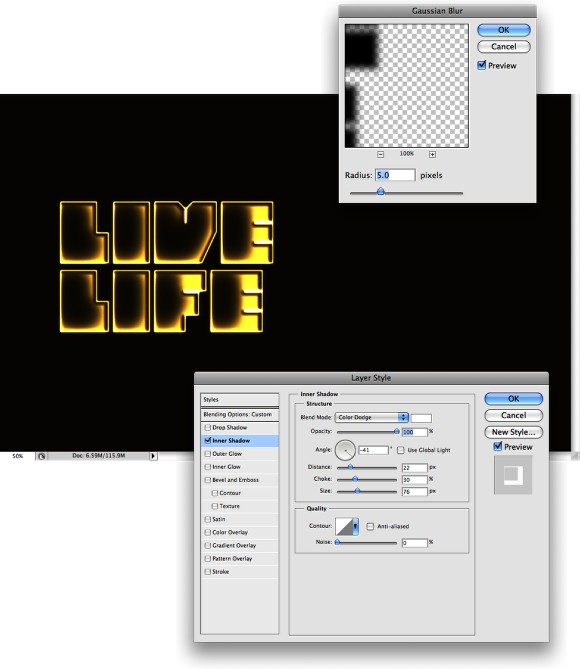
Now for the word without stroke, go to Filter>Blur>Gaussian Blur. Use 5.0 for the radius. Then go to Layer>Layer Style>Inner Shadow. Use Color Dodge for the Blend Mode, -40º for the Angle, 20 pixels for the Distance, 30% for the Choke and 75 pixels for the Radius. Also you you have to change the Fill of the layer to 0%, that way you will only see the the inner shadow.
Step 6
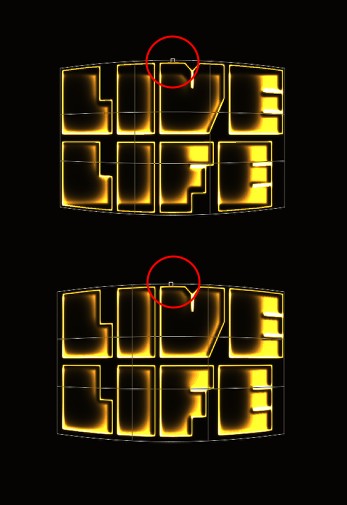
Now for each text layer, the stroke and the inner shadow one, go to Edit>Transform>Warp. For the Warp select Bulge, then just move the handle to reduce the size of the bulge effect.
Step 7
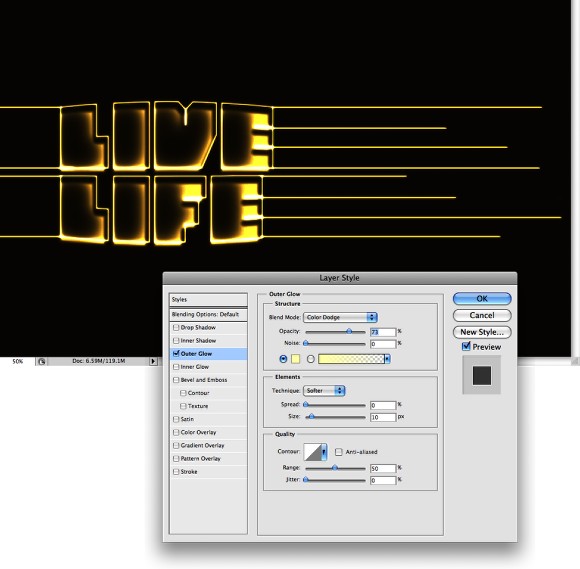
With the Rectangle Tool (U), inside of the folder with Color Dodge, create some lines starting on the edge of the letters Es and Ls. Make sure you use white for the color. After that go to Filter>Blur>Gaussian Blur. Use 0.8 for the radius. Then go to Layer>Layer Styles>Outer Glow, use 75% for the Opacity, a very light yellow for the color. Then for the Size use 10 pixels and for the Range 50%.
Step 8
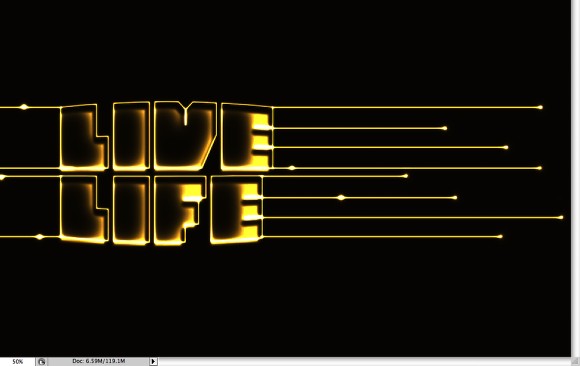
Add another layer inside the Color Dodge folder and with the Brush Tool (B), pick a small and soft brush. Then just paint some dots of light like the light was moving through the lines.
Step 9
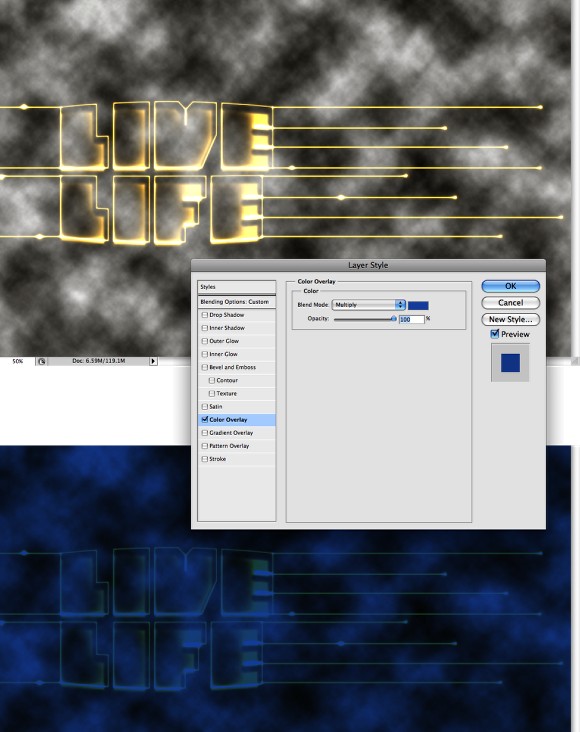
Add another layer, this time not inside the Color Dodge layer, then change the Blend Mode to Screen and go to Layer>Layer Style>Color Overlay. Use blur for the color and Multiply for the Blend Mode.
Step 10
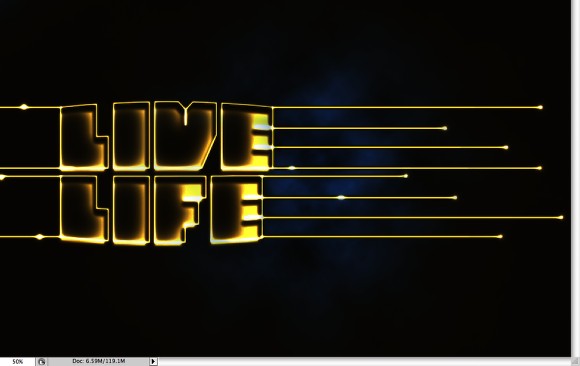
Go to Layer>Layer Mask>Reveal All. Then with the Brush Tool (B) use a big soft brush. With white for the color start painting over the mask layer, so the blue clouds will start appearing. Make it visible only in the center. Also, reduce the size of the brush and invert the color to erase the parts that are over the lines and text, otherwise the blue will affect the light effect.
Step 11
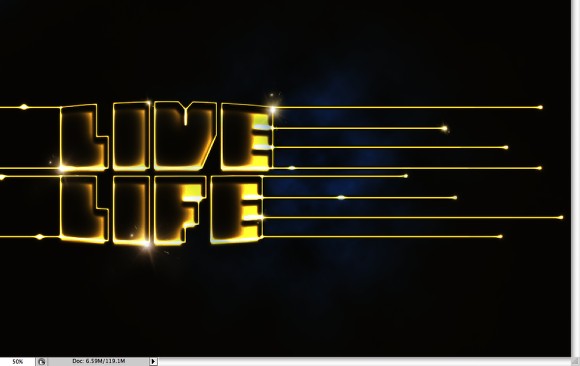
Add some flares using Brushes or stock images.
Step 12
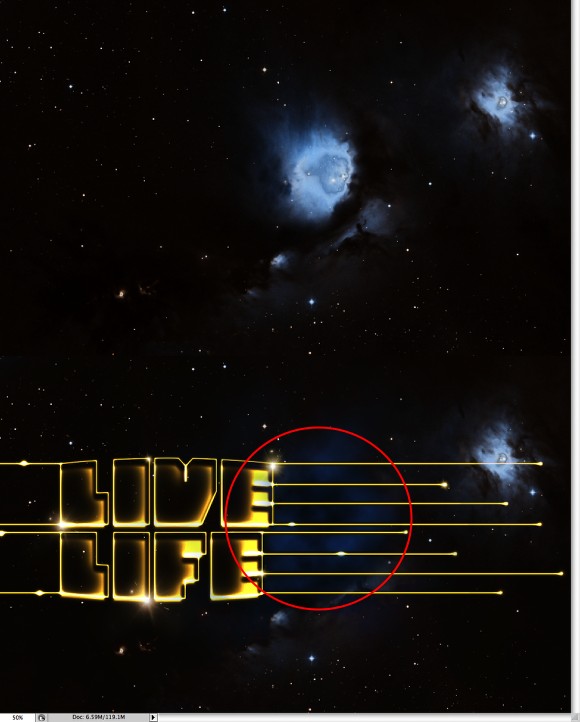
Now if you want to add a space scene, you can either create it from scratch, which I have done several times in past tutorials or we can use a stock photo. I used one from Shutterstock if you want you can get it here.
Just place it in front of the other layers and change the Blend Mode to Screen. Also with the Eraser Tool (E), delete the center light of the space scene. Use the image below for reference.
Step 13
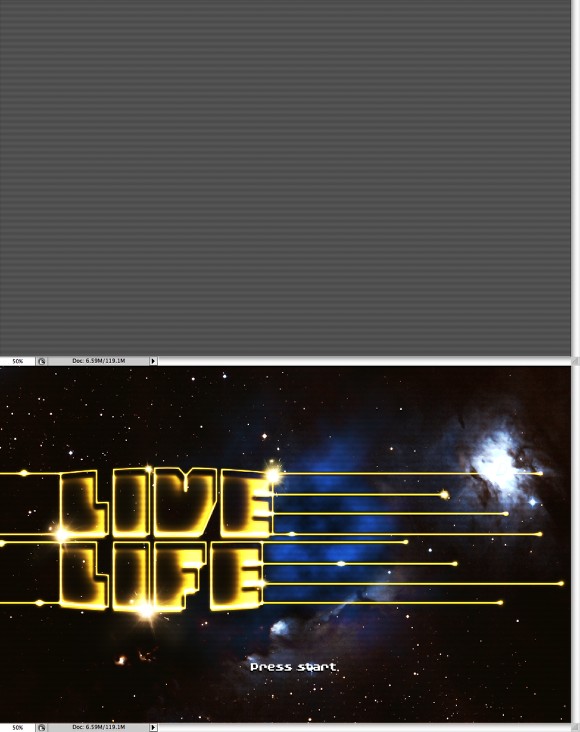
To create the lines I created I pattern, it's really easy, start a new document with 100x4 pixels then create a black line with 2 pixels height and a white line bellow the black with other 2 pixels height. Then just go to Edit>Define Pattern. Done.
So back to the document, just create a new layer on top of the others and with the Paint Bucket Tool (G), select Pattern for the color and use the patter you have just created. After that just go to Filter>Blur>Gaussian Blur. Use 1 or 2 pixels for the Radius. The last thing will be to change the Blend Mode to Color Dodge.
Step 14
With the Horizontal Type Tool (T) type "Press Start" using a pixel font. The one I used was Bylinear. Then just add a shadow using layer styles.
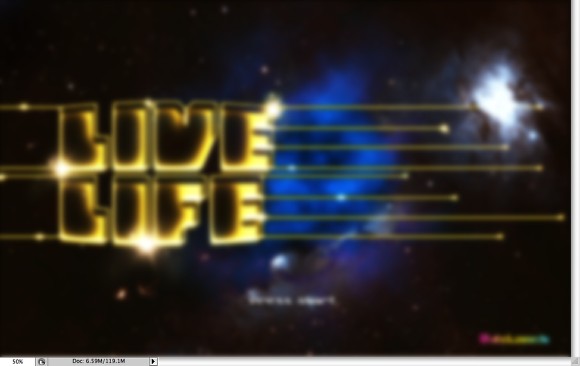
After that, press Command+Option+Shift+E on a Mac or Control+Alt+Shit+E on a PC, that will create a new layer with all the layers merged. Go to Filter>Blur>Gaussian Blur and use 10 pixels for the Radius.
Step 15
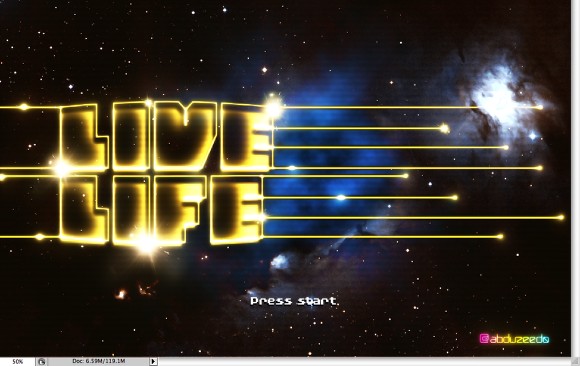
Change the Blend Mode of the Blurry layer to Screen and go to Layer>Layer Mask>Hide all. Again with the Brush Tool (B) and a medium size soft brush and white, paint over the flares and the dots of light. Also a little bit over the word where there's more light, that will add a nice glow to the image.
Step 16
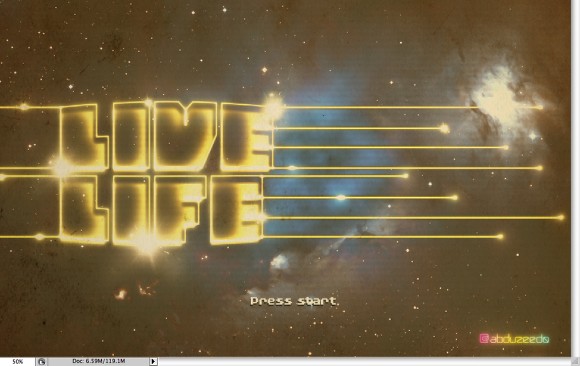
Let's add some texture. I used an old paper texture I got from Shutterstock, you can download it here or you can use another one you have.
Place the image in the document and then change the Opacity to 80% and the Blend Mode to Multiply.
Conclusion
The effect is pretty much done, again it was all about playing with basic filters and blend modes. Of course you can add more elements or try different colors and angles. The idea was just to understand what elements and effects give the 80's feel to an image, or even the video-game look, like Streets of Rage, my favorite of them all. Of course the space background doesn't fit with that.
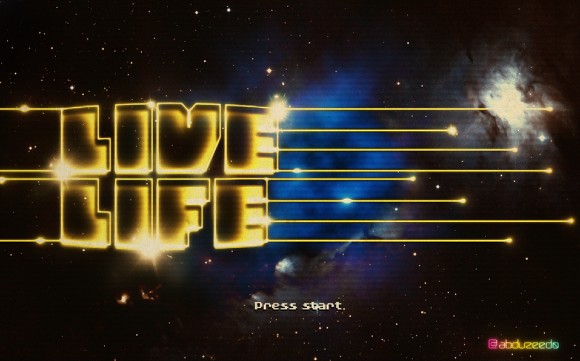
Click on the image for full preview
Another Example
That's why I prefer the version without the space background, it's simpler and we can drive the user attention more to the light effects of the word instead of the space scene. Again it's up to you and it's all about trying. I hope you like this tutorial and that it can be useful to you.
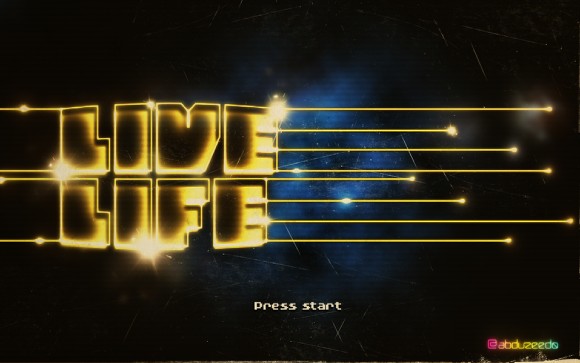
Click on the image for full preview
Download the Photoshop File
Click here to download the Photoshop file used for this tutorial.
