by abduzeedo
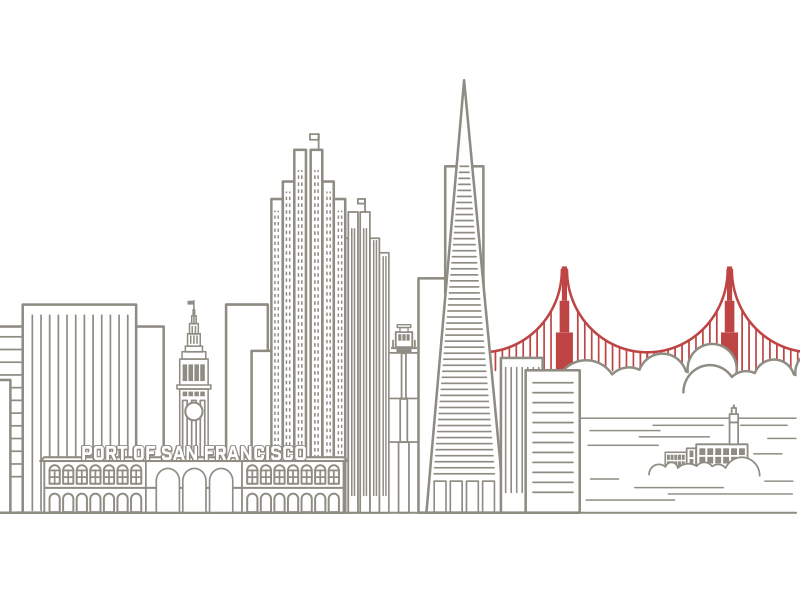
A couple of weeks ago I decided to practice my Illustrator skills to create a simple skyline of San Francisco for a print material I am working on. I loved the style that Ryan Putnam explored on some of his illustrations of city skylines so I decided to give it a try. I have to say, I didn't have that much fun doing illustrations since I was in high school I think.
So in this short post I will walk you through my basic creative process behind the San Francisco Skyline illustration. I used Adobe Illustration for this project but it can be done with any vector tool.
Step 1 - References
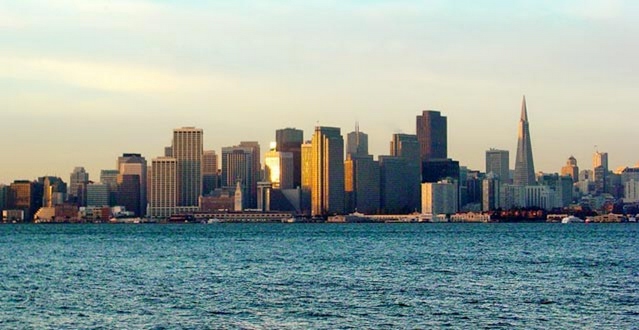
The first step was to get references of some iconic buildings in the San Francisco skyline. San Francisco is a beautiful city and it was very easy to get a few landmarks. The ones I picked was, Transamerica Pyramid, Ferry Building, Embarcadero Center, Alcatraz, Cable Car, the fog and of course the Golden Gate Bridge. Below you can see some references.
Step 2
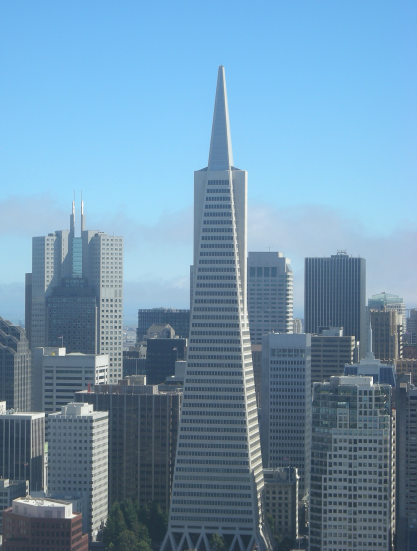
To create the buildings I used basic shapes and the Blend Tool to make the windows. Below you can see the process behind the Transamerica Pyramid.
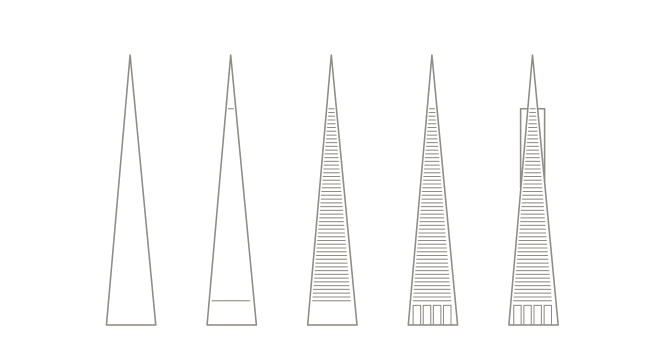
Step 3
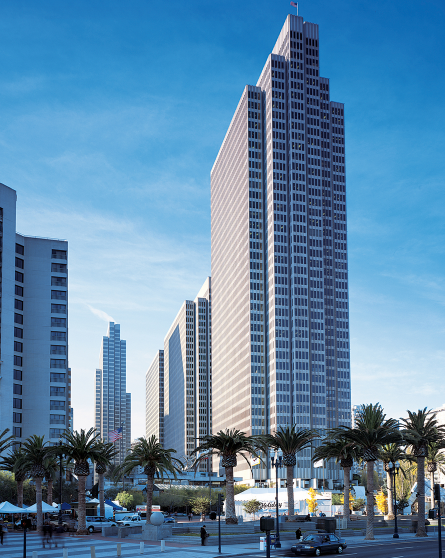
The Embarcadero Center I used the rectangle tool to create half of the building. For the windows, I just used a dotted stroke line. After the first half was done, I just duplicated it and there it was, another building.
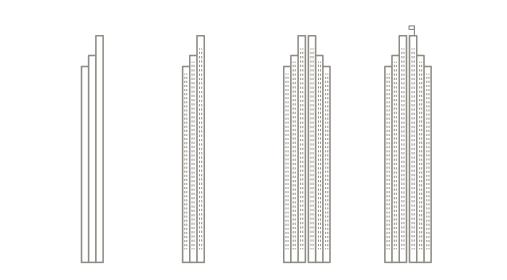
Step 4
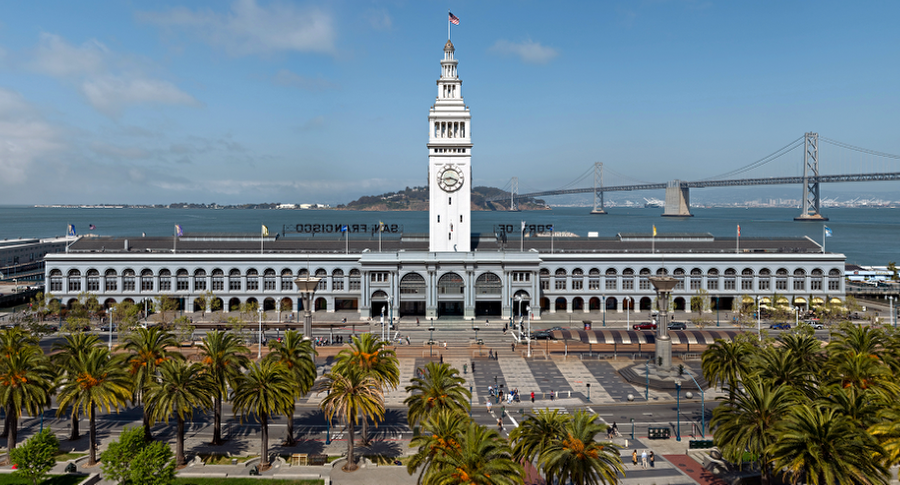
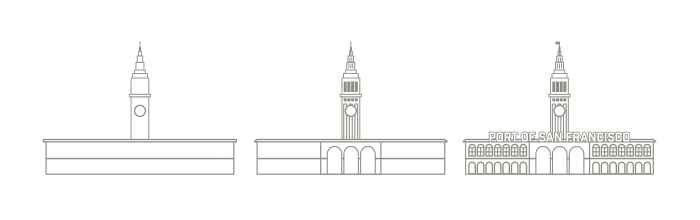
The Ferry Building took more time because of its architecture style. But again, just basic forms and a lot of repetition. The secret is to capture the most important features, it doesn't have to be perfect.
Step 5
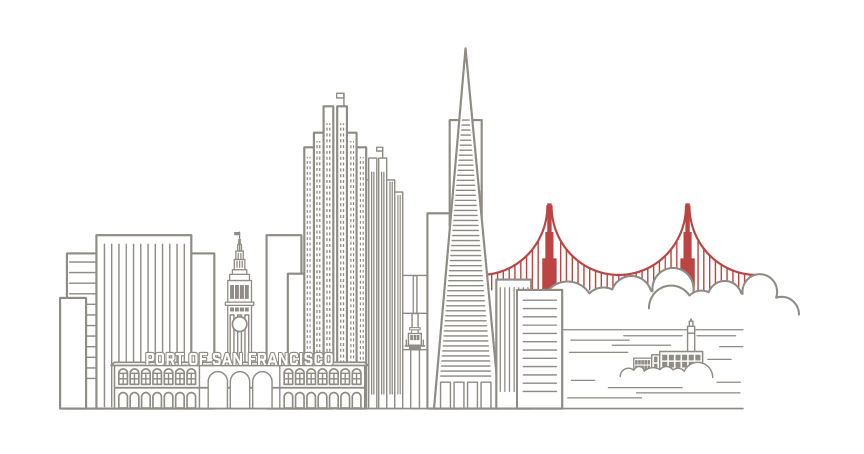
Putting everything together was a lot of fun. I started adding some placeholder buildings to fill the space. For the Golden Gate Bridge I used the Blend Tool and also created the fog with a bunch of circles that later on I united them with the pathfinder tool. The cool thing about this type of illustration is that you can create it quite easily, it just require time. Another important tip is to make the outer stroke of the buildings bigger than the inner.
Conclusion
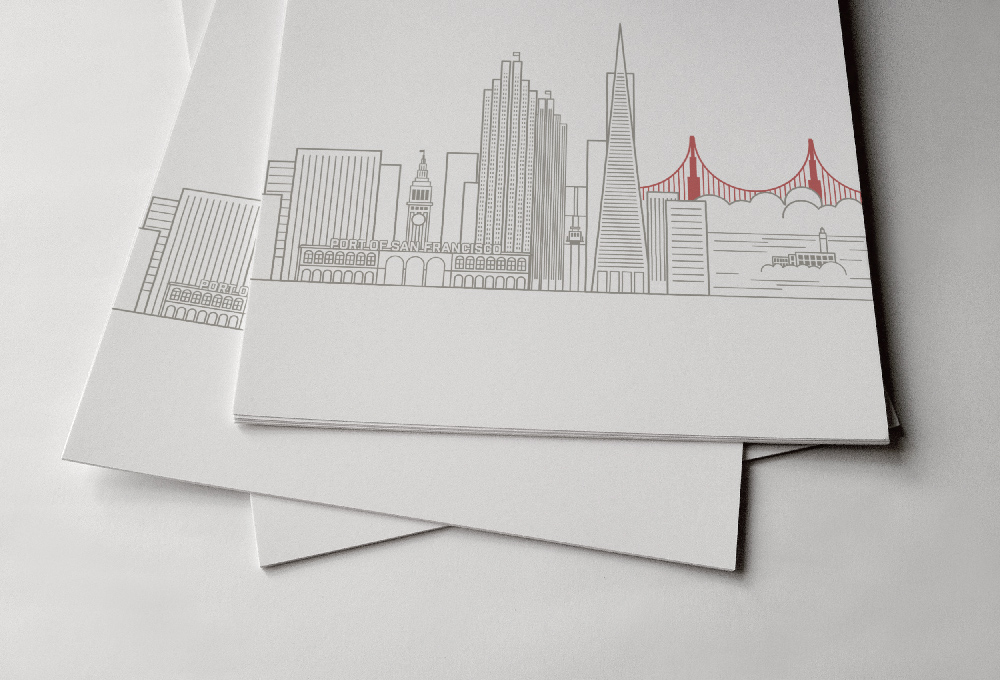
The final print is done but not ready to be shown yet. Soon I will have more details, but below you can see two explorations, one in a print mockup and another one a simple animated gif.

![Neon light effect in Photoshop [revisited]](/sites/default/files/styles/square_1x1/public/originals/hero_neon.png?itok=lP4mbIak "Neon light effect in Photoshop [revisited]")


