Web Site Design Tutorial: Wellknown.as Case
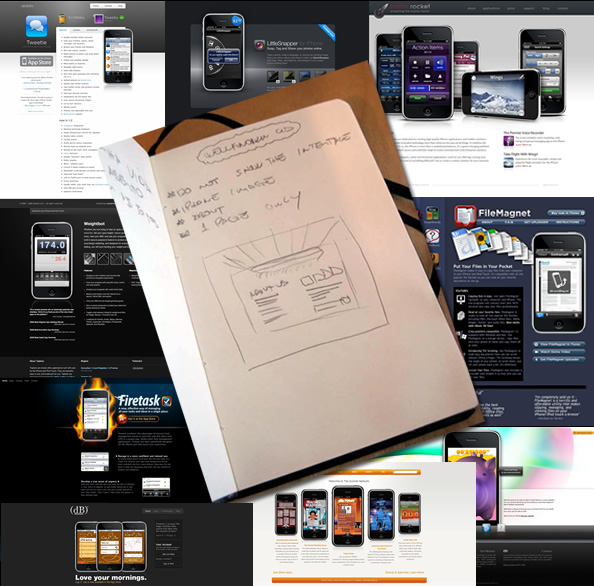
Last month I met some guys that are working on a really nice project that involved an iPhone app. So they invited me to design the web site, called Wellknown.as. I loved the idea and started looking for references and inspiration so I could start the design itself.
So in this tutorial I will show you a little bit of how I created it using Fireworks. Of course you can do the same thing in Photoshop, the commands will change a bit but the process is practically the same.
Design References
Step 1
The first thing to do is of course have a concept in mind of what you want to do. In my case the guys over at Wellknow.as told me exactly what they wanted for the layout. Also I used a CSS Framework and the Fireworks template. You can download it at http://960.gs/

Step 2
With the Rectangle Tool (U) create a new rectangle with the document size. For the Color use Solid and #191D22. Then on the Properties Panel, click on the Add Icon (+) and select Add Noise. Use 1 for the Amount.

Step 3
With the Rectangle Tool (U) create another rectangle but make it like a stripe starting on 200 pixels in the Y axis. For the Color use #1c202a.

Step 4
Click on the Add and to to Shadow and Glow > Inner Shadow. Use 0 for the distance, 40% for the Opacity, 1 for the Blur and 270º for the Angle.

Step 5
Click again on the Add icon and choose Shadow and Glow>Drop Shadow. Use 0 for the Distance, 65% Opacity, 4 for the Blur. The angle won't make any difference because the Distance is 0.

Step 6
Now again let's add some noise so the rectangle won't have that solid color, but instead a nice plastic feeling.

Step 7
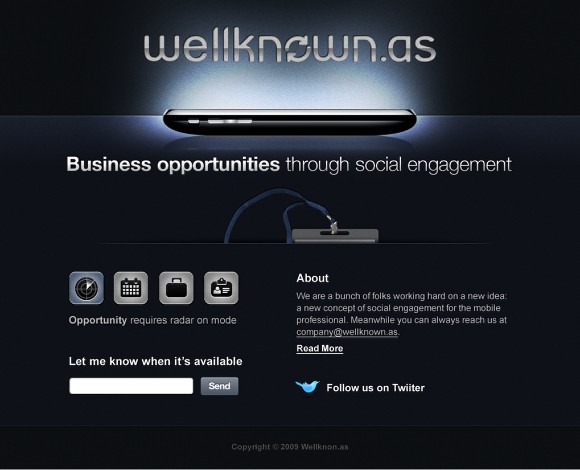
Here I placed the iPhone image right in the center of the image as it was sitting on. They didn't want to show the interface of the app right now so that angle was perfect.

Step 8
Duplicate the layer and go to Modify>Transform>Flip Vertical. Then change the Opacity to 50% and go to Modify>Mask>Reveal All. With the Gradient Tool (G) select the black and white preset and apply it on the layer mask. What is white will be visible and what is black transparent. So, create the famous wet floor effect.

Step 9
Add a new rectangle with the Rectangle Tool and fill it with a gradient using white for the both colors. Just change the opacities one will be 100% (1) and the other 0%(2). Use the Gradient Tool (G) to apply the gradient in a angle of 90º.

Step 10
To create the light effect it was very easy. With the Ellipse Tool (U) create an ellipse, then use white for the color and change the Edge to Feather and 100 for the value (1). After that just change the Blend Mode to Overlay (2).

Step 11
Now duplicate to make the light stronger. Also add different ellipses to make the light effect more realistic. Another thing that is very important is to play with the opacities. Use 50-60% for the new ellipses.


Step 11
For the slogan, I used Arial 35px for the typeface because Arial is the iPhone's font, and a gradient from a light grey to white. Also I added a shadow using 1px for the Distance, 90% for the Opacity, 1 for the Blur and 90º for the Angle.

Step 12
With the Round Rectangle Tool (U) create a rectangle, fill it with grey and change the opacity to 80% (1). The with the Rectangle Tool (U) create another rectangles but beneath the grey one. Also make it smaller (2). Again with the Round Rectangle Tool (U) create another element (3). Then select the 2 round rectangles and go to Modify>Combine Path>Punch. Select all elements and group them. After that add a noise like in the first steps.

Step 13
With the Line Tool (N) create a line then go to Modify>Mask>Reveal All. Select the gradient tool and the black white preset with oval for the type and paint over the layer mask. That way the edges will fade.

Step 14
With the Ellipse Tool (U) add an ellipse in black and change the Edge to Feather and use 60 for the amount. Then with mask, hide the part below the line. To do that is super simple, create a rectangle with the area you want to show and go to Edit>Cut. Then select the ellipse and go to Modify>Mask>Paste as Mask.

Step 15
Repeat the same process to mask the Id Card.

Step 16
Now let's add the lanyard. Again repeat the same process to mask it. Also add a little shadow to the card and lanyard.

Step 17
Place some icons on the left column and it's time to add the content.

Step 18
Make the guides visible so we can have a visual reference to create the columns and place the content. That will be really important when you code the CSS.

Conclusion
The layout is done, I need to do a few adjustments to make the slicing process a little bit easier but we have the whole home-page created. The design process was quite simple even the tools and filters we used, the most important thing was to define the concept before going to the tool. The same thing could be done in Photoshop or a different tool, however, with Fireworks we have the super useful vector capabilities and the non-destructive filters that make the process much easier. Also the way we can play with gradients in Fireworks is simply unbeatable.