by abduzeedo
A few weeks ago watched Clash of the Titans. The movie was okay, I have to admit, I was expecting much more, but it was awesome to see some huge monsters and mythologic creatures battling in this epic movie. However in the end of the movie, when the credits started showing I was really impressed with the effect and I thought to myself that I had to do a Photoshop tutorial inspired by the movie.
So, in this tutorial, I will show you how to create a text effect inspired by the Clash of the Titans posters and artworks. We will use layer styles and basic filters to achieve the effect. It will not take you more than 45 minutes to achieve the effect, but the outcome is really cool.
Step 1
Let's start our design in Illustrator, it's easier to get the text done in Illustrator, even though you can do that in Photoshop as well. When I saw the official Clash of the Titans poster I knew that font, it was the Bank Gothic, or the Bank Gothic is very similar. So with the Type Tool (T) add the word "clash", then "of the" in another independent object and then "titans", again in another object and line. All of the in uppercase.

Step 2
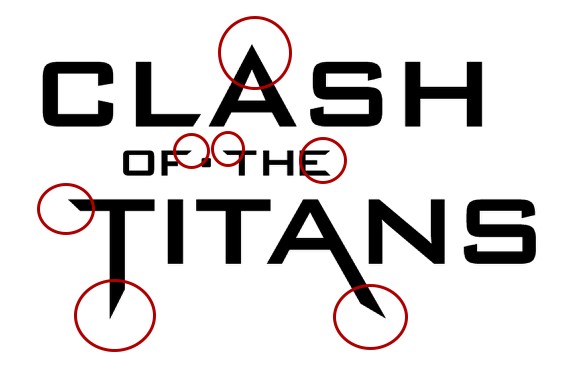
Select the texts and go to Type>Create Outlines. With the Direct Selection Tool (A) start editing the text. First the A of "clash". then the F of "of" and the T and E of "the". After that edit, the word "titans" by changing the T and A. Use the image below for reference. Basically you will be moving points, but be careful to keep the same alignments and angles as the original text.
Step 3
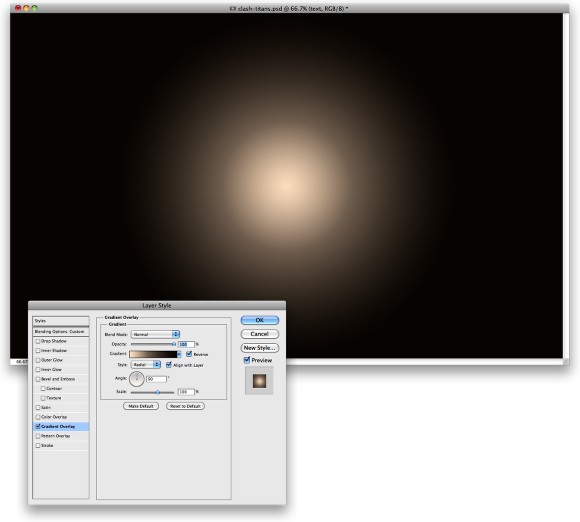
Now open Photoshop and create a new document. Create a new layer and fill it with any color, then go to Layer>Layer Style>Gradient Overlay. Use a light beige #fee4c8 and a very dark brown #0f0802 for the gradient, use Radial for the Style and 100% opacity.
Step 4
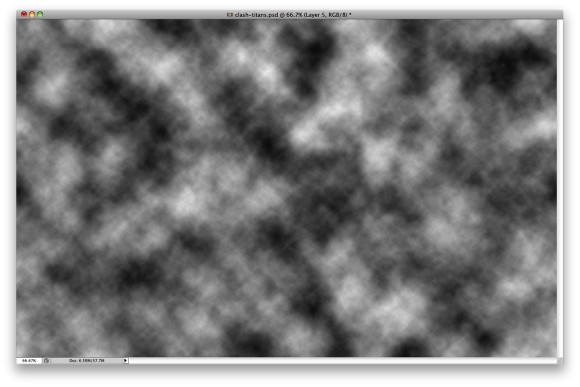
Add a new layer and go to Filter>Render>Clouds. Make sure you have black and white for the colors.
Step 5
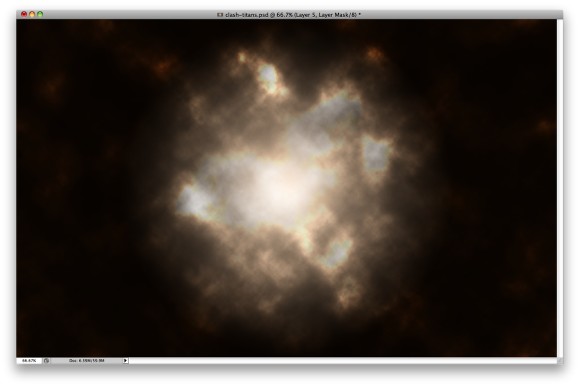
Change the clouds' layer Blend Mode to Color Dodge. After that go to Layer>Layer Mask>Reveal All. Over the Layers Palette, click on the mask thumb of the layer and go to Filter>Render>Clouds to apply the clouds to the layer mask, which will make the clouds less strong. Tip: play with masks and apply the filter on the masks, you will be surprised with the possibilities and the results.
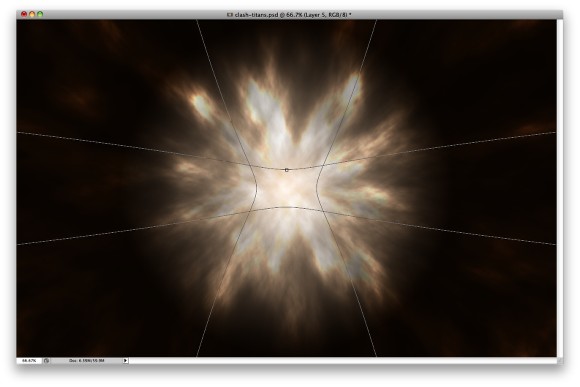
Step 6
Go to Edit>Transform>Warp. Select the Fisheye warp type, then move the controller towards the center of the document. That will create a really nice blur effect, much faster than the zoom blur in Photoshop.
Step 7
Copy the words "Clash of the " from Illustrator to Photoshop. We will do these words first because we will apply a different Layer Style preset for the Bevel and Emboss.

Step 8
The first thing here is to search for an old and rusty metal texture. I found the one I'm using on Google Images.
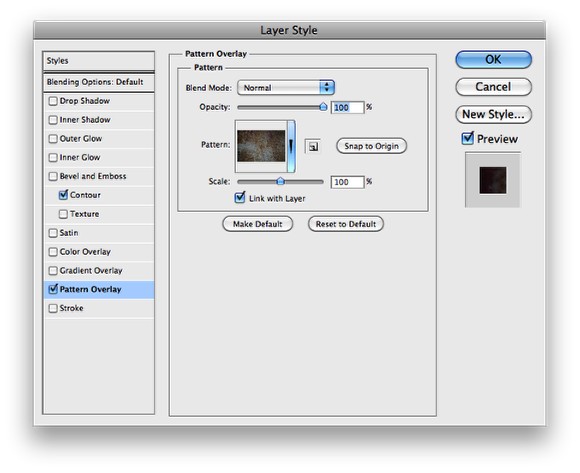
Open the image in Photoshop and then go to Edit>Define Pattern. After that go back to our design and select the layer with the words "clash of the", then go-to Layer>Layer Style>Pattern Overlay. Select the metal pattern you have just created.
Step 9
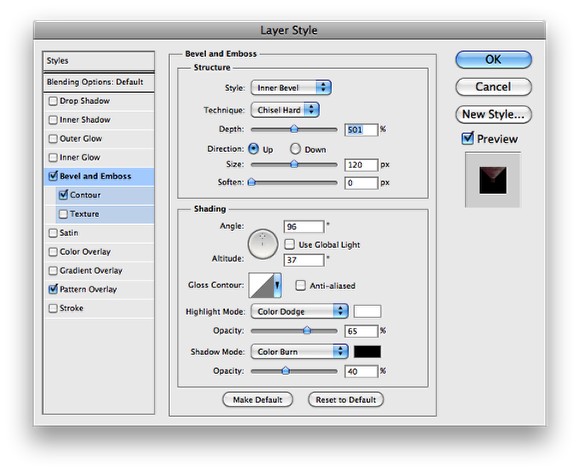
After the Pattern Overlay, select Bevel and Emboss. For the Technique use Chisel Hard, for the Depth use 500%, for the Size use 120 pixels, for the Soften use 0 pixels. Over the Shading Options, use 95º for the Angle, 35º for the Altitude, then for the Highlight Mode use Color Dodge with white for the color and 65% for the Opacity. For the Shadow Mode use Color Burn with Black for the color, then 40% for the Opacity.

Step 10
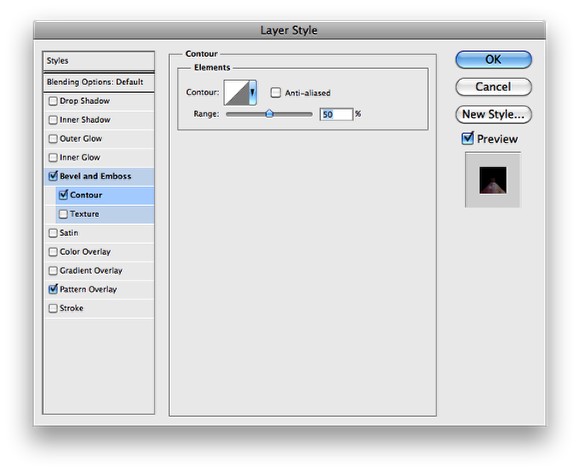
Now select Contour, then just change the Range to 50%.
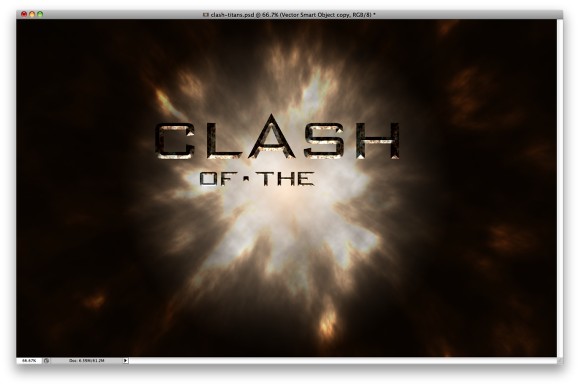
Step 11
Here you can see the effect you will have. Notice that the light is coming from the bottom or the center of the document, and that is why we split the words.
Step 12
Copy the word "titans" from Illustrator and paste it in Photoshop. On the layers, palette select the layer we applied the layer styles in the previous steps and with the right button of the mouse click and select Copy Layer Styles. After that select the "titans" layer and click again with the right button of the mouse click and select Paste Layer Styles. Double click on the layer to open the Layer Style dialog box. Select Bevel and Emboss, then just change the Direction to Up.
Step 13
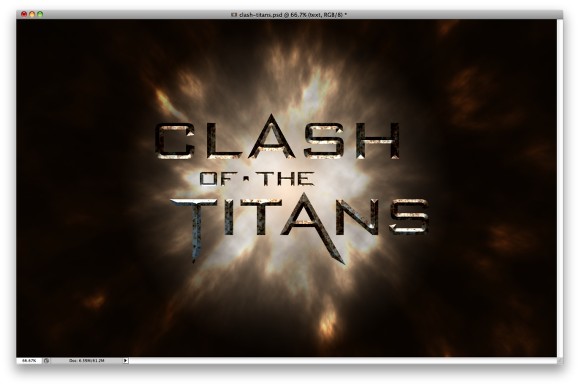
This is the effect you will have gotten so far, notice now that the light for the word "titans" is coming from the top while for the "clash of the" is coming from the bottom.
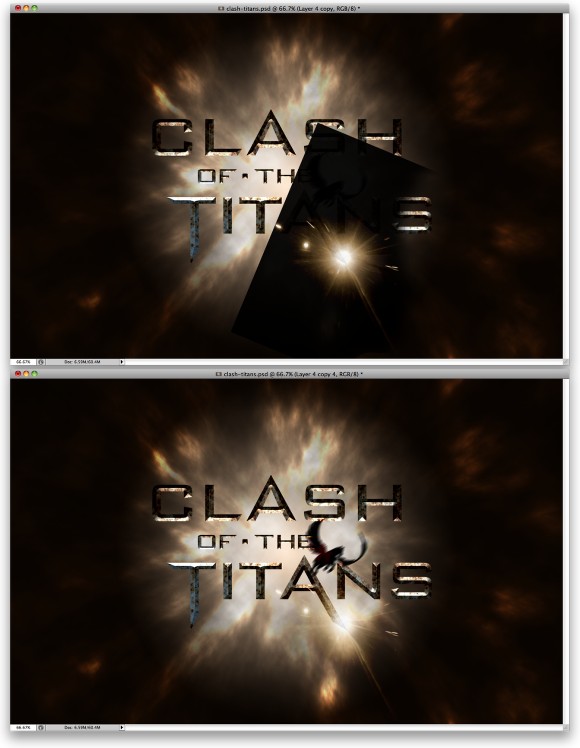
Step 14
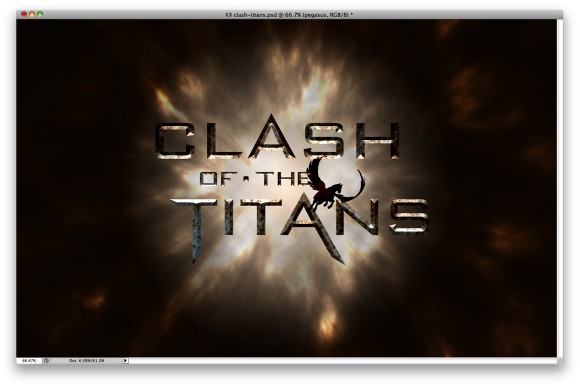
If you watched the movie you will know that the Pegasus was a black-winged horse, so I got an image of a winged horse from Shutterstock, you can find it over here. It's a vector image, but that is fine, just place it as it is coming from the center.
Step 15
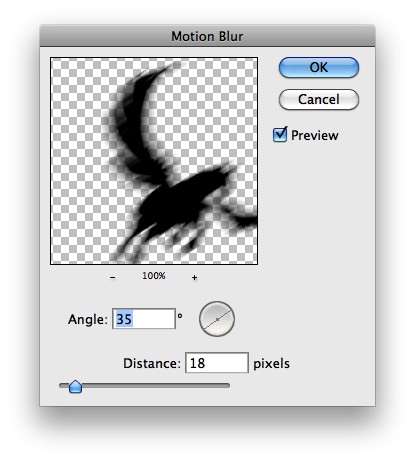
To make the horse more realistic and less vector style go to Filter>Blur>Motion Blur. Use 35º for the Angle and 20 pixels for the Distance.
Step 16
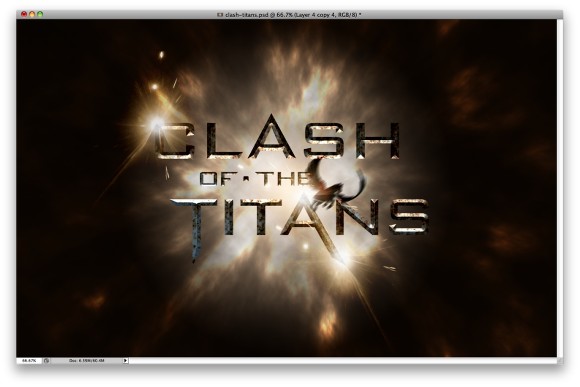
For the flares you can create them using different techniques, you can do that using the noise gradient, the lens flare filter (least recommended) and using an image. I have used an image that is really good for that on most of my projects, the only thing I do is to change the Hue and Saturation to make the colors match the design. You can find the image I used here.
As you can se the background of the image is black so the only thing you have to do is to change the Blend Mode to Screen, so the black will be transparent.
Step 17
Add more lens flares over some letters of the texts. Use the image below for reference.
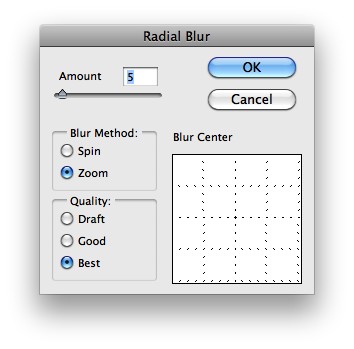
Step 18
Select all layers and duplicate them, after that merge all the duplicated layers into one layer only. The keyboard shortcut to that is Command(mac)/Control(pc) + Alt + Shit + E. Select this layer and go to Filter>Blur>Radial Blur. Use 5 for the Amount, Zoom for the Blur Method and Best for the Quality.
Conclusion
The zoom blur will give that movement idea to our design, as the text is coming out of the page, exactly like the credits at the end of the movie. You can add some noise as well to give that movie style to the image. The technique on this tutorial is pretty simple, there's nothing that is difficult to be done, but the most important thing was that I wanted to show you that you can find inspiration everywhere, but it's important that you turn this inspiration into something real. The best way to do that is through personal projects ;)
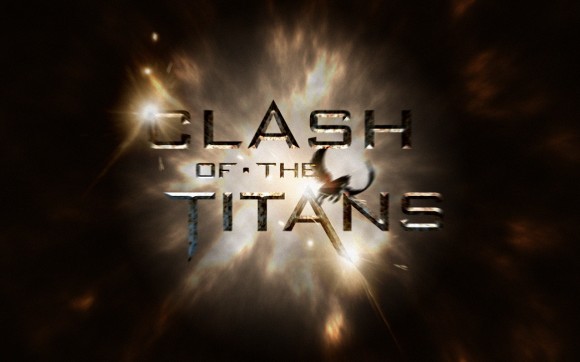
Click on the image for full preview.


