The Dark Knight Rises Stencil Effect in Photoshop
The Dark Knight Rises movie is a couple of weeks away and the amount of posters and viral images promoting the movie is quite amazing. There are some really cool ones and as usual, we want to learn how they were done. That is the case of this Photoshop tutorial based on another promotional image for the Dark Knight Rises.
So in this tutorial, we will create a stencil and spray effect using basic filters and some brushes. The technique is very simple and I am sure you will use it in your future projects.
Step 1
Open Photoshop and create a new document. I am using 2560x1600 pixels. After that let's use an image of Bane. Look up on Google Images for the right one. The one I used can be found at http://screencrave.com/wp-content/uploads/2012/06/Bane-and-The-Bat-in-The-Dark-Knight-Rises.jpg

Step 2
With the Polygonal Lasso Tool (L) select just the head of Bane.

Step 3
Duplicate the head layer just to have a backup. After that select one and go to Filter>Filter Gallery>Sketch. Click on Halftone Patter. Use 1 for the Size, 43 for the Contrast and Dot for the Pattern Type. Make sure you had Black and White for the foreground and background color.

Step 4
Look up on Google Images for the Batman symbol. After that use it as the eyes of Bane.

Step 5
Add a layer to use as a background. Fill it with black and make sure it will underneath all the other layers. Select the Bane head layer with the Batman symbol and merge them into one. Change the Blend Mode to Screen and if necessary go to Image>Adjustments>Levels and increase the black and white inputs to make sure there are no greys. After that add the text "RISE" using a san-serif font in caps. Also, increase the kerning to 125.

Step 6
Duplicate the background layer, hide one of the layers and then select the visible one. Merge them into one layer. Duplicate this layer. With one copy go to Filter>Blur>Gaussian Blur. Use 8.0 Pixels for the Radius.

Step 7
Go to Filter>Noise>Add Noise. Use 30% for the Amount, Gaussian for the Distribution and select Monochromatic.

Step 8
Go to Layer>Layer Mask>Hide All. Then with a spray brush from http://qbrushes.net/photoshop-splash-brushes/dirty-spray-photoshop-brushes/ start painting on top of the mask layer using white for the color.

Step 9
Make the hidden layer of step 6 visible again. Change the Blend Mode to Color Dodge. Go to Layer>Layer Mask>Hide All. Then with a spray brush and white start painting on the mask to make the layer visible. The idea of this step is to give more detail on the Bane's head.

Step 10
Repeat the same process to apply the effect to the "RISE" word. Note that there are some details like blurry edges and splatters. You can do that with the layer mask and the spray brushes.

Step 11
Search from some asphalt textures on Google Images. The one I am using can be found at http://www.martworkshop.com/var/albums/free-textures/Ground-texture/Asphalt%20Textures/asphalt%20texture%2008.JPG?m=1296738717
Place the texture underneath the background layer that is filled with black. Change the Blend Mode of the background layer to Soft Light at 80% Opacity.

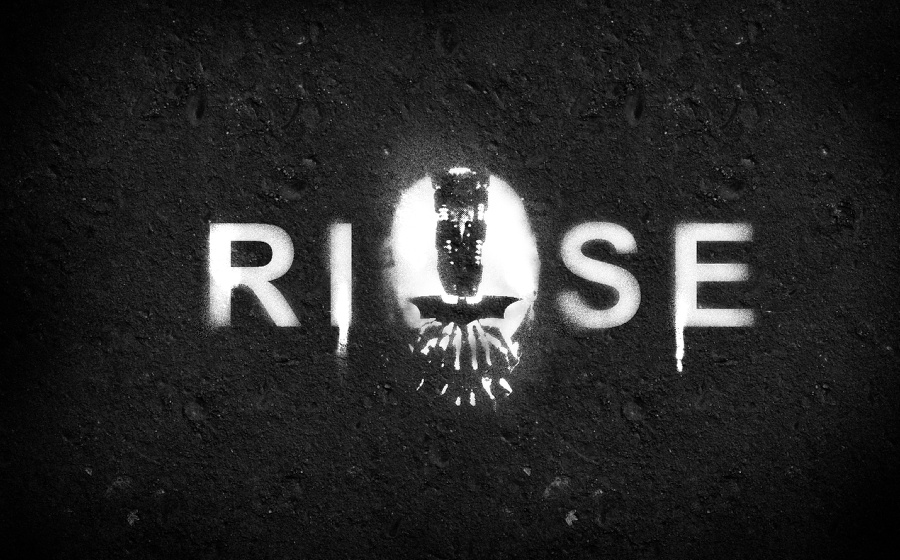
Conclusion
Add a layer on top of the others and using a spray brush with black, create a sort of vignette effect to make the focal point in the center. Our design is pretty much done and the technique we used to create the spray effect can be used for your future graffiti images or any sort of spray effect you want to create. Now it's up to you, have fun.
Download the Photoshop File
