Easy Wax Seal in Illustrator and Photoshop
A few weeks ago I was having my Maker's Mark and decided it was time to do the wax effect they have on their brand using Photoshop. After looking for some references, I found some references and started creating a wax seal using Illustrator and Photoshop.
So in this tutorial, we will create a Wax Seal effect using Adobe Illustrator and Photoshop. The whole process is pretty much done using Layer Styles and won't take more than 45 minutes to be achieved.
Step 1
Open Illustrator and with the Ellipse Tool (L) create three circles.

Step 2
Using the Type on Path tool to use one of the circles to add a text following it. I said "Approved by Abduzeedo" and "Design-Inspiration-Tutorials". After that for the outer circle use the Warp Tool to distort the circle like the image below.

Step 3
Select the outer and the bigger inner circle and then using Pathfinder you subtract the center area to have just the melted wax area. Then copy that in Illustrator and paste in Photoshop in a new document.

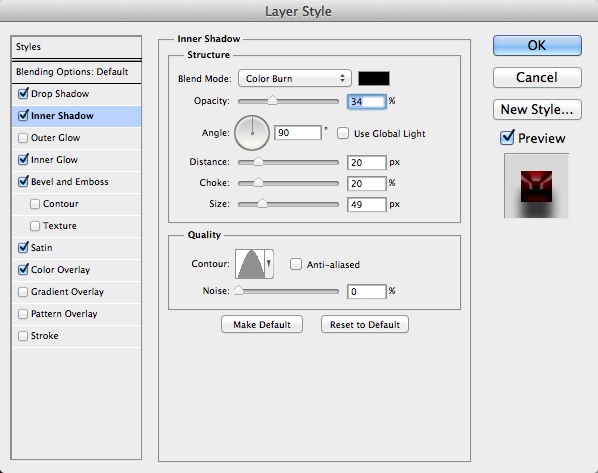
Step 4
Go to Layer>Layer Styles>Ineer Shadow. Use Multiply for the Blend Mode, black for the color, 30% for the Opacity, 90º for the Angle, 20 pixels for the Distance, 0 for the Choke and 75 pixels for the size.

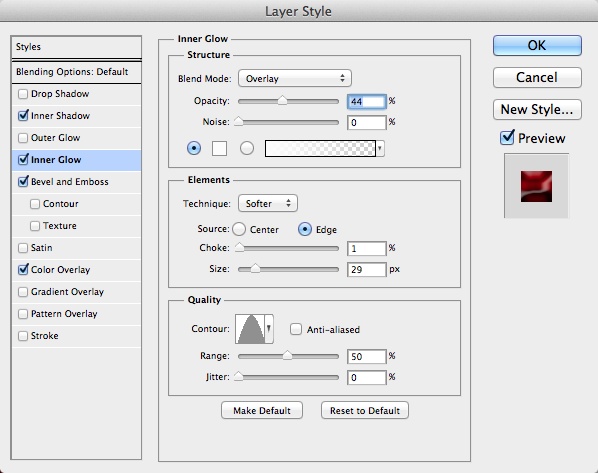
Step 5
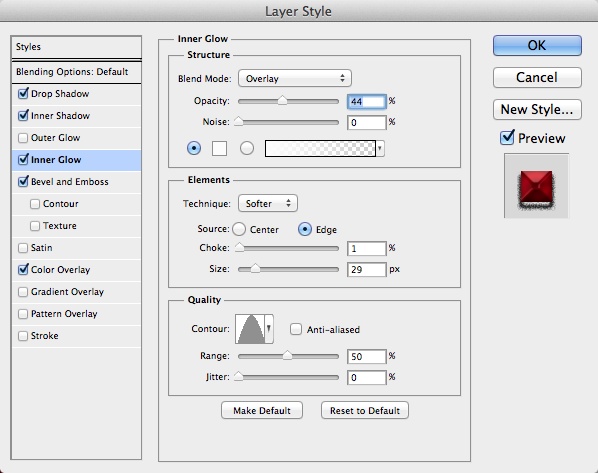
Select Inner Glow. Use Overlay for the Blend Mode, 45% for the Opacity, White for the color, Center for the Edge, 1 for the Choke, 30 pixels for the Size and use the same contour as the image below.

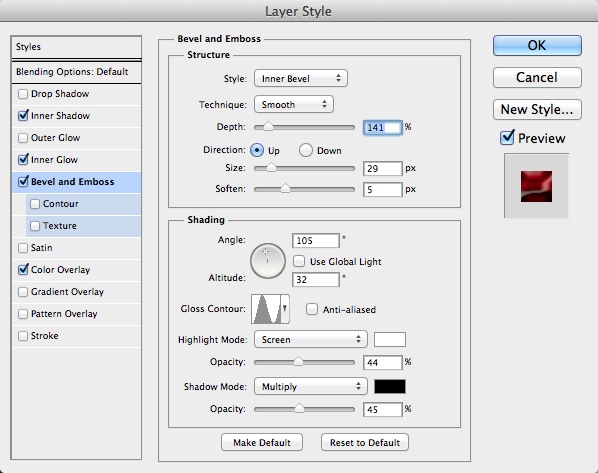
Step 6
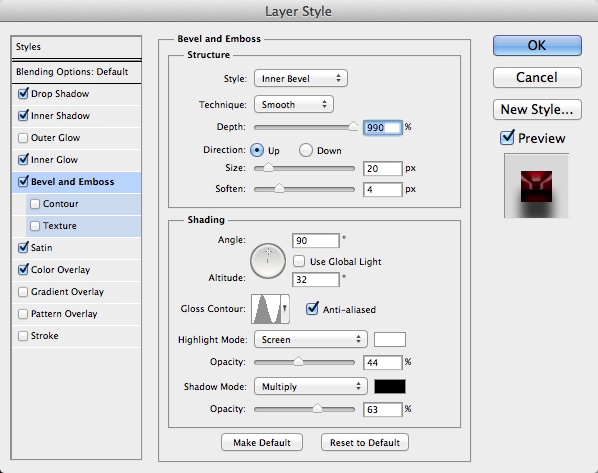
Select Bevel and Emboss. Use Inner Bevel for the Style, Smooth for the Technique, 150% for the Depth, Up for the Direction, 30 pixels for the Size, 10 pixels for the Soften, 90º for the Angle, 32º for the Altitutde. For the Highight Mode use Screen for the Blend Mode, white for the color at 65%. For the Shadow Mode use Color Burn for the Blend Mode with black for the color and 20% for the Opacity.

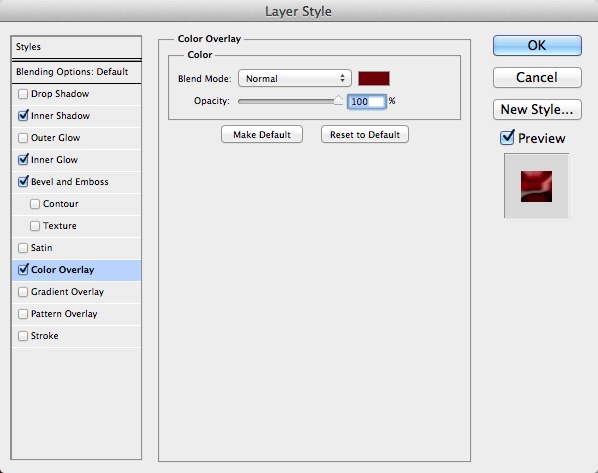
Step 7
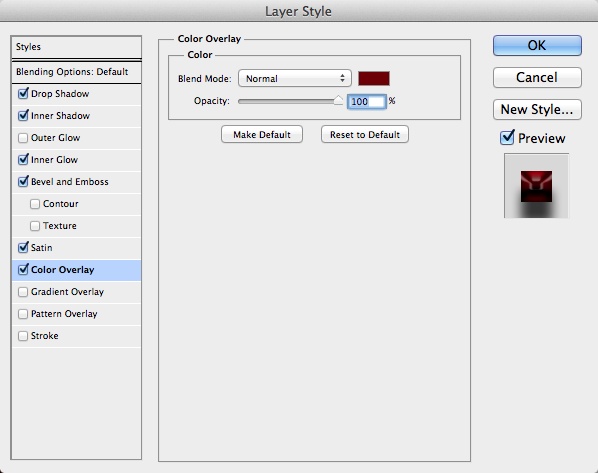
For the color overlay use Burgundy for the color.

Step 5
This is the effect you will have after the first set of layer styles.

Step 6
Create a circle using the Ellipse Tool (U) add a circle underneath the wax effect we created in the previous step.

Step 7
Duplicate the circle and apply the same layer styles but let's edit a few styles.

Step 8
Here is a list of the layer styles for the circle that will be on top of the other layers. The idea is to make the circle less unifor as it was really made with wax.

Step 9
With the Eraser Tool (E) you can delete some parts of the circle as well. Again the idea is make it less uniform.

Step 10
Add another circle in the center of the wax effect.

Step 11
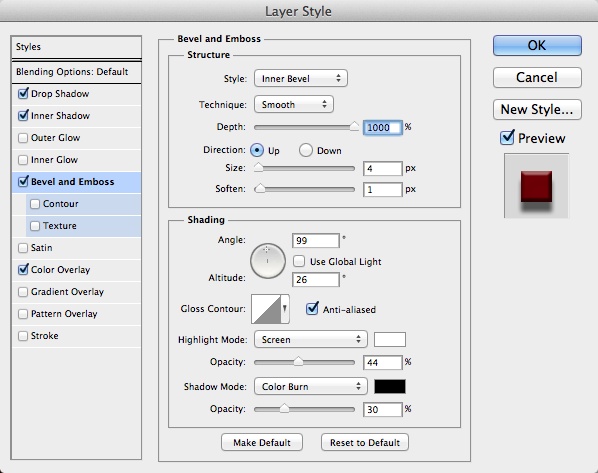
The layer styles will be pretty much the same but here is the screenshots of the new layer styles.


Step 12
This is the effect you will get after the layer styles.

Step 13
Copy the text from Illustrator and paste in Photoshop. Scale them to fit the design in Photoshop.

Step 14
Again the layer styles here are pretty much the same with a few adjustments in the Bevel and Emboss and Inner Shadow values.


Step 15
The text with the layer styles will look something like the image below.

Step 16
Time to add the Abduzeedo Symbol.

Step 17
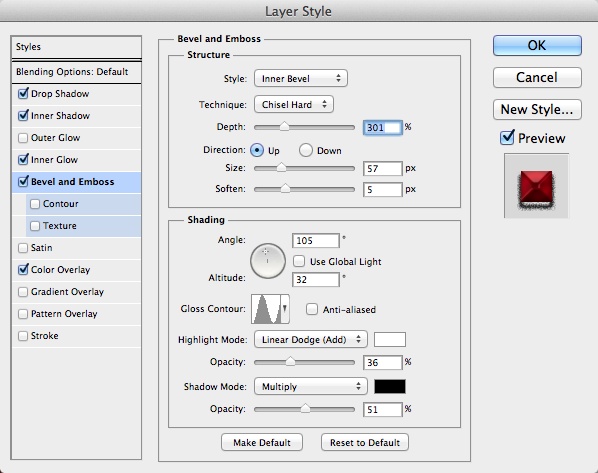
Here the layer styles again will have pretty much the same as the wax in the first steps howver the Bevel and Emboss will be completely different especially technique. We will use Chisel Hard.


Step 18
Here is the symbol with the Layer Styles.

Step 19
Select all layers and duplicate them, after that merge all the new duplicate layers. After that go to Filter>Blur>Gaussian Blur. Use 10 px for the Radius.

Step 20
Import a sand texture and place on top of the other layers. Mask the sand texture using the wax shape.

Step 21
Change the Blend Mode of the Sand texture to Overlay. Make sure your texture is in grey scale, otherwise go to Image>Adjustments>Desaturate.

Step 22
Go to Layer>New Adjustment Layer>Hue and Saturation. Reduce the Saturation to -20.

Step 23
Now just place a paper texture in the background. The one I am using is from Polina Katritch and it's called old paper background. The image is courtesy of Shutterstock.

Conclusion
This is another one of those effects that can always be tweaked and improved. I had an amazing time playing with this and I am sure you can improve upon it by adding your style. Now it's up to you.

Download Photoshop File
