by abduzeedo
In 2008 I came up with a technique using the Brush Tool in Photoshop to create a digital bokeh effect. Then I mixed it with some gradient colors blended all together. The effect has become quite popular so I decided to upgrade a little bit the effect.
So in this tutorial I will show you how to create a digital bokeh effect with hexagons. We will use the brush engine, patterns, blend modes and basic filters to achieve this effect.
Step 1
Open Photoshop and create a new document, I'm using 2560x1440 pixels so I can use it as wallpaper. Fill the background layer with a very dark grey (#181818).
Step 2
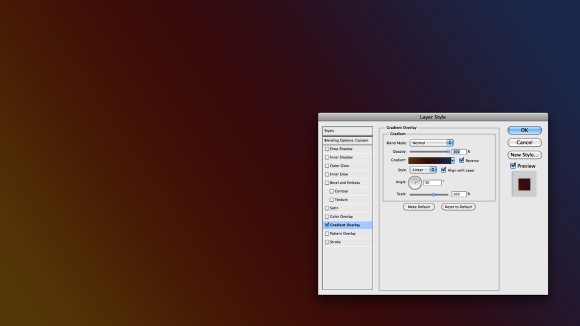
Add another layer and fill it with a gradient using dark yellow, red and blue for the colors. Use 30º for the angle. After that change the Blend Mode to Overlay.
Step 3
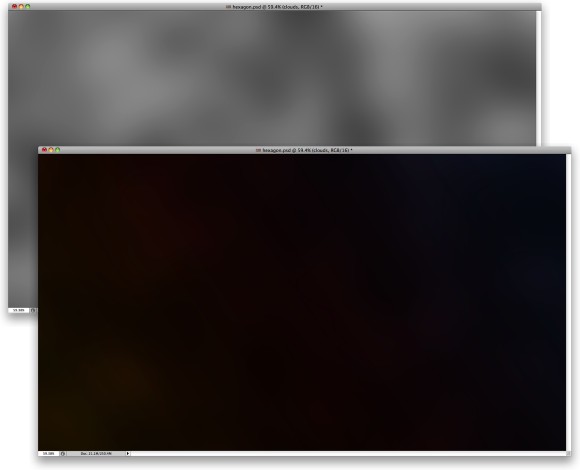
Add a new layer and go to Filter>Render>Clouds. Make sure you have black and white for the background and foreground colors. After that go to Filter>Blur>Gaussian Blur. Use 70 to 100 for the Amount, then change the Blend Mode to Color Dodge.
Step 4
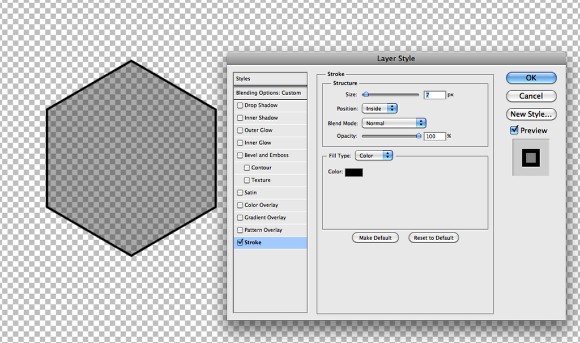
Now let's create a hexagon shape to use as brush. Select the Polygon Tool (U) and create an hexagon with black. After that go to Layer>Layer Styles>Strokes. Use 7 pixels for the Size and Inside for the Position. After that go to Blending Options: Custom and change the Fill Opacity to 50%.
To create the brush just select the hexagon by holding Command(mac)/Control(pc) and clicking on the thumb of the layer, then go to Edit>Define Brush. Name your brush and get back to the document with the design.
Step 5
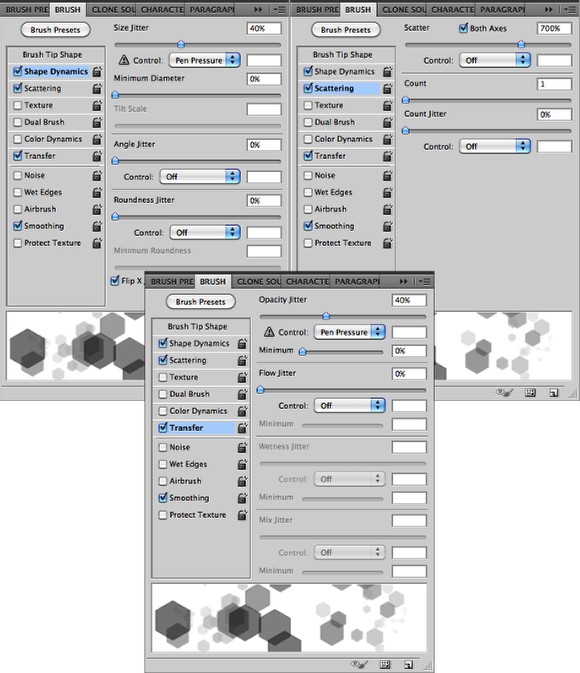
Go to Windown>Brushes. Select Shape Dynamics and use 40% for the Jitter. Keep the other values the same. Then select Scattering, select Both Axes for the Scatter and use 700% for the value. The last thing here is Transfer. Use 40% for the Opacity Jitter and keep the other values with 0%.
Step 6
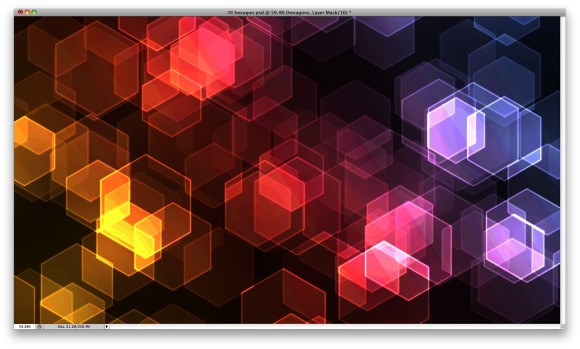
Add a new layer and group this new layer, it will be inside a folder. Change the Blend Mode of the folder to Color Dodge. With the Brush Tool (B), select the hexagons brush we created in the previous step, then using white paint the layer with some hexagons.
Step 7
Go to Filter>Blur>Gaussian Blur. Use 2.0 pixels for the Radius.

Step 8
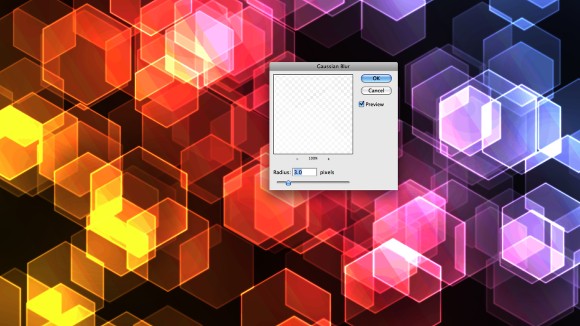
Duplicate the layer and then go to Filter>Blur>Gaussian Blur again, this time however use 5 pixels for the Radius. Change the Fill Opacity to 60%. Also with the Eraser Tool(E) delete some areas that might get too bright.
Step 9
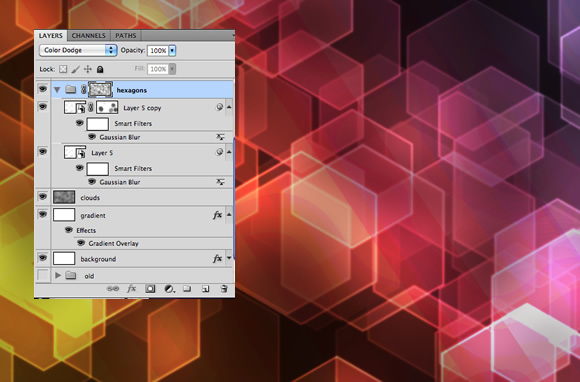
Select the folder in the Layer Palette and go to Layer>Add Layer Mask>Reveal All. Select the layer mask thumb and go to Filter>Render>Clouds. After that go to Filter>Blur>Gaussian Blur. Use 20 pixels for the Radius. Applying the clouds fliter with the mask will hide some areas based on the clouds colors.
Step 10
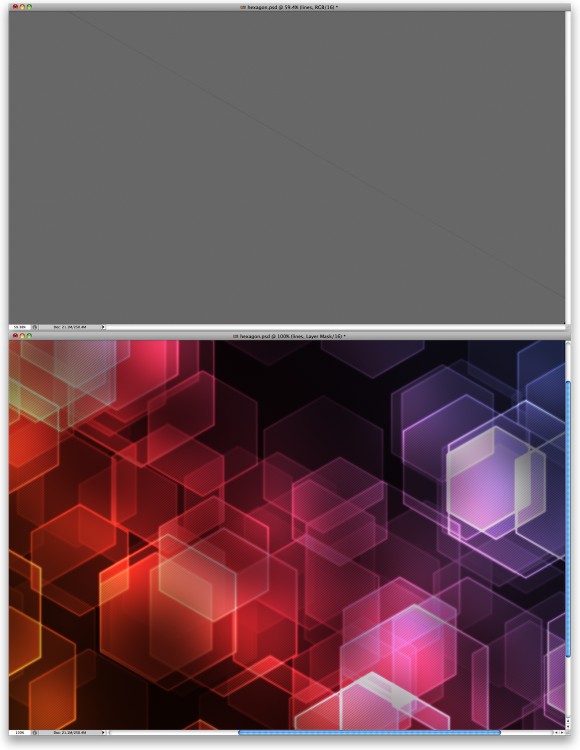
Add a new layer on top of the others and the select the Paint Bucket Tool (G), change the type to Pattern and select a stripped pattern, the one I used you can download it here. After that rotate it 30º. You will have to duplicate the layer and move it the new copy to fill the whole screen. Select both layers and go to Layer>Merge Layers.
Change the Blend Mode to Overlay and once again add a layer mask and apply the clouds filter with blur in the layer mask as we did in the previous step.
Step 11
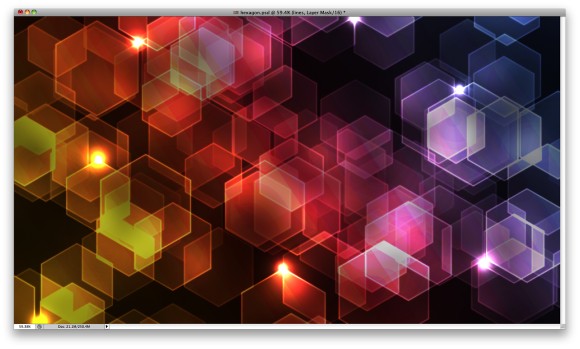
Add a new layer and then group this new layer into a folder. Change the Blend Mode of the folder to Color Dodge then select the Brush Tool (B). With a rounded and very soft brush; use white for the color and paint some light flares.
Step 12
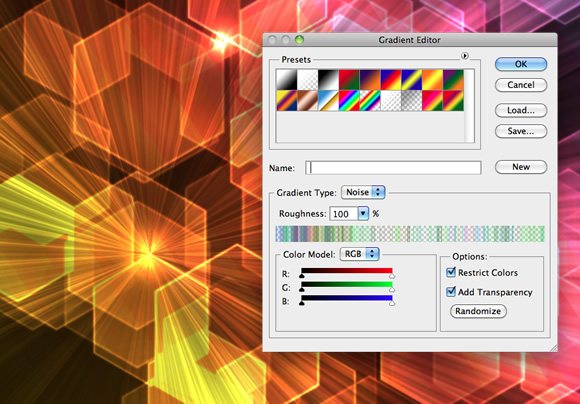
Add a new layer still inside this folder. Get the Gradient Tool (G) and then click on the gradient to open the Gradient Editor. Change the Type to Noise, the Roughness to 100% and select both Options: Restric Colors and Add Transparency. Fill the layer using this gradient but using an Angle Gradient type.
Step 13
With the layer with the Angle gradient selected go to Filter>Blur>Gaussian Blur. Use 10 pixels for the Radius. After that with the brush tool, add another light spot exactly in the middle of the angle gradient.

Step 14
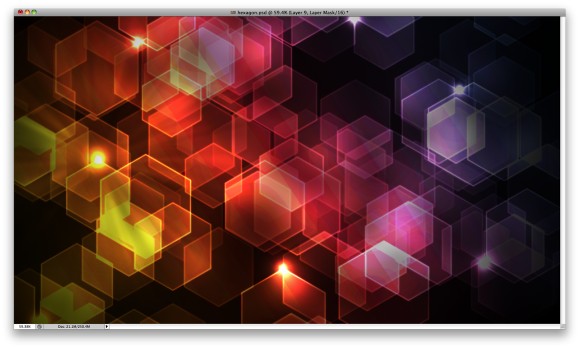
Add a layer on top of the others, then fill this layer with black. with the Eraser Tool(E) and a big soft and rounded brush, delete the center a few times until you have created a vignette effect. The idea here is to darken the edges of the design.
Step 15
Select all layers and duplicate them, after that, with all duplicated layers selected go to Layer>Merge Layers. The next thing to do is to go to Filter>Blur>Gaussian Blur. Use 15 pixels for the Radius .

Step 16
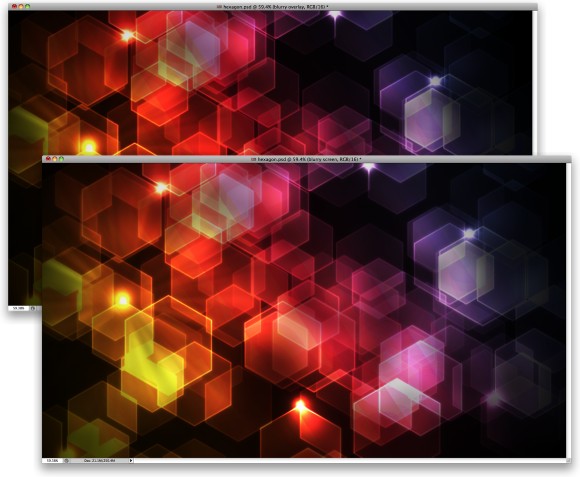
Duplicate this blurry layer so you will have 2 layers. For the first one change the Blend Mode to Overlay and the Opacity to 40%. For the second one, the one that will be on top of the others, use Screen for the Blend Mode and 30% for the Opacity.
Conclusion
This is a very simple effect to create in Photoshop, and as you can see we didn't use any special plugin or stock photos, we just used basic filters, the brush engine and some blend modes. There are lots of things we can create in Photoshop and these types of abstract effects are my favorite. Now it's up to you to come up with your own!

Click on the image for full preview.

