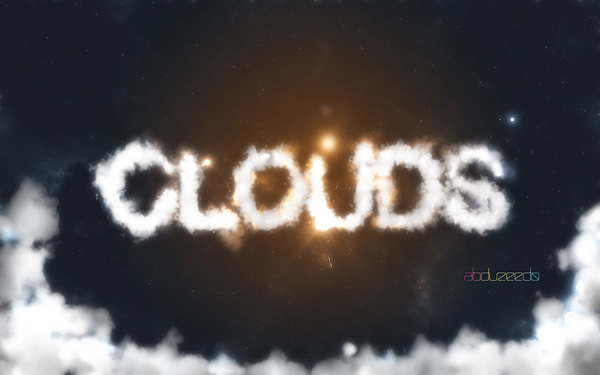
by abduzeedo
Last year I wrote a tutorial showing how to create clouds using Adobe Photoshop. However, I have received quite a few emails asking me how to create a text made with clouds. Because of that I decided to write a very quick tutorial showing how to do it.
Following our Quick Tips series, in this tutorial I will show you how to create a text with clouds, using brushes and other few interesting light effects.
Step 1
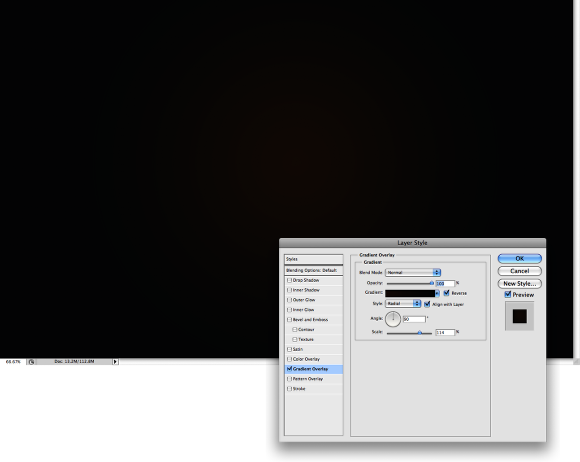
Create a new document in Photoshop, I used 1920x1200 pixels for the size. Then using the Layer Style apply the Gradient Overlay to the background layer. Use Normal for the Blend Mode, 100% Opacity, Radial for the Style and #07090b and #27160a for the Colors. Also increase the Scale to 115%.
Step 2
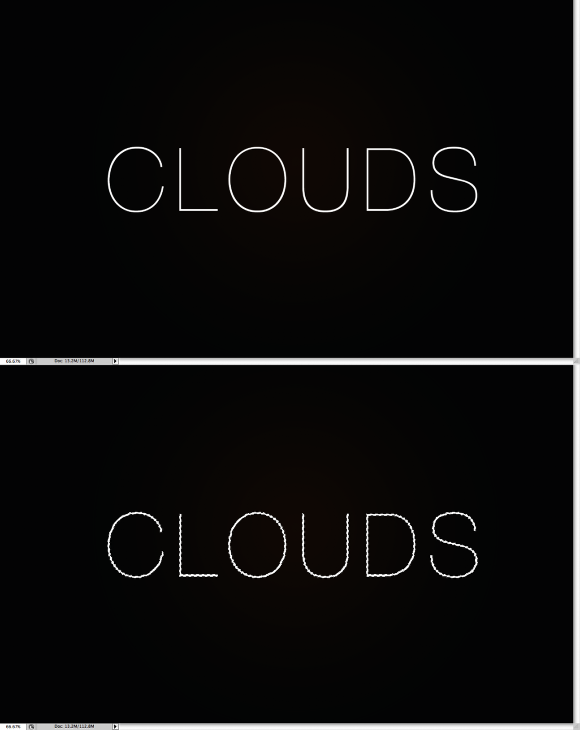
With the Horizontal Type Tool (T) type CLOUDS, all caps. I used Helevtica Neue Ultra Light. It's important that you use a very light font because we will concert it to a path. After that go to Layer>Rasterize>Type. That will rasterize the layer, then in the Layer Palette, hold the Command(mac)/Control(pc) key and click on the thumbnail of the layer. That will create a marquee selection from the text.
Step 3
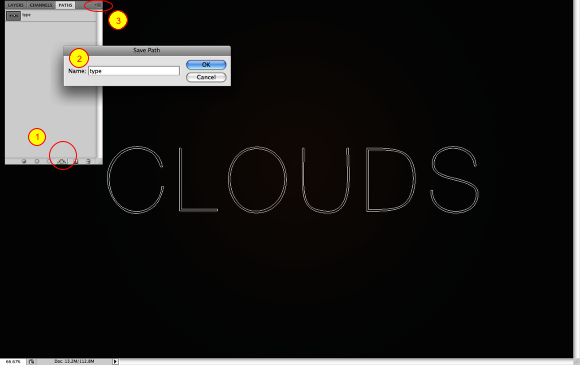
With the marquee selection from the previous step, go to the Path Palette and click on the icon Make Work Path from the Selection (1). Then Save the path so you can use it later on. You can do that by clicking on the icon that is on the top right icon (3) and click Save Path.
Step 4
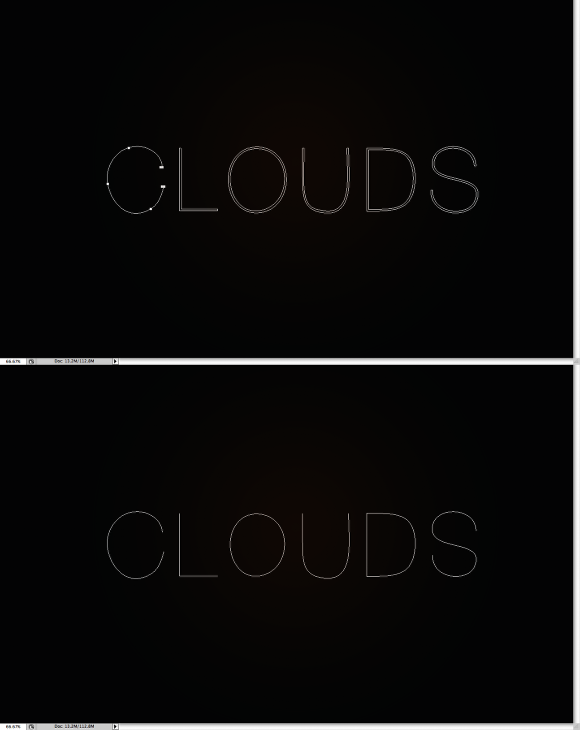
With Direct Selection Tool (A) let's edit the path. Start deleting the inner part of the paths like, each letter has to have only one path like in the image 2.
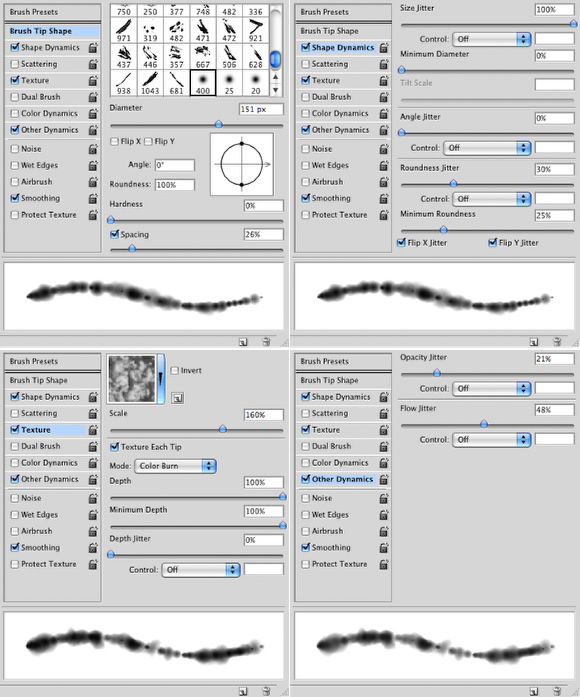
Step 5
Let's create a brush that will be used to create the clouds. I have already published a tutorial showing how to make this brush, you can check out at http://abduzeedo.com/beautiful-fluffy-clouds-photoshop-christmas-tutorial . But below you can see what's necessary to create the brush. Go to Window>Brushes. Select a regular and very soft brush. Select the Shape Dynamics, Texture and Other Dynamics. For the Texture is very important that you change the scale every time you change the brush tip scale.
Step 6
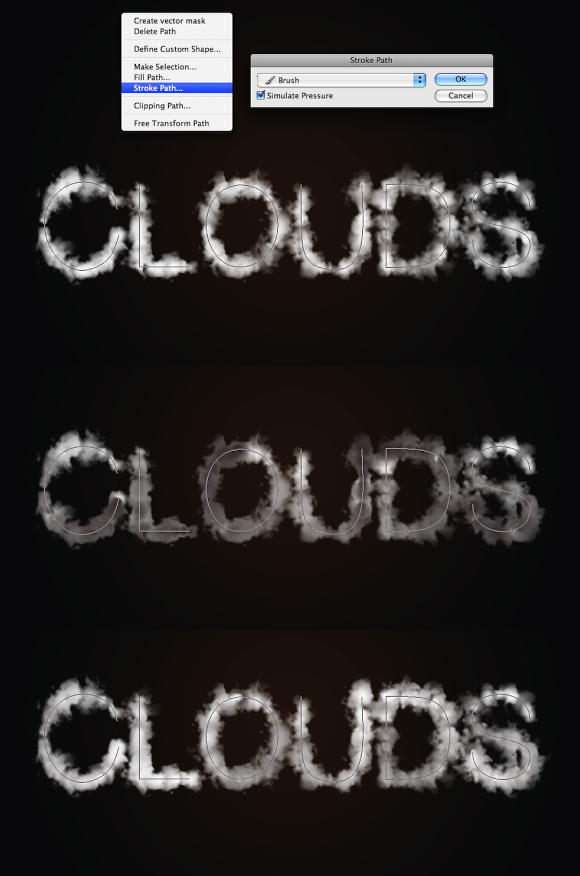
Again with the Direct Selection Tool (A), click with the right button of the mouse over the path in the image and select Stroke Path. A dialog box will appear, the stroke path window, where you can select what you will use to stroke the path. Make sure you have the brush we have just created selected and then select Brush. Also make sure that you have the color white selected for the brush color. (1).
We will repeat that 2 more times, but each one in a new layer. The first time we used white, the second let's use black and the third, white again. That will add volume to the clouds and make them more realistic.
Step 7
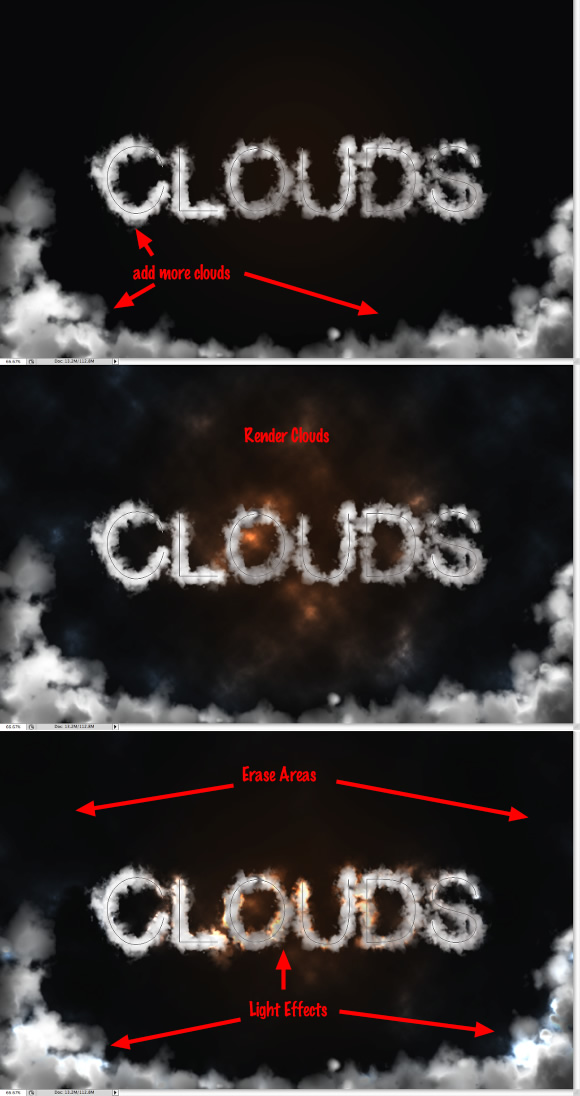
Let's add create some more clouds, (image 1), then add another layer and go to Filter>Render>Clouds. Make sure you had black and white for the colors. After that change the Blend Mode of this layer to Color Dodge and with the Eraser Tool (E) delete some areas leaving just the ones closer to the clouds text.
Also let's add some light effects. To do that add a folder in the Layer Palette, this folder has to be beneath the clouds we created with the brush tool. Change the Blend Mode of the folder to Color Dodge. Inside this folder add a new layer. Then with the Brush Tool (B) and white for the color, start painting some clouds. These clouds we will be painting will be light effects so if you want you can change the opacity of the brush by clicking on the number keys (1-0). Use the image below for reference.
Step 8
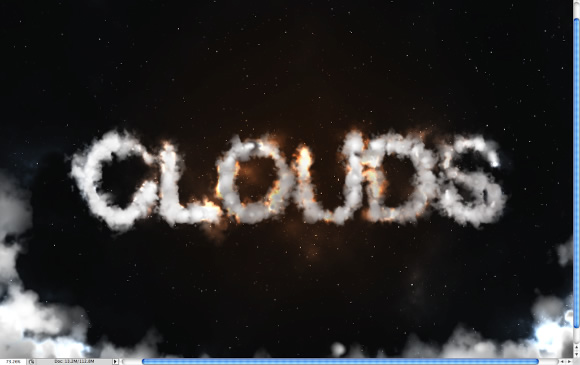
Now just add some stars. To do that create a new layer and fill it with black. Then go to Filter>Noise>Add Noise. Use 10% for the Amount and Gaussian for the Type. After that go to Image>Adjustments>Levels. Increase the Black until you have just a few stars then increase the white to make them brighter. Also change the Blend Mode to Color Dodge.
Step 9
Select all layers and duplicate them, then go to Layer>Merge Layers. After that go to Filter>Blur>Gaussian Blur. Use 12 for the amount. Also change the Blend Mode to Screen. That will create a nice glow and make the clouds more realistic.
Conclusion
You can add more light effects like some bigger stars or even play with colors, the idea of this tutorial was to show you a very quick tip on how to create clouds and a text made with clouds. Now it's all about playing and testing different variations.
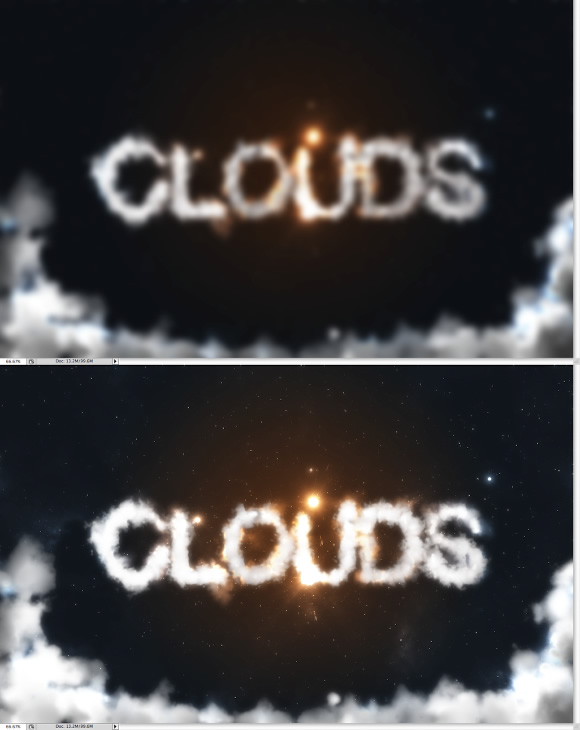
Click on the image for full preveiw
Donwload the PSD File
Click here to download the Photoshop fileused for this tutorial


