by abduzeedo
A new year has just started. I can believe it’s been already more than 12 years since I started Abduzeedo. Back in the day I really wanted to share inspiration and some experiments I was doing, especially using Photoshop. I remember around 2007/2008, I am not sure exactly when it was, but I saw a video of a brand new tool called Pixelmator. It was a beautiful video with even more beautiful interface design. It was dark, with floating windows. I didn’t hesitate. I sent them an email asking to get an invite to try the beta. For my surprise, they replied, I got to play with Pixelmator and I ended up writing a few tutorials that were part of their website. Quite an interesting journey looking back.
For this year I want to go back to some of those experiments. Completely casual, not focus on trends or styles, just try to do things I like. Even if they might look outdated. These experiments can be with Photoshop, Pixelmator, Sketch, Figma, or even code with HTML/CSS or Android Studio. Honestly, I just want to have fun and experiment a bit more and I hope you enjoy it.
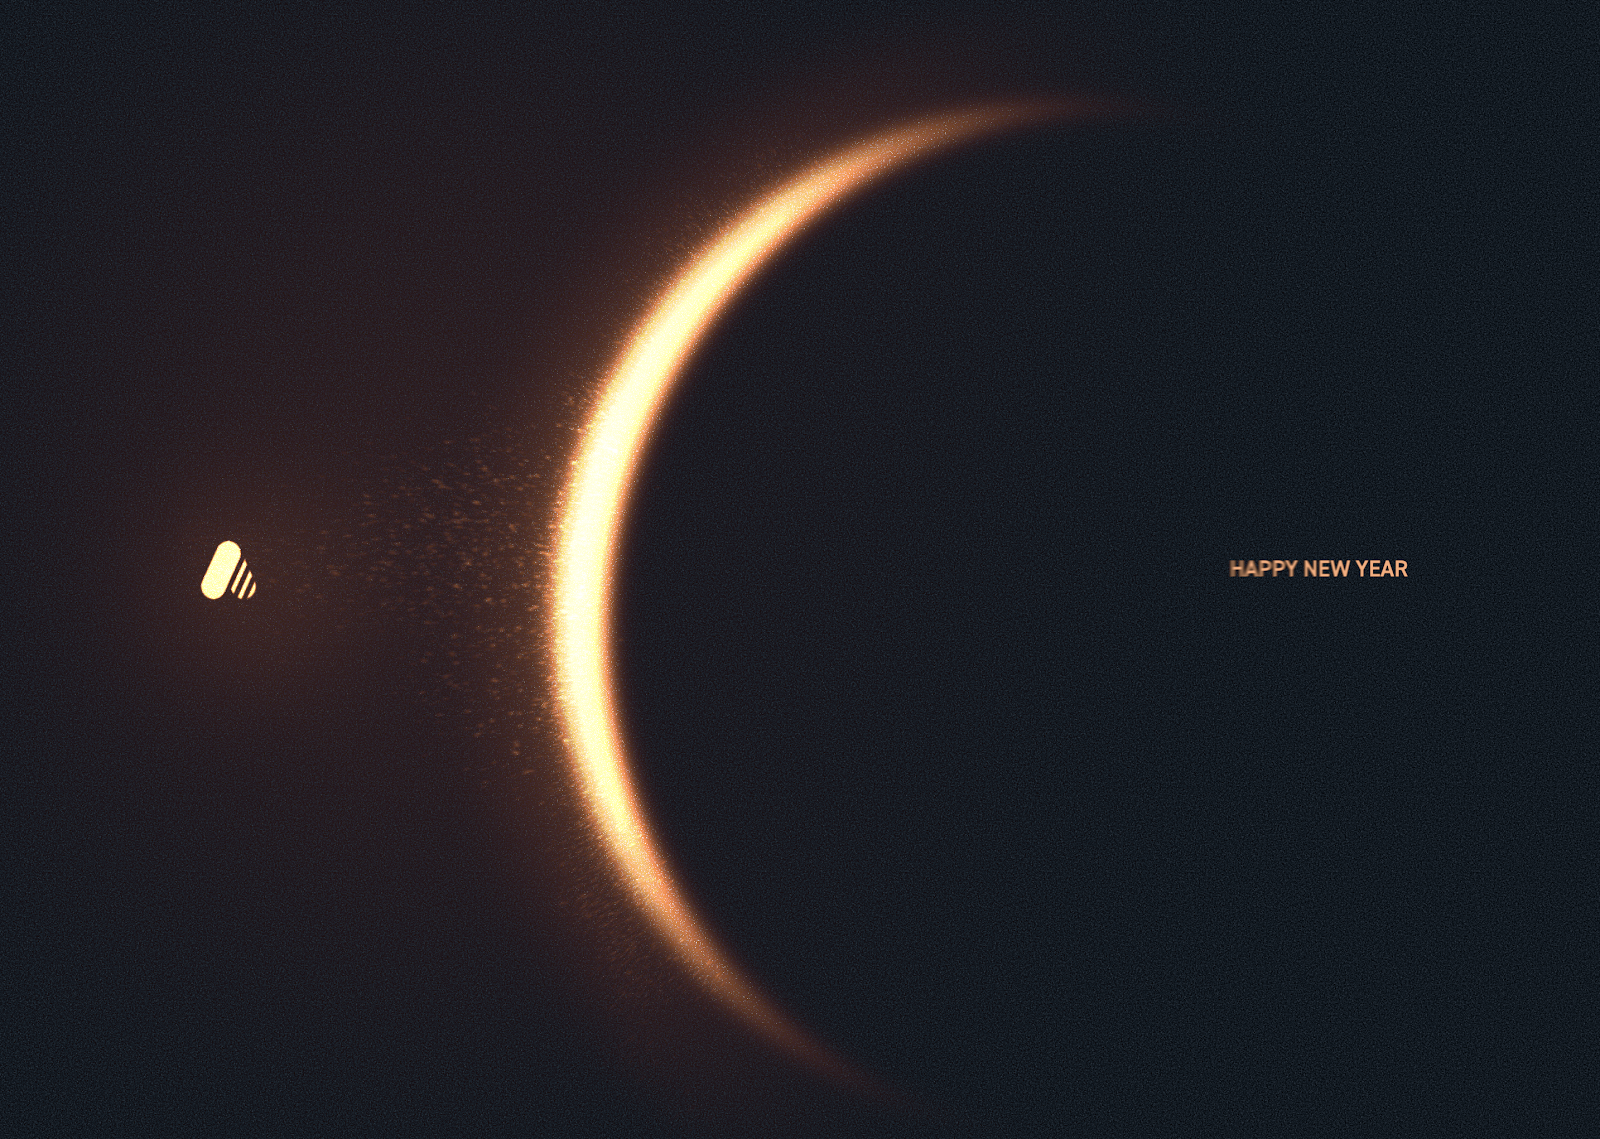
So for the first experiment, I would like to share my experience in creating a simple image using the new Pixelmator Pro. It’s a case study/tutorial but I will try to highlight a bit more of the UI.
Pixelmator Pro Tutorial
Opening Pixelmator Pro for the first time was quite a shock. I was used to the old interface, where things were more floaty. The new one is much more aligned with Apple interface guidelines I assume. Everything is in a big container, it actually reminds me of Apple Keynote (the last time I used Keynote was two years ago, so bear with me).
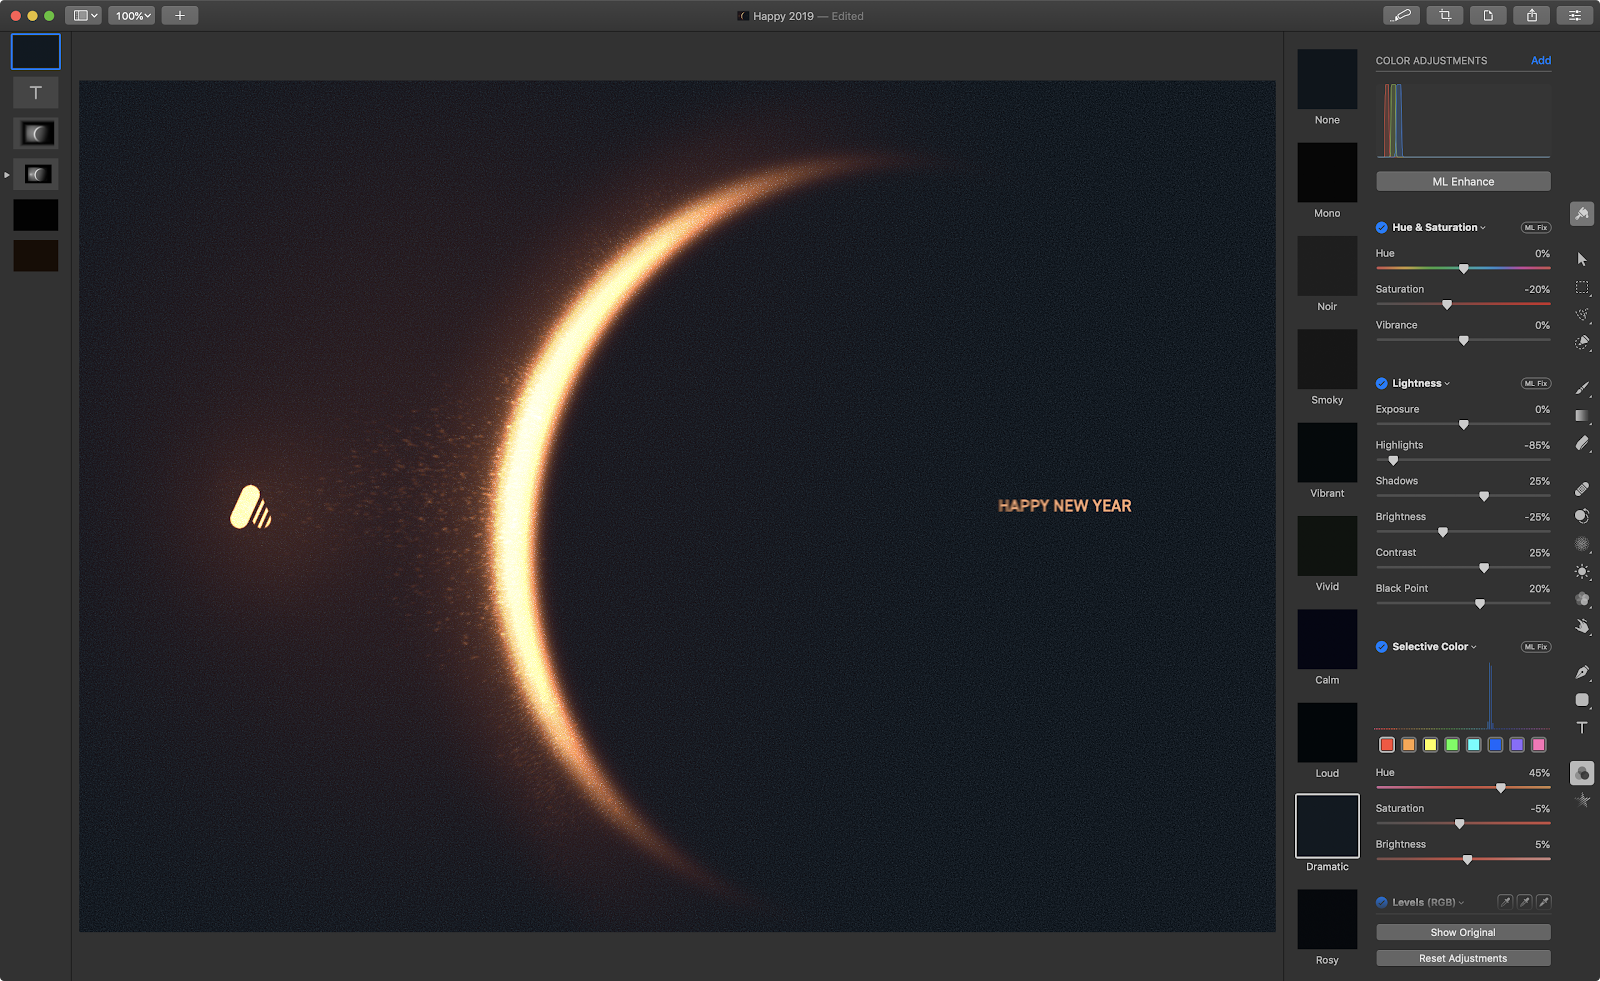
In terms of panels, everything now is on the right side. You have the toolbar with icons right on the right side, and when you select one, the properties panel load on the right column. It’s very contextual and everything moves super smoothly. The image below is with the Arrange Tool selected.

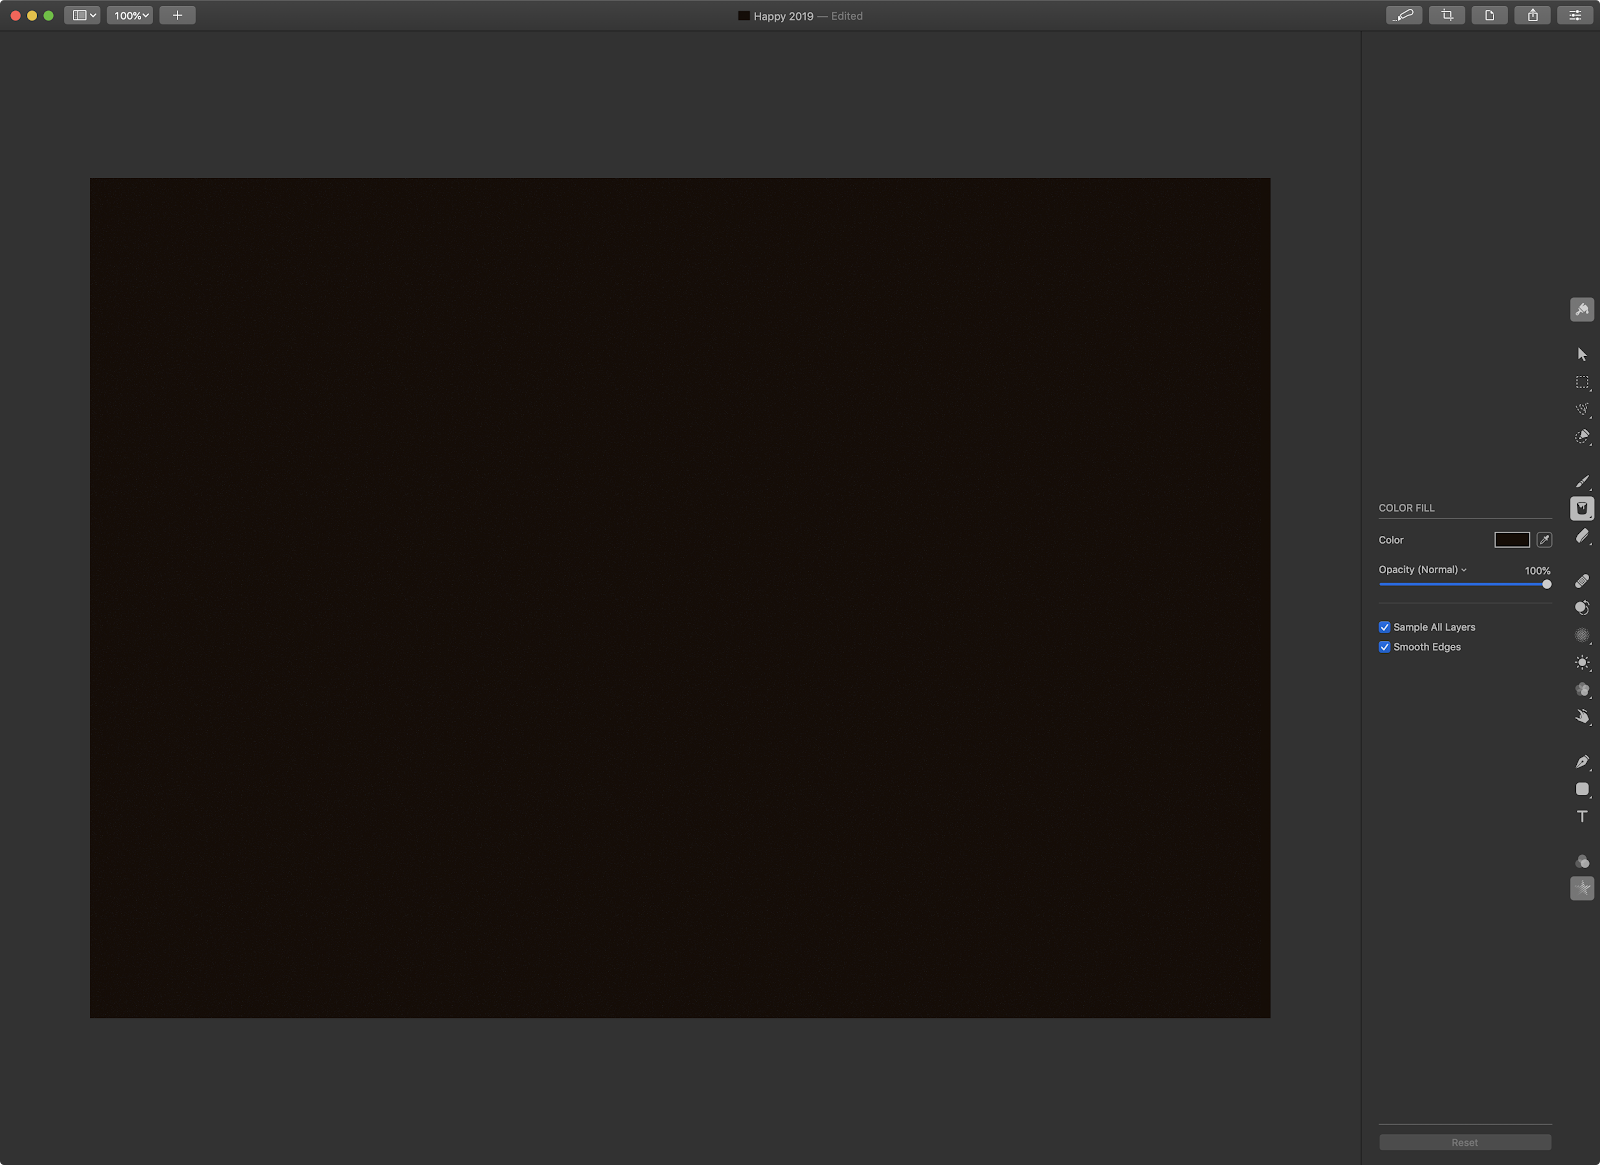
Step 1
For the first step let’s fill up the layer with a solid color using the Color Fill Tool. The color I’m using is #170C06.
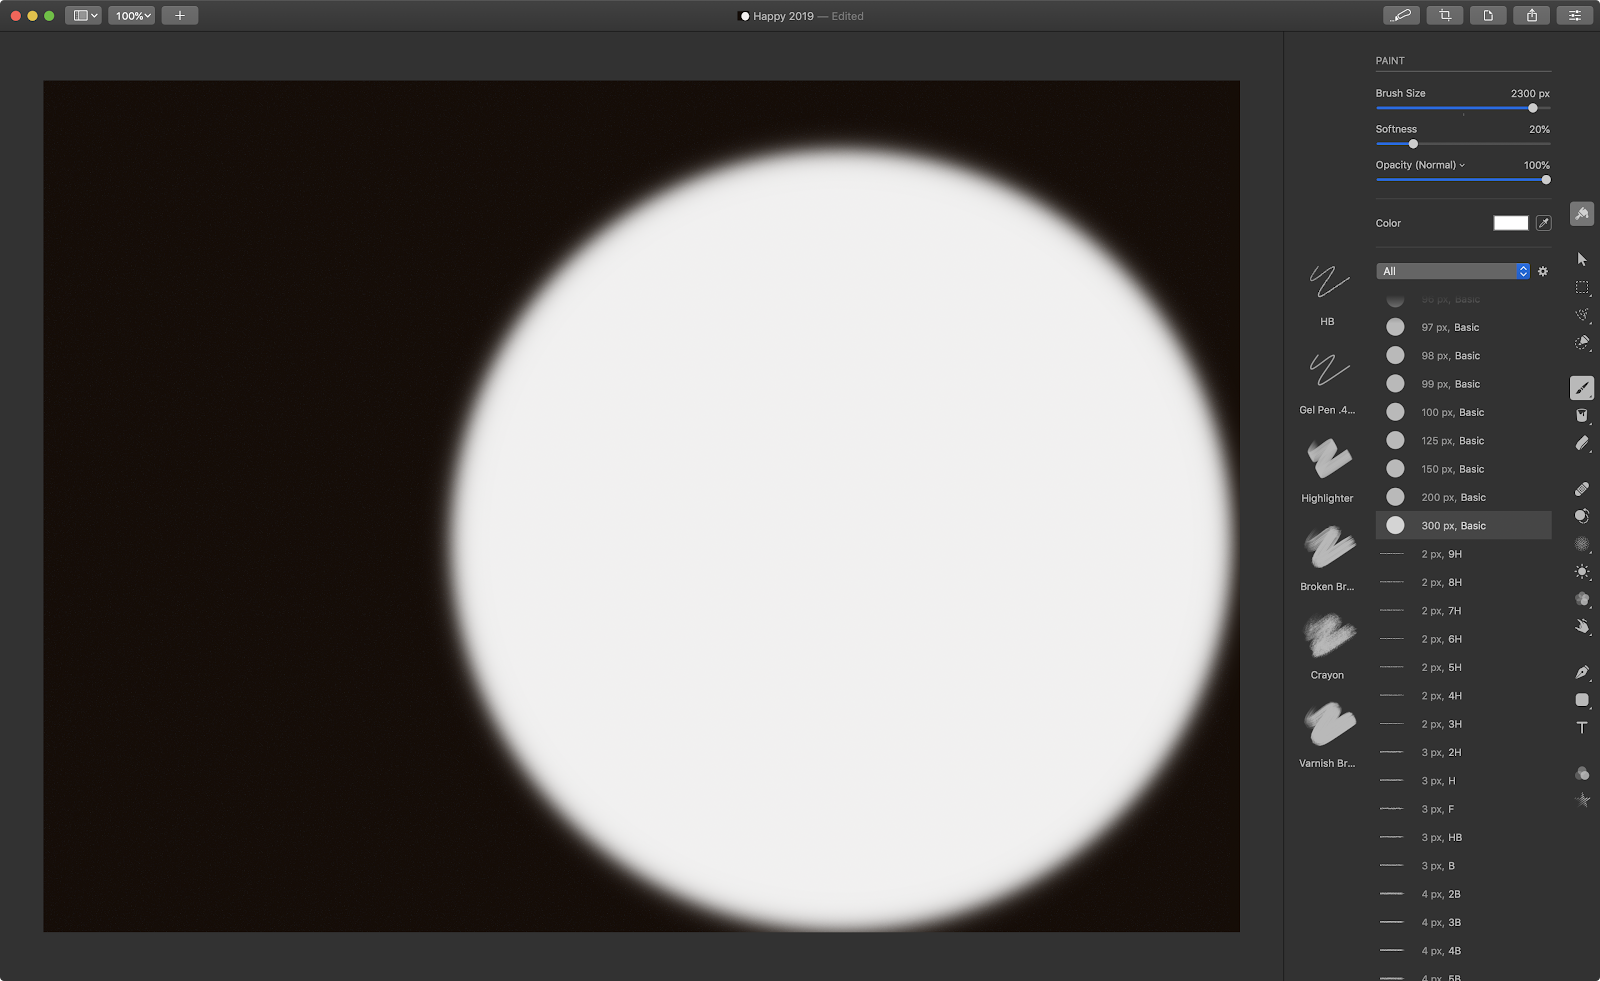
Step 2
With the Brush Tool (B), select the Basic Brush. For the properties use 2300px for the size, 20% Softness, and 100% Opacity. Change color of the brush use pure white. (#ffffff). Then add a new layer and paint a big circle like the image below.
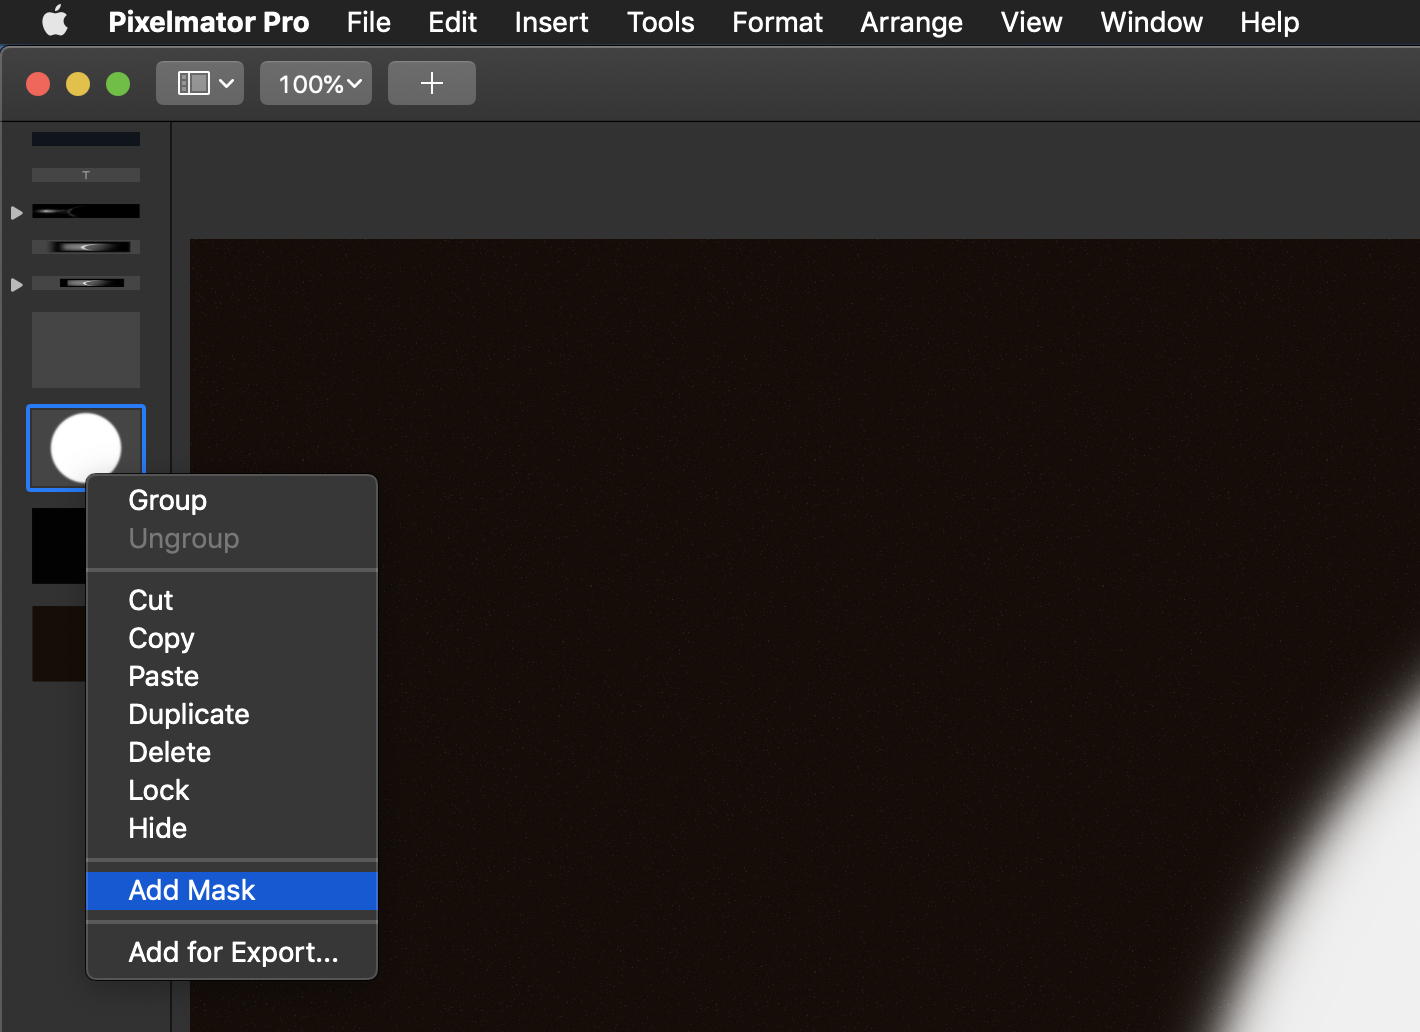
Step 3
Now let’s add a mask to the layer. It’s very easy. Select the layer from the Thumbnails, there’s an option to show them on the top left. Then with the right click select Add Mask.
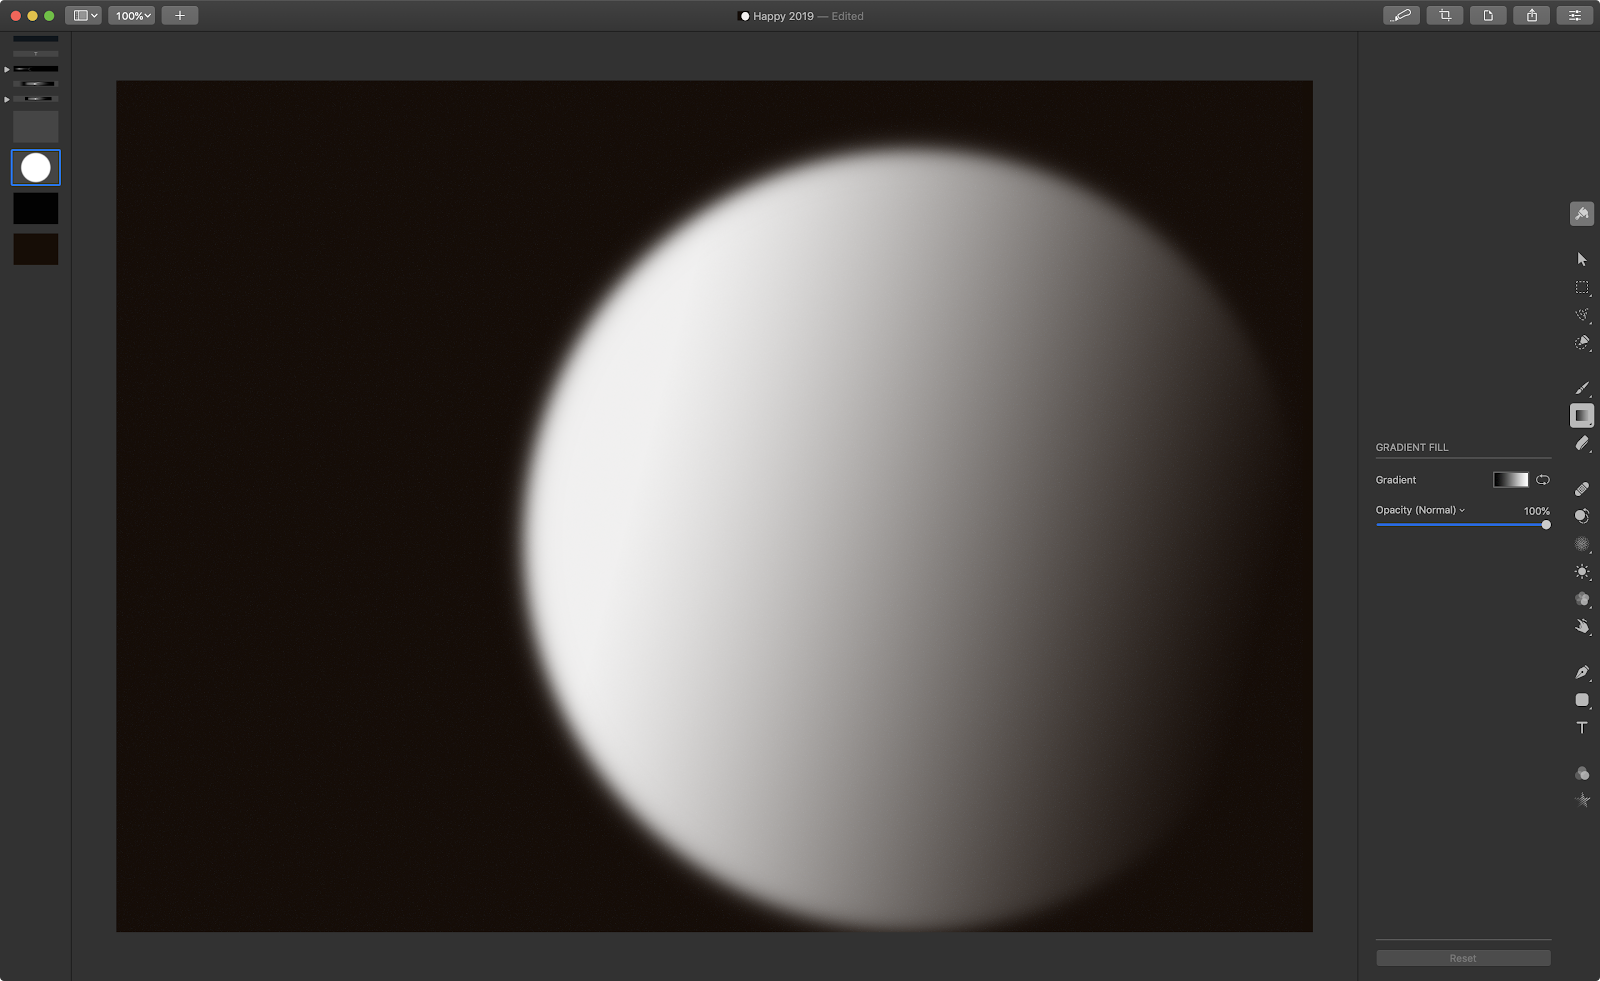
Step 4
You will notice that the thumbnail of the layer will turn to a full white. Select the Gradient Tool (G) and paint over the layer to create something like the image below.
Step 5
That’s pretty much the most important parts of the whole composition. Now just group this circle layer. We just want it to be inside of a folder if you will. Then inside of this folder add another layer and fill with pure black (#000000) using the Fill Tool (N).
The last thing to do is to change the group Opacity to Color Dodge at 100%. You will notice that we have already an interesting effect happening. Tweak the opacity of the circle layer to reduce the strength of the effect. I changed it to 95%.

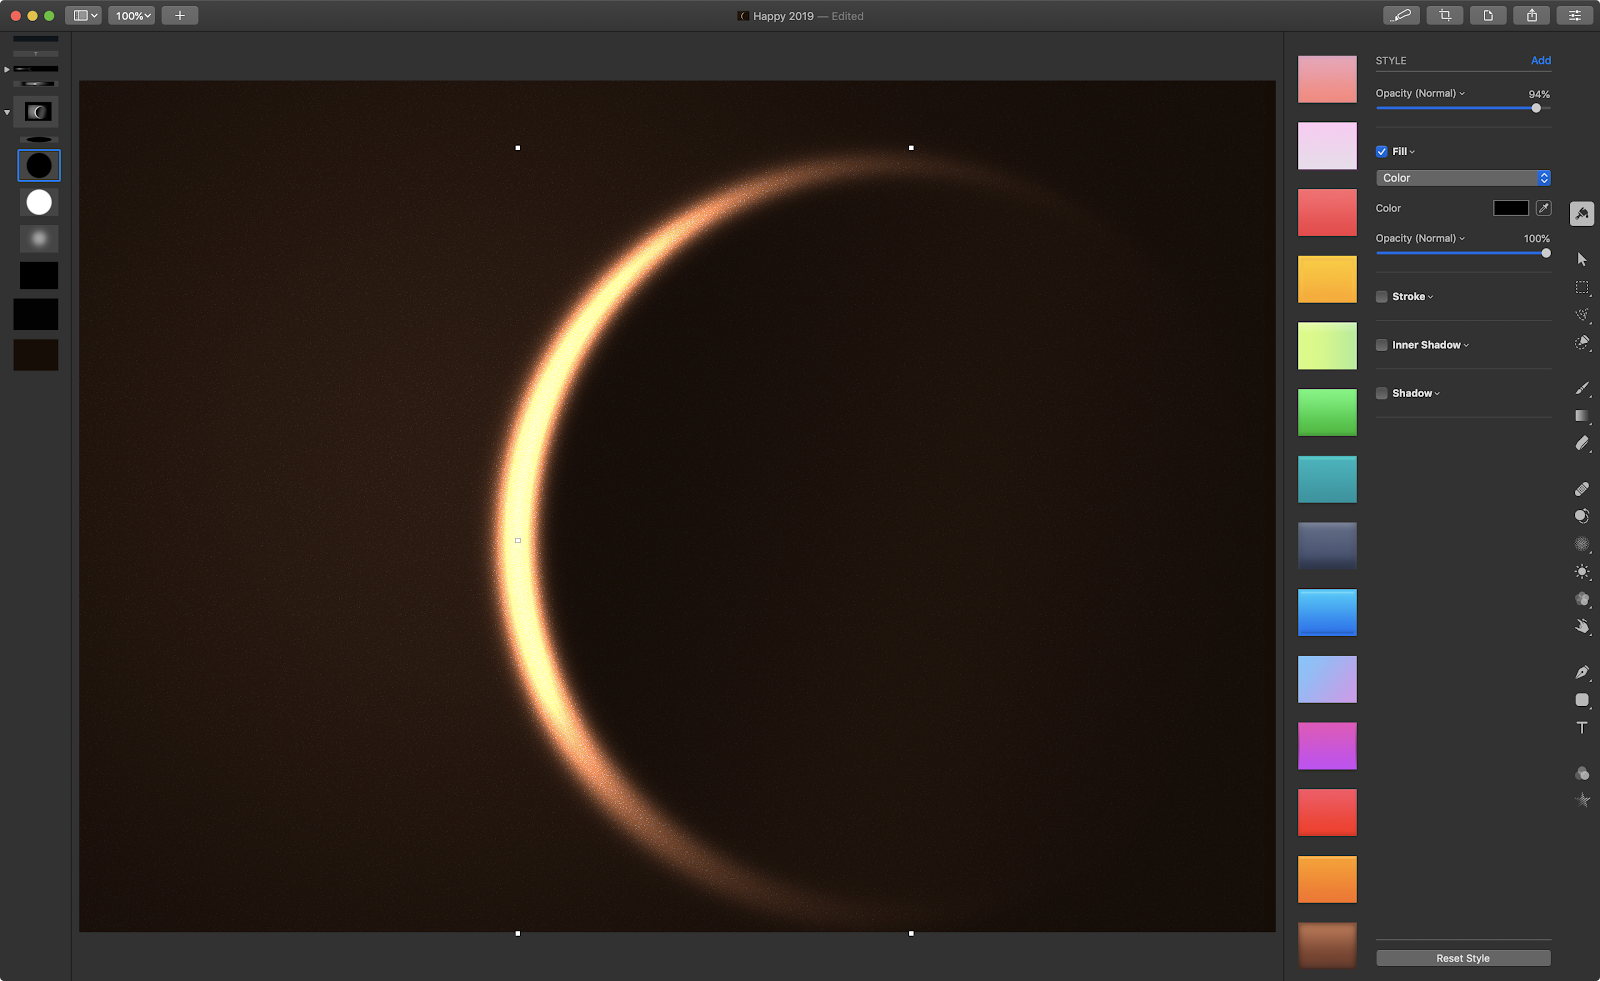
Step 6
Now it’s the fun part. Duplicate the white circle layer. Then go to Styles. Simply add Fill with black color (#000000). Nothing will happen immediately, however, start moving the layer to the right or even scaling it down and you will see how awesome this eclipse effect is.
Step 7
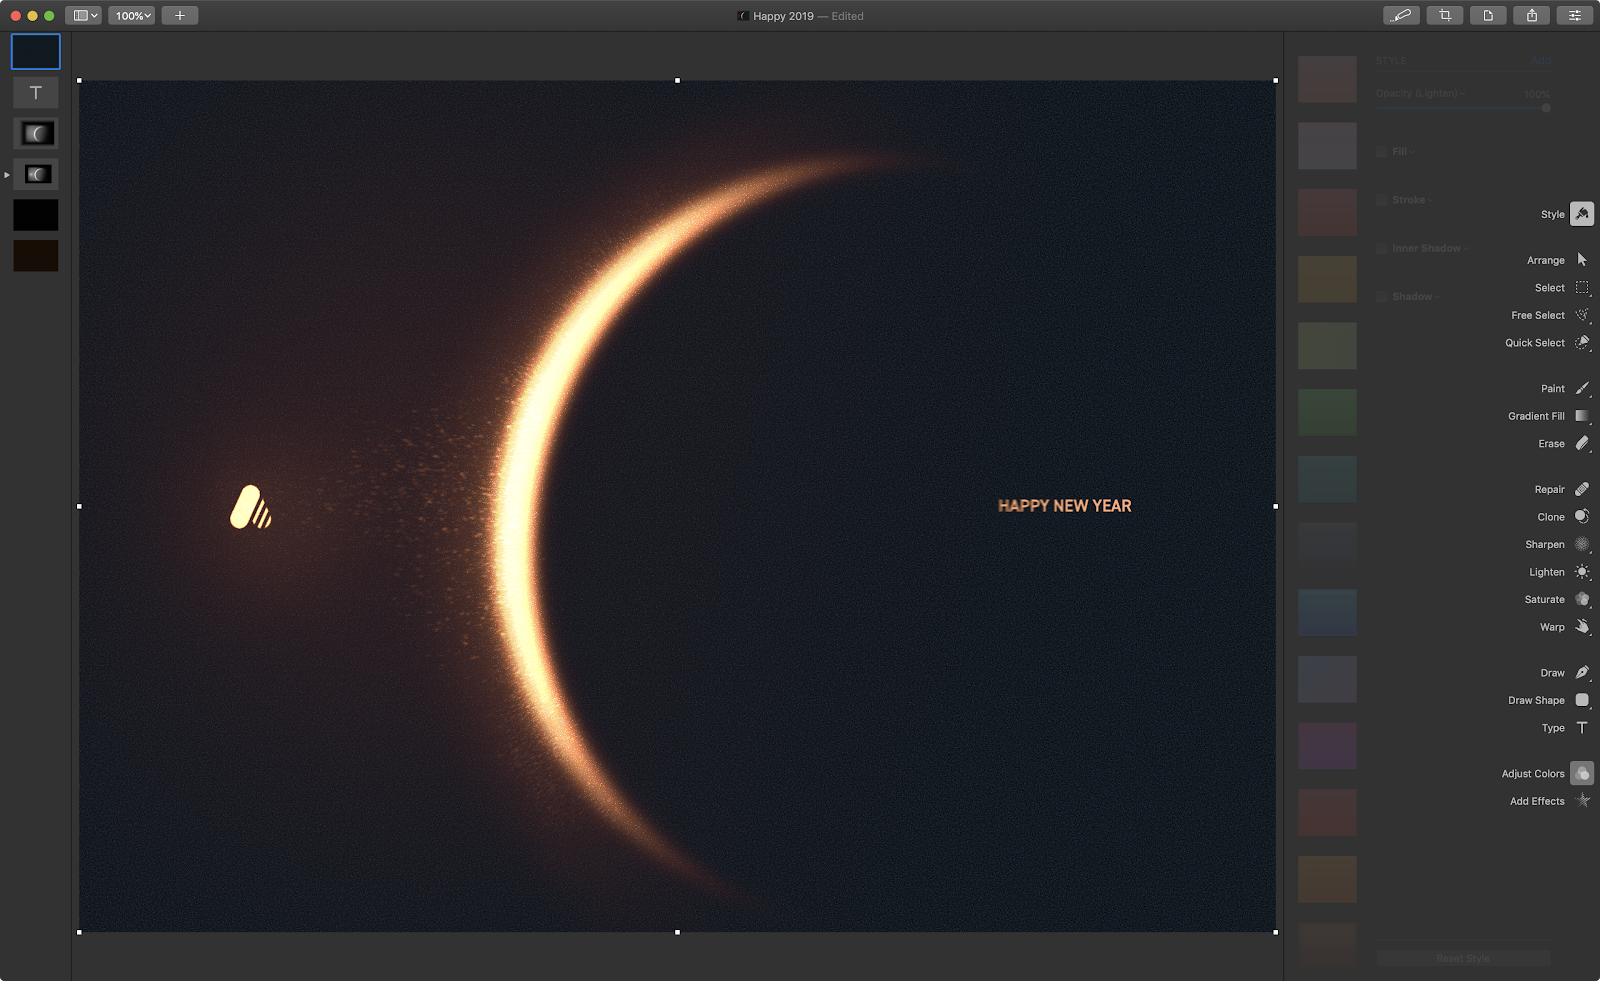
Inside that group, you can add more layers to add a more dramatic look. I added a layer with the new Abduzeedo logo in white. I also added another layer, then I selected the Brush Tool (B) and the Broken Spray with default properties and white color. One important thing to do is to change the Opacity of these layers to 70% or so. That will make the blending much smoother.
Now, literally, just paint over this layer with this brush to create amazing sparkles.
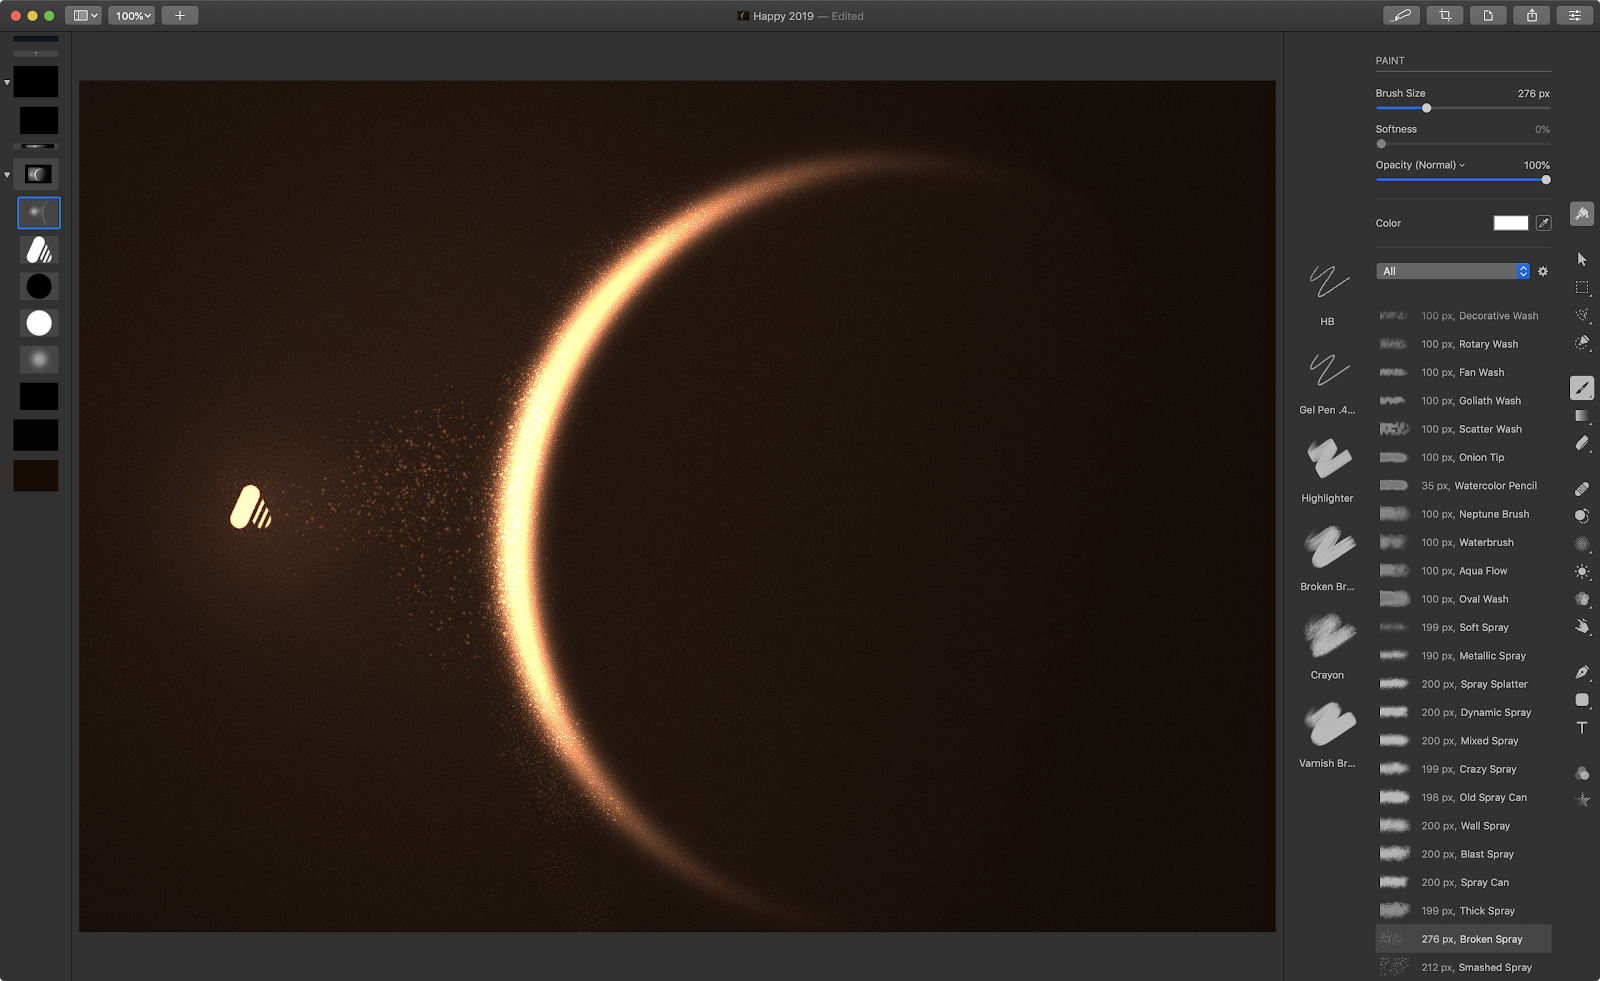
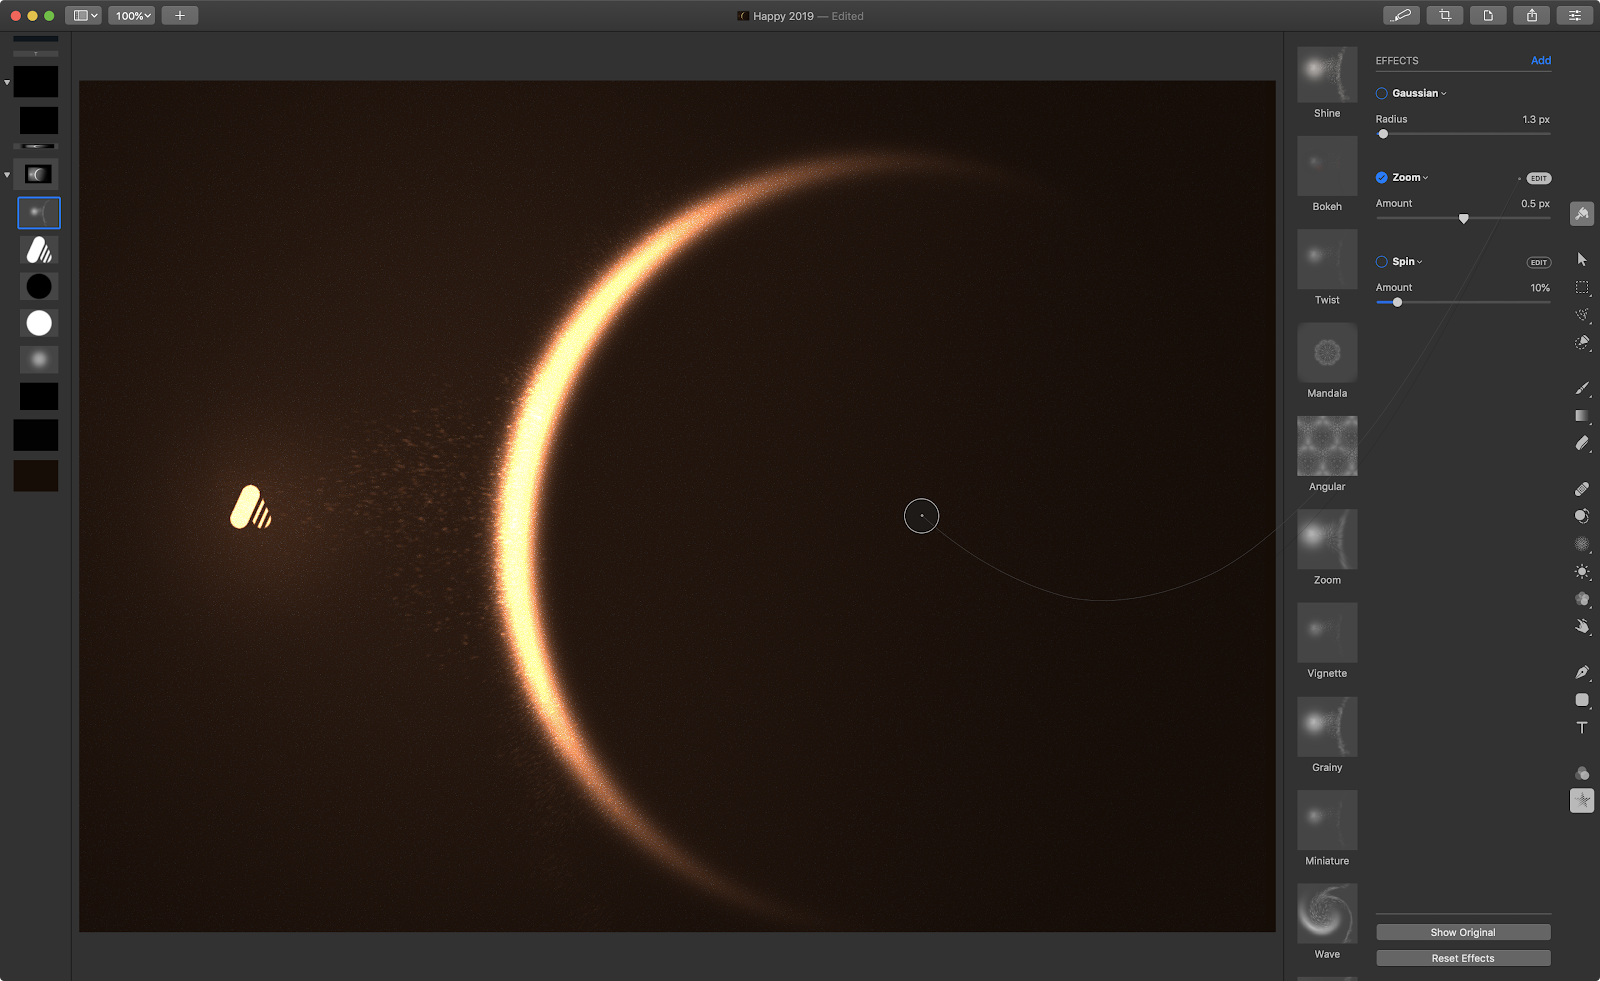
Step 8
Select the layer with the sparkles and go to Add Effects (little start icon). Select Zoom then move the little handle to the right. I used 0.5px for Amount. That will add some motion to your composition.
Conclusion.
To finalize the image I added text with Happy 2019 plus a new layer fill with black on top of all of the other layers. Why?
Pixelmator has amazing color adjustments and filters. Select Adjust Colors then check it out, but for my layer, I chose Dramatic, just because I wanted a more bluish look. In order to make the effect work though, you will have to change the Opacity to Lighten at 100%.
I hope you enjoyed this little tutorial and if you have time, check out Pixelmator Pro, it’s a wonderful tool if you want to replace Photoshop for this type of composition.
Also, Happy New Year.