by abduzeedo
I shared some posters awhile back on Abduzeedo and got a few emails asking how I created the application mockups for the posters so I decided to post about the process. There are several ways to go about and of course you can find templates online, however, today I'll show you an easy way to create simple mockups that you can reuse for your projects in order to give them a more realistic and professional look.
So in this little tutorial, I will show you how to create a poster mockup that can be reused for your future poster projects. It's a simple guide on how to use Photoshop Smart Objects to make non-destructive elements in Photoshop.
Step 1
The first thing to do is to take a good picture of someone holding a real poster. In this case, my friend and Abduzeedo writer Paulo Gabriel is holding an old Abduzeedo Poster. Take some pictures and open the one you like the most in Photoshop.
Step 2
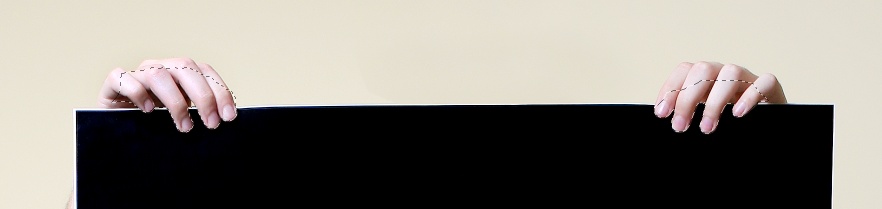
With the Polygonal Lasso Tool (L) select the fingers that are holding the poster.
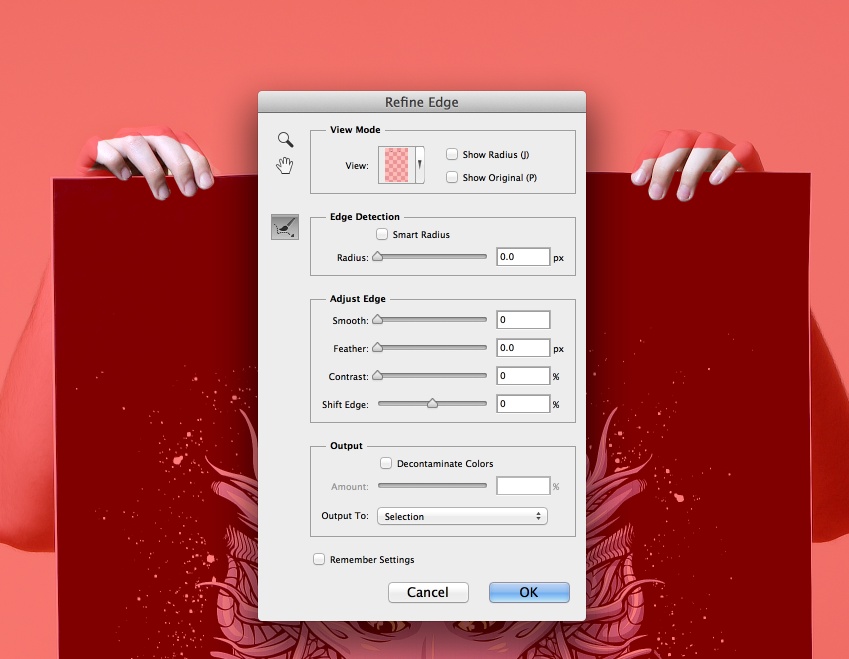
Step 3
Click on the Refine Edge options. Select Smart Radius and then paint over the edges of the fingers to refine the selection. After that change the Output to New Layer with Layer Mask.
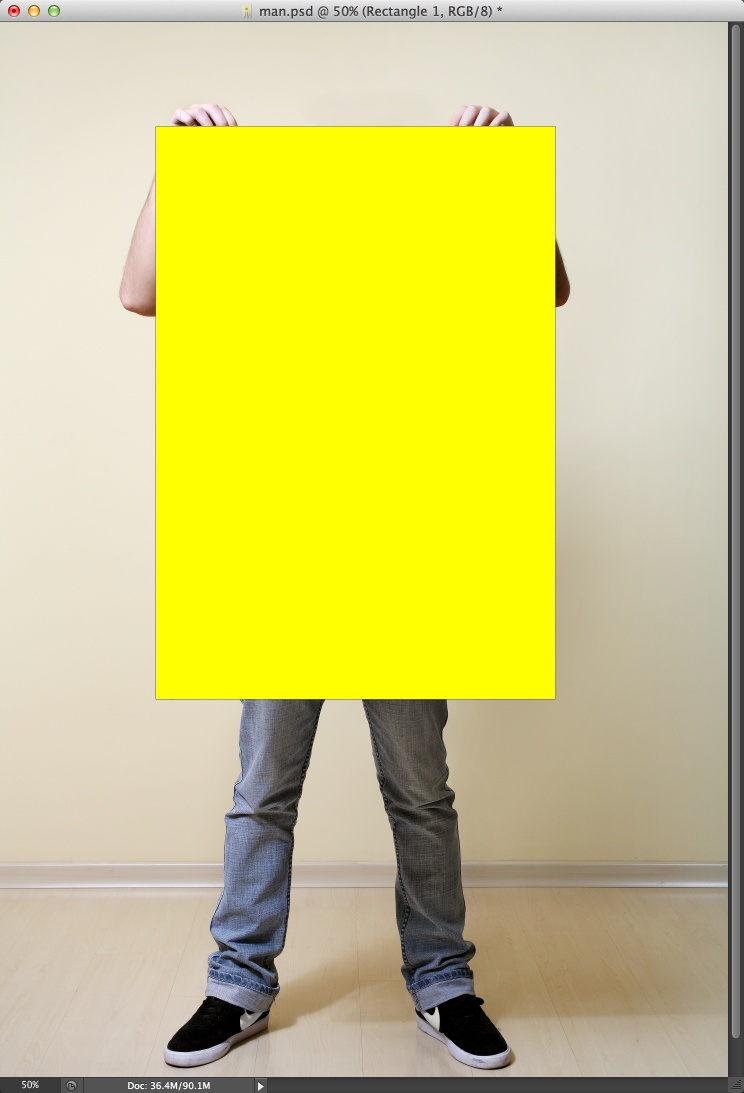
Step 4
Create a rectangle covering the old poster.
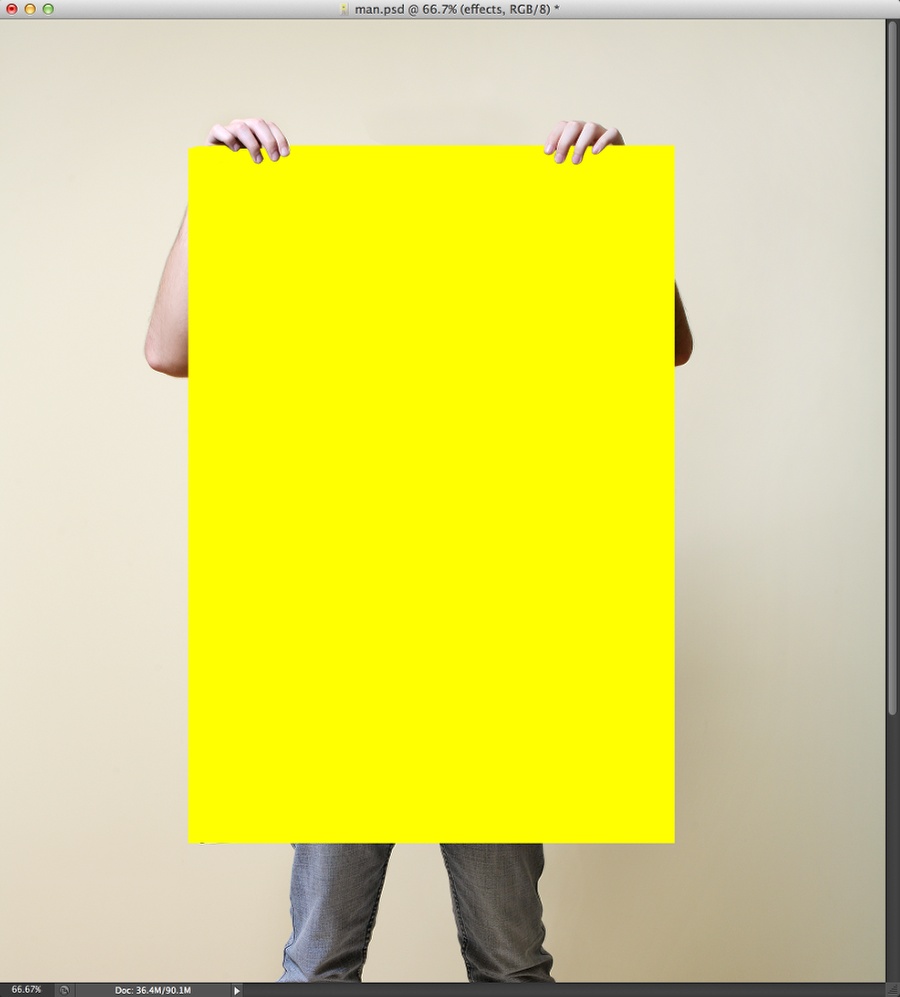
Step 5
Reorder the layers so the rectangle is below the fingers layer created during step 3.
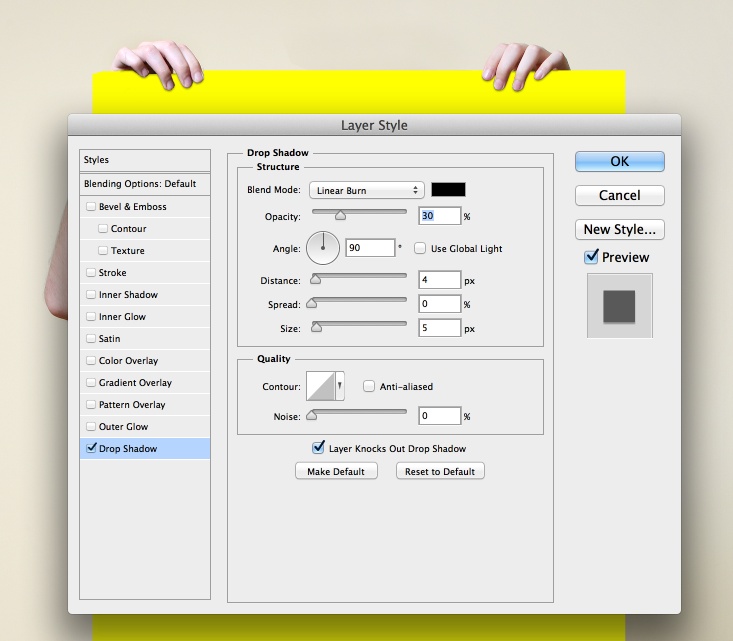
Step 6
Select the fingers layer and then go to Layer>Layer Styles>Drop Shadow. Use Linear Burn at 30% for the Blend Mode and Opacity, then use 4 for the Distance, 0 for Spread and 5px for the Size.
Step 7
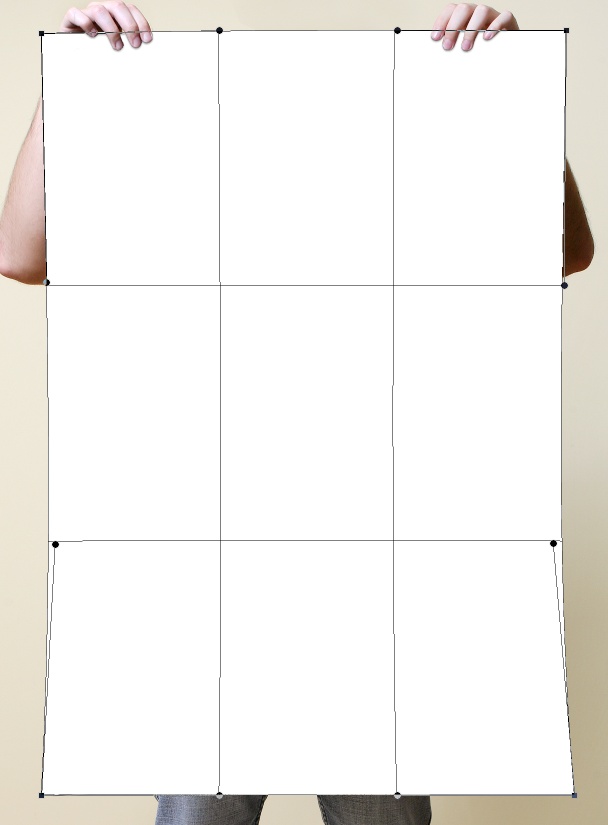
Select the rectangle layer and change the color to white. Then go to Layer>Smart Objects>Convert to Smart Objects. After that go to Edit>Transform>Warp. Then edit the edges to make them follow the real poster.
Step 8
Select the Smart Object layer and then go to Layer>Layer Style>Gradient Overlay. Use the black and white gradient at 10%. Reduce the Scale to 55% and move the dark area down to the bottom to the poster.

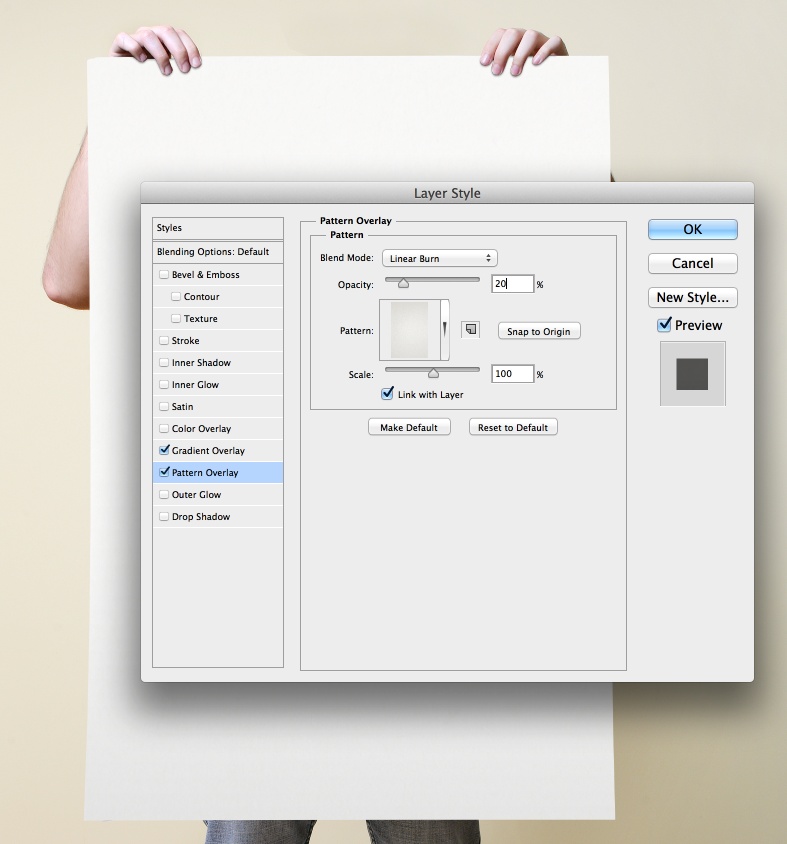
Step 9
Now select Pattern Overlay. You can find a nice texture paper online to use as a pattern. Then use Linear Burn at 20% to make sure that it blends with your design.
Step 10
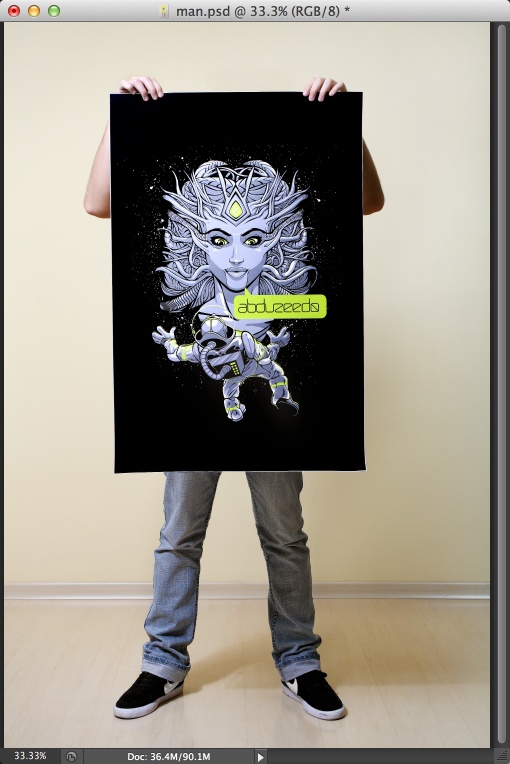
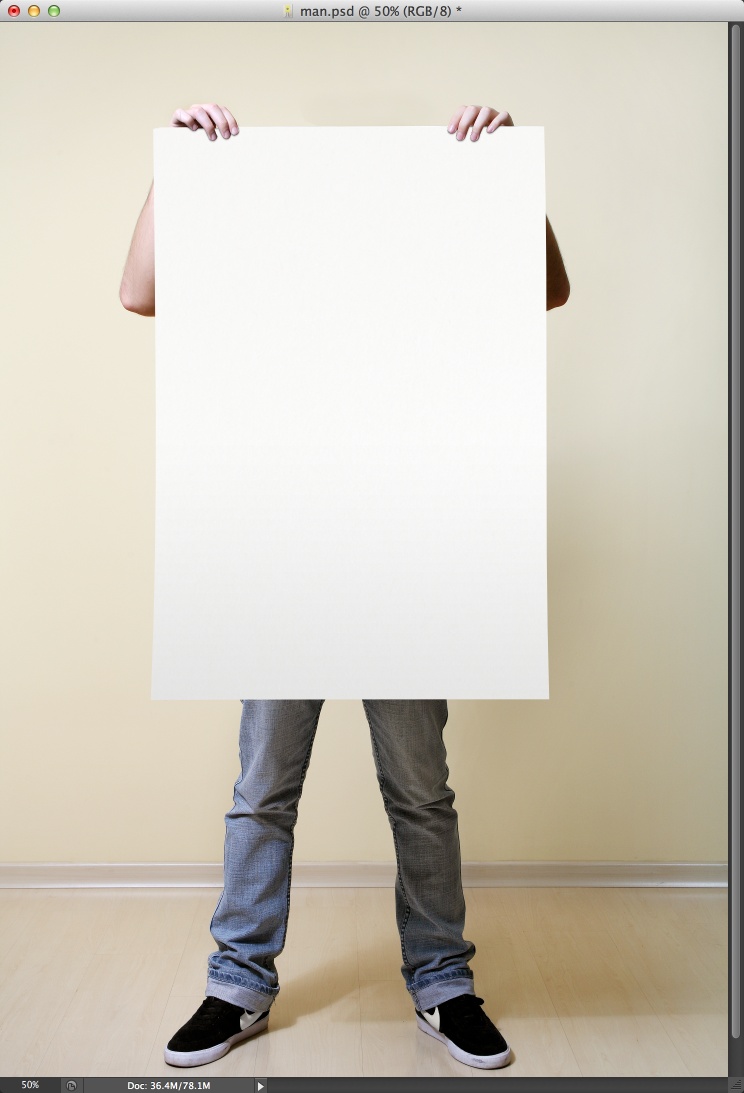
Here's the final composition you will have. A blank poster is a Smart Object that you can simply double click to edit it and simply add your artwork in there.
Step 11
Once you save the .psb file that Photoshop will open to edit the Smart Object, the poster artwork will show in your poster composition.

Conclusion
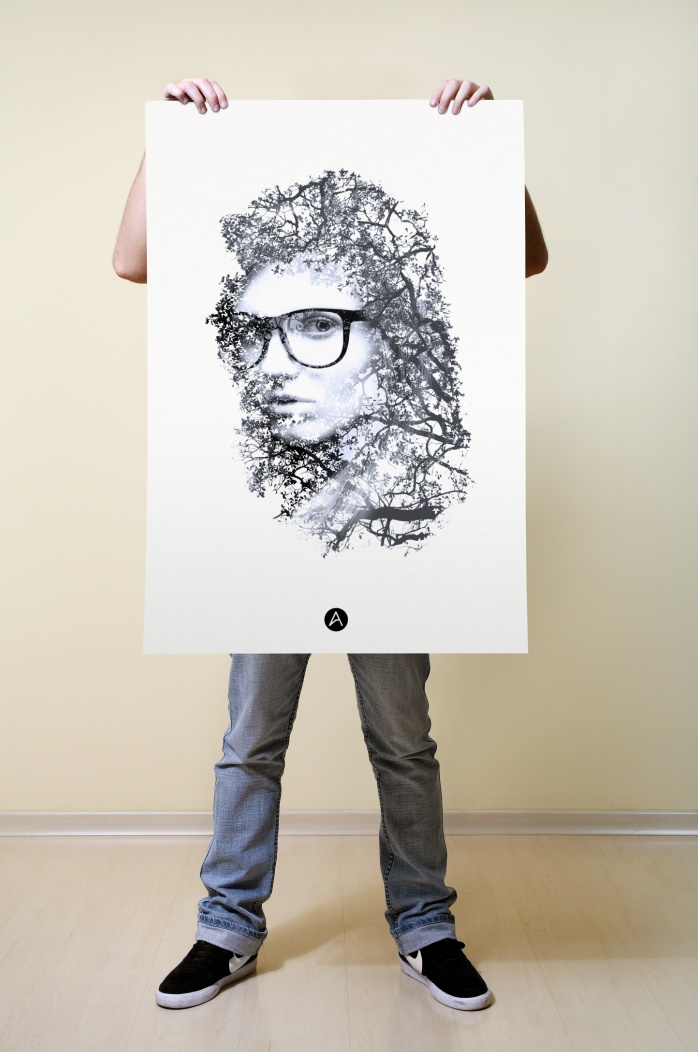
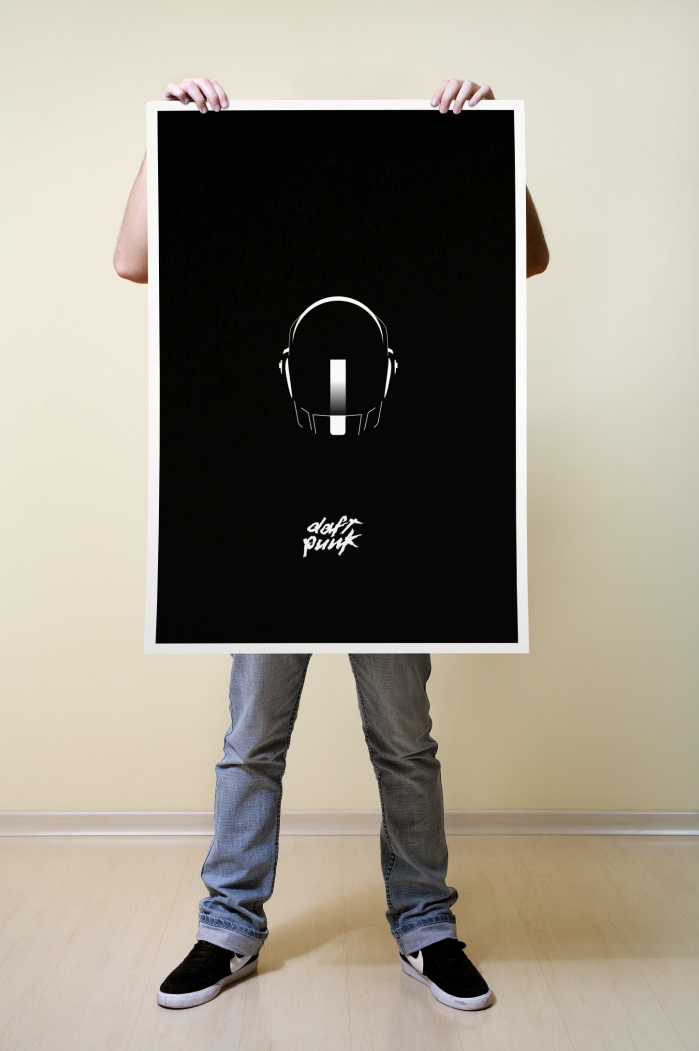
Here are some examples of different posters using the same application mockup. Now you can create that from books, business cards, collaterals, pretty much anything. It's an easy way to make your projects more realistic.