Super Cool Watercolor Effect in 10 steps in PhotoshopListThumbs

Super Cool Watercolor Effect in 10 steps in Photoshop
Last year I wrote a Photoshop tutorial for PSDTUTS showing how to create a very nice design using watercolor brushes. It was inspired by the work of guys such as Bruno Fujii, Margot Mace, Raphaël of My Dead Pony and Stina Person. This time I will create another effect but it will be using Masks and Watercolor brushesl; it's inspired by another great digital artist, the master Scott Hansen the mind behind ISO 50 and also some images from the Daily Inspiration.
So in this tutorial we will use Photoshop, some brushes from Brusheezy and some stock photos.
Step 1
Open Photoshop and create a new document, I'm using 1920x1200 pixels.
Step 2
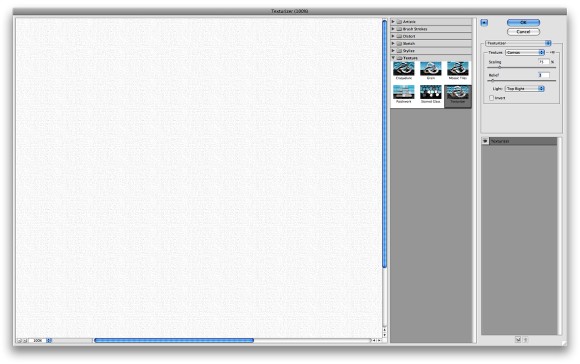
Add a new layer, fill it with white then make sure you have black and white for the foreground and background colors. Then go to Filter>Texture>Texturizer. Use Canvas for the Texture, 75% for the Scaling, 3 for the Relief and for the Light choose Top Right.
Step 3
Let's add a nice texture. You can use the image of your choice it could be parchment paper for example. I'm using a image from Shutterstock that you can buy it at: http://www.shutterstock.com/pic-20845342-old-yellow-paper-background-with-scratches.html
Place the image in the document on top of the other layers. After that, change the Opacity to 75%.
Step 4
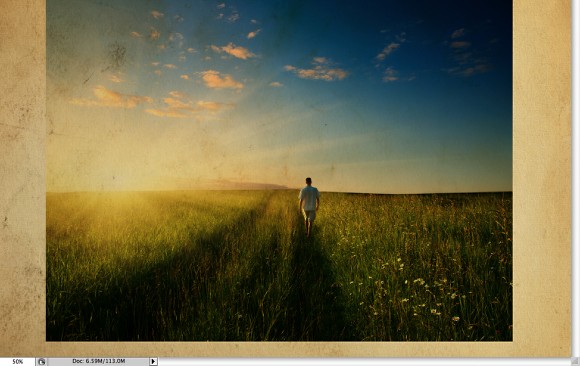
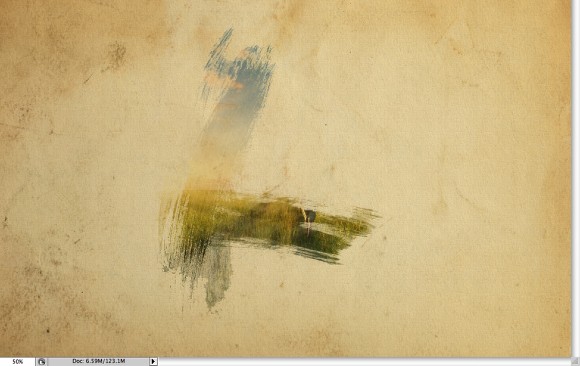
Now let's place an image in our document. I'm using a photo of a guy walking in the field from Shutterstock, you can get it here. The image has to go beneath the texture layer. After that go to Layer>Group Layer. The layer of the image will be inside a folder in the Layer Palette. Select the folder and go to Layer>Layer Mask>Hide all.
Step 5
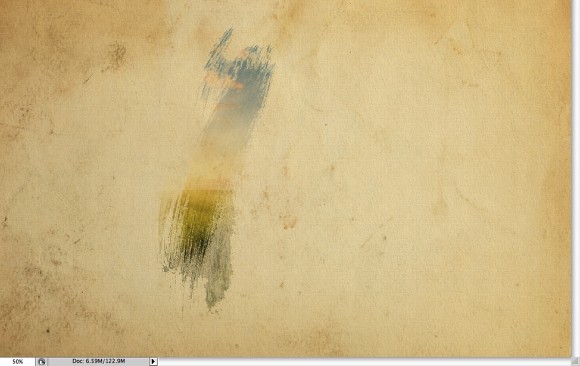
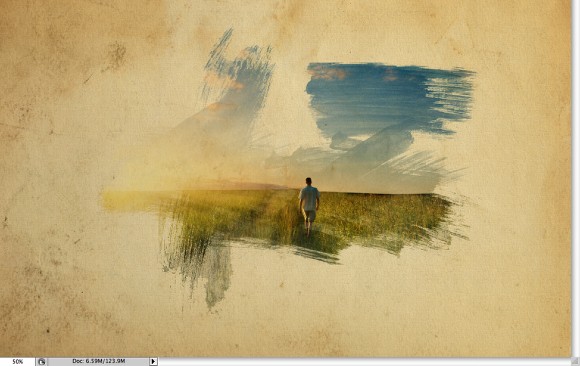
The image is hiding because of the mask. So now, let's use some Watercolor Brushes. The ones I use are from Brusheezy and you can download them here http://www.brusheezy.com/brushes?search=watercolor.
So select one of the watercolor brushes and them white for the color and paint on the layer mask of the group. You will notice that the image will start showing.
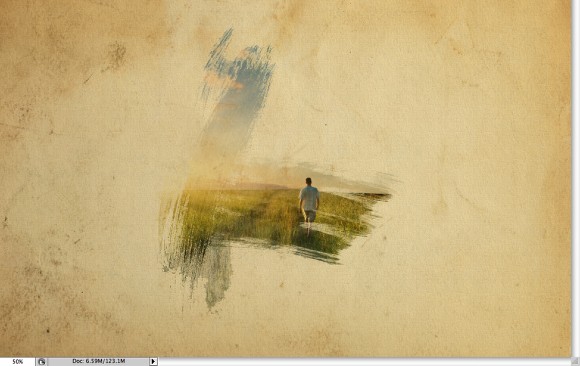
Step 6
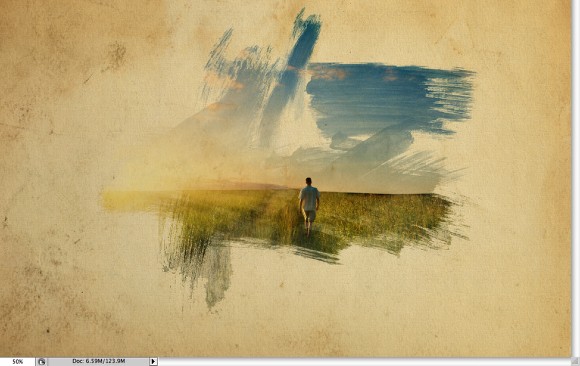
Pick another Brush and paint again.
Step 7
Keep painting untill you can see the image without losing the brush splatters.
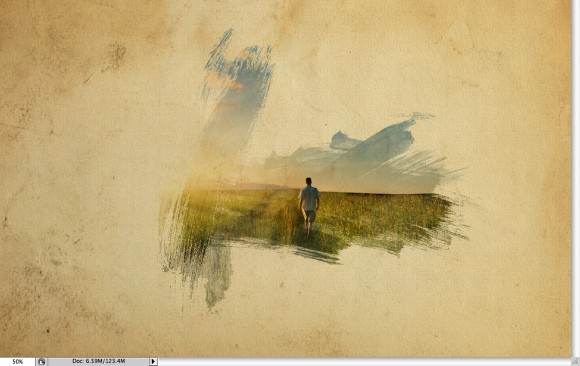
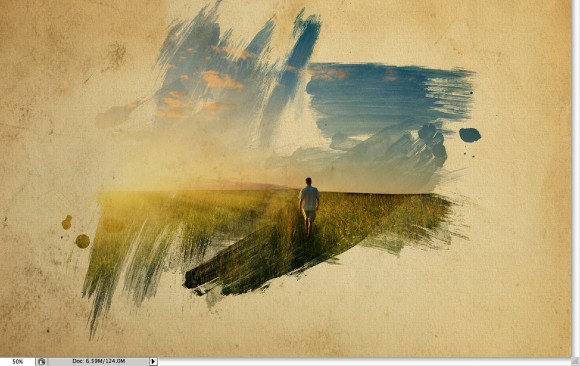
Step 8
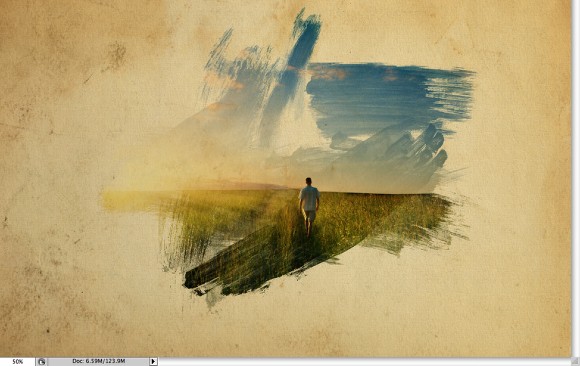
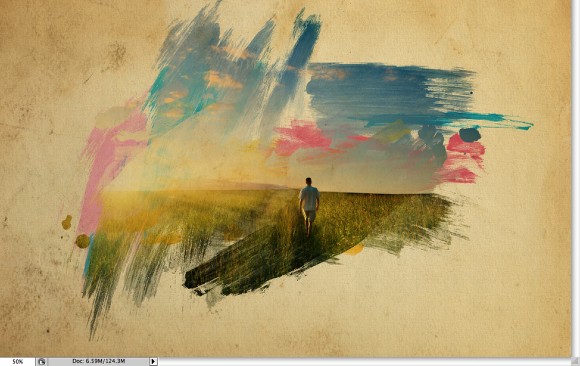
Now add another layer, this time beneath the Folder that the image is in. Then again using the watercolor brushes paint over the layer using colors like: pink, blue and yellow. Use the image below for reference.
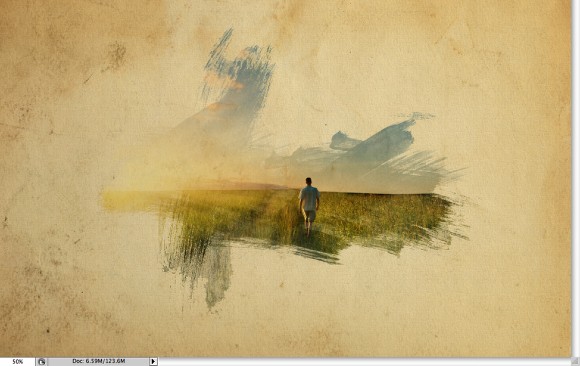
Step 9
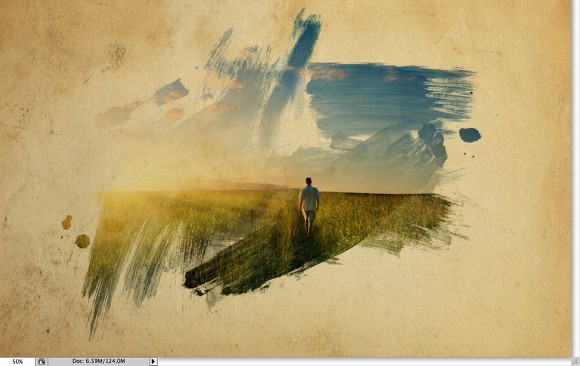
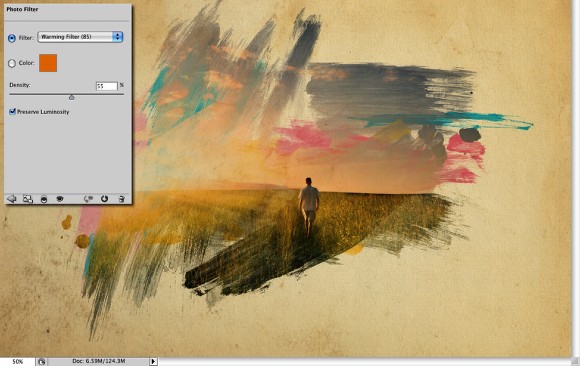
Let's just adjust the color of the image. Select the image and go to Image>Adjustment>Photo Filter. Select Warning Filter (85) and 55% for the Density. Also select the Preserve Luminosity option
Step 10
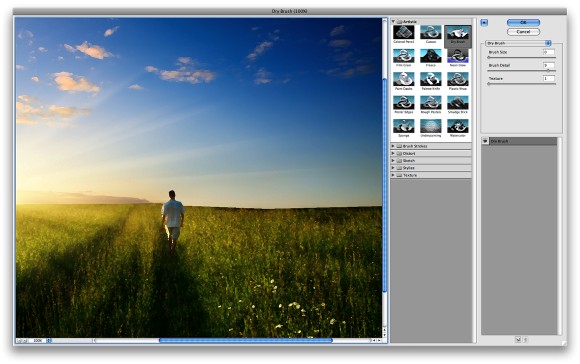
Select the image and go to Filter>Artistic>Dry Brush. Use 0 for the Brush Size, 9 for the Brush Detail and 1 for the Texture.
Conclusion
Just place your logo and that it you will have a really cool effect and super simple to achieve. That can be used for website headers to create a simply awesome design, and, of course to create posters. Also you can reduce the opacity of the paper texture. I reduced to 50%, that way we can drive the viewer's attention to the watercolor effect.
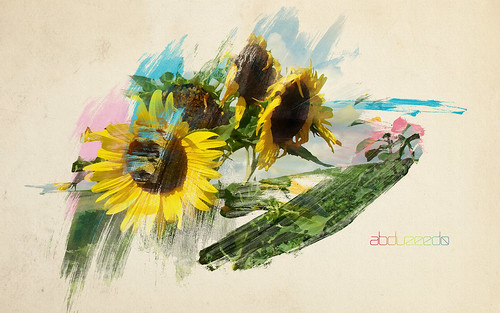
Version 2
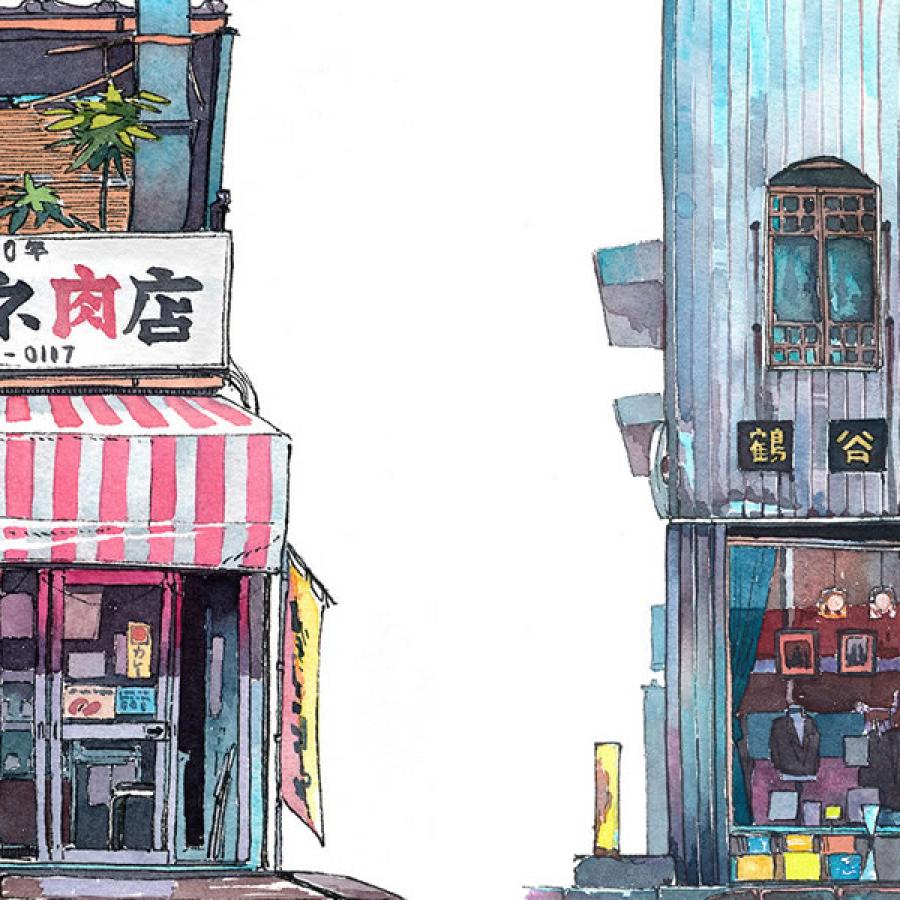
You can try different images as well like the one below.
Download the Photoshop File
Click here to download the Photoshop file used for this tutorial


94 Comments
Wow, really amazing tutorial. I've read countless tutorials on how to create watercolour effect using existing photos, but this is one of the few ones that used masking instead of the usual filtering methods. Terrific!
wow, cool! I like that.
It's a cool effect, but I'm not sure it looks like watercolor.
Looks really cool! Is it possible to make this in Fireworks as well?
I think the added colors at the end are a little too obvious. Otherwise, pretty cool.
nice tutorial... thkx for this
cool..........................:
http://www.flickr.com/photos/eggchandrika/3649923887/
amazing!
very nice :)
this is so totally awesome! really inspiring and helpfull, thanks a lot for that!
Nice!
It's a cool effect:
http://www.flickr.com/photos/blogwiese/3651141320/
Thanks! I like that!
That's awesome, thanks!
http://tfw92.deviantart.com/art/Watercolor-Jump-126846532
really nice, i must try it :)
This is a really cool idea, though I personally would have stopped after step 7. Still a beautiful outcome though .
awesome, that is!
Help! Anyone know why i dont have the Canvas texture in cs3? can anyone tell me how i can get it?
thanks!
Really simple and easy tutorial, great!
Featured here: http://www.presidiacreative.com/web-picks-26/
I wish I didn't have to make a newb comment like this, but either your steps are missing a very important one, or I am. I'm using a different paper & subject photo here, but I'm sure the principles are the same, and I should be achieving similar results, but I am not.
I have followed the steps verbatim, and the issue I have is that after applying the layer mask->hide all to the GROUP folder, and brushing with white to reveal the subject, the subject photo layer does not come out clear as it does in the sample images provided in the steps.
Here's what I'm talking about, and again, this is following the steps provided, exactly, up until using the Dry Brush filter:
http://www.flickr.com/photos/kinsbane/3651278731/sizes/l/
I don't know what's going. Did I miss a blending mode change? Did I the wrong layer's opacity?
What a cool but very simple tutorial! :D
Really nice technique, used a summery image of some bright yellow sun glasses, looks ace!
Looks great. Bookmarked.
Great tutorial, and excellent outcome!
Love simple techniques that look this good, very useful.
Great tutorial, that's really nice. You guys have the best design blog in portuguese i've ever seen. :D
Waterrific!
it brush....................nice:
http://www.flickr.com/photos/eggchandrika/3652594365/
this is what I came up with...sweet tutorial! thanks!
http://makesomethingcooleveryday.blogspot.com/2009/06/day-45.html
simple and yet effective, this tutorial would look good for creating logos. This is worth a try!
"This time I will create another effect but it will be using Masks and Watercolor brushesl;" -> "brushesl;"
Brabo hein!! Como sempre ótimos tutoriais ... parabéns ...
this is awesome!!!!!!!!!!!!!!
pixelmator version please!
Cheers
Really inspiring! :)
Nice!
Long time reader, first time commenter.
Very interesting and creative style! I check for updates everyday. This would be one of my favourite tutes from you guys so far! I loved and tried the cloud tute which was also A+++!!
Well done!
nice it`s a great effect
hey thanks for this tutorial it is a really good effect, check out my version here
Click Here
Wow awesome, I will try it myself!
Simple and nice! Thanks
thanks for the tuts, heres my try!
http://abduzeedo.com/super-cool-watercolor-effect-10-steps-photoshop
or you could just fucking learn to watercolor
Excellent tutorial - very effective result.
Oh yes! This is super cool. Thanks for sharing.
I like this a lot. Will test it out. thanks for sharing.
Awesome tutorial. I'll try this out with some of my new brushes.
Awesome step by step guidelines
I like the effect this gives pics, nice work on the tut - thanks! :))
John Shaw I had the same problem using my own paper and picture. I found a better result when I changed the blend mode on the my paper layer to multiply.
Thanks for the tutorial, nice effect.
super cool! i need to try this!
This looks really cool, however I think the name should be changed to "Acrylic Effect." The color behind the actual photo looks good but not for watercolors. Have you seen a watercolor up close and personal before?
You could also maybe say an Oil painting effect because one choice is to have an under painting in the complementary colors of what is actually going to be on the painting.
But awesome tutorial. Just change the name
sure it looks nice, but it looks nothing like water colour.
hey, I loved ur tutorial...used it here >>http://mztweeta.deviantart.com/art/Watercolours-127429698
Thank you so much for this super coll effect ! Used my texture and image. Hope you like it!!!
http://www.flickr.com/photos/79188259@N00/3665515515/
brilliant tutorial!
I'm from Battle Creek, Michigan AKA cereal city,
here's what I came up with.
Hi there. It's amazing how you transform a image. This is my attempt; I worked in Fireworks, so, It's a little different than yours. http://www.flickr.com/photos/39904657@N05/3668526895/
and another one...

amazing! thanks! :D
love this. thanks!
My try ^^.
http://www.flickr.com/photos/henty/3673761866/
I have the same problem as JOHN SHAW. can someone help me out?
Great effect, thanks alot for this. I do think you should have stopped around step 7 though as it looks a bit overdone towards the end. Look forward to using it, in one of my projects
As always ... great inspiring work
cool effect! thank you!
http://www.flickr.com/photos/3r1c/3685017920/
very cool the effect thx :)
i was wondering which is the font of your logo ? it's awesome
Great easy to follow tutorial, having read one of the other comments I too switched the blend mode of my paper texture to multiply. Here is what I got:
First try - http://www.flickr.com/photos/guyjamesdavies/3695809284/
Second try - http://www.flickr.com/photos/guyjamesdavies/3695002009/
Thanks for the tutorial. The mind positively reels with possibilities. :)
Here's what I did: http://www.flickr.com/photos/pokedyoureyeout/3697398750/
Nice one. I like this.
http://photoshopcs4features.blogspot.com
Very nice and pretty easy tutorial! :)
Used it for a flyer I made today:
http://lin0.deviantart.com/art/Killekill-meets-Salon-du-Katz-129122864
STEP 4 **The image has to go beneath the texture layer. After that go to Layer>Group Layer. The layer of the image will be inside a folder in the Layer Palette. Select the folder and go to Layer>Layer Mask>Hide all.
Aww... I need help I don't understand this part. I have only had photoshop for about two and half weeks and I'm learning about of different things about it. I just need a little more help with certain things. I love your tutorials they are usually really easy for a beginner to understand just not this time. Please help me understand. Thanks.
it's so cool...........
thx 4 making this tutorial....i Love it....
Awesomeeeeeeeeeeeeeeee works.............=)
thanks I used it. http://i248.photobucket.com/albums/gg180/coachkid/v2.jpg
Nice quick and easy tutorial, here's my go at it, I changed it up a bit though... http://gabriella-louise.deviantart.com/art/I-dream-in-watercolour-129636...
great..i like it
cool!! simply marvelous!!
Très bon tuto =)
Mon résultat : http://reyohster.deviantart.com/art/Face-a-Face-131059011
really cool tutorial, thanks a lot :)
Thanks, this is a really cool tutorial I have started to use it but I haven't had time to sit down and really work at it.
But I will.
Hey thanks for the awesome tut, i reposted it over at my site w/my version & a few tweaks to the tutorial
http://photoshop-pinups.blogspot.com/2009/08/irina-shayk-10-step-waterco...
THANKS
Thanks. This is realy good for understanding tutorial. I'll post my result soon!
Oi, Eu gustei muito do tutorial! Mais nao funciono pra mim porque eu tenho photochop cs. E possivel fazer o mesmo efeito no photoshop cs?? (Meu portugues nao e perfeito porque eu nao falou portugues em sim, eu falou
espanhol)..
Obrigado por seu tempo!
Step 4 didn`t work for me =(
thanx anyway
Tutorial de muito bom gosto. Assim como os outros que você posta. Tudo muito bem planejado, as cores muito bem usadas muito bom mesmo.
Acho que vou mudar meu nome para Fábio. O Fábio Lody é outro fera nesse assunto. :)
Parabens cara. E o melhor de tudo "Made in Brazil"
HELLO FOLKS! well I just made the tutorial, and read the comments. And surprisely I found that some of you people out there got troubles on step 4 as I did. Well to get exactly the effect you need to change the blending mode of the texture to Multiply the image will come more colorful and not like that milky effect. Well that's all... Success to all of you!
very nice with the effect. I wantt to try it
Awesome tutorial! Just finished it in not more than 20 minutes. The outcome is great. :D
Extremely simple and sweet effect. Thanks! :)
I really like that, it seems so easy, sometimes you forget the simple stuff.
very nice
my try
http://www.up-00.com/s1files/6lK80382.jpg
nice effect !
Thank you, I was playing with it for hours. :)
http://baohan.deviantart.com/art/Paris-140345390
cool cool esta demas haber cuando pueden poner en español la pagina estaria muy bueno
Really nice! Thank you very much! =)
Post new comment