by abduzeedo
Sunday is the day to play with Photoshop and try some new ideas. As usual I went through some books and Web sites to find some inspiration. I am still addicted to the Handy Book of Artistic Printing, it's a must-have book for some old style print references. I got some ideas and also found this amazing image from Alex Beltechi on Dribbble called Twisting in the Wind. Then I knew the effect I wanted to know how to create in Photoshop.
So in this tutorial, I will show you how to create a super cool and very easy effect using Photoshop and the Repoussé tool. The whole process is quite simple, it's less than 10 steps and won't take you more than 30 minutes.
Step 1
Open Photoshop and create a new document. I am using 2560x1680 with 300 DPI (very important) with a black background. With the Horizontal Type Tool (T) add a text. I am using for the font Edwardian Script ITC. Notice that I sort of connect the words "the" with "book" with "of" and with "Abduzeedo". After that merge, the texts into a new layer then create a marquee selection of the text area by clicking on the thumbnail of the layer holding Command(MAC)/Control(PC).

Step 2
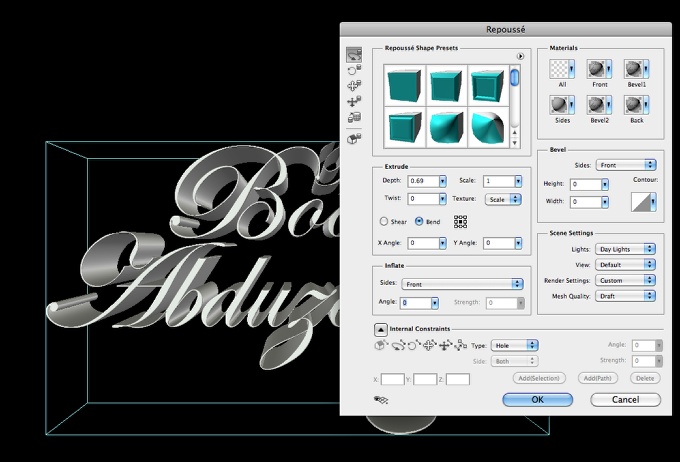
Go to 3D>Repoussé>Current Selection. The Repoussé dialog box will open then change the Depth to .7 and the Lights to Day Lights. Also you might have to select some areas to change the type to Hole for the Internal Constraints.
Step 3
This is the result after the 3D filter. In order to render the final image you must select the Scene in the 3D dialag box and change the Quality to Ray Traced Final.

Step 4
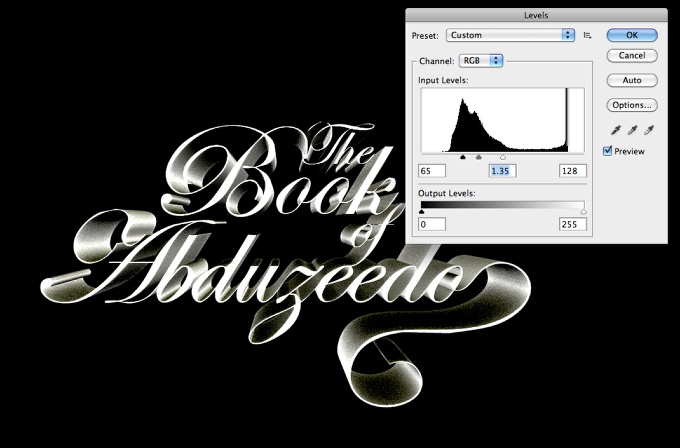
Merge all layers into one including the black background, then go to Image>Adjustments>Levels. Change the Input Levels to 65, 1.35 and 128.
Step 5
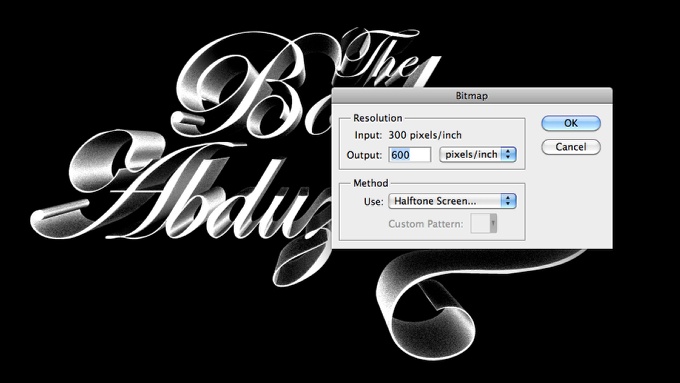
Go to Image>Mode>Greyscale. After that go to Image>Mode>Bitmap. Change the Output to 600 pixels/inch and the Method to Halftone Screen.
Step 6
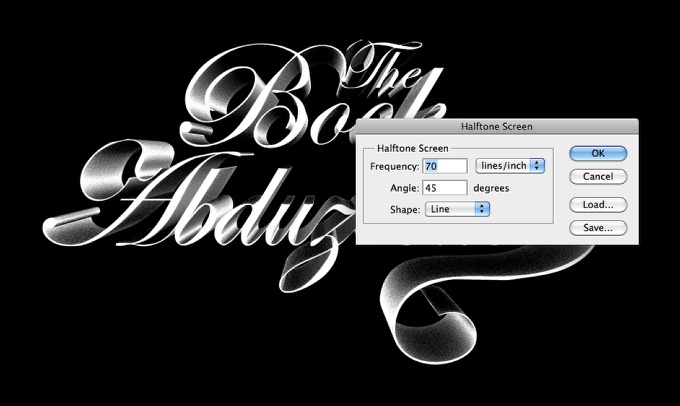
For the Halftone Screen, change the Frequency to 70 lines/inch, the Angle to 45 degrees and the Shape to Line.
Step 7
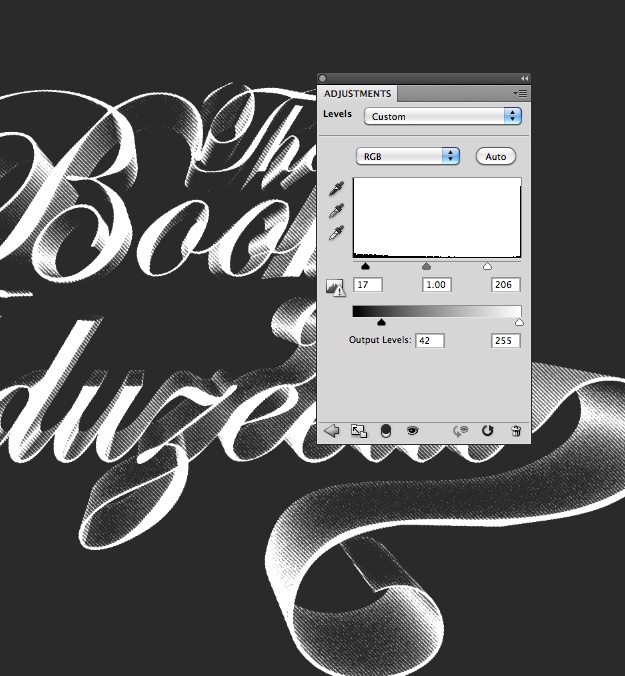
Go to Image>Adjustments>Levels. Change the Inputs to 17, 1 and 206. Also change the Output Levels to 42 and 255.
Step 8
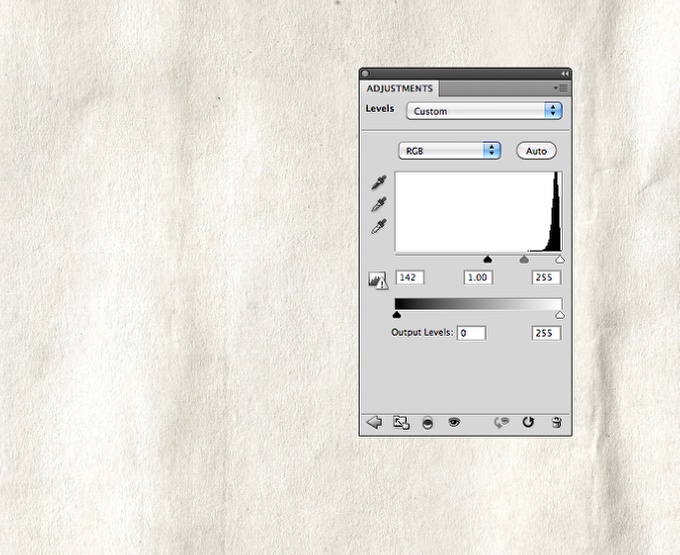
Time to add some texture. Import some old paper texture, the one I am using is courtesy from Shutterstock and you can find it at http://www.shutterstock.com/pic-43075990/stock-photo-the-old-shabby-pap…. After that go to Image>Adjustments>Leveles. Change the Input to 142, 1.00 and 255.
Conclusion
Change the texture layer to Multiply and the effect is pretty much done. You can also save the image in step 5 and reuse it here adding on top of the layer with halftone at 50% Opacity to make the effect a bit more smooth. As you can see the Bitmap mode is perfect to create some old-style print effect, especially now that when vintage and this sort of effect is quite trendy.
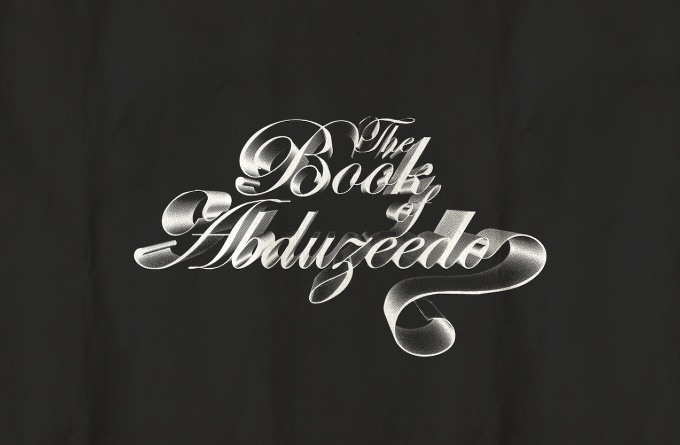
Click on the image for full preview.

