by abduzeedo
We've featured quite a few posts and images with the effect most call double exposure. This technique consists of 2 images superimposed. There are some really nice examples with very intricate overlaying, usually with faces of people mixed with photos of nature. I've been thinking about giving it a whirl in Photoshop for a long time and I've finally gotten around to it.
So in this tutorial/case study I will show you how to create this double exposure effect using Photoshop and some stock photos. The process is simple however it does take time to adjust the details.
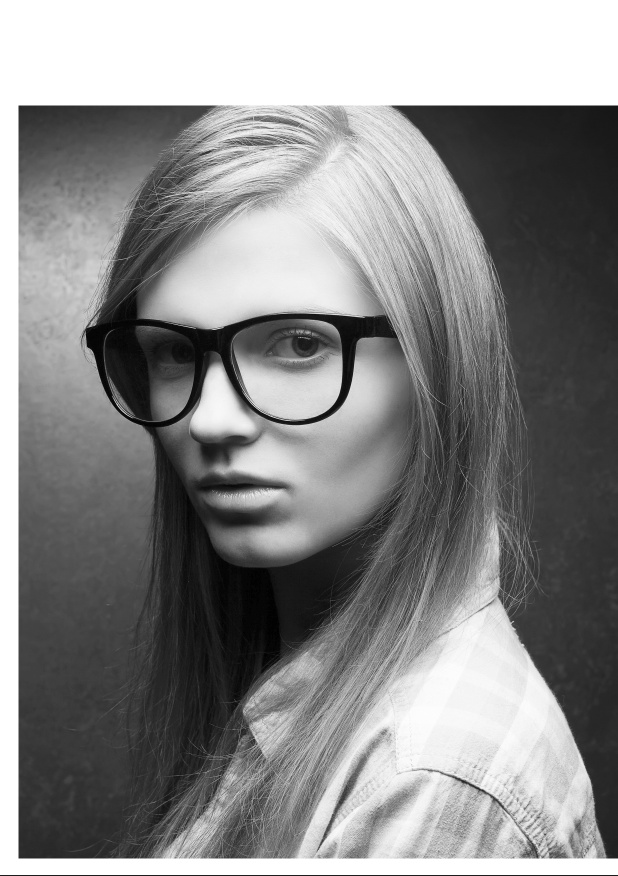
Step 1
Open Photoshop and start a new document. I am using A4 for the format. After that get a photo of a person you want to use for your composition. The image I am using is courtesy of Shutterstock. It's titled Portrait of a young beautiful blonde model wearing trendy glasses and casual shirt and posing over metal background. Hipster style by Augustino
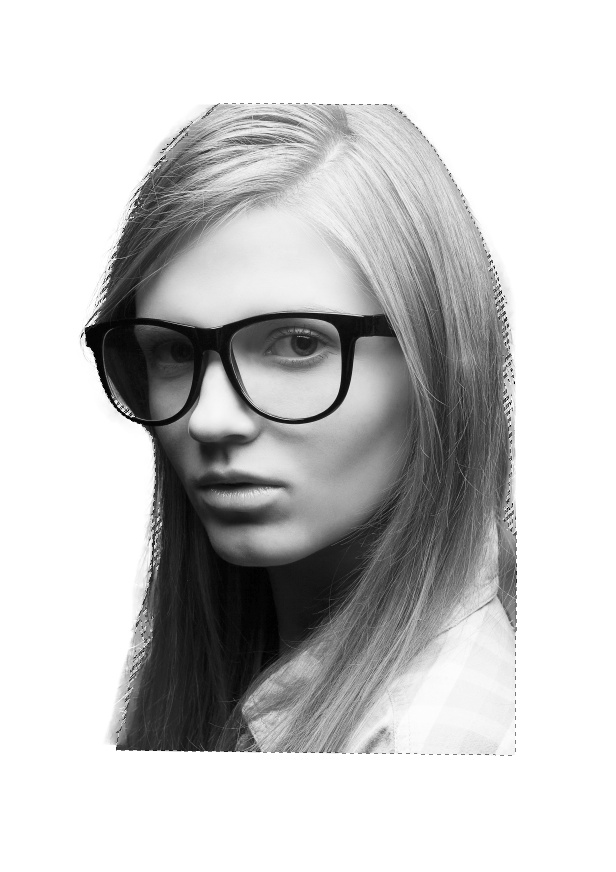
Step 2
Isolate the girl from the background using the select tool. Use the Refine Edges option to help with the hair.
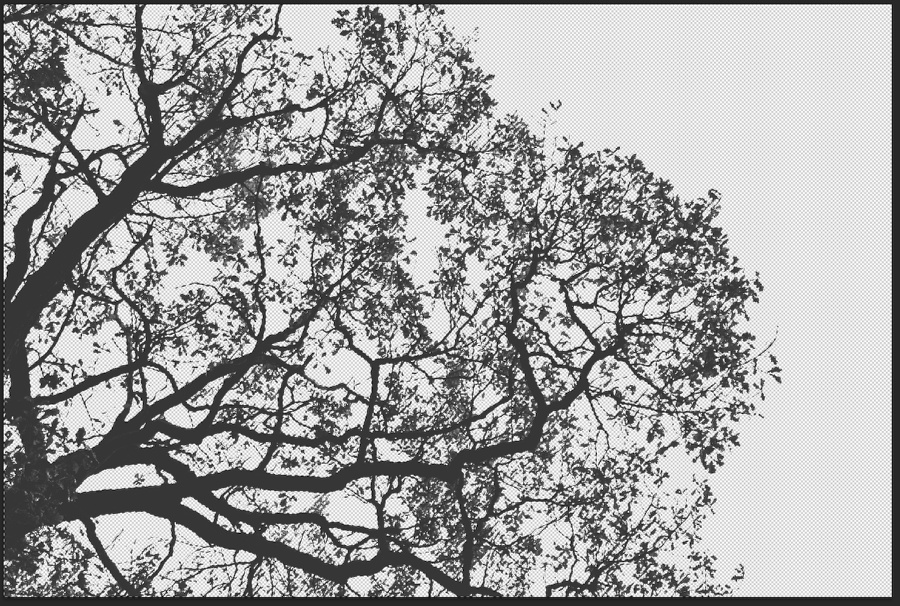
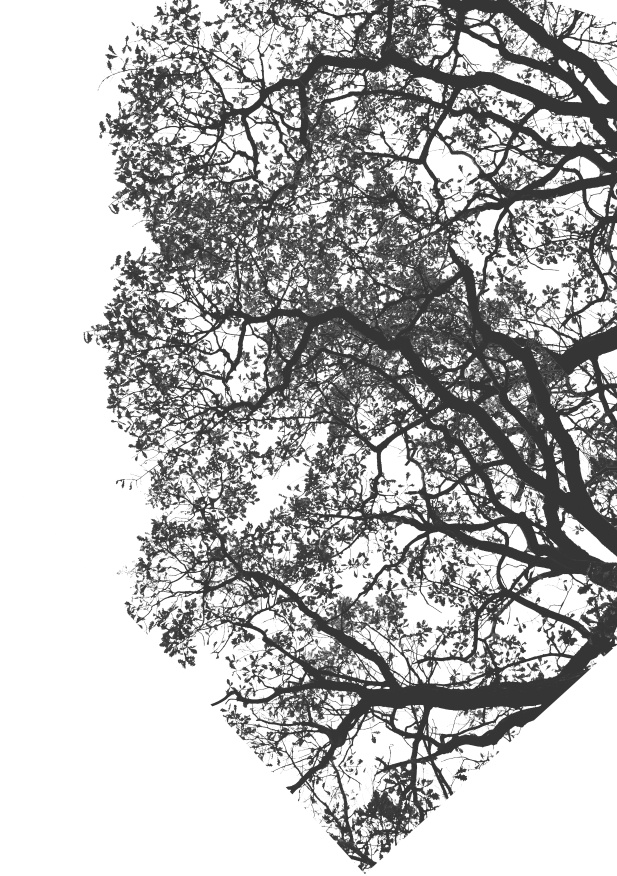
Step 3
Now let's add the second image for the double exposure experiment. The image is titled Silhouette of tree. Black and white by Namsilat. Again isolate the background, we will just use the branches.
Step 4
Duplicate the photo of the branches to make them mor compact.
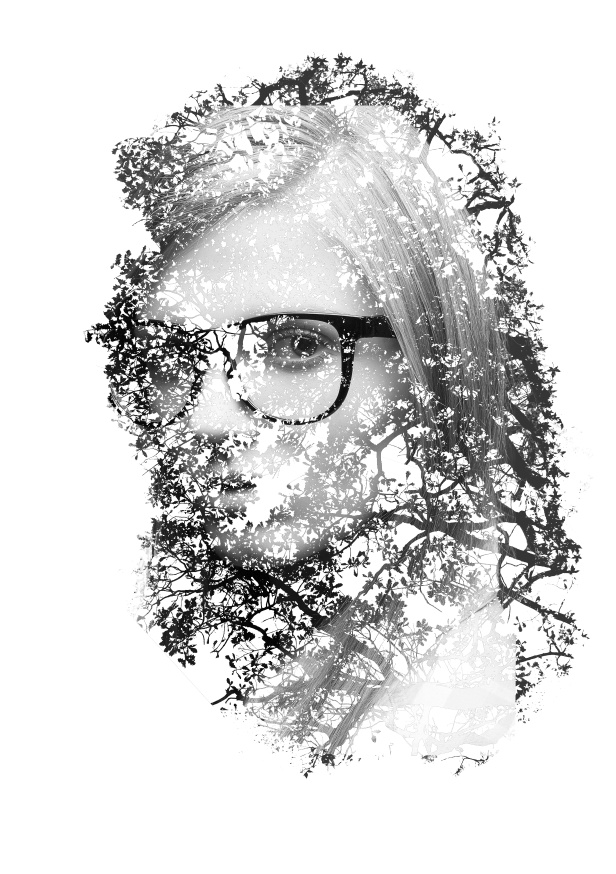
Step 5
Now put both images together. Create a marquee selection of the branches by clicking on the thumbnail of the layer holding Command (MAC) or Control (P).

Step 6
Mask the photo of the girl with the branches selection.
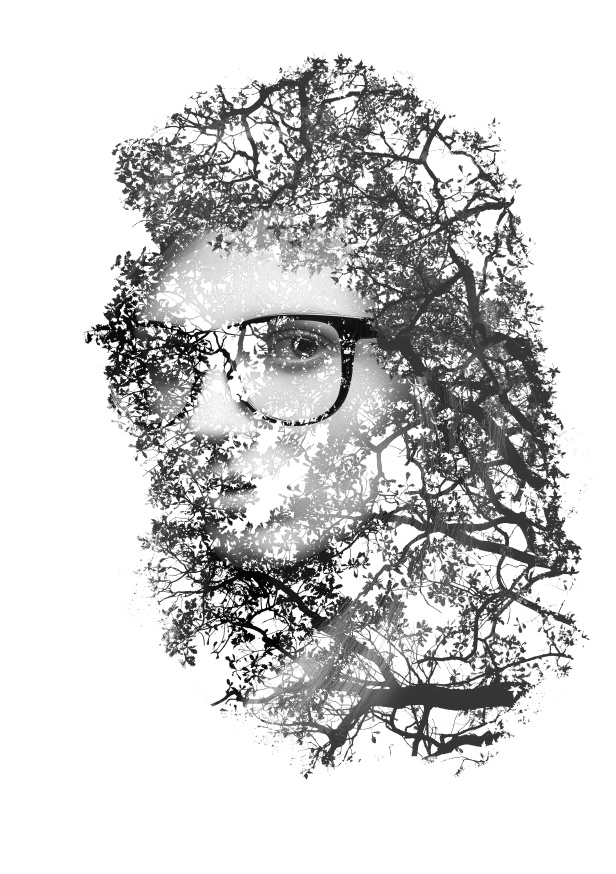
Step 7
Time for some refinements, especially on the edges and to make them look random and not so uniform. Also duplicate the girl's layer and move it on top of the other layers. Reduce the oapcity to 70%.
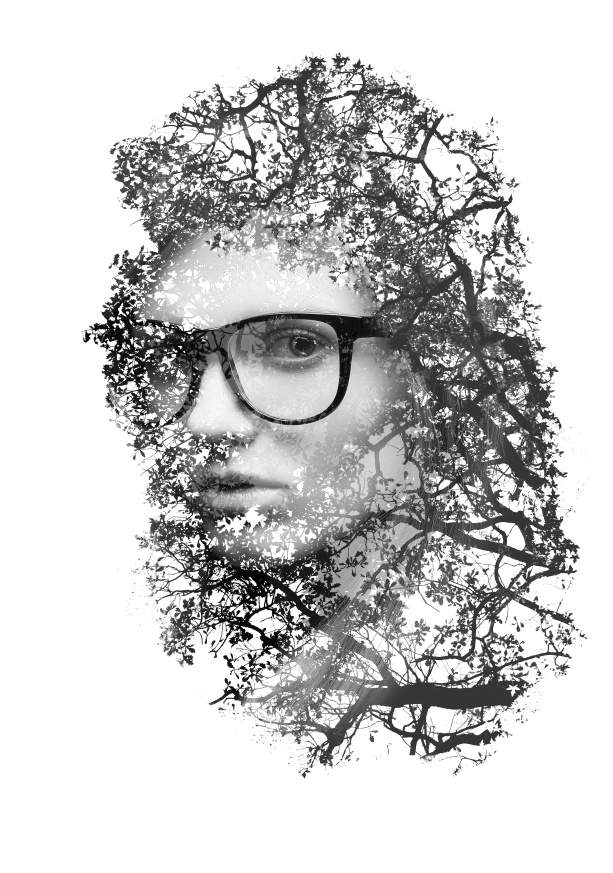
Step 8
Duplicate all layers and merge them into one. Then change the Blend Mode to Screen.
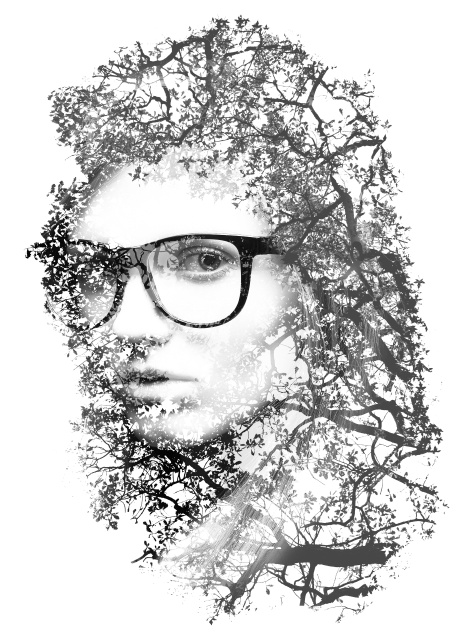
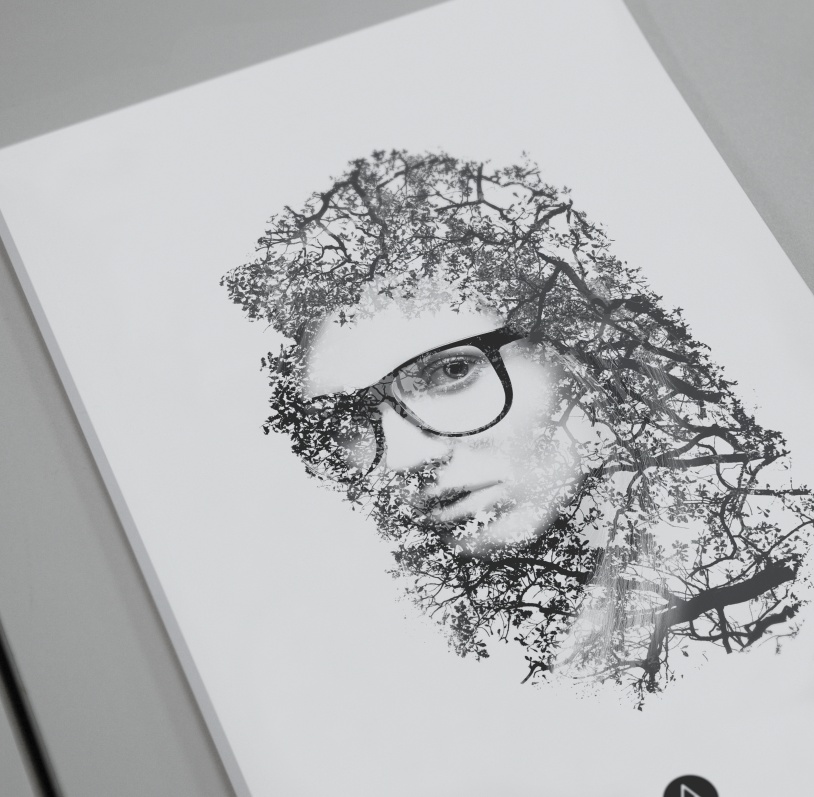
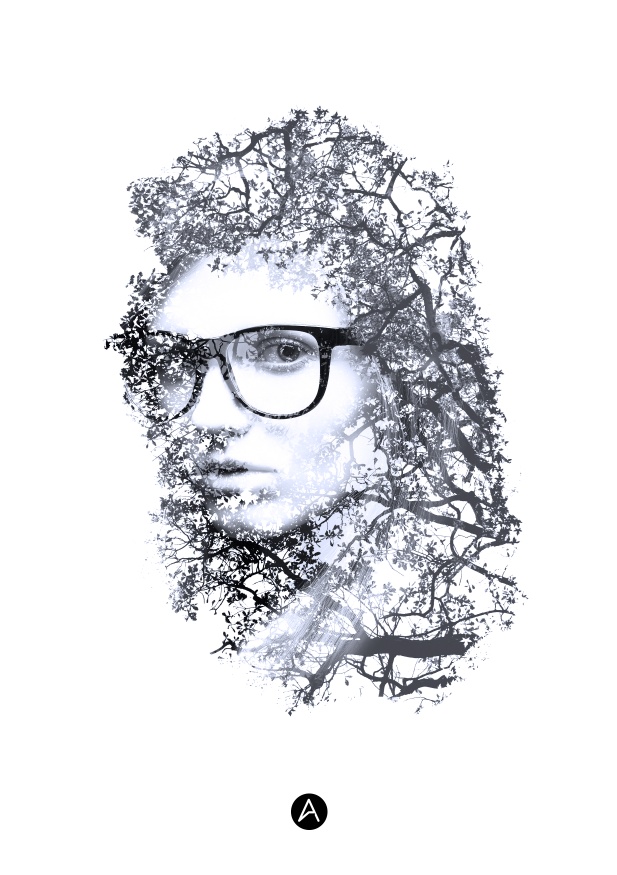
Conclusion
Resize the layers to place the girl in the center of the document. You can also add a photo filter, Layer>New Adjustment Layer>Photo Filter. You can use deep blue or orange to add a really nice style to the final design.
Applications