by abduzeedo
It’s been more than 10 years since I wrote the tutorial about neon effects in Photoshop. I still love creating light effects in Photoshop and a lot has changed since the last time I played with this type of light effect. So I decided to take it a try and create a simple and reusable effect using just Layer Styles so you can use it for your own designs.
Step 1
Start a new document in photoshop and fill the background layer with a radial gradient. I am using for the center color a dark pink (#470f26) blending to a dark blue (#130b2b). You can play with different colors later to change the way your neon color works.


Step 2
For the text I used a super nice font called Ohm Bold from Adobe Fonts. You can use any font or graphic you want. In the end I have an example with the Spotify logo.

Step 3
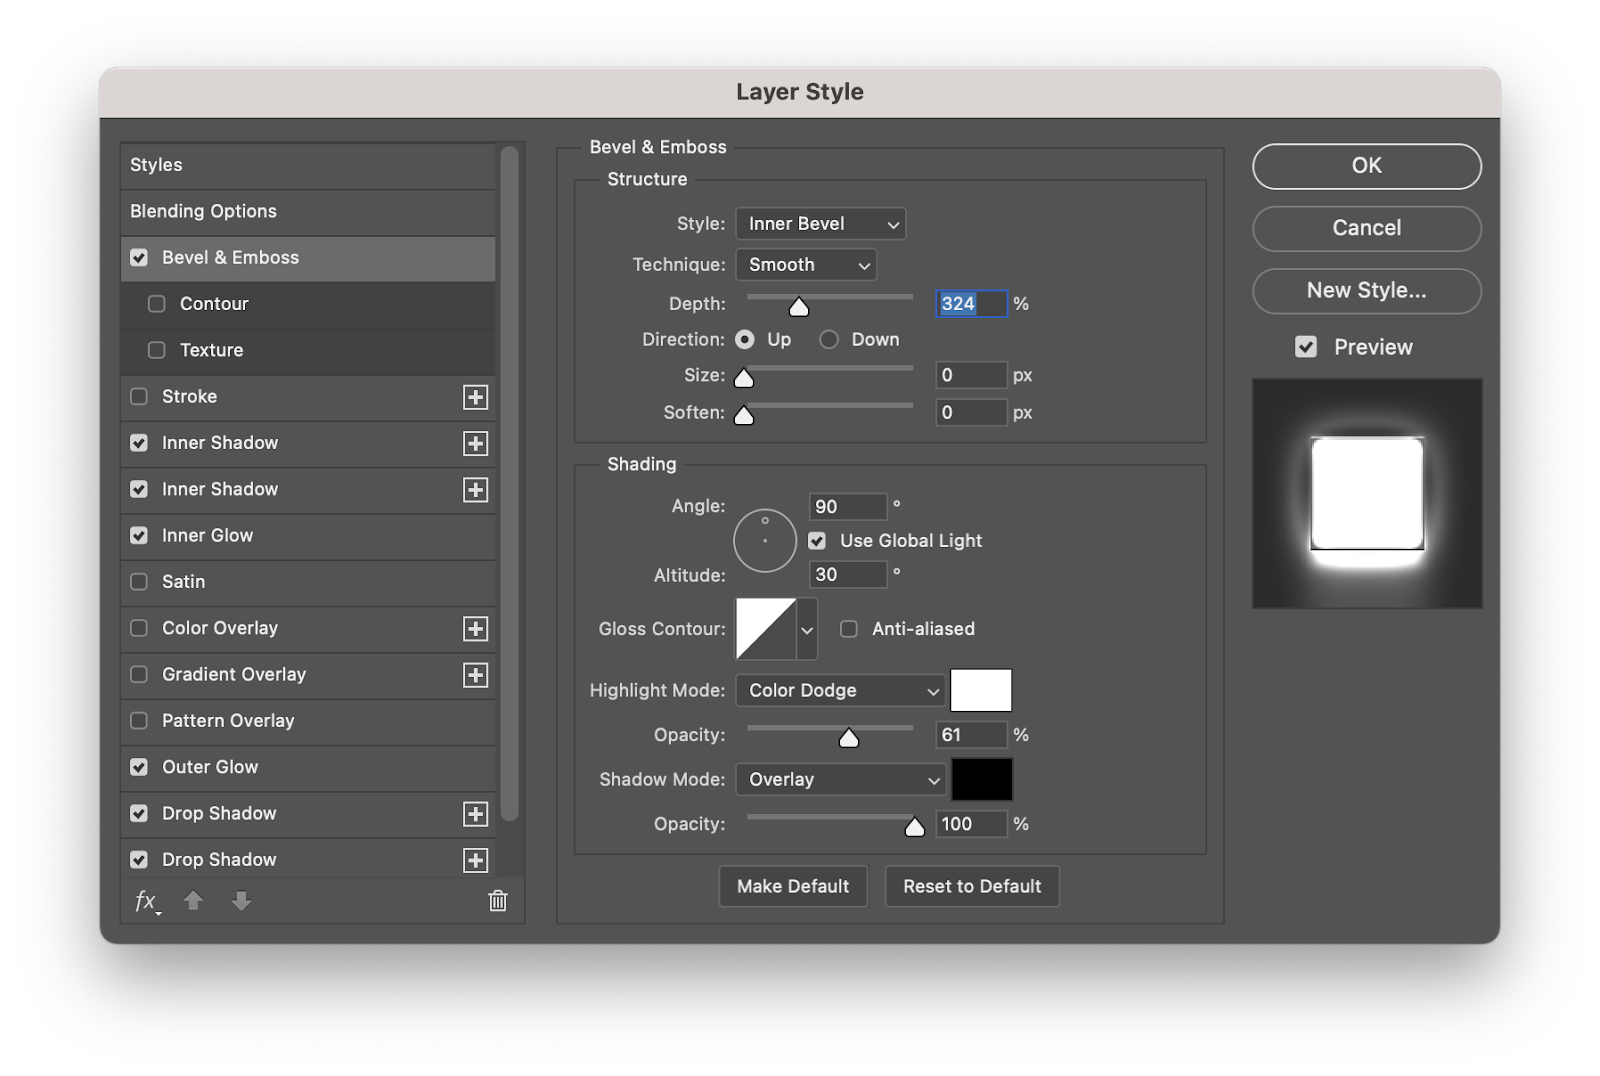
Now to the fun part. Let’s go to Layer Styles. The first part is adding a Bevel & Emboss to create a volume to the object. Use the values below for reference. They might need to be tweaked depending on the thickness of the strokes of your object.
Step 4
Continuing with Layer Styles, this time let’s add 2 Inner Shadows to create a neon burning effect.

 Step 5
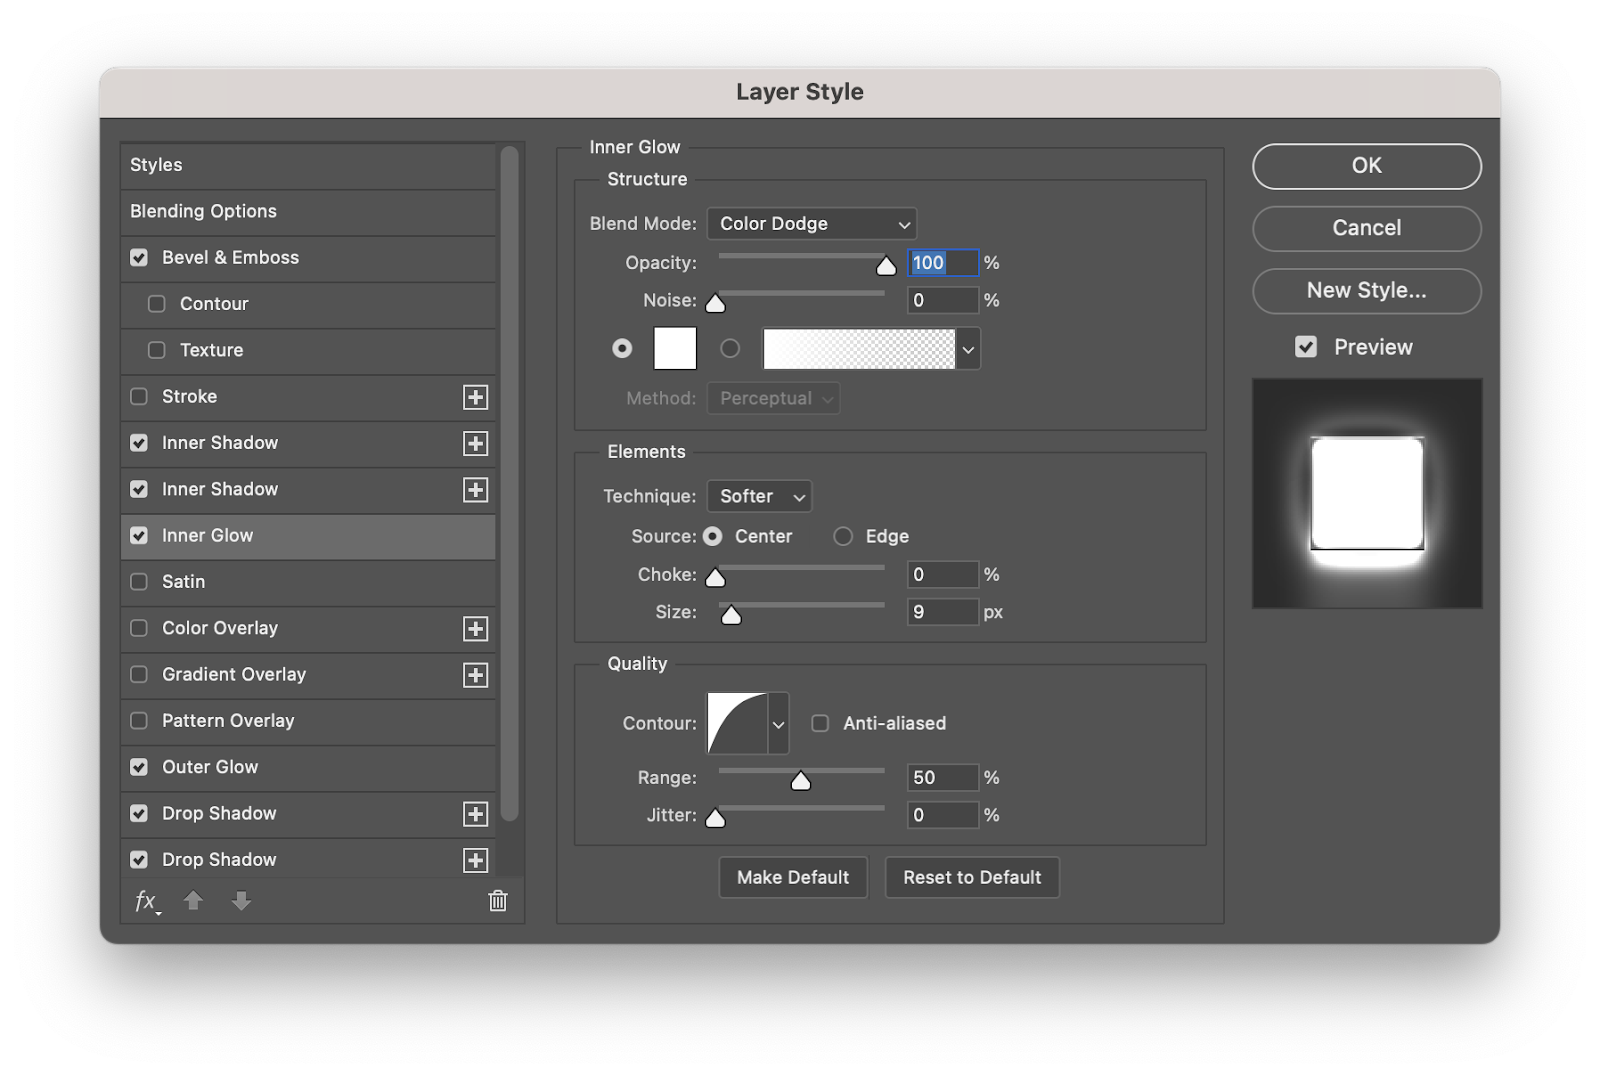
To soften the effect we use Inner Glow in the layer styles. Notice that for all the Inner Shadows and Inner Glow we use Color Dodge for the Blend Mode.
 Step 6
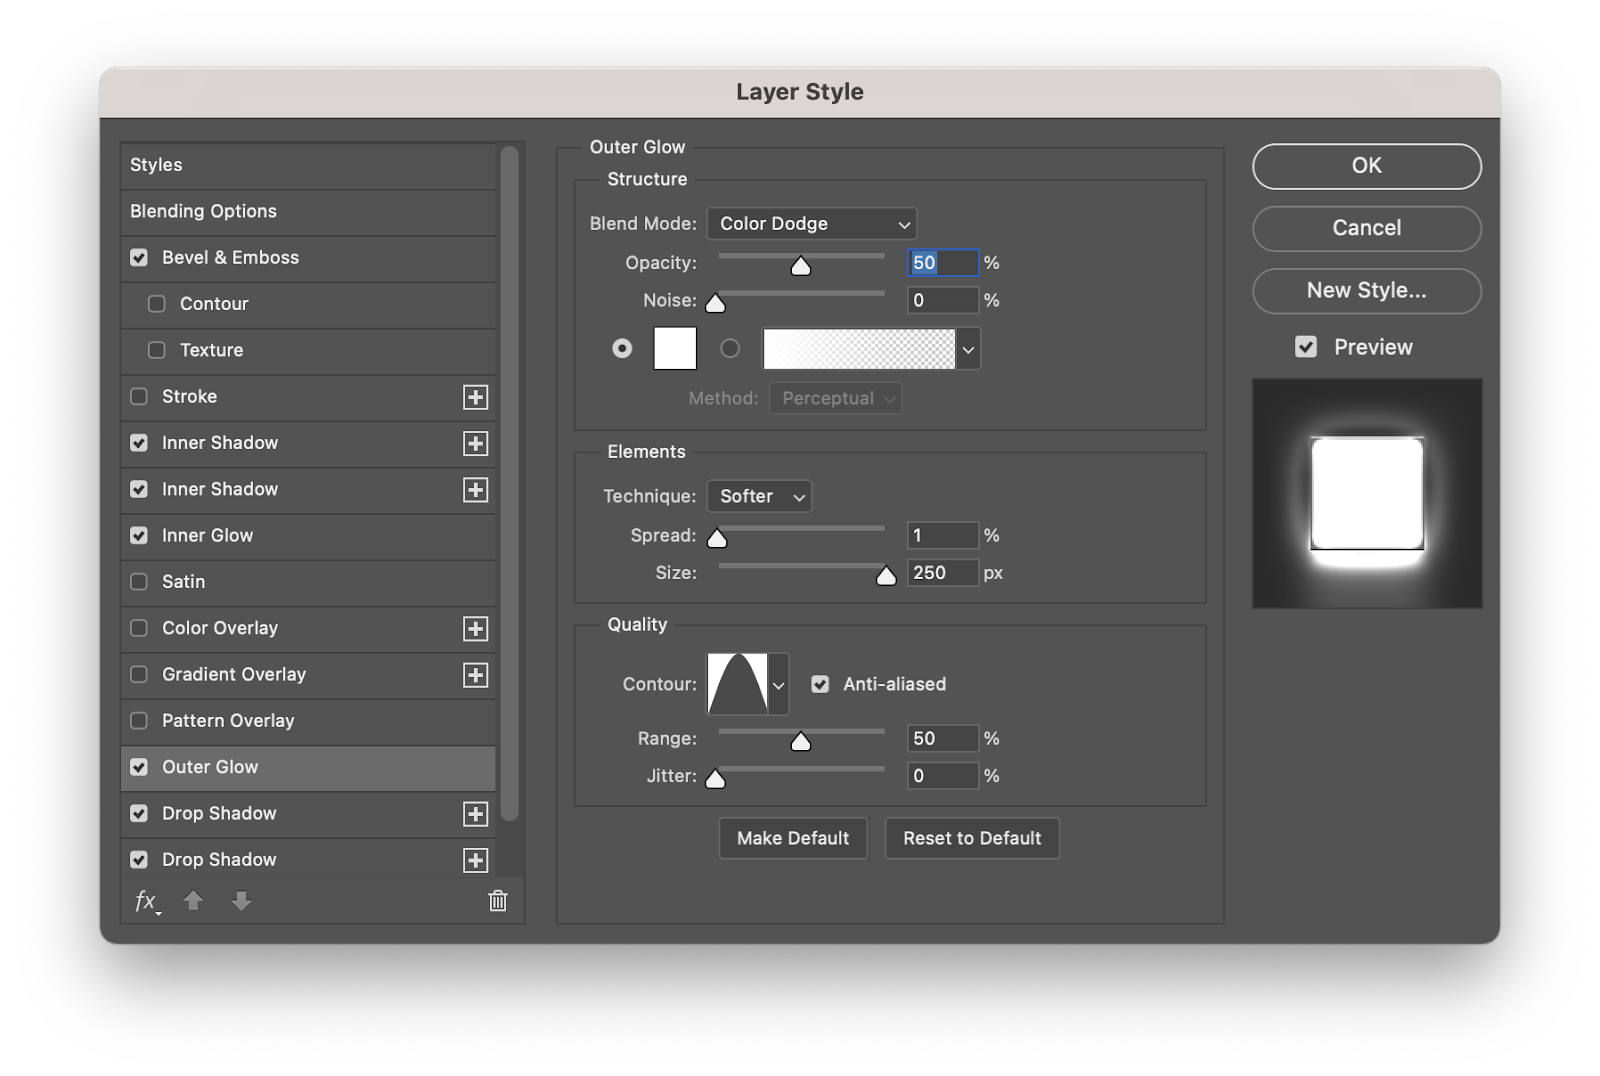
Up to this part, everything was inside of the neon tube. Now let's make it glow. For that we will use Outer Glow. Again, white for the color and Color Dodge for the Blend Mode.
 Step 7
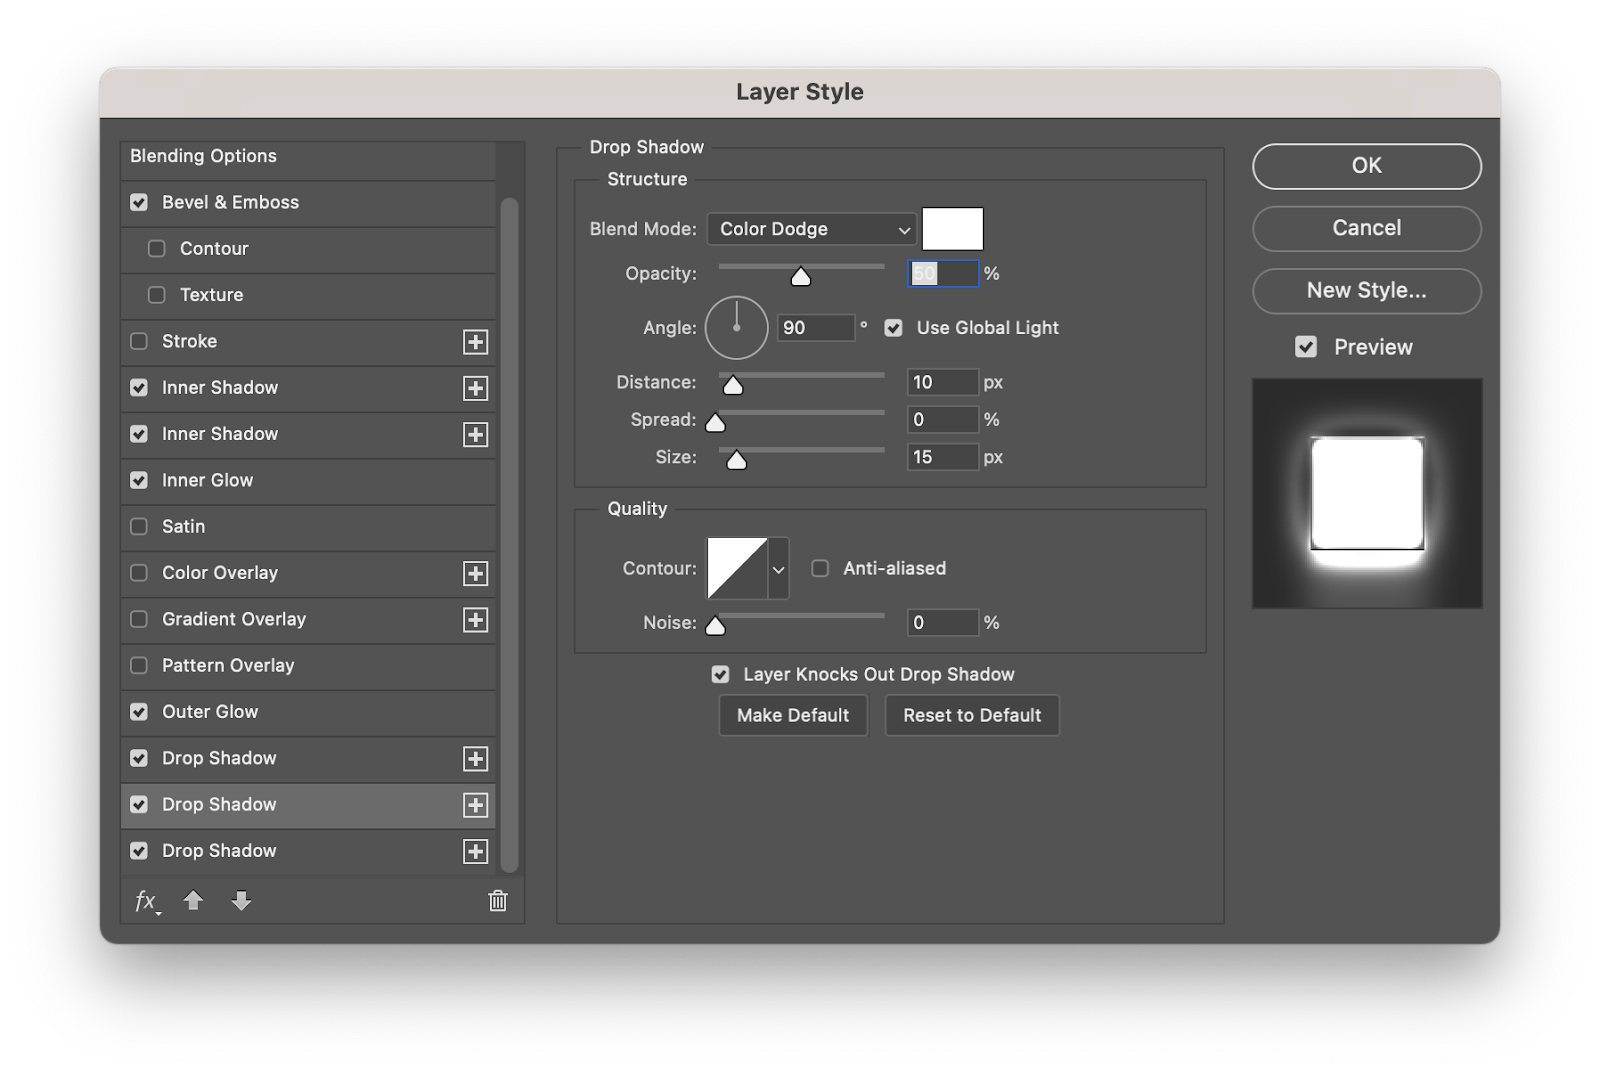
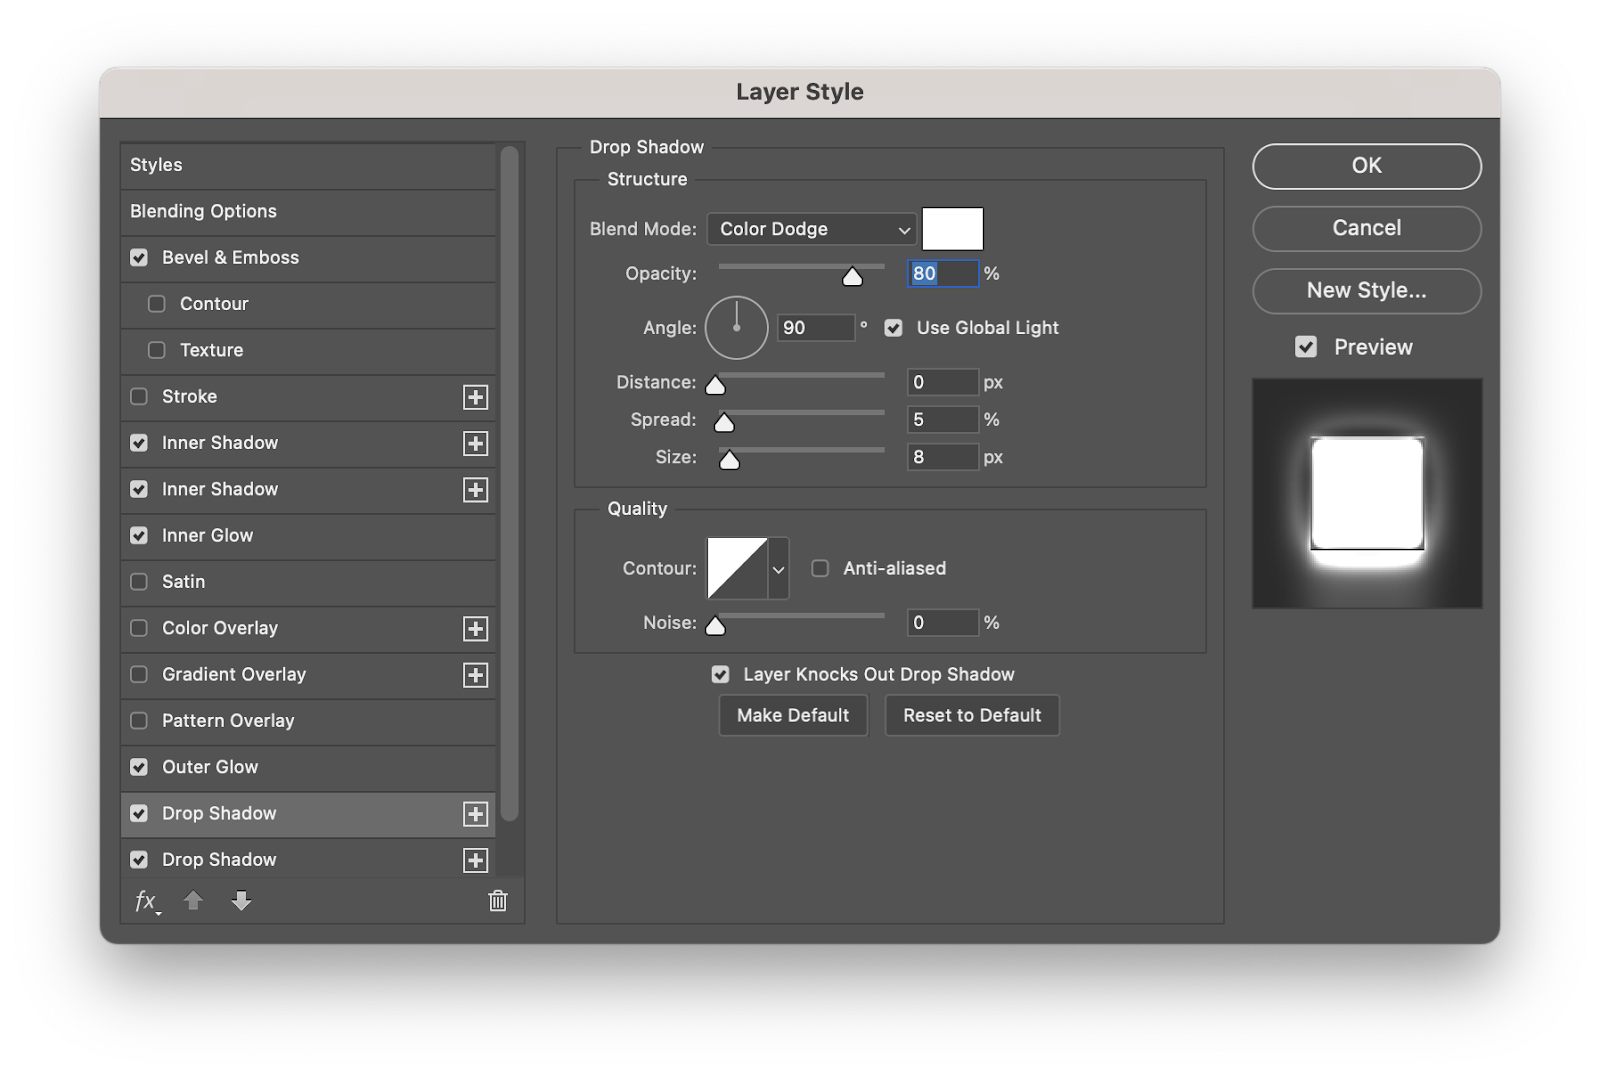
To expand the light and add more dimensionality let’s add 3 Drop Shadows using white for the color and Color Dodge for Blend Mode. Use the values below for reference. You can add more or remove some of them if you want to simplify your design.

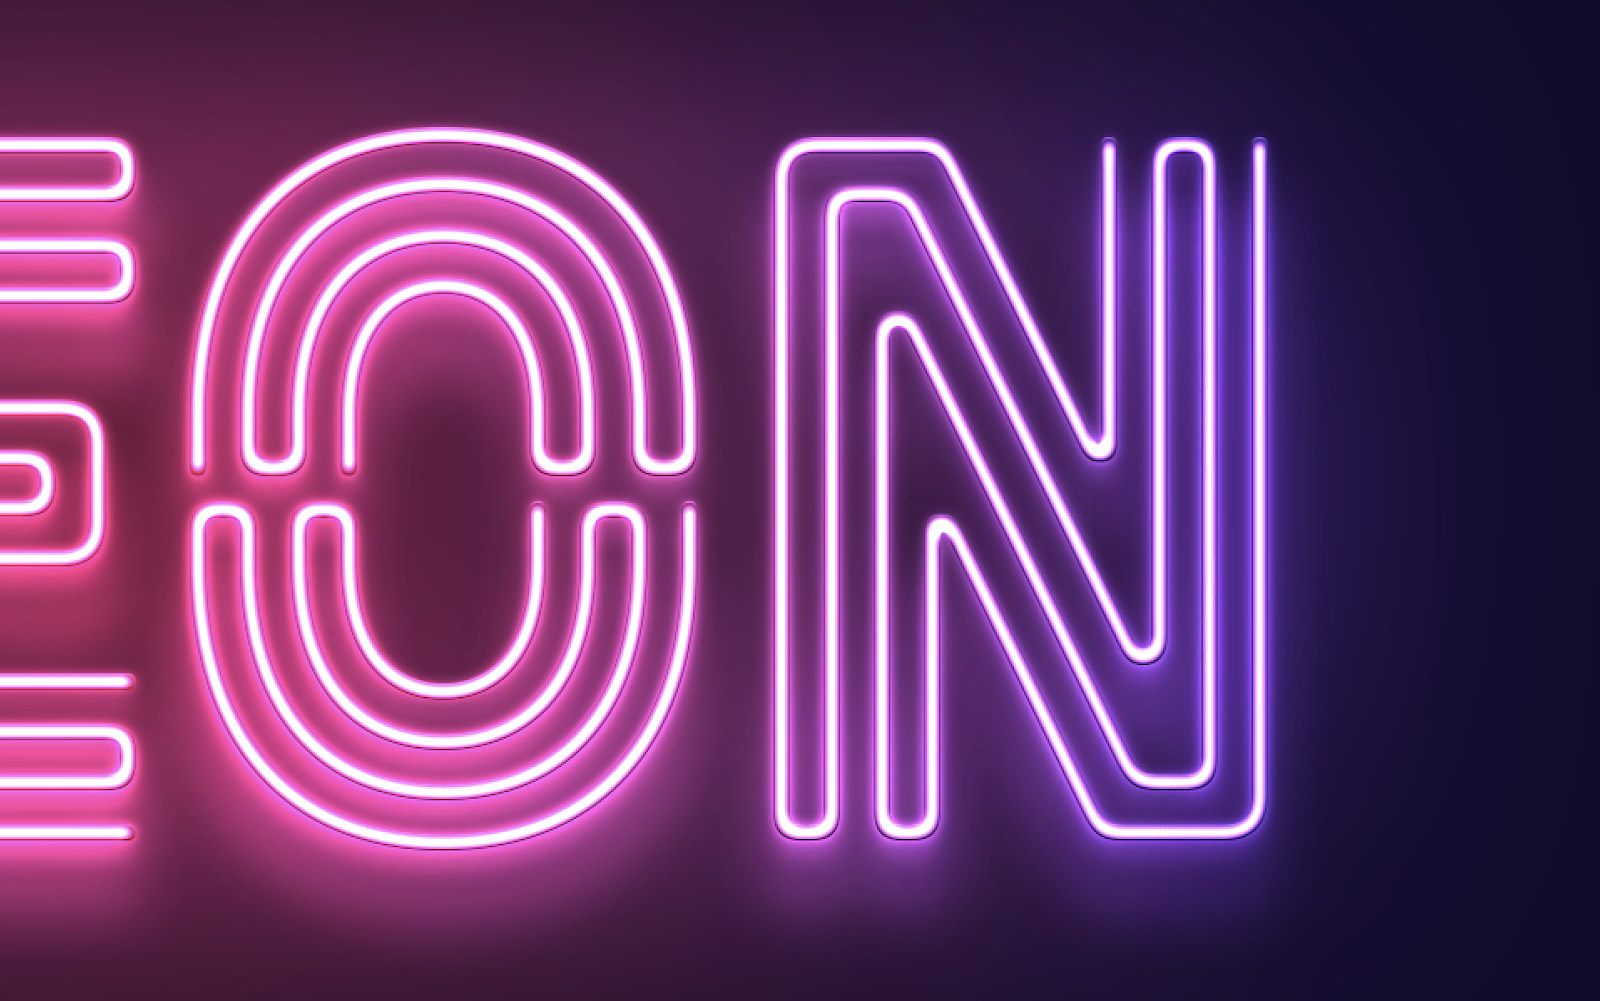
Step 8
After those steps you will end up with something like the image below. Notice how the light burns more in the center and fades towards the edge of the tube. You can now tweak with the Fill of the layer to make that inner white stronger. I find 1% to be the best option for my graphic.
Step 9
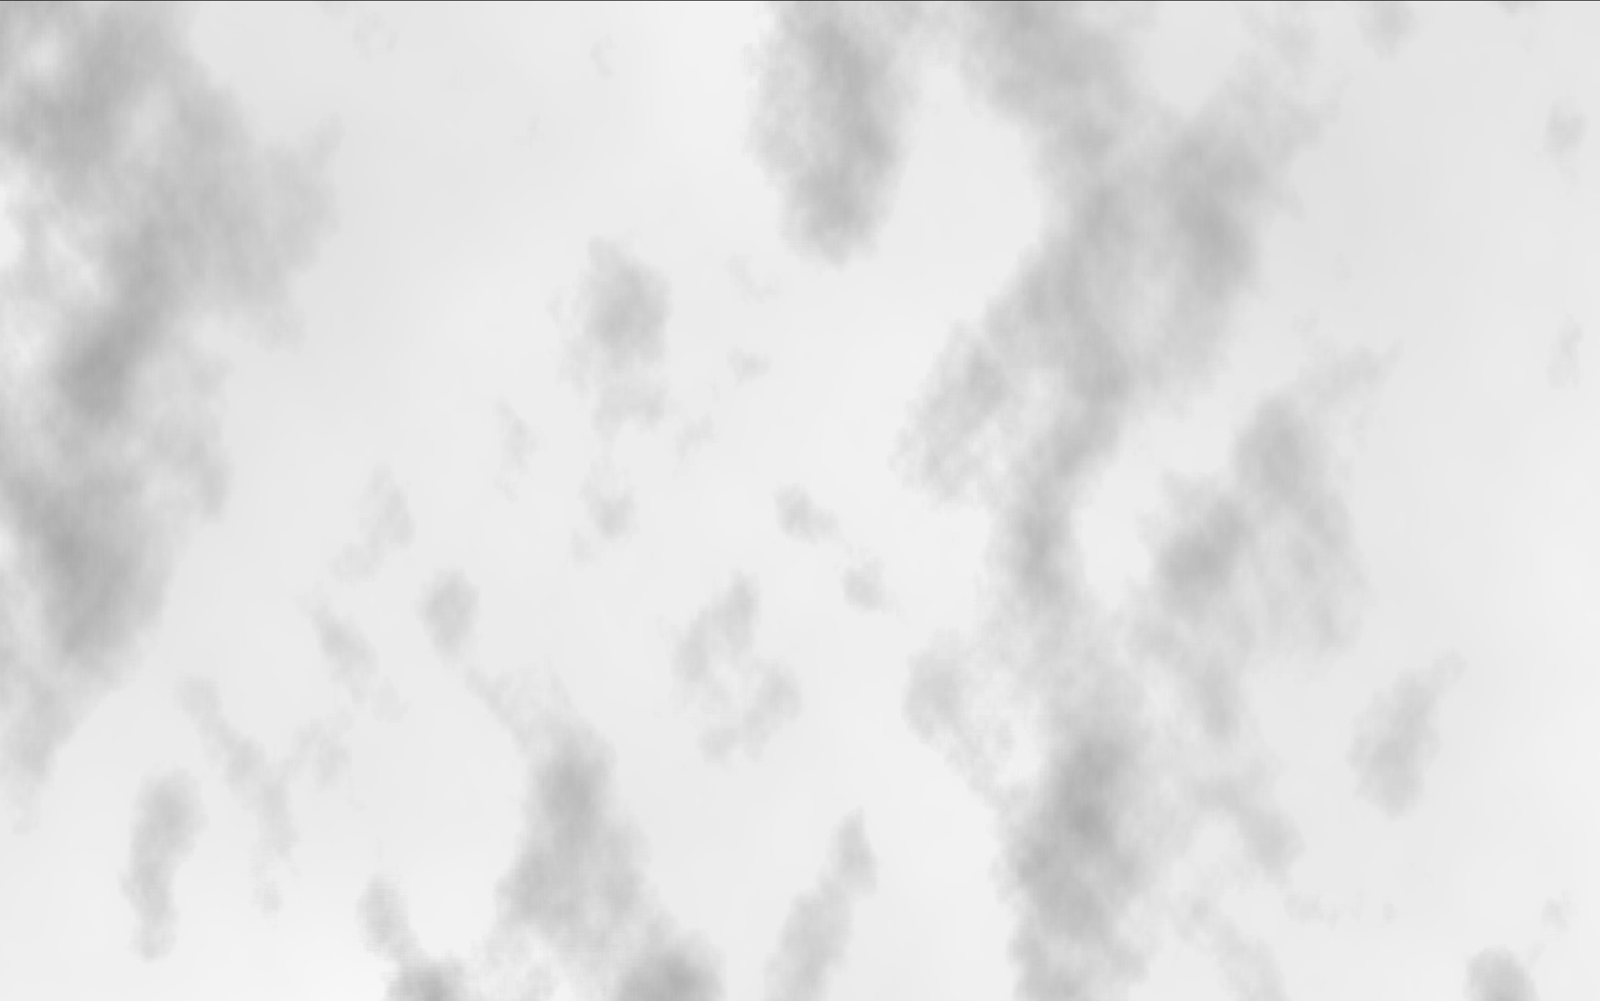
To add more realism let’s create some smoke. Add a new layer and go to Filter>Render>Clouds. After that resize the layer and make it much bigger so the smoke gets much more subtle. Change the Blend Mode to Multiply with 85% Opacity.

Step 10
Duplicate that layer and change the Blend Mode to Color Dodge with 100% opacity. Also just move it around a bit so it doesn't align with the layer below as they are the same.
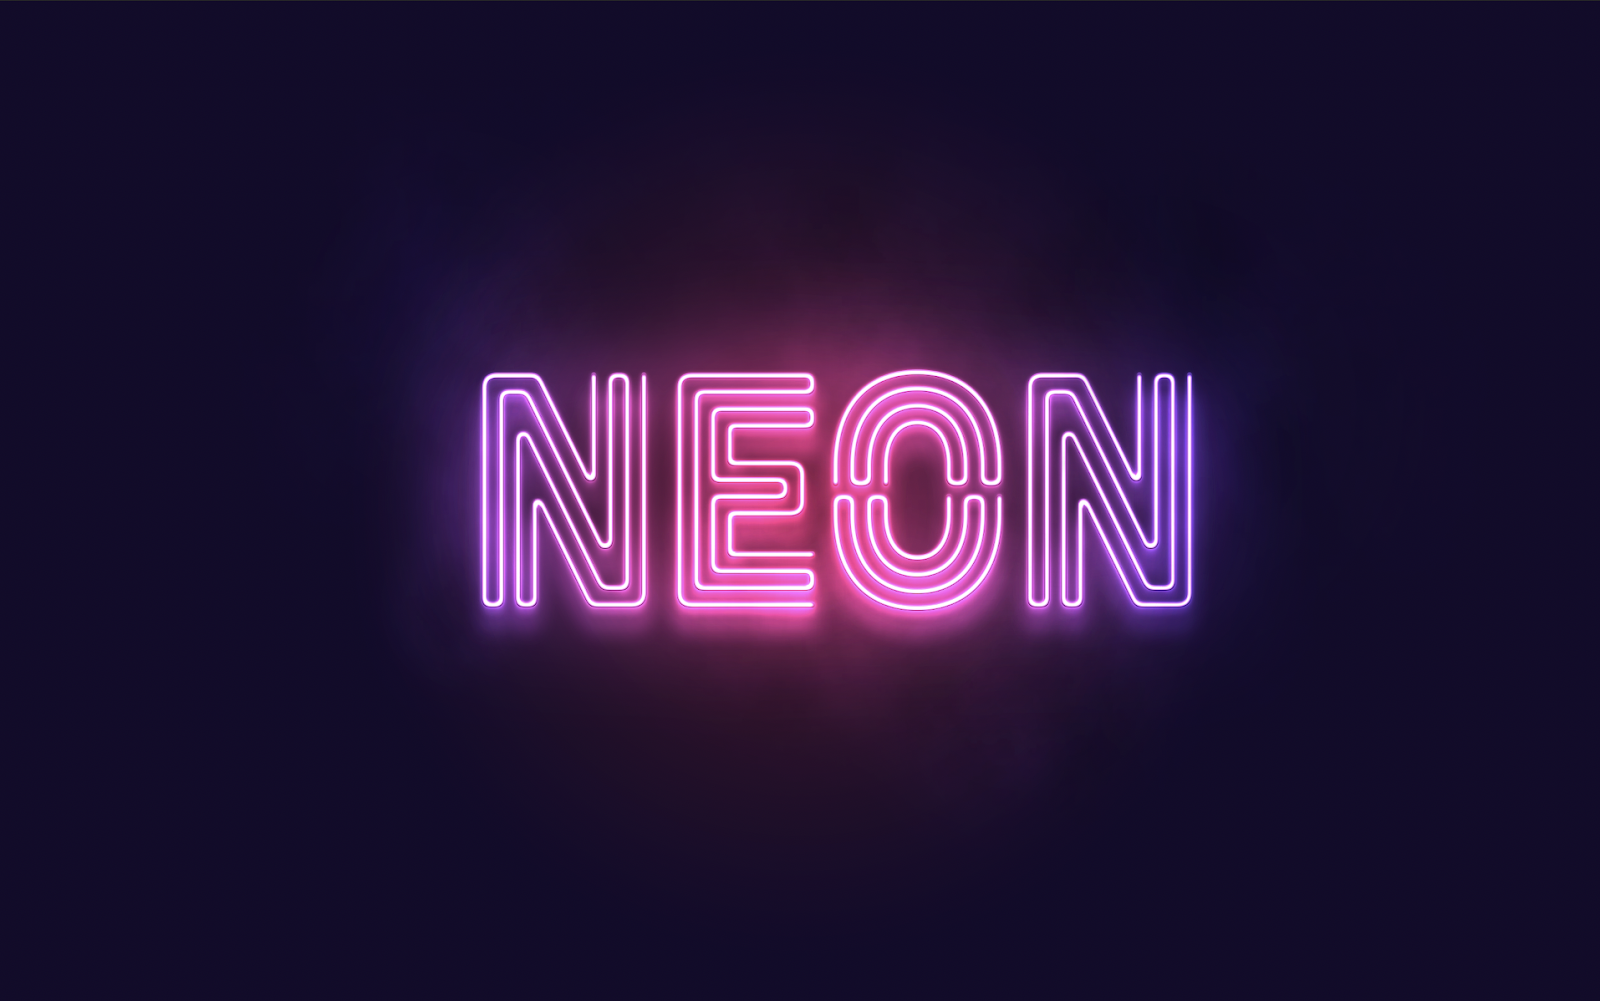
Conclusion
Group the 2 smoke layers and mask the group. Then with the Brush Tool and a soft brush with white for the color you just paint over some areas to give a hit of the smoke. That’s it, your design is over and you have a super simple, reusable, neon effect.
Variations