by abduzeedo
Playing with text is one of the coolest things to exercise your skills with any software, at least in my opinion. You can try to make fire with the word fire or water effects with the word water. In my case today I will show you how to create a sweet cookie effect using Pixelmator.
In this tutorial we will show you how to create a nice text effect using basic filters and some stock images. The result is really good for the amount of time required to achieve it.
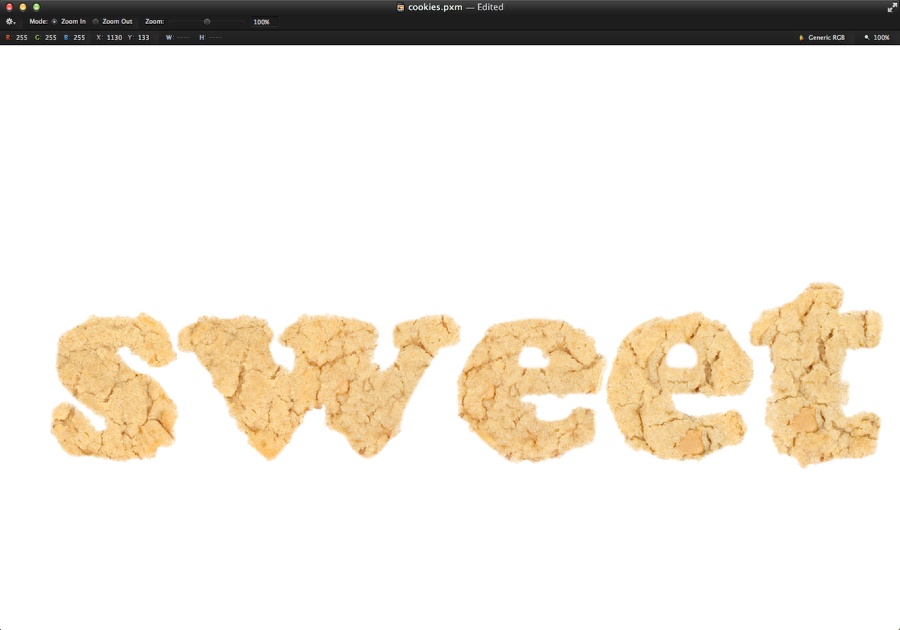
Step 1
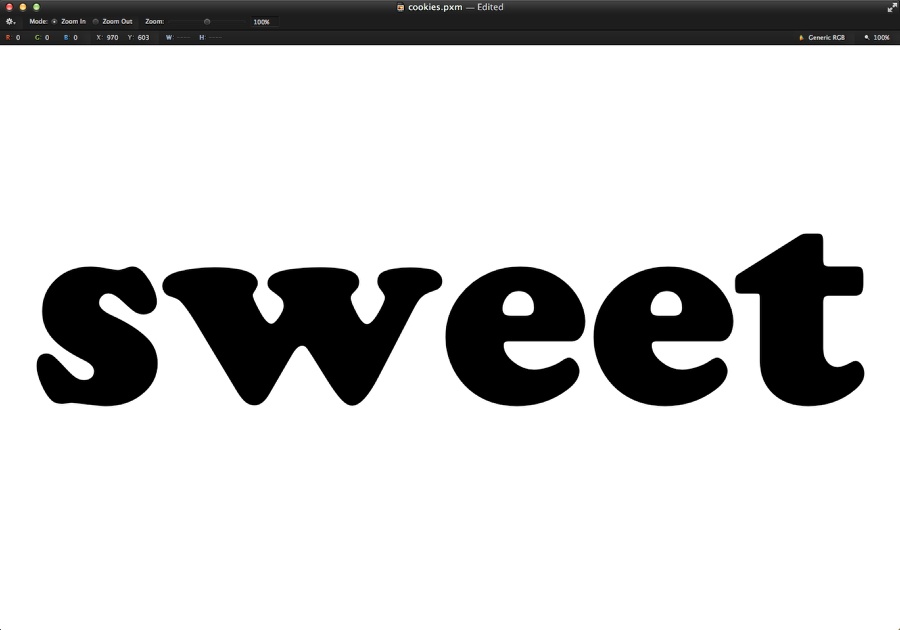
Open Pixelmator and create a new document. I am using 1920x1200 pixels for the size. The background is white. After that select the Type Tool (T) and type the word you want. I used "sweet" with Cooper Black for the font.
Step 2
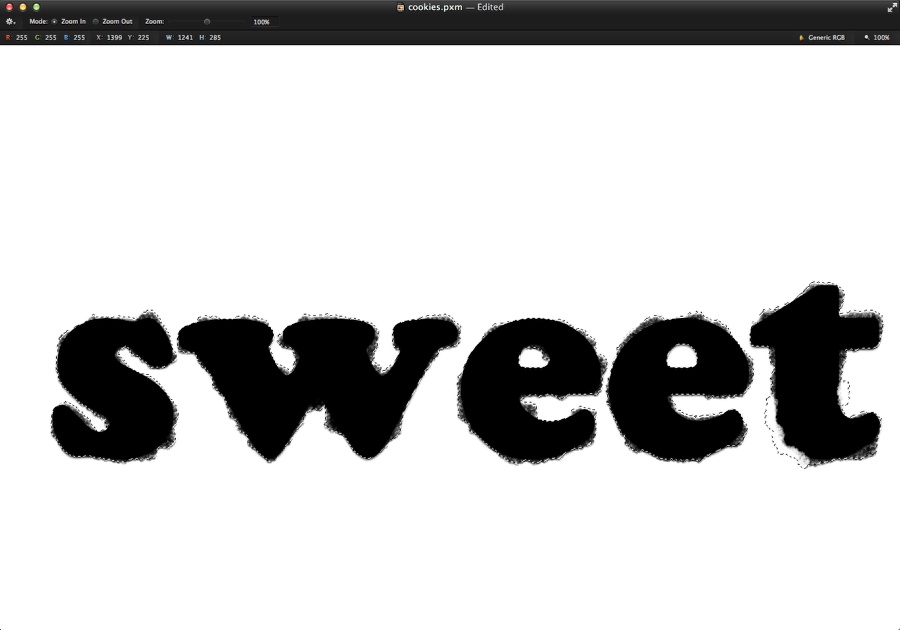
Add a new layer and then with the Brush Tool (B) with black for the color select the clouds preset. Then start painting on the edges to make the word much less uniform. Once you finish the word ad a layer underneath and fill with it white using the Paint Bucket Tool (N). Duplicate these layers a few times and hide them for future use. Select the white layer, the text layer and layer with the brush effect and merge them. Layer>Merge Layers.

Step 3
Add a new layer and group it into a folder. After that holding Command, click on the thumb of the sweet word from the previous step to create a marquee selection. Select the folder and go to Layer>Add Layer Mask.
Step 4
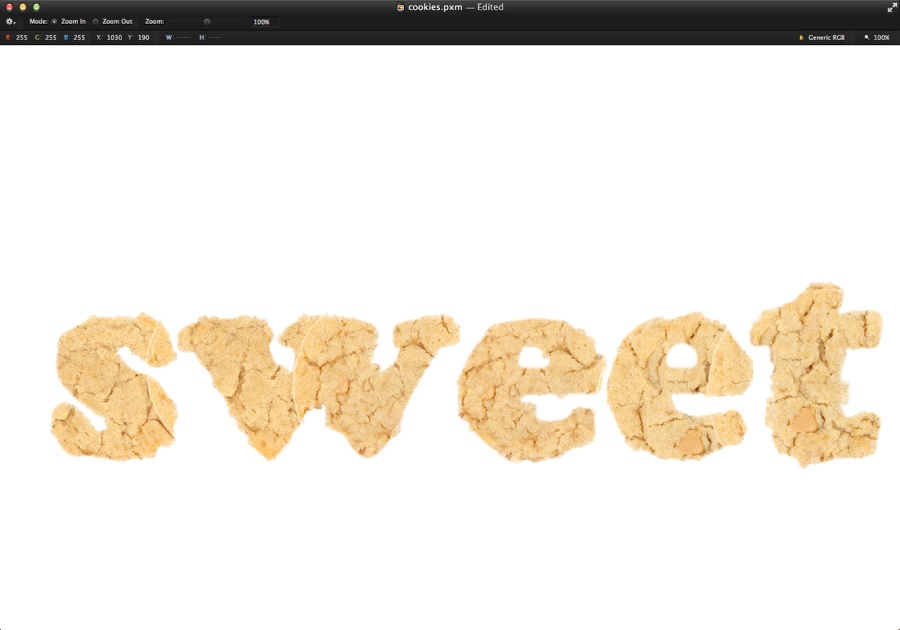
Now let's use some cookies texture. The image I am using is from Bryan Solomon and it's called Three Peanut Butter Cookies Isolated on a White Background. The image is courtesy of Shutterstock.

Step 5
Add the images of the cookies inside the layer with the mask.
Step 6
Delete the areas where the cookies that overlap each other.
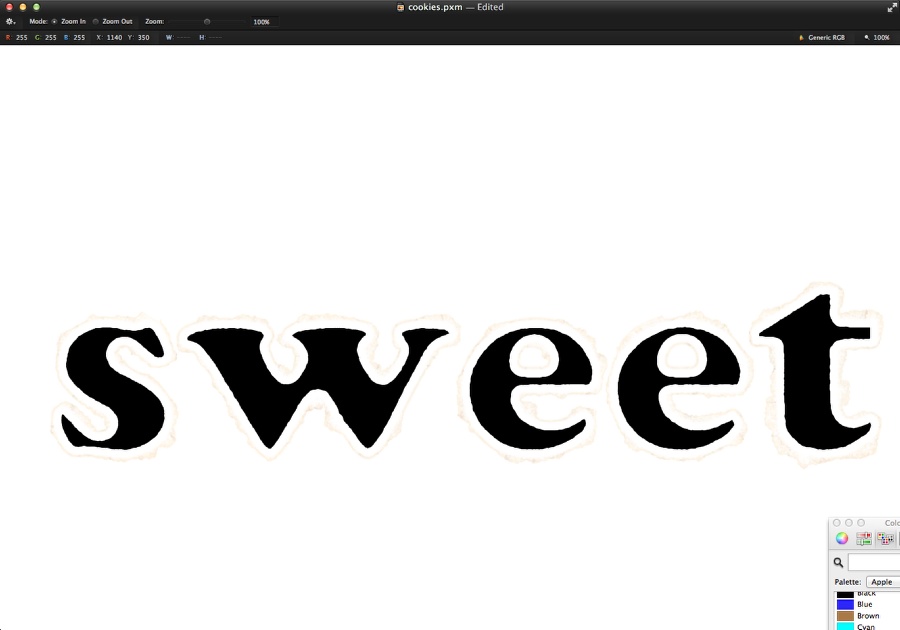
Step 7
Select the layer with the word "sweet" and the layer with the brush effects. Merge both and then go to Edit>Stroke. Use white for the color, 10 pixels for the width and Inside for the Position.

Step 8
Go to Image>Invert Color.
Step 9
Go to Filter>Blur>Gaussian Blur. Use 8 pixels for the Radius.

Step 10
Change the Blending to Soft Light. Duplicate the layer once again and hide it.

Step 11
Select the Eraser Tool (E) and start deleting the top and left sides of the visible layer from the previous step. The idea is create the shadows on the bottom and right only as if the lights are coming from the top left.
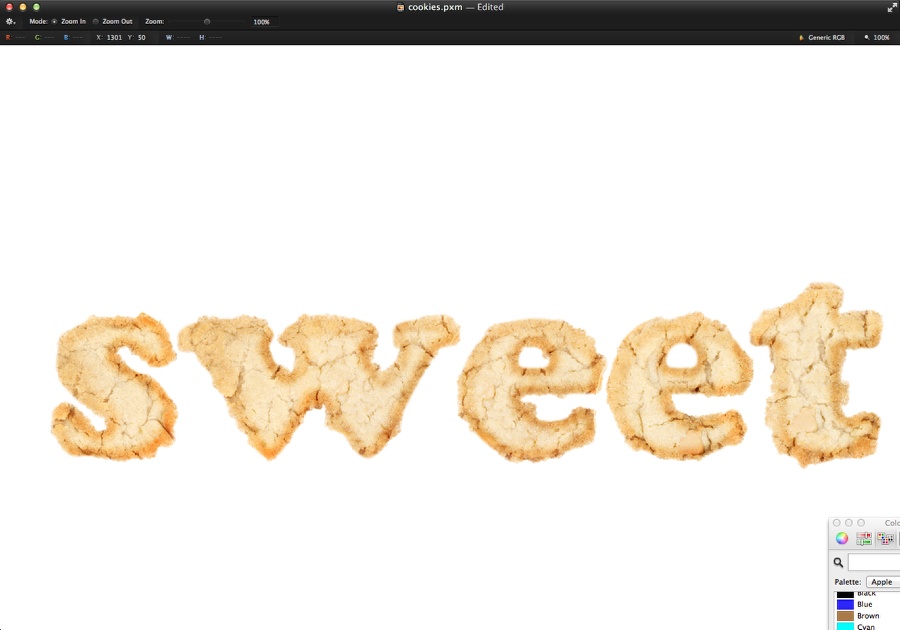
Step 12
Make the other layer visible and then go to Image>Invert Colors. Change the Blending to Overlay at 40%. Then with the Eraser Tool (E) delete the bottom right of the layer to create a highlight at the top left.
Step 12
Let's add a background to make the effect a bit more realistic. The image I am using is called Texture Series - Old aged antique parchment manuscript for background use. Reduce the opacity to 40%.

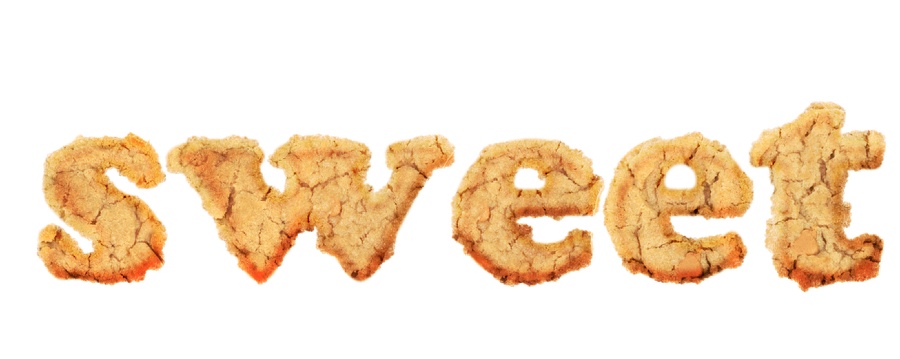
Conclusion
Using the same layer of the Step 2, make sure it's all in black and merged with a white background. Then move the layer so it will be underneath the cookies text. Go to Filter>Blur>Gaussian Blur and use 4 pixels for the radius. Duplicate the layer and apply the blur again with 10 pixels for the radius. Change the Blending of both layers to Color Burn and move them down a little bit to create a really nice shadow effect.