by abduzeedo
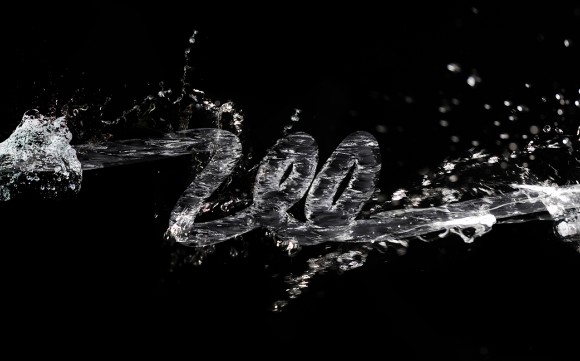
Last year I wrote a tutorial called Incredibly Realistic Water Text in Cinema 4D and Photoshop where I created a text made out of water. I had to use Cinema 4D to create a 3D object then I imported this 3D file in Photoshop where I mixed with some stock photos. Now with Photoshop CS5 Extended and the Repoussé tool we can create 3D objects direct in Photoshop, so I decided to recreate that effect.
So, in this tutorial I will show you how to create a water text. Even though it might look complex it's a very simple effect. We will be using the new Repoussé then some stock photos to create the effect.
Step 1
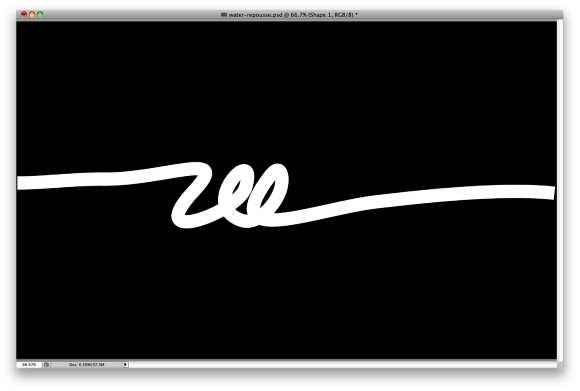
Open Photoshop and create a new document. Fill the background layer with black and using the Brush Tool (B) or importing a vector file with a handwritten text. You can the one I used in the PSD file that you can download in the end of this tutorial.
Step 2
If you create a text using the brush tool or importing a vector and paste it as bitmap, create a marquee selection of the area you want to apply Repoussé. With the selection active go to 3D> Repoussé>Current Selection.

Step 3
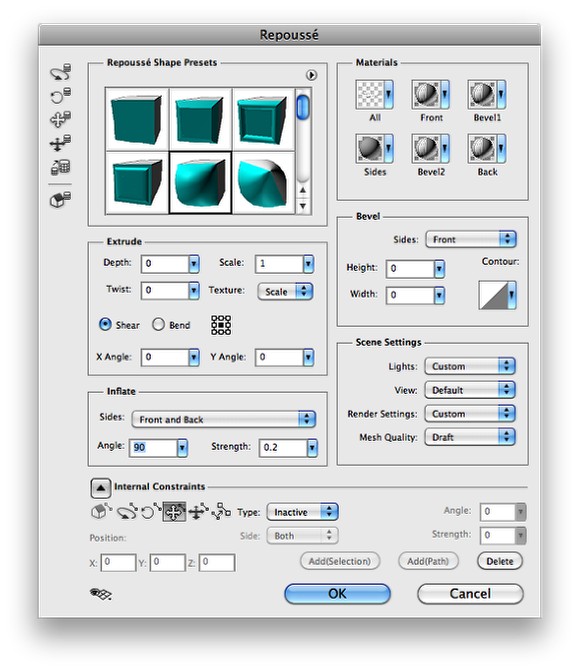
To create the water effect we will use the Inflate preset and pretty much use the same values we used in the previous step, the Inflate 3D type. Change the Depth to 0 and the Scale to 1, also for the Inflate, change the Slides to Front and Face.
Step 4
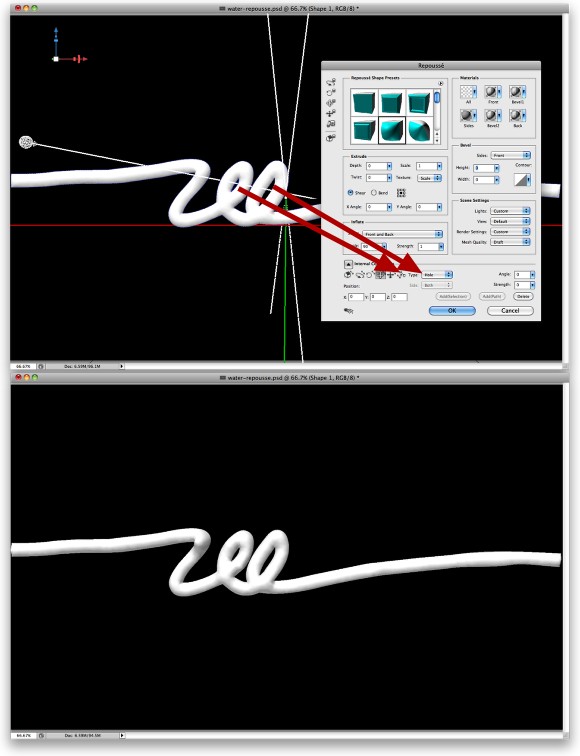
You will notice that the E will be a solid block and the hole will be lost, then select the area that you want to be hole and then change the Type to Hole. Also increase the Strength of the Inflate to 1.
Step 5
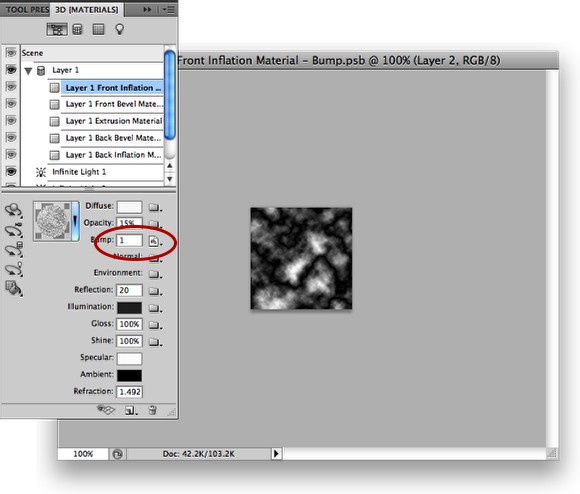
Select the Front Inflation over the 3D Palette and then click on the folder next to the Bump values. Select Open Texture to open the texture in a new document. Then in this new document create a new layer and go to Filter>Render>Clouds. Make sure that you are using black and white for the colors. After that go to Filter>Render>Different Clouds. If your result is too dark, go to Image>Adjustment>Levels, then increase the white input. This texture will be the Bump map, which will distort our 3D text.
For the other values, use white for the Diffuse color, 15% Opacity, 20 for the Reflection, Black for the Illumination, 100% Gloss, 100% Shine, white for the Specular and 1.5 for the Refraction. You can render here to have a preview of the 3D effect.
Step 6
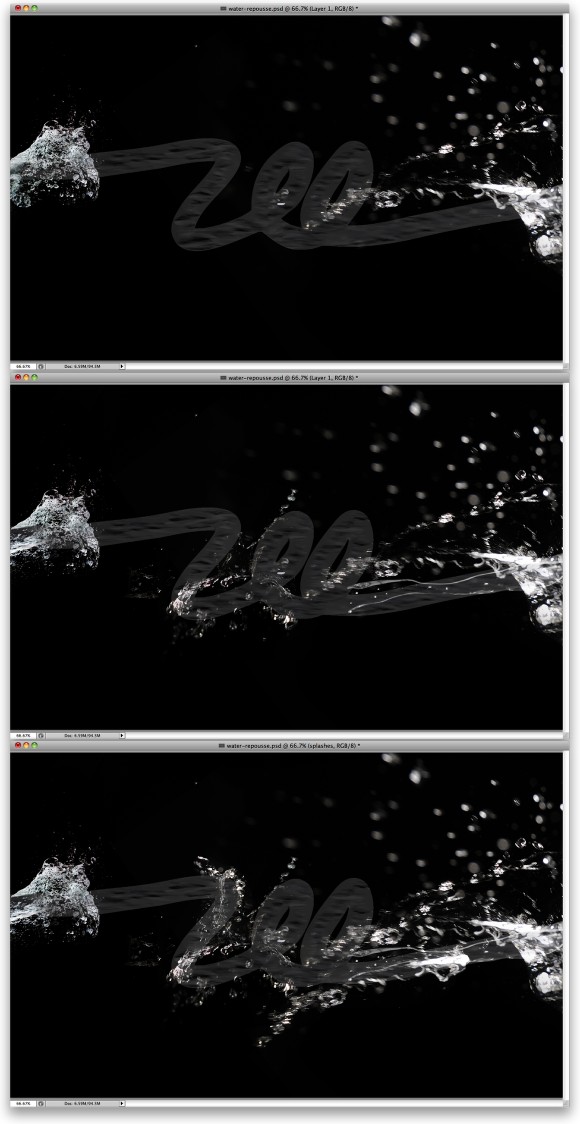
Now to make our effect more realistic let's mix some stock photos. The one I used is from Stock.xchng (http://www.sxc.hu/photo/884261 and http://www.sxc.hu/photo/1131843). Open these 2 images in Photoshop. Copy some parts of the water splash from the photos and paste it in our 3D image.

Step 7
Repeat the process, copy and paste more splashes. As the water splashes from the photos have black background, just change the Blend Mode to Screen, so the black will be transparent.
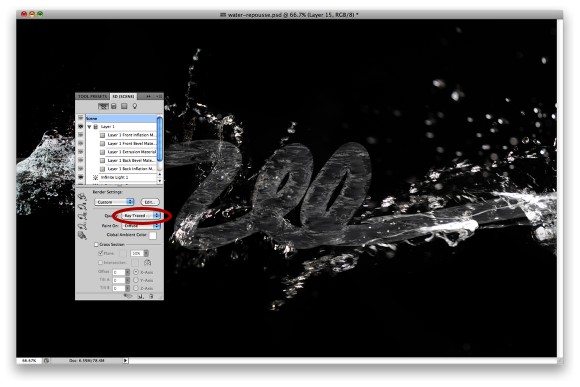
Step 8
Time to Render our 3D object. On the 3D Palette change the Quality to Ray Traced Final. It will take a few minutes to render the 3D object. If you want to change the lights you can do that and render it again until you find the best result.
Step 9
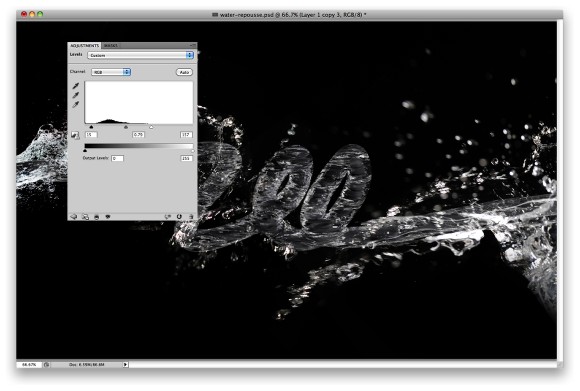
Duplicate the rendered 3D object and go to Layer>Rasterize>3D. I will rasterize the 3D object so I can apply some image adjustments, I could do that with the 3D layer but some wouldn't work the way I want or it can get a bit slow.
Add a new layer and fill it with black, then merge the black layer with the 3D rasterized layer. After that go to Image>Adjustments>Levels. Use 15 for the Black, 0.8 for the Grey and 160 for the White inputs.
Step 10
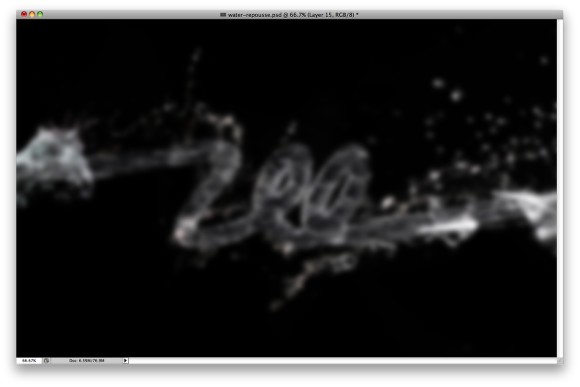
Select all layers and duplicate them. After that go to Filter>Blur>Gaussian Blur. Use 15 for the Amount. After that change the Blend Mode to Color Dodge and the Opacity to 30%.
Conclusion
Last year I created this effect using Cinema 4D to create the 3D part, which was really simple as well. However now with Repoussé in Photoshop CS5 Extended we can do everything, in this case the 3D part, in Photoshop. I have been playing quite a lot with Repoussé and there are lots of new things that we can create with this new tool, this water effect is an example. I hope you enjoyed it and now it's up to you.
Click on the image for full preview.
Download the Photoshop File
Click here to download the Photoshop file used for this tutorial.


