by abduzeedo
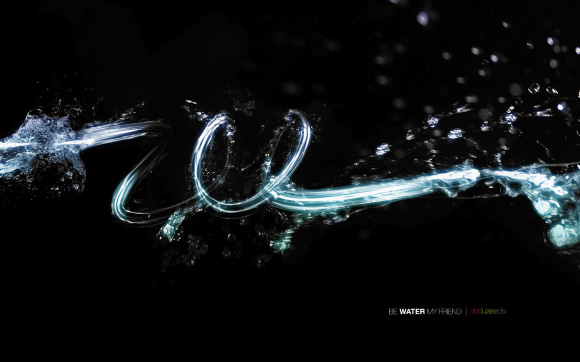
Yesterday it was raining and I decided to create a water effect. I didn't know what to do then I saw the desktop wallpaper I'm using, a image from the depthCORE Heist chapter created by Sumeco that we used of the Wallpaper of the Week 43. To create the effect, I had to use Adobe Photoshop, Illustrator and Maxon Cinema 4D.
So, in this tutorial I will show you how to create a water text effect. Even though it might look compex it's a very simple effect. We will use Illustrator for the text, then Cinema 4D to make it a 3D text and Photoshop to mix the 3D with some real photos to create a nice and realistic result.
Step 1
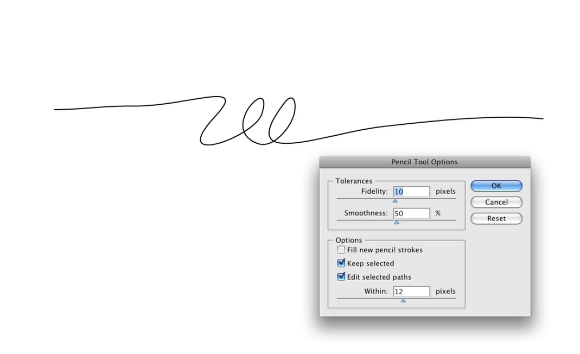
The first thing to do is create a hand writing with the text you want to use for the effect. I used Adobe Illustrator to write the text. Using the Pencil Tool (N), double click its tool icon to open the Pencil Tool Option. Use 10 pixels for the Fidelity and 50 % for the Smoothness. Save the Illustrator file, we will import it in Cinema 4D.
Step 2
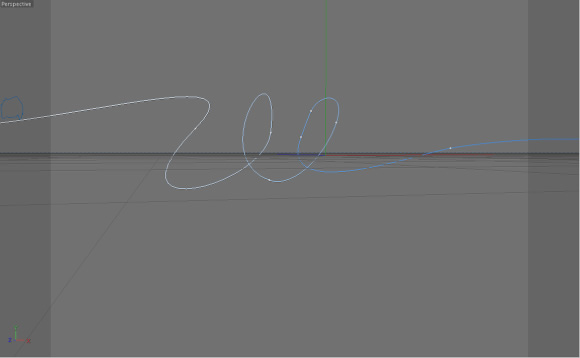
Open Maxon Cinema 4D and go to File>Merge. Select the Illustrator file to import it.
Step 3
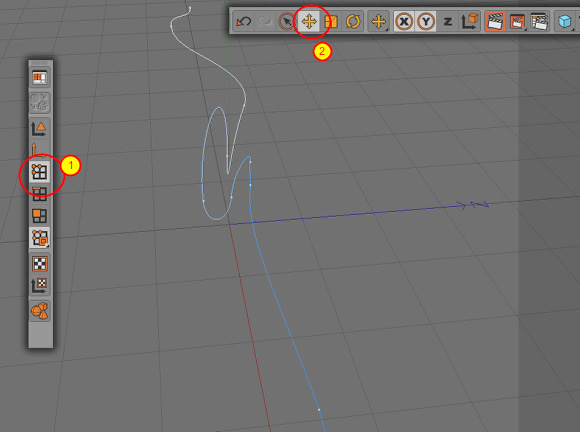
Let's edit the path just to add a bit of depth to it. In Illustrator we have a simple 2D path, now we can move in a 3D enviroment and that will give a nice effect. Select the Point Tool (1) and the just click and with the Move Tool (2), move the points, use the Axis arrows to make sure you are moving to the right direction and axis.
Step 4
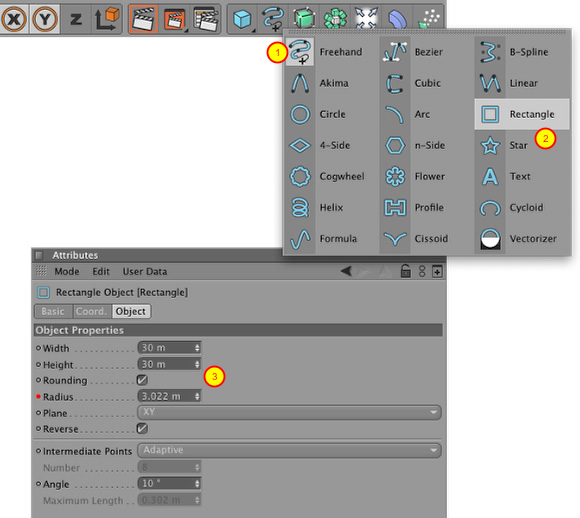
After you finish editing the path, add a rectangle. To do that click on the Draw a Freehand Spline icon (1) and select Rectangle (2). In the Attributes panel change the width and height to 30m, select Rounding and use 3m for it (3).
Step 5
Even though it might look a complicated, this step is quite simple. Click on the Add HyperNURBS Object icon and select Sweep NURBS (1). In the Objects panel you will have the 3 object layers, the Zee path, the rectangle and the Sweep NURBS. Move the path and the rectangle into the Sweep NURBS objects (2). Then in the Attributes panel use the image below for reference (3), but make sure that you change the Rotation.

Step 6
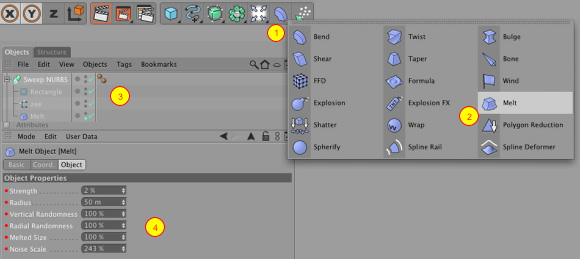
Now let's add a melting effect. Click on the Add Bend Object (1) and then select Melt (2). Again, drag the melt layer into the Sweep NURBS layer, (3) it wil be right below the Zee path. With the Melt Object selected go to its Attributes panel and play with some values. There isn't any fixed value, they will depend on the size of your text path. You can use the ones I used from the image below (4).
Step 7
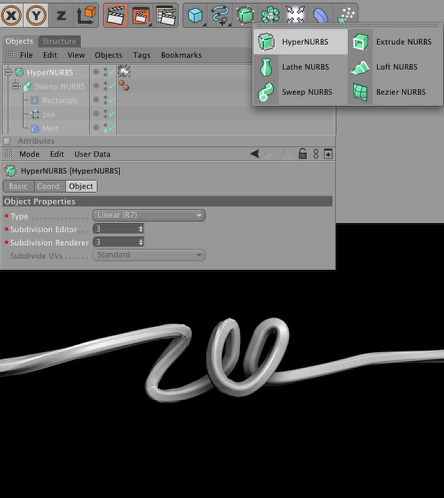
The object is getting quite nice, but there's still some adjustments to be done. Let's make it a little smoother and then add a nice water texture. So click on the Add HyperNURBS Object icon and select HyperNURBS (1). In the Objects panel click and drag the Sweep NURBS group of layers into the new HyperNURBS layer (2). In the Attributes panel for the HyperNURBS object change the Subdivisions to 3 and use Linear (R7) for the Type. Render the Perspective View to see how it's looking. Tip: Change the angle and distance of the view by dragging the icons on the top right hand corner of the preview window.
Step 8
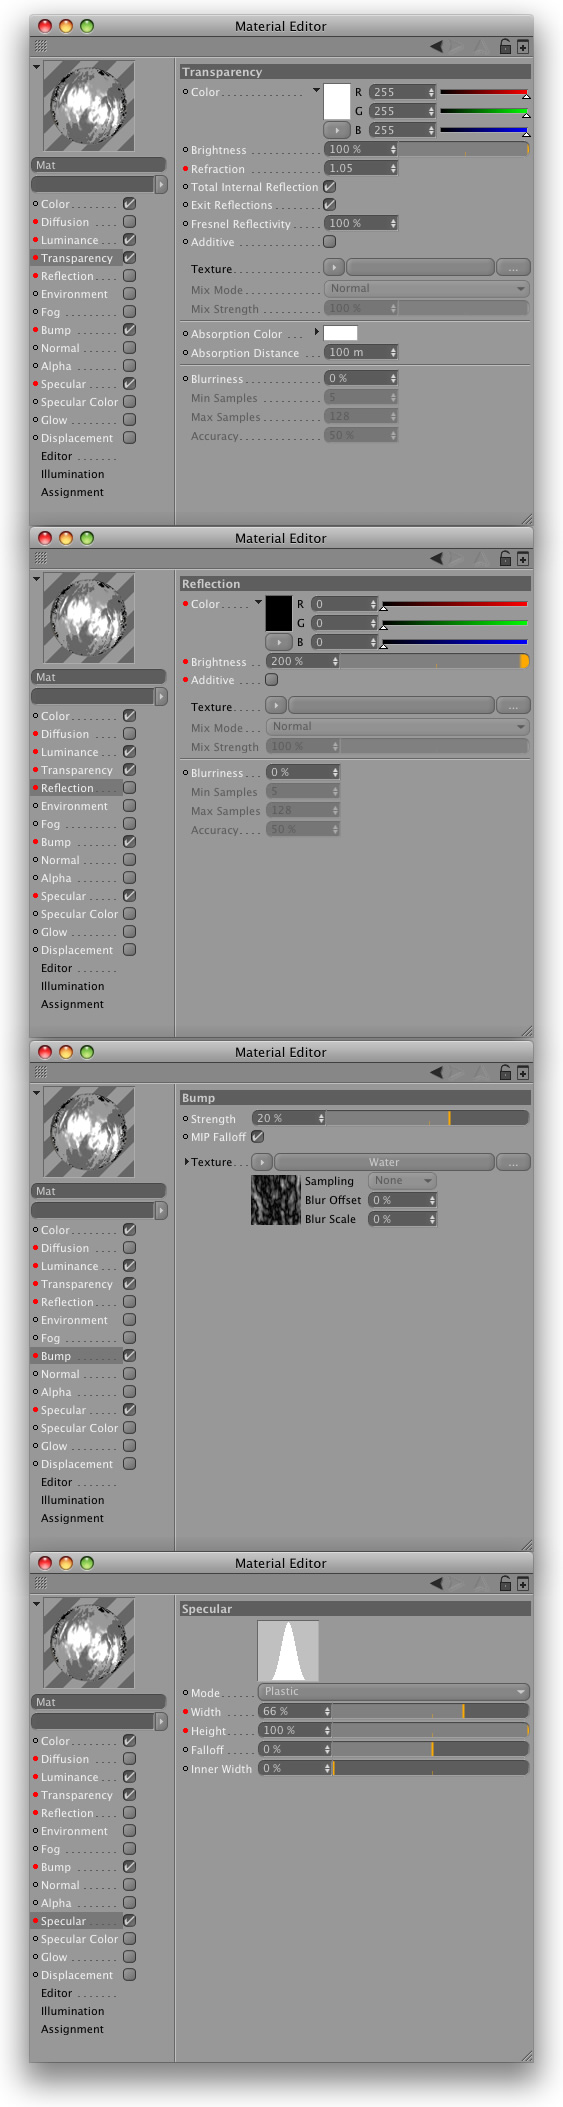
The material we will use to create the water is very important. In the Material Panel go to File>New Material. Then double click on the material icon to open in a new window. Select the Color, Luminance, Transparency, Bump and Specular. Use the image below for values and settings references. TIP: for the BUMP click on the arrow button next to Texture, click on it and select Surfaces>Water. That will use a water map for the Bump.
Step 9
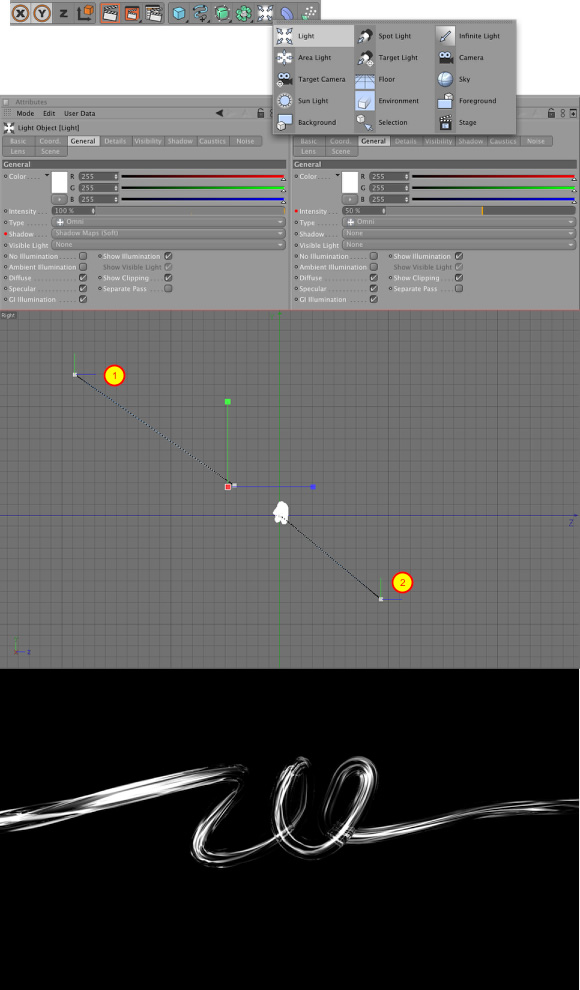
Click on the Add Light icon and add 2 new lights. Both will be Omni but make one 100% intensity and the other 50%. For the Shadow select Shadow Maps (soft). Then move the 100% intensity light to the top of the object (1) while the other light move to the bottom and behind the object(2). Render the Perspective view to see how it's looking. It's supposed to be alright and ready to be exported.
Step 10
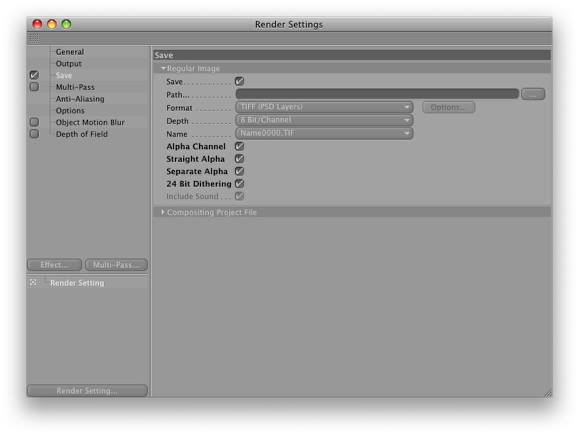
Go to Render>Render Settings and select the Save option. Select Alpha Channel, Straight Alpha, and Separate Alpha. For the Output select Scree>1920x1200 pixels. Then just go to Render>Render to Picture Viewer. After that save it and let's go to Photoshop.
Step 11
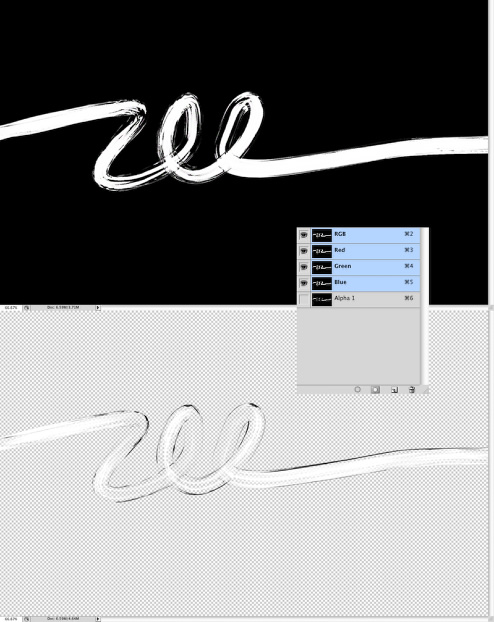
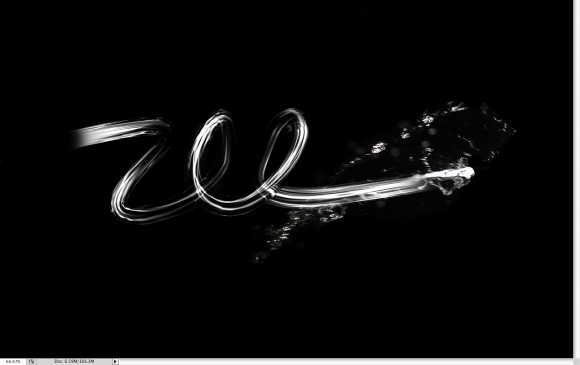
Open Adobe Photoshop and the image rendered in Cinema 4D. The first thing to do is to go the Channel palette and then holding Command(MAC)/Control(PC) click on the thumbnail of the Alpha 1 to load the channel as selection. After that go back to the Layer Palette and select the layer and go to Layer>Layer Mask>Reveal Selection.
Step 12
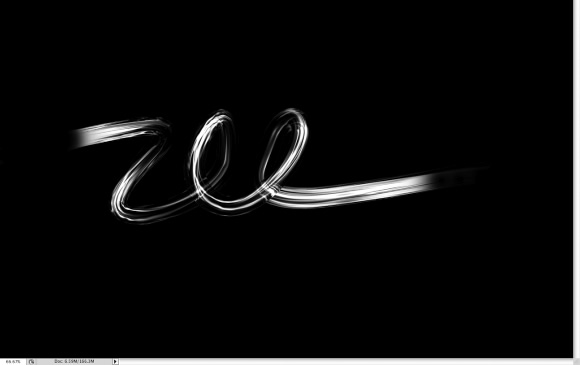
With a very soft rounded brush and black for the color, paint over the mask to hide more parts of the image, use the image below for reference. We will place now some real water photos to give a very realistic feeling to the image.
Step 13
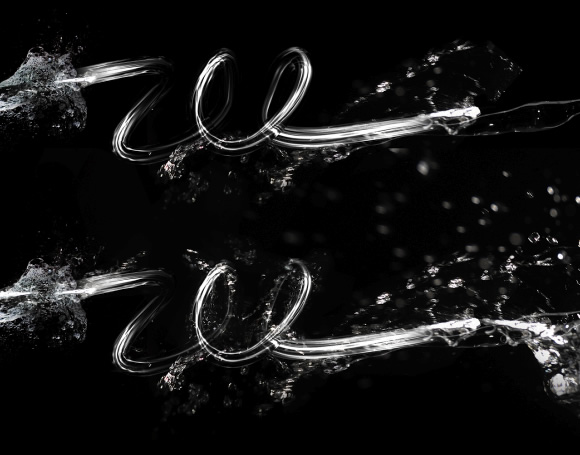
Over at http://sxc.hu search for water splash and download the photos of water with black background, below I showed the ones I used. Place them in your design and always use Screen for the Blend Mode, that way the black will be transparent.

Step 14
Start copying some parts of a photo and place them in the areas of the image we had hidden.
Step 15
Keep adding the small splash. You can go to Edit>Transform>Warp to change some forms, also with the Eraser Too (E) delete some areas of the splash to make it look real. It's all about details.

Step 16
Now add the big splash, for me it's easier that way because it's easier to avoid overload the image with elements. Again make sure you use Screen for the Blend Mode.
Step 17
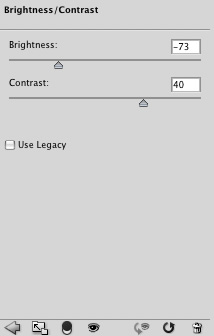
Select all layers and group them. Duplicate the group and go to Layer>Merge Group. Then go to Filter>Blur>Gaussian Blur. Use 20 pixels for the Radius. After that change the Blend Mode of the layer to Screen as well. The blur with the blend mode will add a nice glow effect, however it's going to be necessary to reduce a bit of the brightness and increase the contrast. Go to Layer> New Adjustment Layer>Brightness and Contrast. Use -75 for the Brightness and 40 for the Contrast.
Conclusion
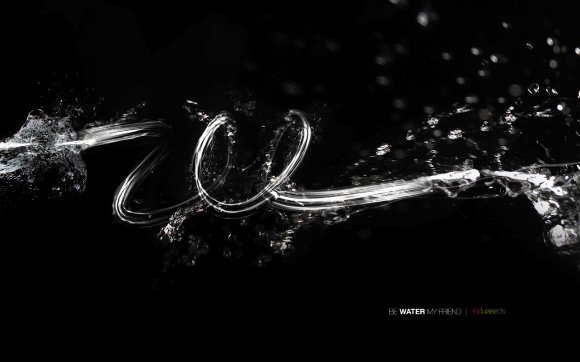
Just add you logo or any text and that's it, we're done. Because of the beautiful outcome,you make think it's a very complicated effect, but the process is quite simple. Probably there are ways to do the text using only the blend tool in Illustrator and not use Cinema 4D but it's always good to know how to use 3D tools. As I said, the process is all about matching photos with a 3D object. I hope it can help you because it helped me a lot in my endeavour to learn more about 3D.
Version 2
To add some color to the image just add a Gradient Overlay via Layer Styles to the layer we applied the Gaussian Blur in the Step 17. Use Multiply for the Blend Mode of the Gradient Overlay then.