by abduzeedo
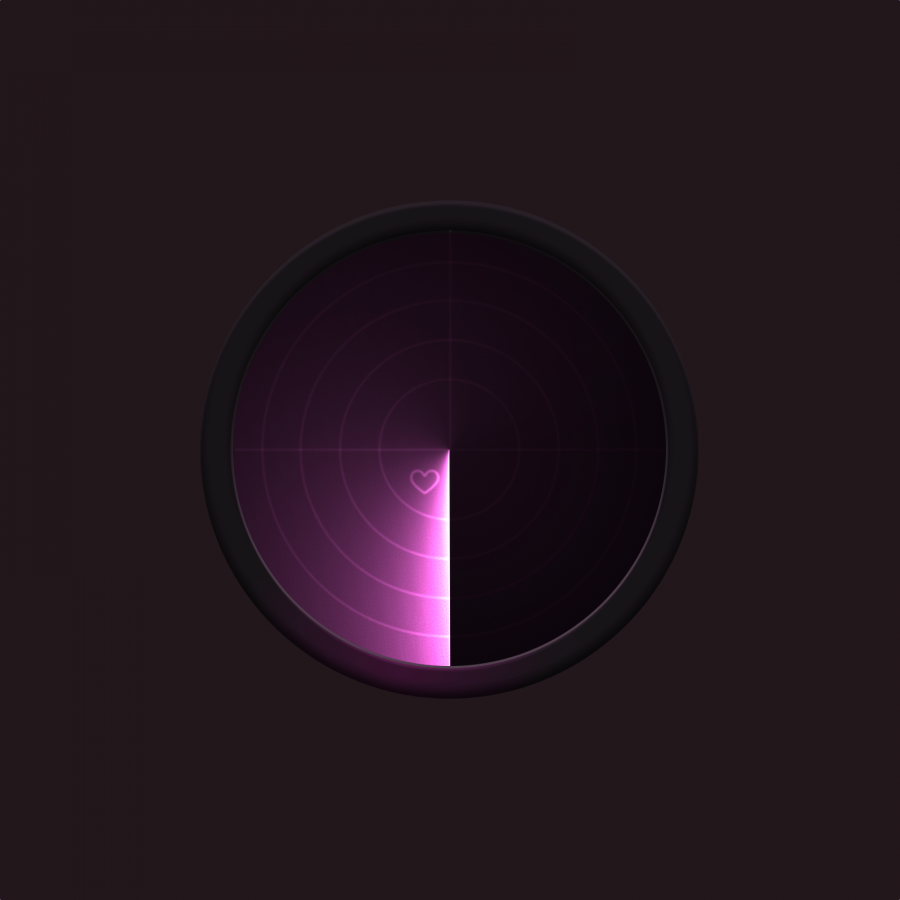
In this tutorial I will show you how to create a very nice image inspired by the amazing work of Andy Gilmore. If you don't know who he is, I highly recommend you to check his work out. He creates images combining vectors and blend modes to create astonishing designs, and that is what we are going to do. We will use Illustrator and Photoshop in this tutorial.
Step 1
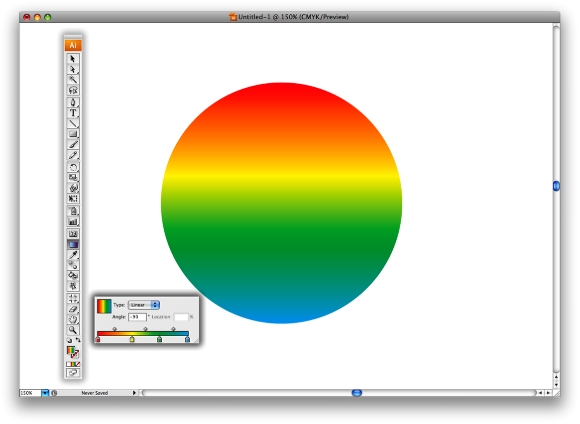
The base for our design will be done in Illustrator. Open Illustrartor and with the Ellipse Tool (L) create an ellipse, then select the Gradient Tool (G) and add a Gradient. Use Linear type, -90º for the angle and red, yellow, green, and blue for the color.
Step 2
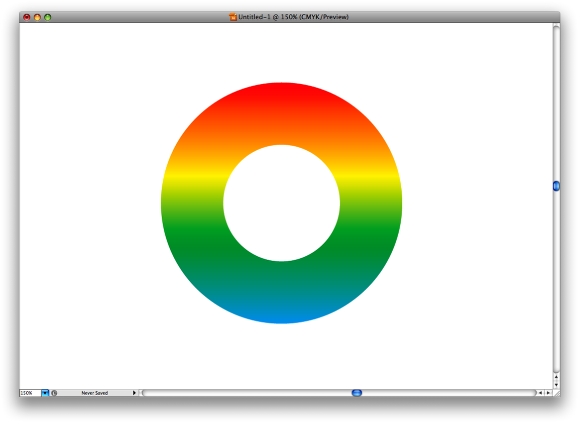
Create another ellipse, much smaller this time. Fill it with white and align it in the center of the big circle.
Step 3
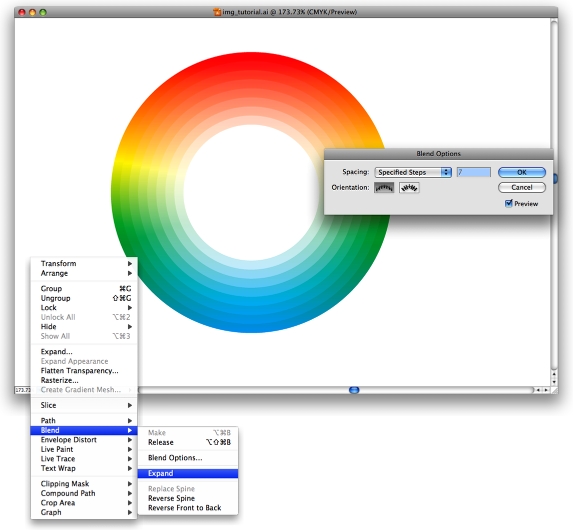
Select the Blend Tool (W) and create a blend from the 2 circles. Just click on the first than on the second. After that double click on the Blend Tool icon and change the Blend Options. Use Specified Steps for the Spacing and 7 steps.
The last thing here, go to Object>Blend>Expand it will break the blend and you will be able to select all steps of the blend. Then just go to Object>Ungroup.
Step 4 - Photoshop
Now copy each element from Illustrator and paste in Photoshop in different layers. That will be necessary to create add a layer mask to each element.

Step 5
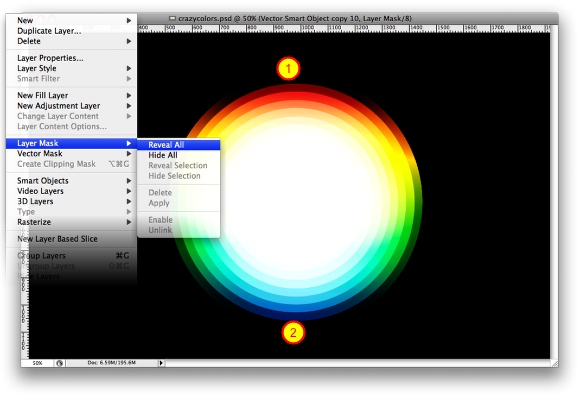
Now select the biggest circle and go to Layer>Layer Mask>Reveal All. Then select the Brush Tool (B) a regular brush, very soft, like 0% Hardness. The select black for the color and paint the mask to hide some areas (1-2).
Step 6
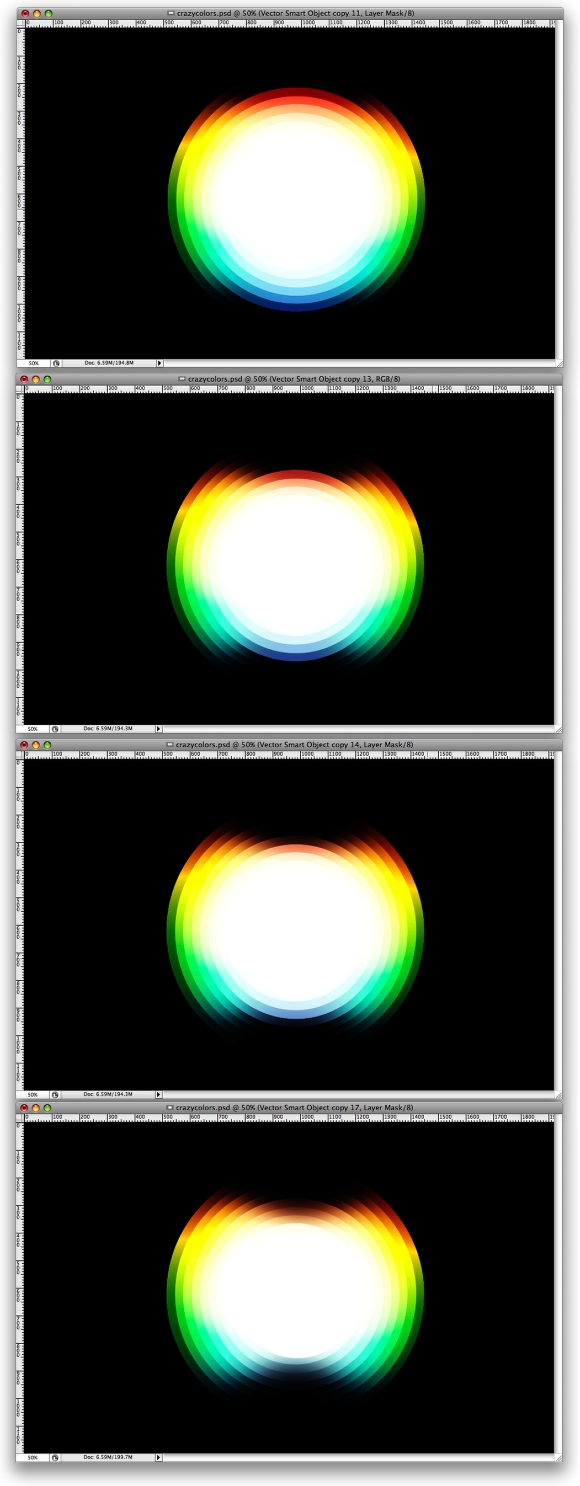
Now just repeat what we did in the previous step to all the other circles. But use smaller brushes to each one.
Step 7
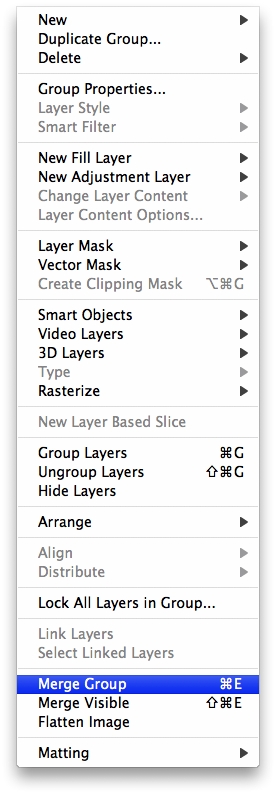
Group all circles and merge the group, to do that just go to Layer>Merge Group.
Step 8
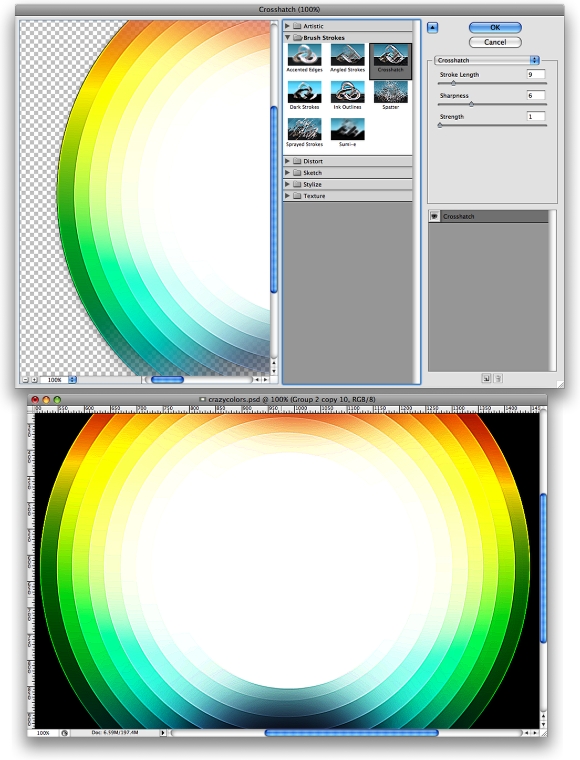
Select the merged layer and go to Filter>Brush Strokes>Crosshatch. Use 9 for Strong Lenght, 6 for Sharpness, and 1 for Strong.
Step 9
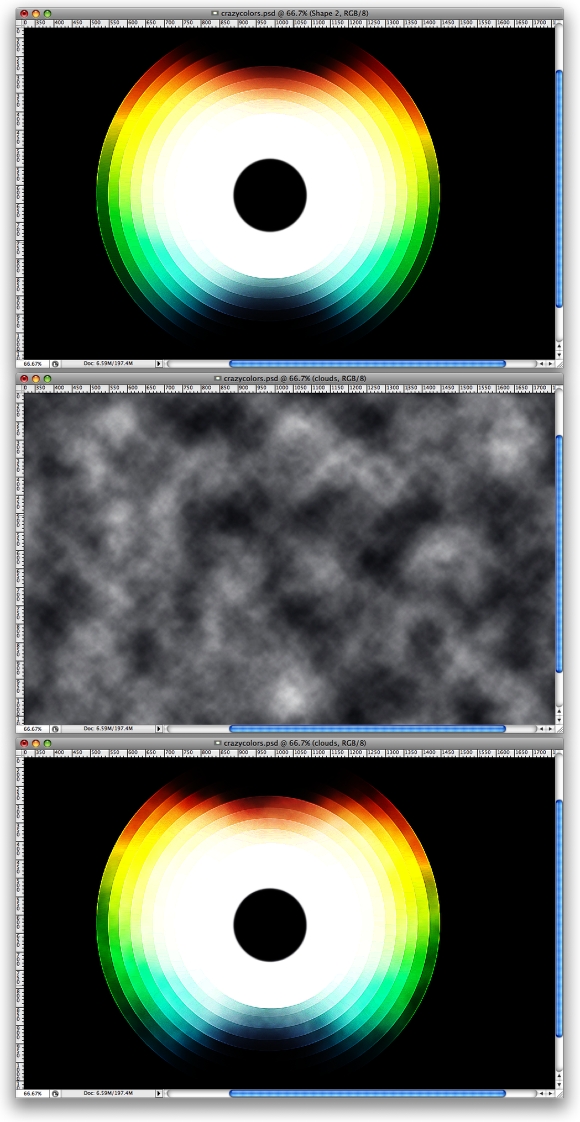
First lets create a small circle, select the Ellipse Tool (U) and make sure that you select the Shape Layer option. Then create the circle using black for the color and align it in the center of the other circles.
Then, create a new layer and go to Filter>Render>Clouds... make sure you used black and white for the colors. Change the Blend Mode to Overlay.
Step 10
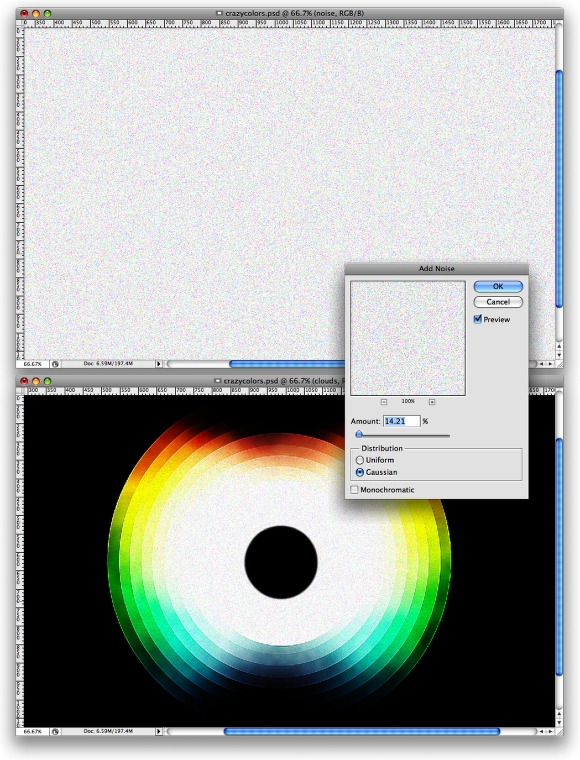
Now create a new layer on top of the others and fill it with white. After that go to Filter>Noise>Add Noise. Use 14% for the Amount and Gaussian for the Distribution.Then change the Blend Mode to Multiply.
Conclusion
Just group the black circle with the circle layers and then duplicate it. Change the Blend mode to Screen and position the new group next to the other but let a part of it over the other circle. That will create a nice blend of colors.
In this tutorial we learned how powerful is the Blend Tool in Illustrator, and combined with all the things we can do in Photoshop, we can create very cool images blending vectors and colors. Now it's up to you.
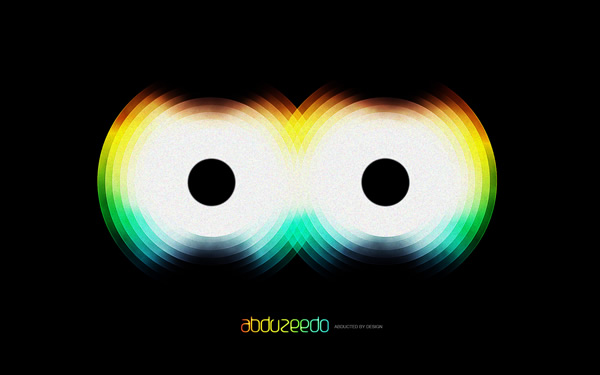 Click on the image to see the Full Preview.
Video Example of this tutorial
This is just an example of how to create some cool vector blends using Illustrator. Instead of creating the circles I will use stars.
Crazy Cool Vectors in Illustrator and Photoshop from fabio sasso on Vimeo.



![Neon light effect in Photoshop [revisited] Neon light effect in Photoshop [revisited]](/sites/default/files/styles/square_1x1/public/originals/hero_neon.png?itok=lP4mbIak)
