by abduzeedo
We are heading to the last weeks of 2012 and nothing better than getting ready for the new year with a Photoshop tutorial playing with the number 2013. The inspiration for this image was, of course, from one of the trends of 2012: chalkboard typography with ornaments.
So in this tutorial, we will try to create stylish ornament typography and then apply a chalkboard effect using Adobe Illustrator, Photoshop and some vector ornaments. The whole process is simple but time-consuming, so I would take at least 3 hours to recreate this design.
Step 1
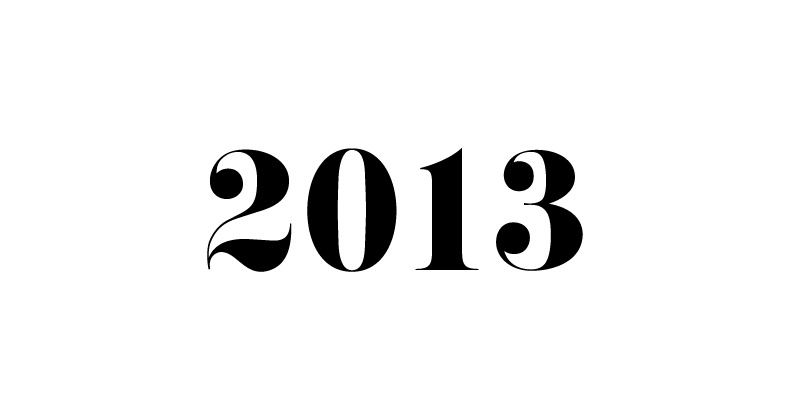
Open Adobe Illustrator and create a new document. With the Type Tool (T) add the text 2013. I am using a free font called Pistilli Roman, you can download it at http://www.dafont.com/pistilli-roman.font?text=2013
Step 2
Time to add some ornaments. There are several places you can download ornaments, the ones I am using are courtesy of Shutterstock. The file is title Set of vector graphic elements for design by iana.
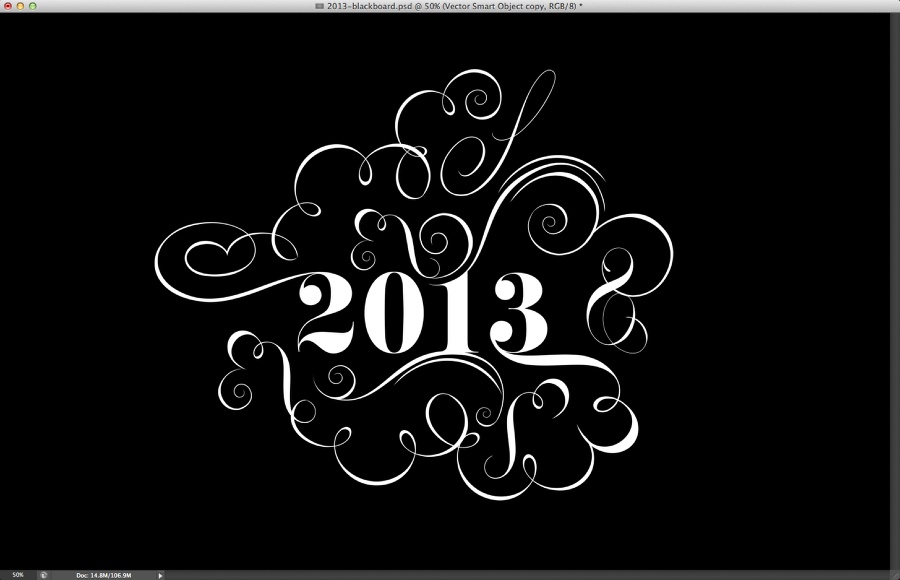
Start adding ornaments trying to match the letter design, in this case, the numbers.

Step 3
Keep adding more details. Remember to always make the transition of these ornaments as smooth as possible.

Step 4
You can duplicate the same ornament a few times and connect them.

Step 5
Add more ornaments until you few you have a balanced composition.

Step 6
The last thing to do is to add the final details like swirls at the end of most of the ornaments.

Step 7
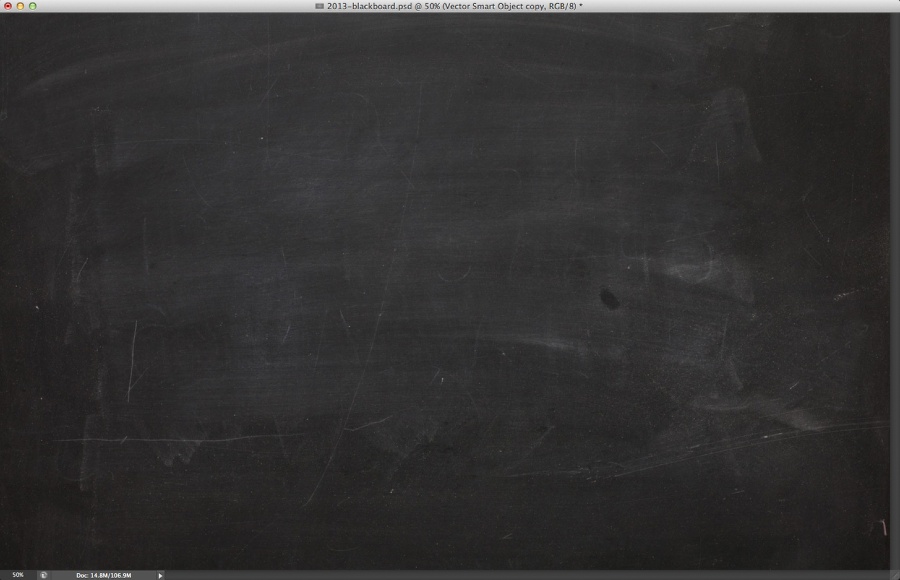
Now in Photoshop, create a new document. I am using 2880x1800 pixels. After that search for a blackboard image to place as the background of your design.
Step 8
Copy the graphic you created in Illustrator and paste it in Photoshop. Also, add a layer and fill it with black. After that duplicate the 2013 graphic and merge it with the black background.
Step 9
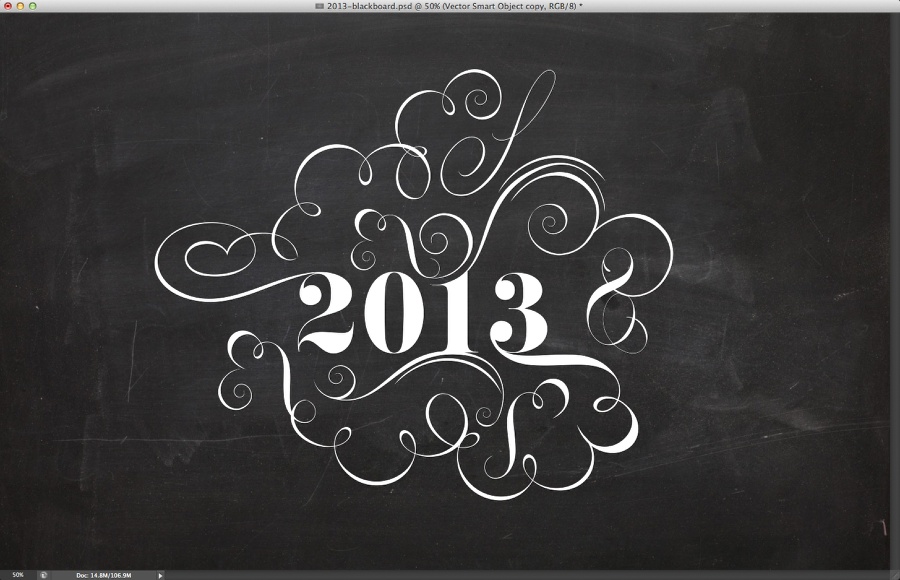
Change the Blend Mode of the merged object to Lighter Color.
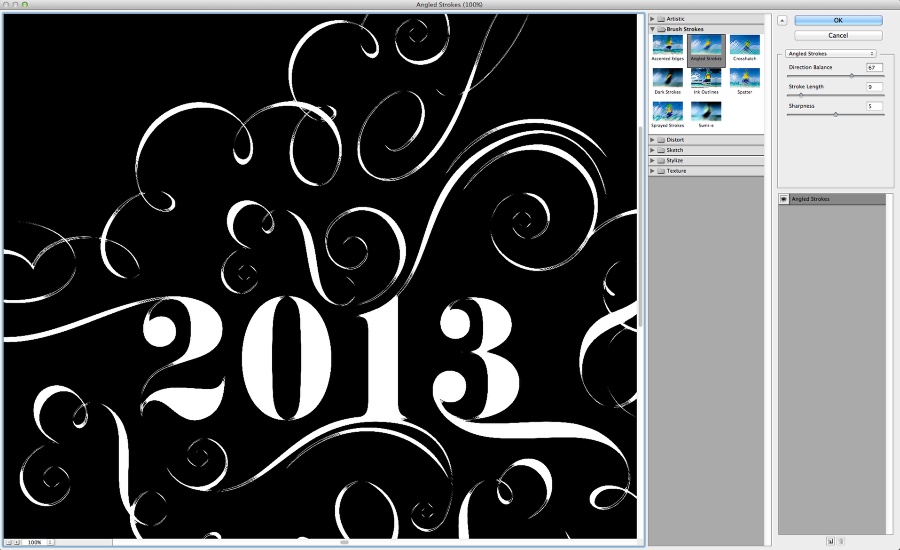
Step 10
Go to Filter>Filter Gallery>Angled Stroke. Use 67 for the Direction Balance, 9 for the Stroke Length and 5 for the Sharpness.
Step 11
Add a mask and then with the Brush Tool (B) using a textured brush, paint with 30% black on the mask to make the white less uniform.
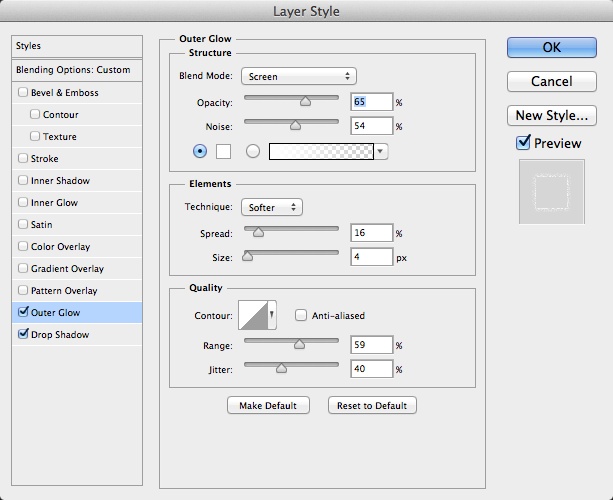
Step 12
With the other layer with the 2013 graphic on top of the other layers, go to Layer>Layer Style>Outer Glow. Use the image below for the values.
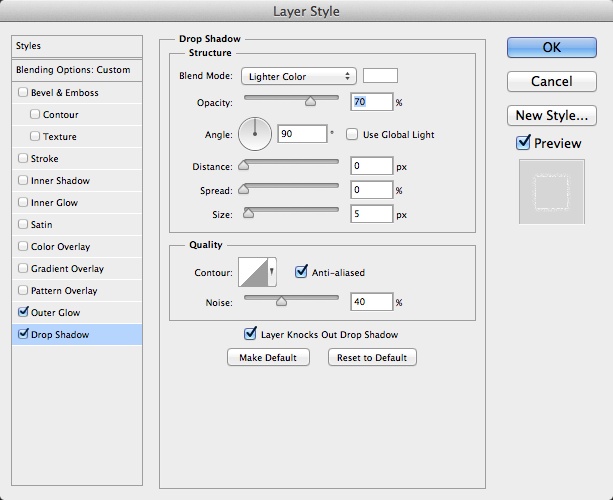
Step 13
After that select Drop Shadow. The idea of these 2 layer styles is to create a sort of chalk effect.
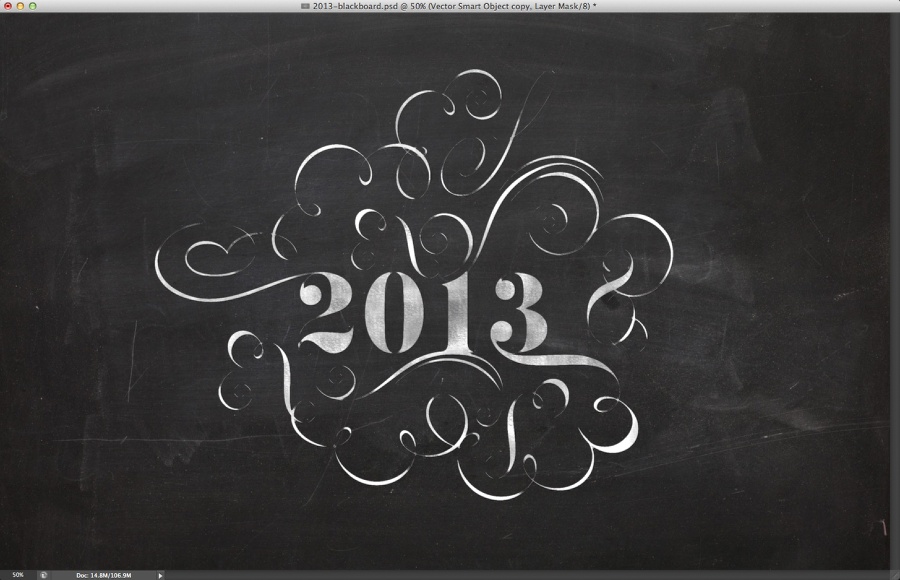
Step 14
Here is the effect you might have after these steps. After that change the Blend Mode of the layer with layer styles to Dissolve.

Step 15
Select all layers and duplicate them. Merge the duplicated layers into one and then go to Filter>Blur>Gaussian Blur. Use 5 pixels for the radius. After that change the Blend Mode to Soft Light at 50%. Duplicate the layer again and change the Blend Mode to Screen.
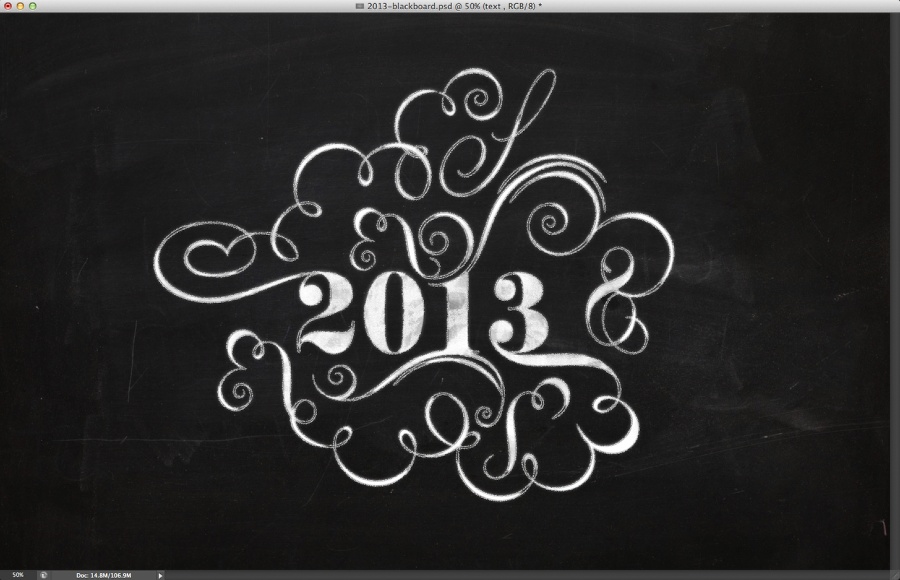
Add your logo in the end and if you want you to add some noise and using adjustment layers reduce the contrast. But that is up to you. The idea here was just to create a nice chalkboard effect using Photoshop and Illustrator.