Stylish Light in Cinema 4D and Photoshop Tutorial
Following my Cinema 4D tranining I started playing with lights and illumination. It's amazing what we can do using Global Illumination. We can turn a simple scene into a very realistic render with complex light and shadows. Also, I've used Adobe Photoshop to add some post production effects.
In this tutorial I will show you how to create a scene inspired by those gangster movies and of course the great depthCORE chapter NOIR. We will use Cinema 4D to create the scene and then in Photoshop we will add the gangster and other effects.
Step 1
Open Cinema 4D and click on the Draw Freehand Spline (1). Type the word you want to use. In my case, I wrote "Light". Also adjust the scene perspective using the the window icons (2).

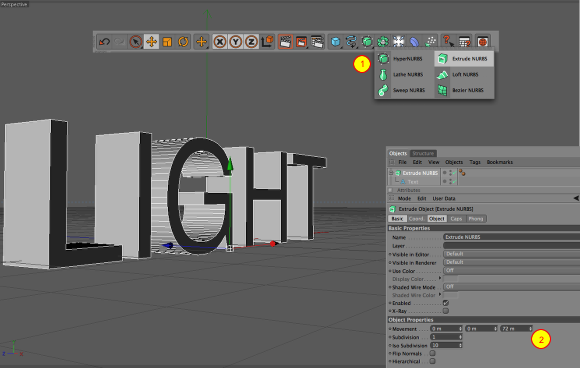
Step 2
With the spline text created, we need to make a solid 3D object from it, to do that, let's use the Extrude NURBS tool. Click on Add HyperNURBS Object and select Extrude NURBS (1). Then move the text layer into the ExtrudeNURBS object in the Objects panel. For the Extrude setting, use 0, 0 and 72m for the movement (2).
Step 3
Let's create the scene now, click on the Add Cube Object. Then go to Function>Make Editable. After that, with the Scale Tool (T) make the cube much bigger, it will be the room where the light text will be inside. Use the image below as reference.

Step 4
Now we need to create a door where the light will come from. To do that add other cube, move it like in the image below.

Step 5
Click on the Add Array Object(1) and select the Boole object (1). Then you will have to move the Box and the Door objects into the Boole Object (2), the process is the same as we did to extrude the text. In the Object Properties change the Boolean Type to "A without B". The order of the objects in the Boole object is very important: make sure that the Box is over the Door layer.

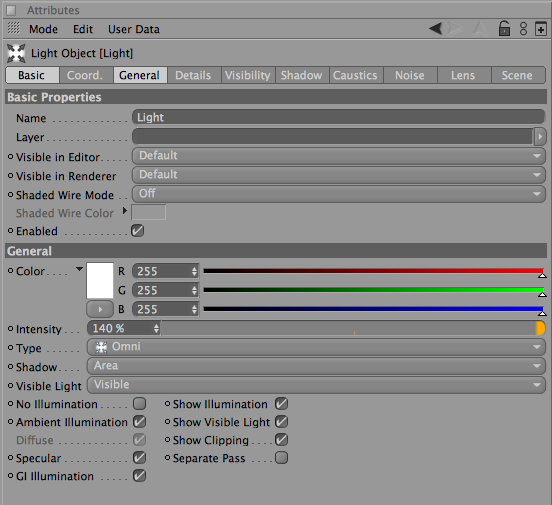
Step 6
This is the most important part of the tutorial, we'll play with the illumination. Let's add a light, in this case, I'm gonna use a single one. Click on the Add Light Object. The kind of light we're about to use is Omni. You will have to position the light to make sure that it will lit up the room the way we want. Render a few times until you have it in the right position, or use the image below for reference.

Step 7
For the light settings I've used 140% Intensity and selected the Amient Illumination. For the Shadow use Area and for the Visible Light use Visible.
Step 8
This is a regular render, without Global Illumination. It's impossible to see the walls and the light text.

Step 9
Go to Render>Render Settings. In the Render Settings box, select the Global Illumination option. Let's just increase the Primary Intensity to 120%. Now Render the scene and compare. Even though the render will take lnoger, the result is much better.
Again in the Render Setting box, go to Output and select the Preset: Screen>1920x1200. Render and save the image.

Step 10
Open the render scene in Photoshop and go to Layer>Layer Style>Pattern Overlay. For the Pattern, select the Light Marble 200x200. Also, change the Blend Mode to Overlay and the Opacity to 70%.

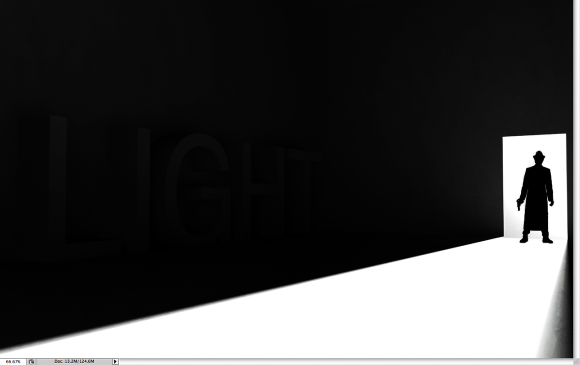
Step 11
Let's use an image from iStockphoto.com, you can download it at http://www.istockphoto.com/stock-photo-3201285-gangster-silhouette.php. Place the image in front of the door like the image below.
Step 12
Duplicate the layer and then go to Edit>Transform>Distort. Adjust the perspective following the perspective of the light. Use the image below as reference.

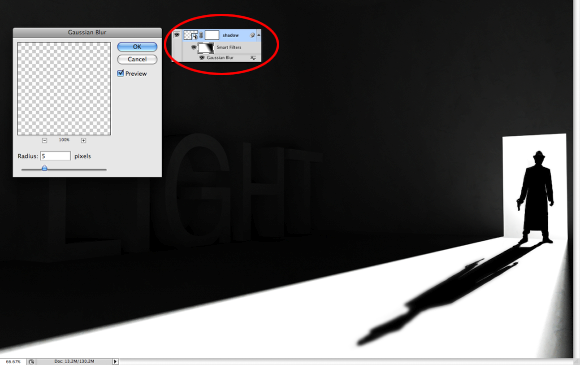
Step 13
Convert the shadow layer to Smart Objects. Then go to Filter>Blur>Gaussian Blur. Use 5 pixels for the radius.
You will notice that in the shadow layer in the Layer Palette there's a white thumbnail inside the layer, the name is "Smart Filters". That thumb behaves exactly like a regular mask, but for the filters. So select the Gradient Tool (G) and black and white for the colors. Then fill the thumb with the gradient. The black part will hide the fliter while the white will show it. That way we can make the shadow more blury as far as it gets from the guy.
Step 14
Add another layer and go to Filter>Render >Clouds. Change the Blend Mode to Screen and the Opacity to 20%. After that, with the Eraser Tool (E) delete almost the whole layer, just leave the clouds near the door. Use the image below for reference.

Conclusion
The idea behind this tutorial was to share with you some of my experiments while I'm learning and practicing Cinema 4D. The image is inspired by the depthCORE chapter NOIR which had only black and white images and some had the gangster subject. But again, the purpose of the image was to test the global illumination feature in the Cinema 4D. In Photoshop we added a few nice effects. Hope you liked it ;)
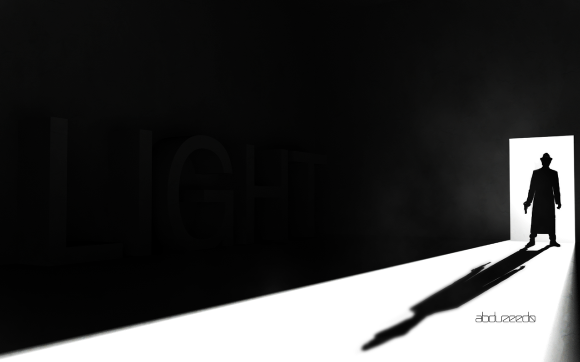
Click on the Image for Full Preview.
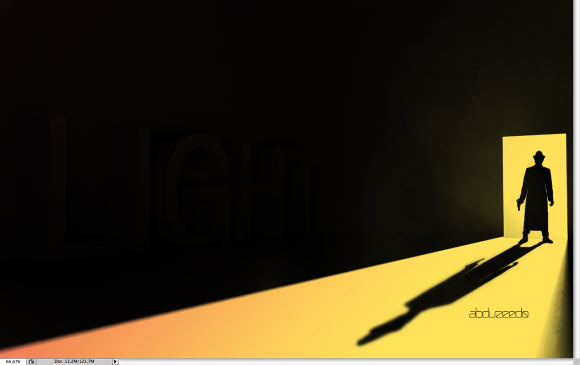
Another Version
You can play with some colors to create a cartoon style.
Download the Files
