by abduzeedo
The new season of Heroes is on and it's really good. While I was watching the last episode I saw the opening credits and I thought to myself, why I haven't done that effect yet. So I decided to create the Heroes eclipse effect in Photoshop with a litle extra retro style.
So in this tutorial I will show you how to create a nice eclipse effect using only Photoshop. We will add a texture in the end just to give that retro feel to the image.
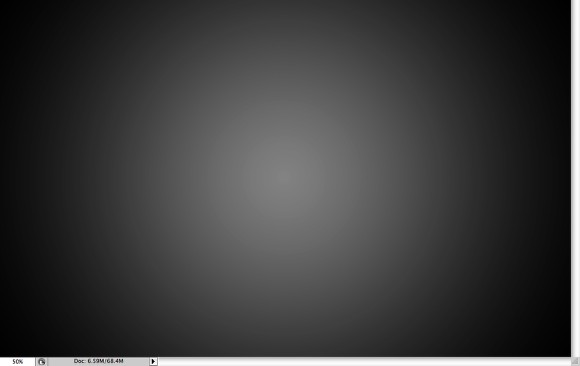
Step 1
Open Photoshop and create a new document. Add a new layer and with the Gradient Tool (G), fill the background with a Radial Gradient from black to a very light grey in the center.
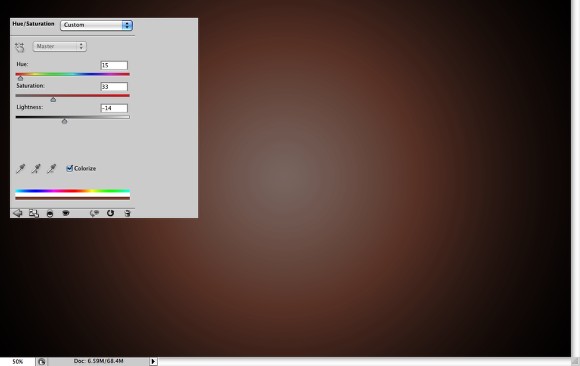
Step 2
Go to Image>Adjustments>Hue and Saturation. Use 15 for the Hue, 35 for the Saturation and -15 for the Lightness.
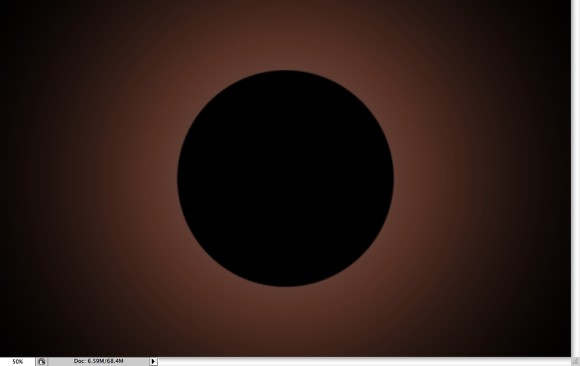
Step 3
With the Ellipse Tool (U), create an ellipse in the center of the image.
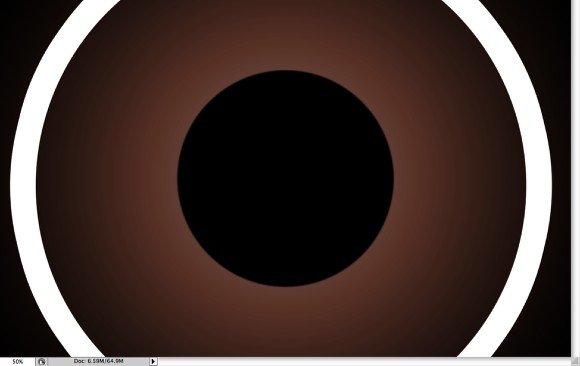
Step 4
Again with the Ellipse Tool (U) create a bigger ellipse. Then go to Layer>Layer Style>Stroke. Use 60px for the Radius and white for the color. Then go to Layer>Layer Style>Create Layer. That command will create a layer with the Stroke. So select the 2 layers that will have for the ellipse with stroke and go to Layer>Merge Layers.
After that duplicate this layer because we will need 2 copies of it.
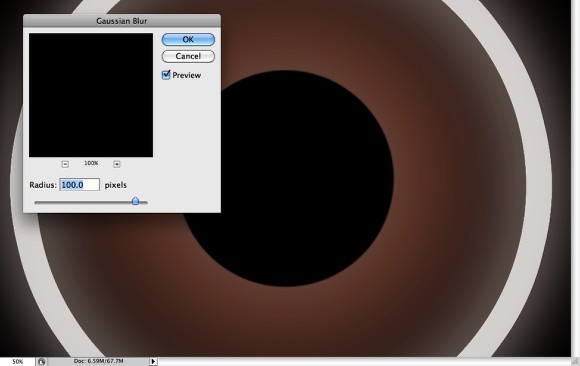
Step 5
Select one of the "ring" layers and go to Filter>Blur>Gaussian Blur. Use 100 pixels for the Radius. Also change the Blend Mode to Screen.
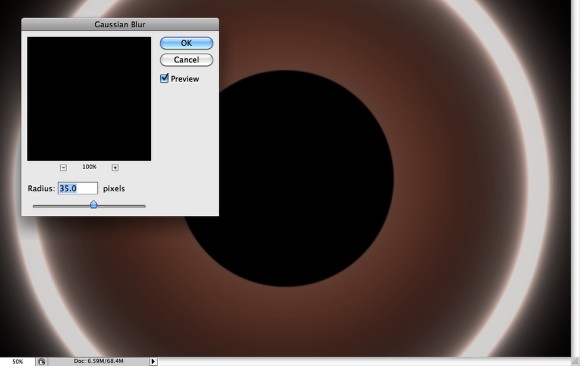
Step 6
Add a new folder in the Layer Palette and move the other ring into this folder. Change the folder's Blend Mode to Color Dodge, then select the ring layer and go to Filter>Blur>Gaussian Blur. Use 35 for the Radius.
Step 7
Add a new folder in the Layer Palette right on top of the gradient layer. Then change the Blend Mode of the folder to Color Dodge. After that add a new layer inside the folder and with the Brush Tool (B), use white for the color and a big soft brush to create the light behind the black circle.
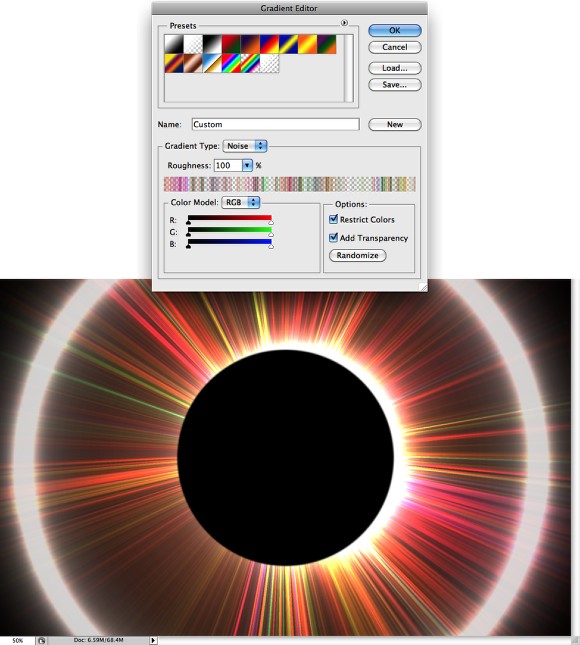
Step 8
Add another layer still inside of the folder we have just created the light beneath the black planet. Select the Gradient Tool (G) and edit the gradient. Change the Type to Noise, the Roughness to 100% and select Restrict Colors and Add Transparency. Fill the new layer with the gradient like the image below.
Step 9
Go to Image>Adjustments>Hue and Saturation. Reduce the Saturation to -100. After that go to Filter>Blur>Gaussian Blur. Use 20 pixels for Radius.
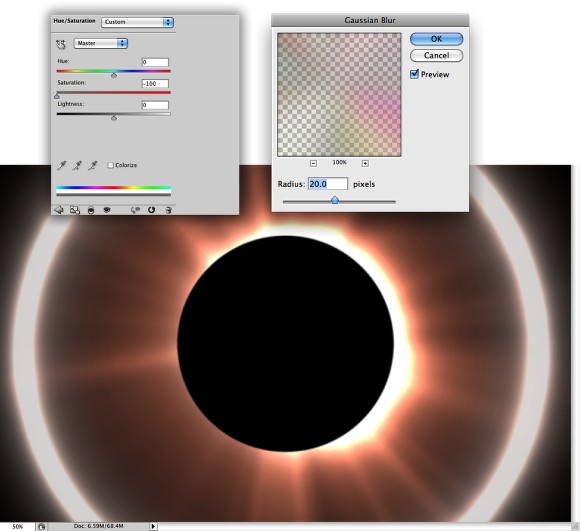
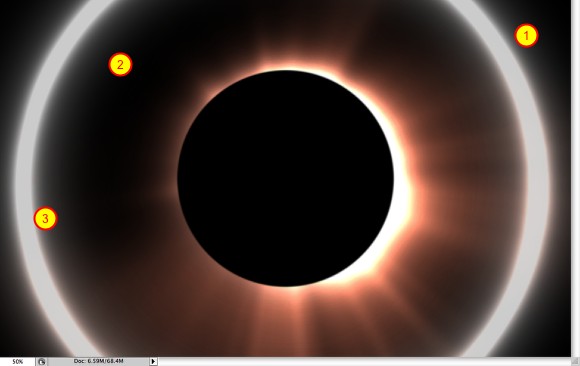
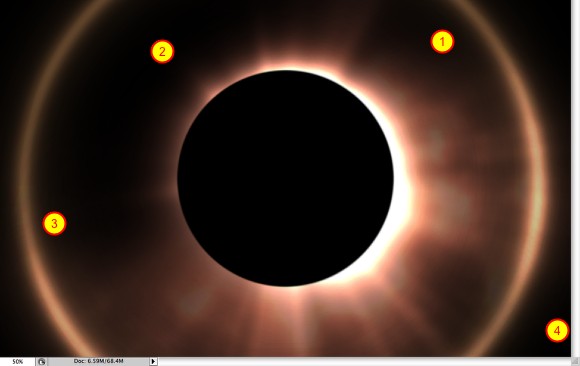
Step 10
Select the Folder with the light layers and go to Layer>Layer Mask>Reveal All. Then select the Brush Tool (B) with a very soft brush and black for the color. Start painting over the Layer Mask to hide some parts of the layer (1-3)
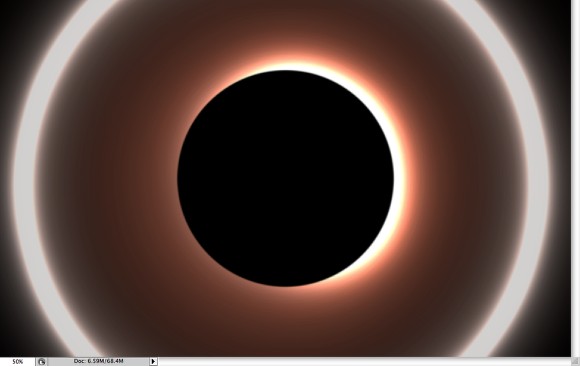
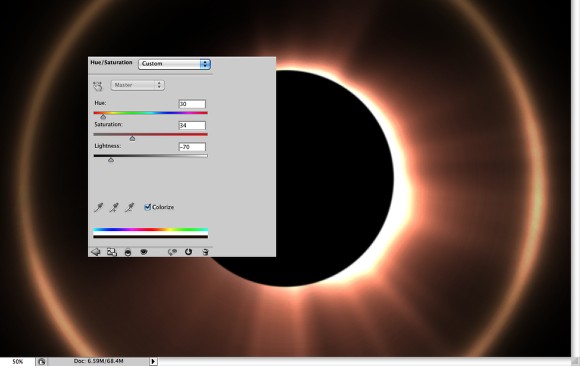
Step 11
The ring of light is too white so lets add some color. Select the layer with the ring of light that you applied more blur (Step 5), then go to Image>Adjustments>Hue and Saturation. Use 30 for the Hue, 35 for the Saturation and -70 for the Lightness.
Step 12
Add a new layer on top of the other layers and go to Filter>Render>Clouds. Change the Blend Mode to Color Dodge and the Opacity to 20%.
Step 13
With the Eraser Tool (E) delete areas of the smoke as well (1-4). The idea is just to add some noise and waves to the lights.
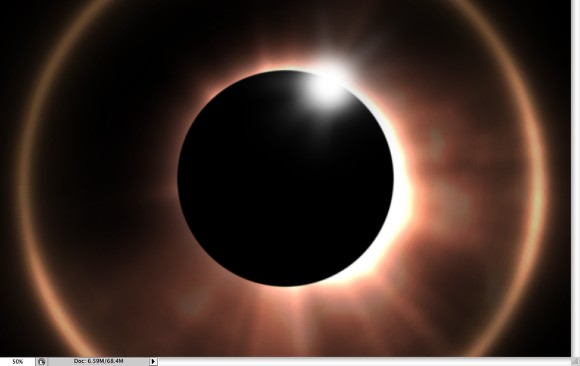
Step 14
Now, add a layer on top of the black ellipse. Then with the Brush Tool (B) paint a light at the top right corner of the ellipse. You can, also, add another layer and repeat the Steps 8 and 9 to create some rays of light. But start the gradient from the center of the light effect and not the document's
Step 15
Add another layer on top of the others and fill it with a beige color (#B59071), then change the Opacity to 20%.
Step 16
Import an old paper texture and put it on top of the other layers. The one I used was a courtesy of Shutterstock and you can download it here. After that change the Blend Mode to Overlay.
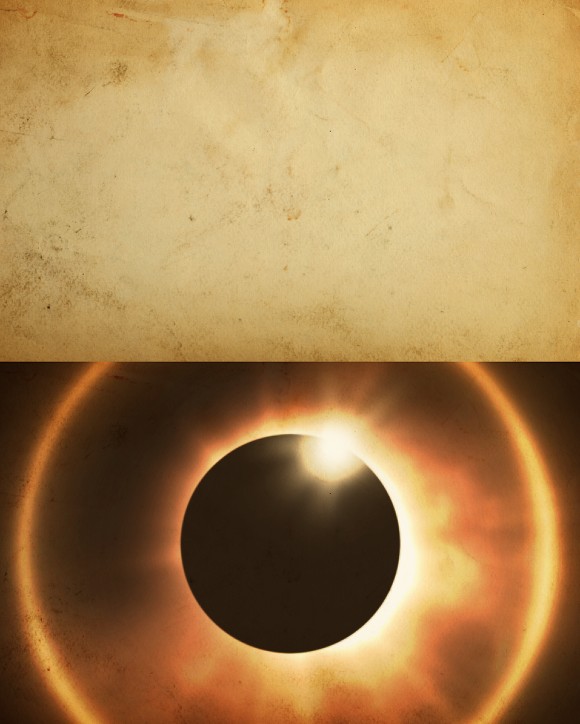
Step 17
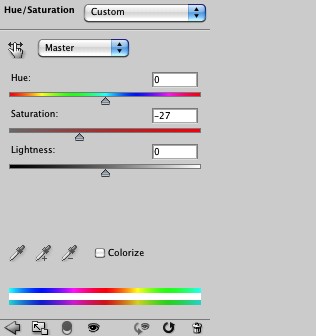
Go to Layer>New Adjustment Layer>Hue and Saturation. Use 0 for the Hue, -25 for the Saturation and 0 for the Lightness.
Step 18
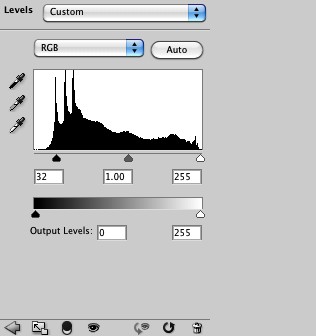
Now go to Layer>New Adjustment Layer>Levels. Increase the Black input to 30. That will make the image darker.
Conclusion
The whole process won't take more than 30 minutes and it's pretty straightforward. The idea of this tutorial was to show you how to create some light effects first using greyscale and then with the Hue and Saturation we add nice colors. Now it's up to you, it's really important that you try different settings and colors as well.

Click on the Image for full preview.


