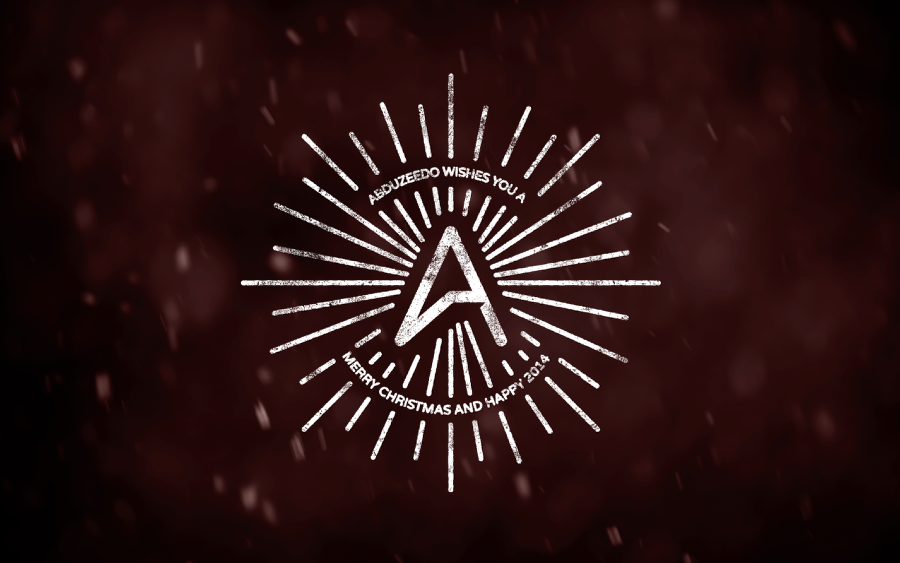
by abduzeedo
One of the best ways to learn is by practicing and trying to recreate styles and effects that you like. We have been doing this here on Abduzeedo since the beginning, always adapting a little bit to add our own unique flavor. The goal is to learn the details behind a style or composition so we can apply some of that to our future work. I've been seeing quite a few logos using this style so what we'll show you today is how to create a logo, Abduzeedo just seemed natural, using Illustrator and then Photoshop.
So, for this tutorial I will show you how to create a simple vector mark using Illustrator and then we'll add some effects in Photoshop.
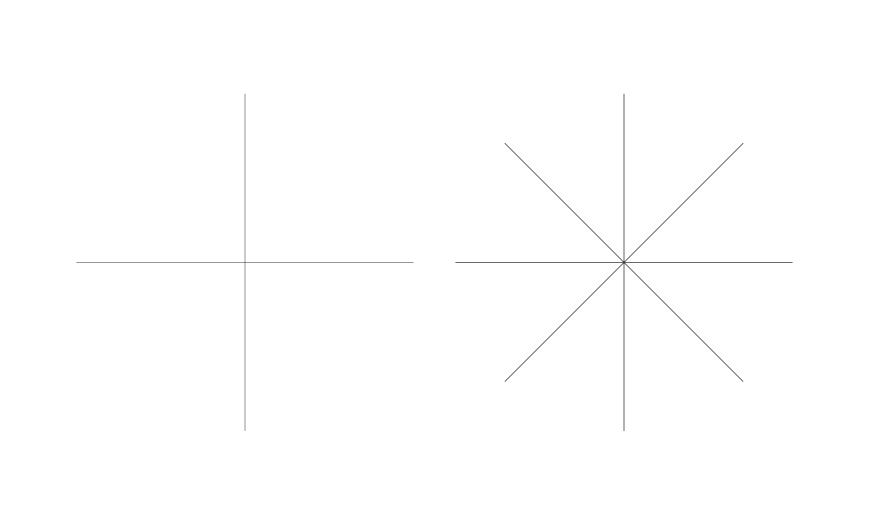
Step 1
Open Illustrator and with the Line Segment Tool create a vertical line. Copy and paste in place and rotate it 90º. Copy the 2 lines, group them and rotate 90º again.
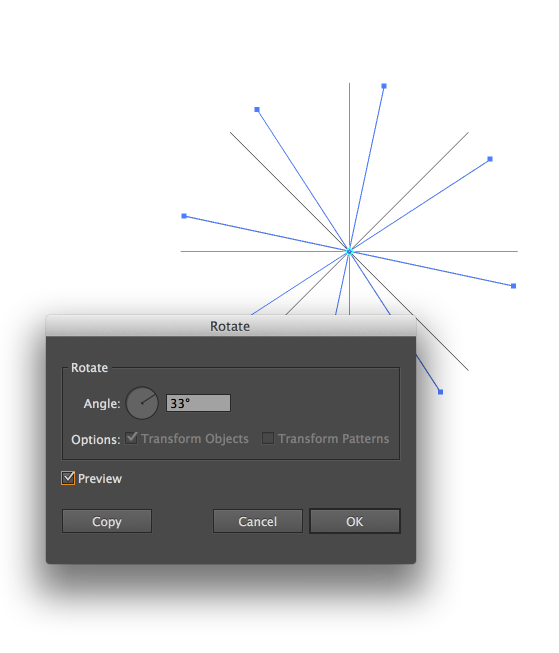
Step 2
Select the lines and rotate 33º
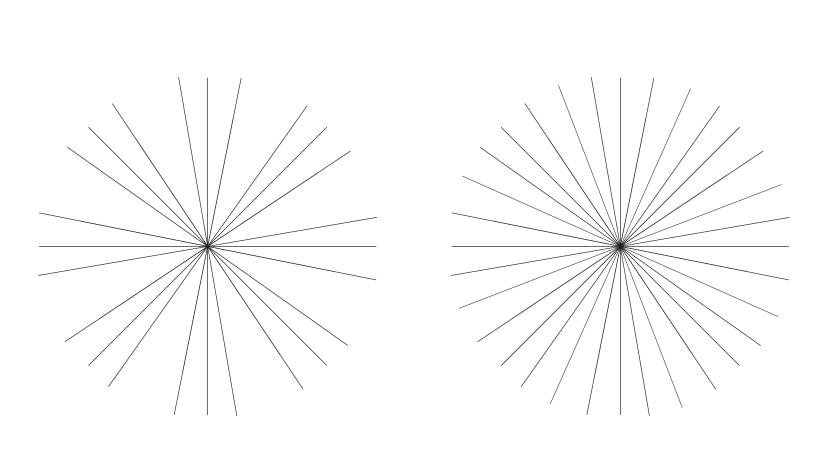
Step 3
Duplicate and rotate the segments until you have something like the image below.
Step 4
Select some segmentes and then start resizing them so you have different sizes for the lines The the first set will be the bigger and from there one you make them a bit smaller.

Step 5
Add your logo in the center using a big white stroke. Also increase the stroke size of the lines to 8pt.

Step 8
Selet the symbol and copy it. Go to Object>Expand. Make sure that the stroke is now a fill path. Then go to Window>Pathfinder and Unite the symbols. Select all lines and the symbol and in Pathfinder select Outline. The idea is to delete the area where the symbol and the lines overlap. Paste the symbol again.

Step 9
Create a circle and aline in the center of your logo. We will use that for reference for your text.

Step 10
Add your text and then repeat the same thing as the step 9 to make the gap on the area tha the text will be visible.

Step 11
Create a black background and then place the logo in the center with white colors.

Step 12
In Photoshop now, first use a brush to create the grungy effect.

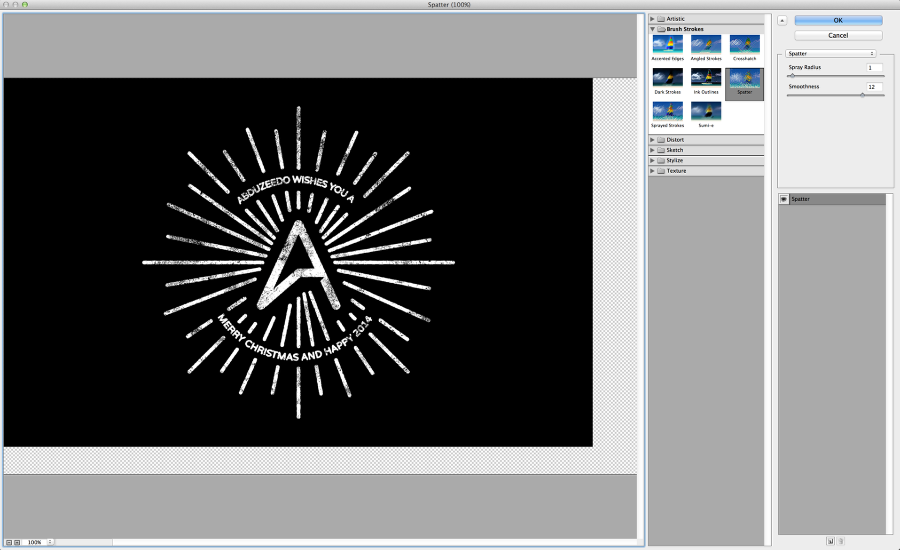
Step 13
Make sure you have a black backgroud and your logo over it. Merge the 2 layers and then go to Filter>Filter Gallery>Brush Strokes>Spatter. Use 1 for the Spray Radius and 12 for Smoothness. The idea of this step is to make the for less uniform.
Conclusion
Now just add your background and your image is done. I hope you enjoy this little case study/tutorial and have a great holidays. The background image is titled Background of snow flurry falling at night with motion blur by Elena Elisseeva, courtesy for Shutterstock