by abduzeedo
It is been a while since the last time we published a Pixelmator tutorial and now with Pixelmator 2.0 out there and App of the Year we decided to show more love to this really cool tool. We will be creating weekly Pixelmators tutorial here on Abduzeedo alongside with our Photoshop, Illustrator and Fireworks tutorials.
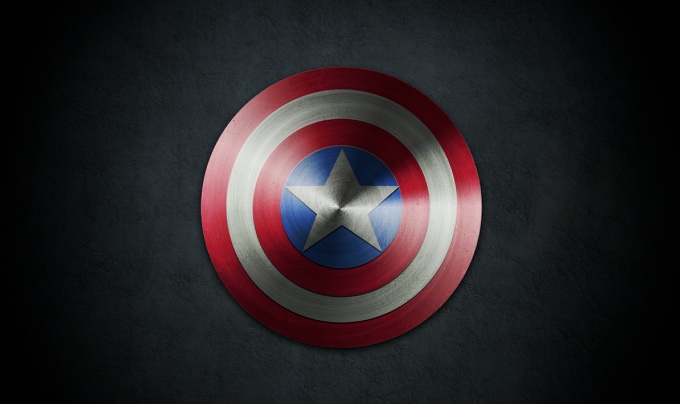
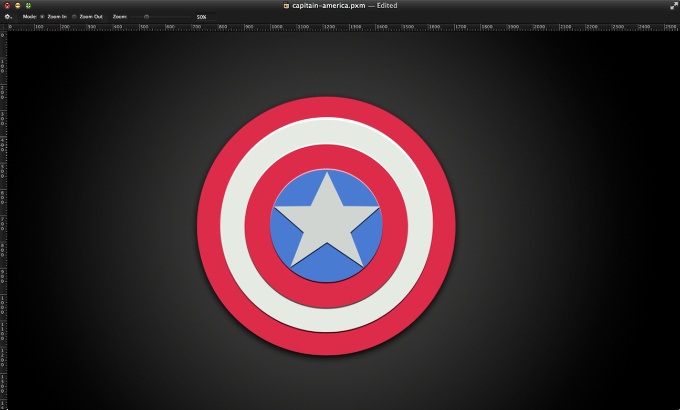
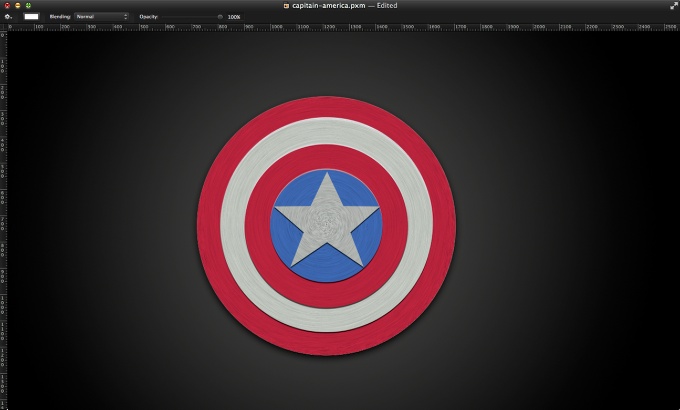
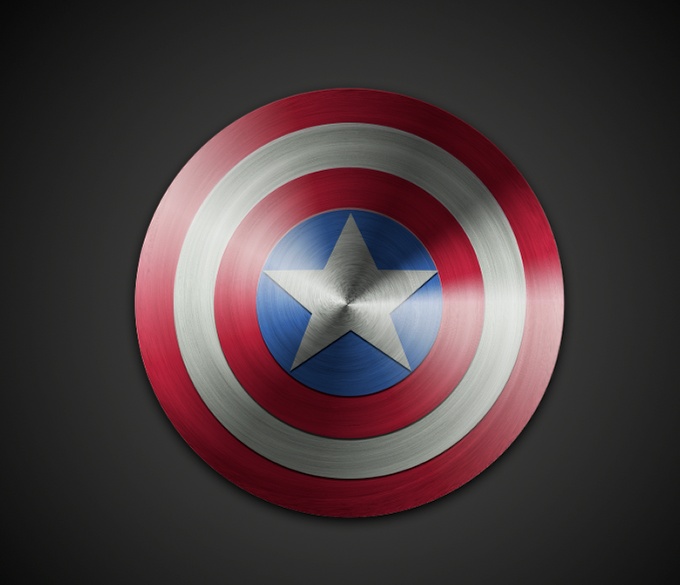
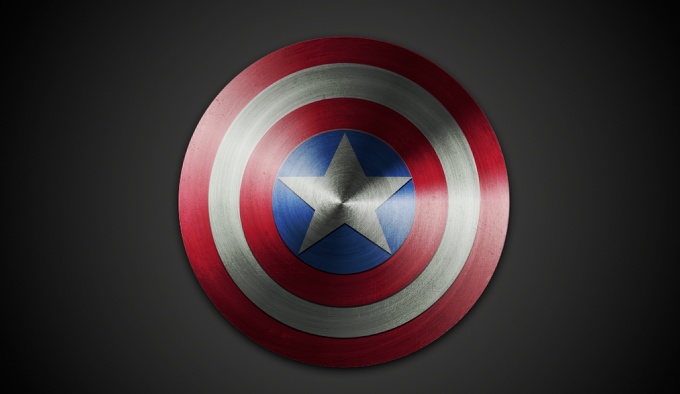
So in this tutorial we will show you how to create the Captain America Shield using Pixelmator only. The process is quite simple and won't take you more than 30 minutes.
Step 1
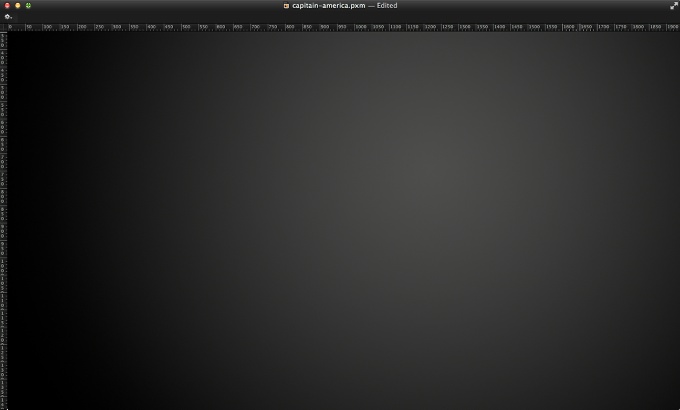
Open Pixelmator and create a new document. I am using 2560x1440 pixels for the size. After that with the Gradient Tool (G) fill the background with the default black/grey radial gradient.
Step 3
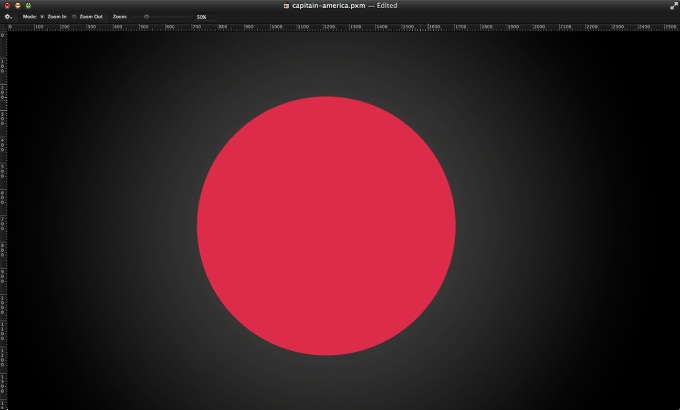
Pixelmator 2.0 has some amazing new features like vector shapes. So select the Ellipse Tool and create a circle. After that go to Shape Settings and change the fill color to red (#d51a37).
Step 4
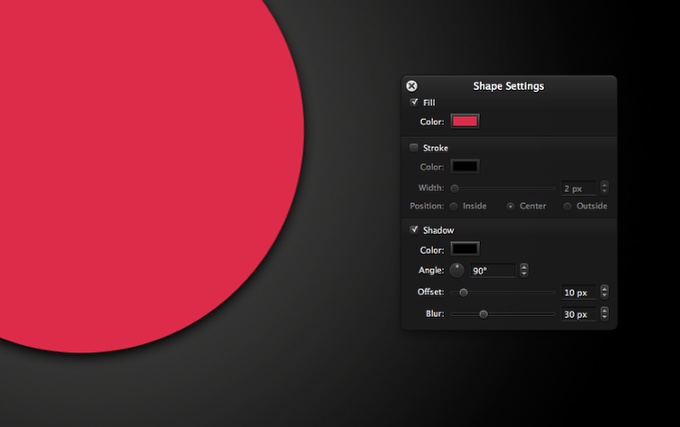
In the shape Settings options you can now add shadow as well. So mark the Shadow option and use Black for the color, 90º Angle, 10px Offset and 30px Blur.
Step 5
Add 3 more circles. A light grey, another red and a blue. After that add a Star like te image below. Note that I added shadow to the internal circles as well, however I used 5px for the Offset and 2px for the blur. Another important thing you can do is duplicate the circles and change their colors to white and move them 2px up and make sure that they are underneath the original ones. The idea here is to create a highlight.
Another important thing is to make all the circles clipping masks of the bigger circle.
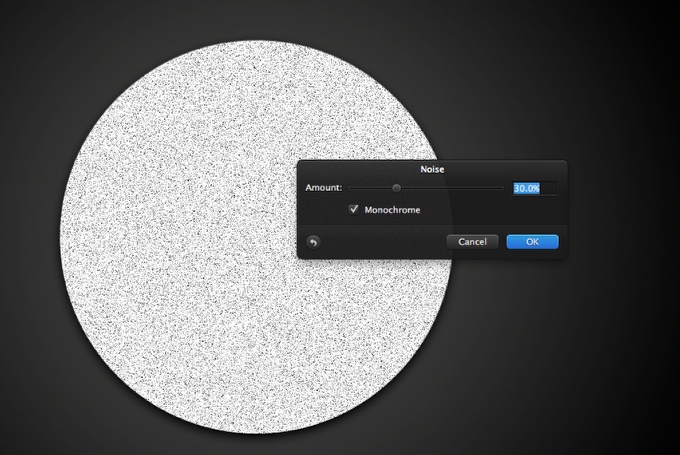
Step 6
Add a new layer and also go to Layer>Create Clipping Mask. Fill this new layer with white using the Paint Bucket Tool (N). After that make sure you have black and white for the background and foreground color. Then go to Filter>Style>Noise. Use 30% for the Amount and select Monochrome.
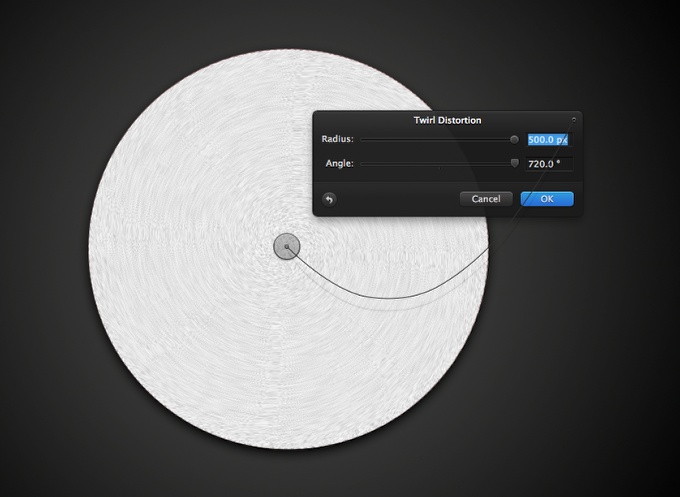
Step 7
Now go to Filter>Distort>Twirl. Use 500 px for the Radius and 720º Angle.
Step 8
Repeat that 6 times to make the effect stronger.
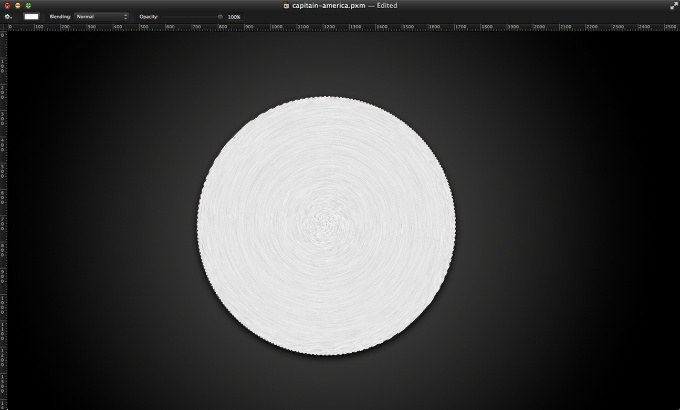
Step 9
Change the Blending to Multiply. After that duplicate the layer to make the effect stronger again.
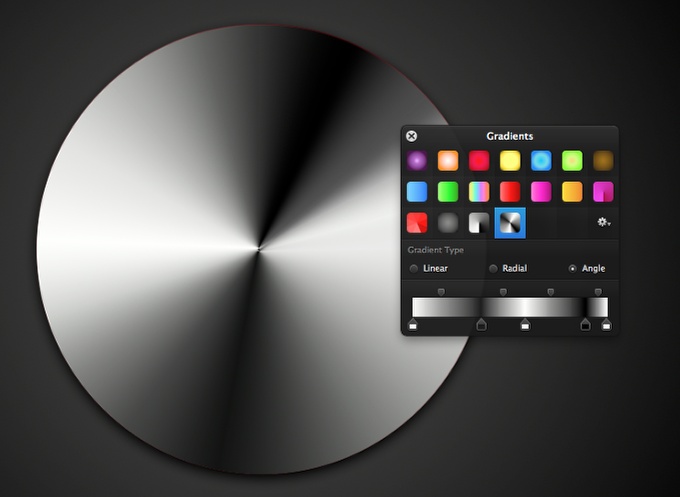
Step 10
Select the Gradient Tool (G) and then create a new gradient preset. Use Angle for the type and then use white, black, white, black and white. Add a new layer and again make it a clipping mask. Fill the layer with the new gradient like the image below.
Step 11
Change the Blending to Multiply at 60%, after that duplicate it and change the blending of the new one to Hard Light at 60%.
Step 12
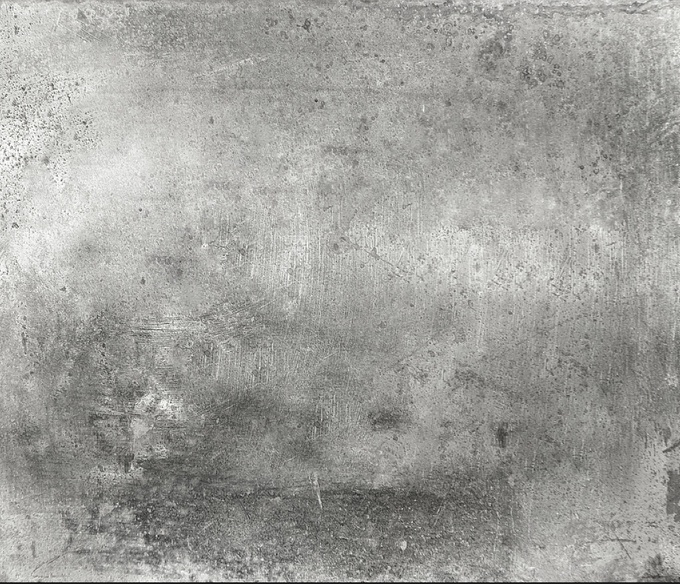
Now let's make the effect more real by applying some textures. The one I am using is from maxstockphoto and it's called Metal plate background texture. Courtesy of Shutterstock.
Step 13
Change the blending to Overlay at 30%. After that go again to Filter>Distort>Twirl. Use the same presets of the Step 7.
Step 14
Duplicate the layer again and change the blending to Color Burn at 33%.
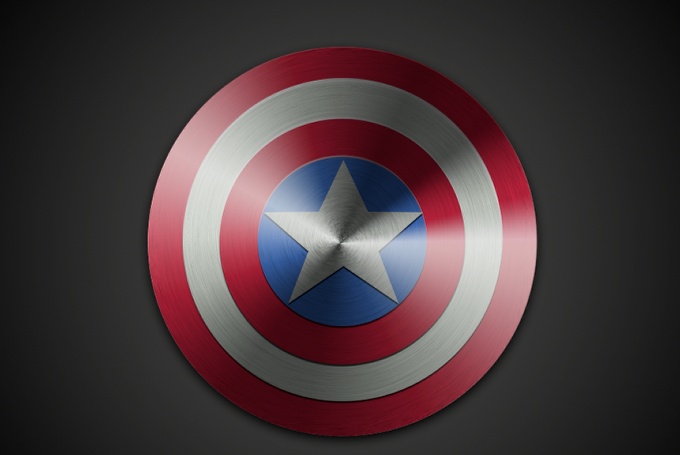
Conclusion
Now just add some texture on the background as well. The one I used is from Kompaniets Taras and it's called seamless silver metal texture with empty place for your text or image.
As you can see the process was very straightforward and Pixelmator with its new tools make it easier to play with basic shapes like circles, rectangles, stars and so on. This effect can be used to create nice UI buttons as well. But now it's up to you.