by abduzeedo
I've been writing tutorials inspired by skateboard deck designs for a few weeks and today it's not going to be different. I'm very addicted to that, I love the ideas some of the designers have and for this tutorial I will recreate a really nice effect with lines forming a star. However I will go a little bit further and I will transform it in a light effect and add a nice pattern overlay. Everything using Adobe Illustrator and Photoshop.
So in this tutorial we will create a composition from scratch first in Illustrator where we will play with shapes and the Blend Tool. After that in Photoshop we will add the light effects and the pattern overlay.
Step 1
We will start our image in Adobe Illustrator. We could have done it entirely in Adobe Photoshop but I like to use the right tool for the right type of work, if there's vector I will always use Illustrator, it's easier and faster. In Illustrator select the Star Tool and create a star.

Step 2
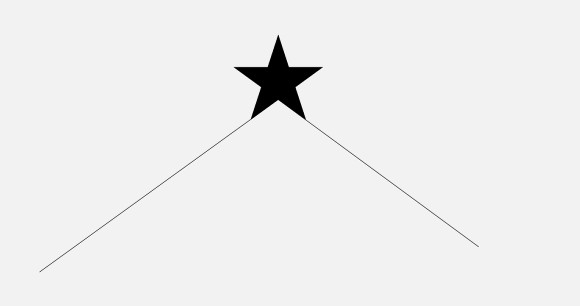
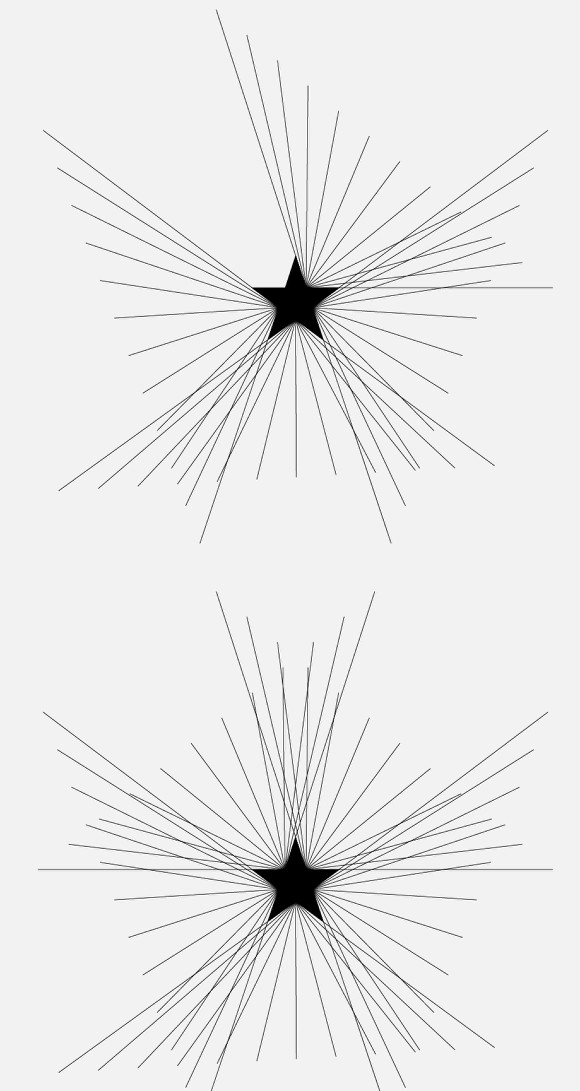
With the Line Segment Tool (\) create 2 lines following the base shape of the star. Use the image below for reference.
Step 3
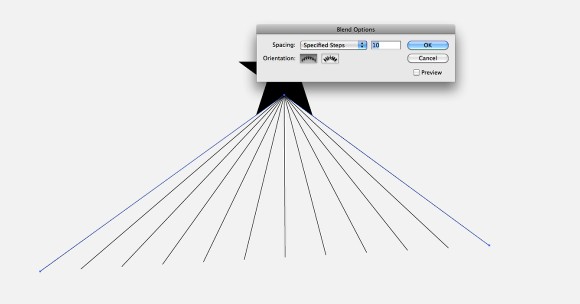
With the Blend Tool (W), click on one line then click on the other one. You will apply the blend effect to the lines. Now double click on the Blend Tool icon to open the Blend Options. Change the Spacing to 10.
Step 4
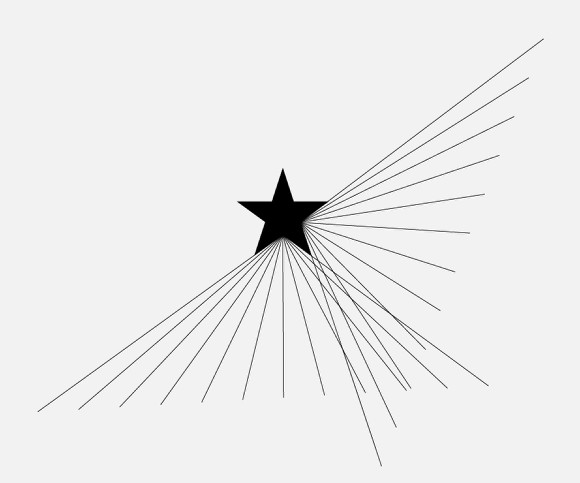
Duplicate the whole blend object and move it to the other side of the star.
Step 5
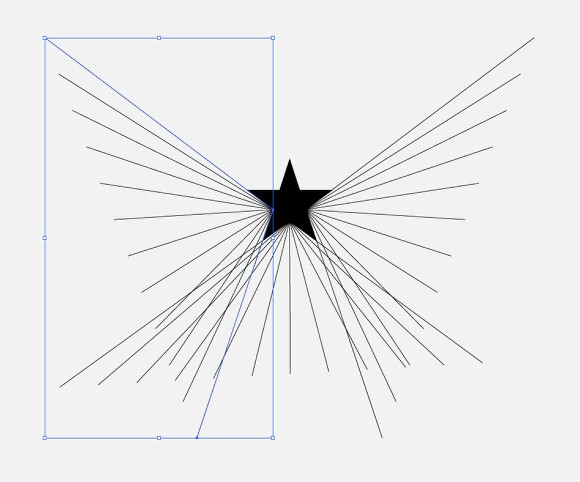
Just flip horizontally the on side to get the other one.
Step 6
Keep duplicating until you get all the sides covered.
Step 7
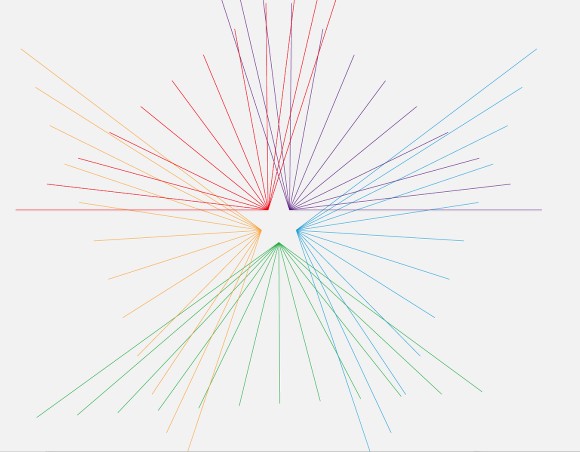
Now lets add some color to the lines. I used red, yellow, green, cyan and purple for the colors.
Step 8
Open Photoshop and create a new document. I used 1920x1200 pixels. Then fill the background layer with a very dark grey.

Step 9
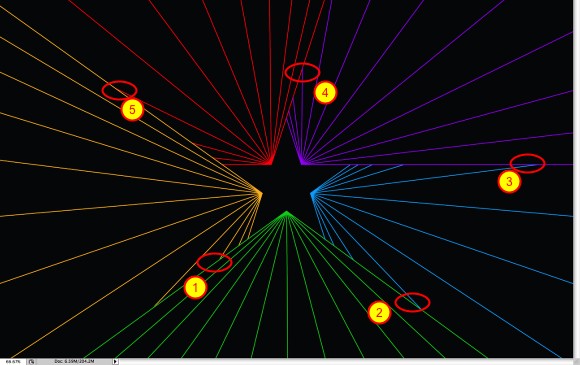
Copy each blend object from Illustrator and paste them in Photoshop separately, you will have 5 layers. Now it's really important to organize them.
Using the Lasso Tool (L) and mask (Layer>Layer Mask>Hide Selection) hide parts of the lines so they do not cross one another. That way the green lines will be on top of the blue and yellows. Use the image below for reference.
Step 10
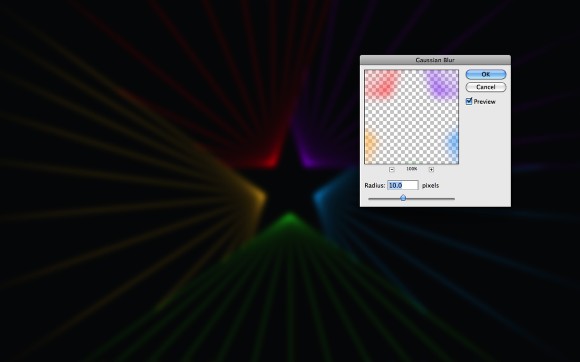
Select all line layers and go to Layer>Merge Layers. Duplicate the layer. After go to Filter>Blur>Gaussian Blur. Use 10 pixels for the Radius.
Step 11
With the duplicate layer go again to Filter>Blur>Gaussian Blur. Use 2 pixels for the Radius.

Step 12
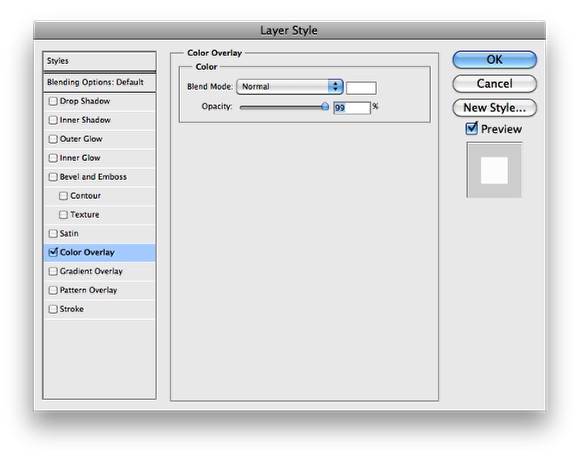
Go to Layer>Layer Style>Color Overlay. For the color use white. After that group the layer and then change Blend Mode to Color Dodge.
Step 13
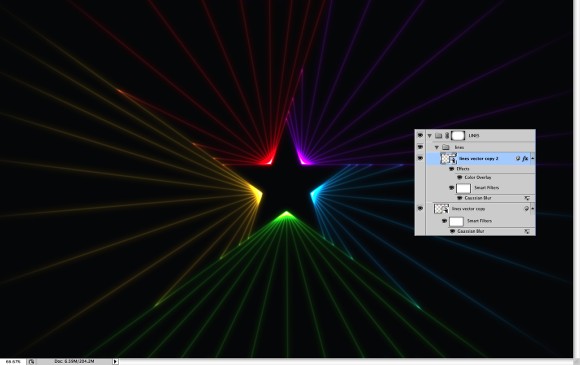
This is the effect you will have after these steps. Take a look at the order of the layers, it's really important for the lines effect.
Step 14
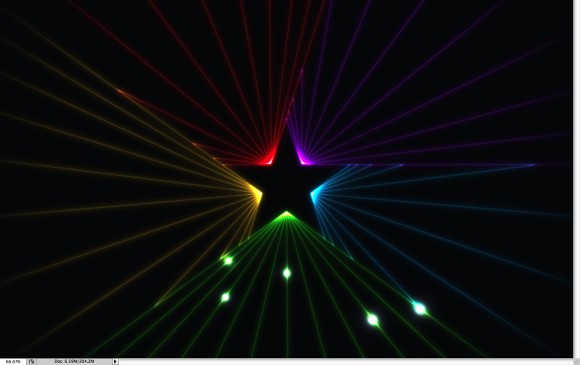
Add a group folder in the layer palettes and change the Blend Mode of the group to Color Dodge. After that inside this group add another layer. With the Brush Tool (B), select white for the color and get a very soft brush to start paint some light spots over the green lines.
Step 15
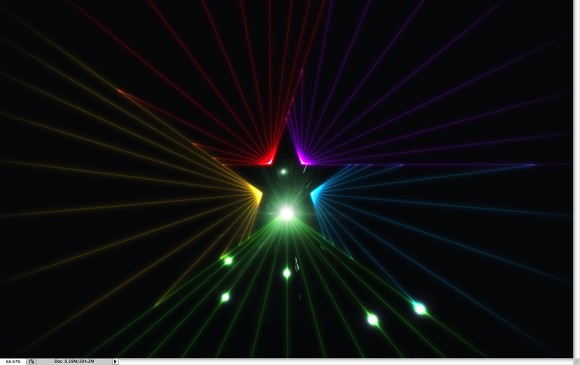
Let's use an image to add another light effect. The one I used can be downloaded for free at http://www.williams.edu/Astronomy/IAU_eclipses/eclipse_results.html. Place the image and change the its Blend Mode to Screen. After that with the Eraser Tool (E) delete most of the image leaving only the light effect in the middle of the document.
After that, go to Image>Adjustments>Hue and Saturation. Move the Hue until you get a greenish color.
Step 16
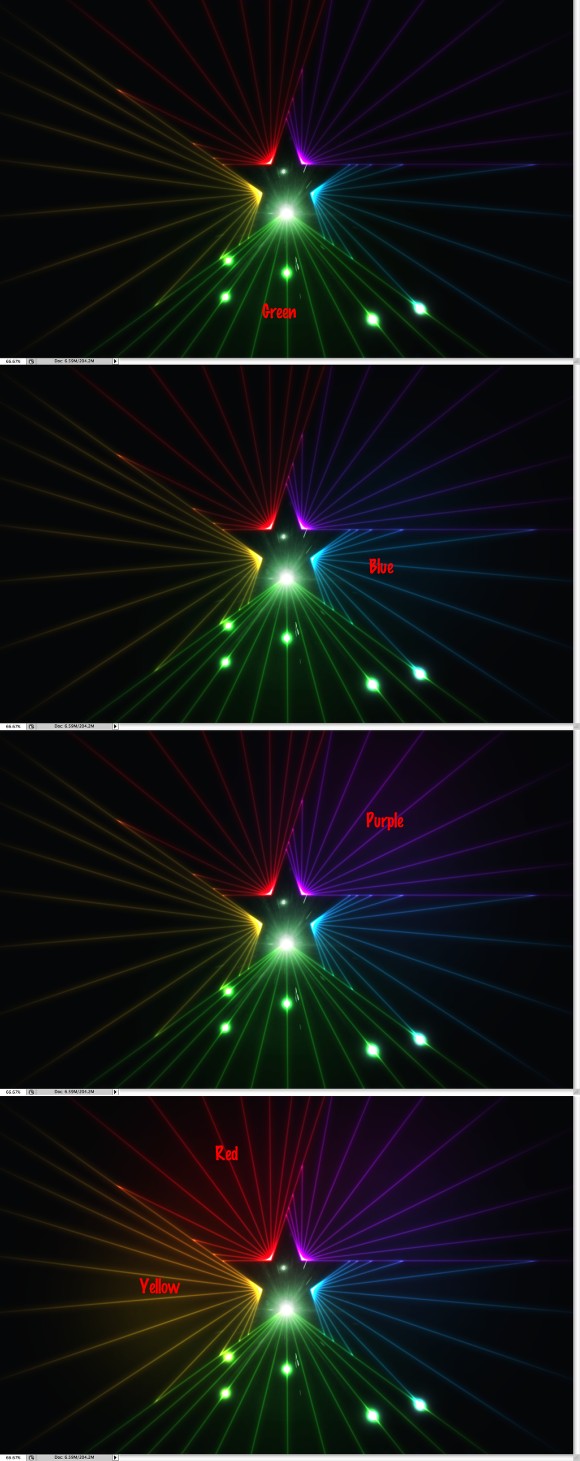
With the Brush Tool (B) and a very soft brush, change the opacity to 20% and start with a green color. So paint over the green lines, add another layer and select cyan and paint over the cyan lines. Do the same for the other colors. The idea is to make the light effect a little bit stronger. This layers will be beneath the lines.
Step 17
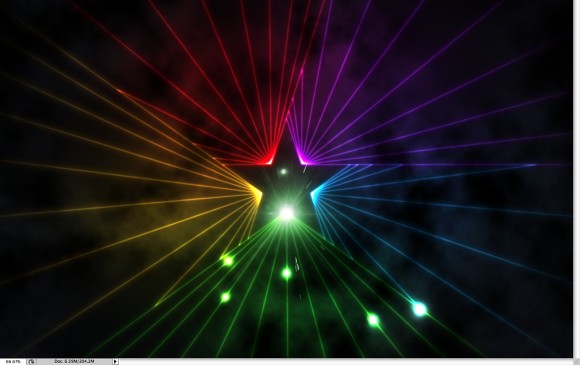
Add another layer, this time on top of the layers we painted in the previous step and beneath the lines. Go to Filter>Render>Clouds. Make sure you had black and white for the background and foreground colors. Change the Blend Mode to Overlay, then with the Eraser Tool (E) delete some parts of the layer to make the clouds less uniform.
Step 18
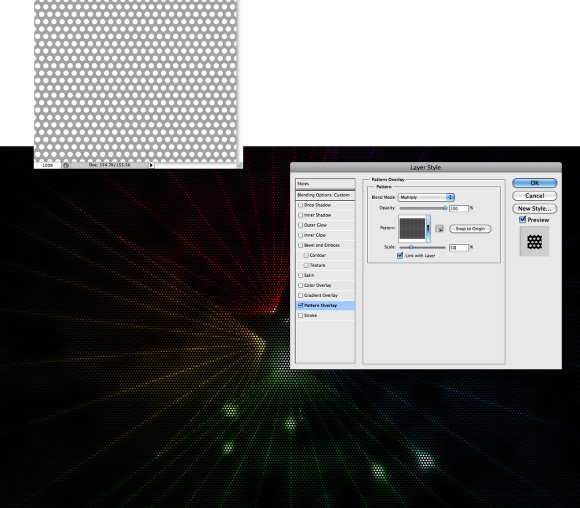
Now let's create a pattern, actually let's use an image and create a pattern from that. Download the Free Seamless Vector Perforated Metal Pattern (http://www.bittbox.com/freebies/free-seamless-vector-perforated-metal-p…) and open it in Photoshop. Go to Edit>Define Pattern.
Back to our design, add another layer on top of the others and fill it with any color, the go to Layer>Layer Styles. First go to Blend Options and change the fill opacity to 0. After that go to Pattern Overlay. Select the pattern we've just created for the Pattern and reduce the Scale to 50%.
Step 19
Go to Layer>Layer Style>Create Layer. You will break the layer style into layers, so you will have a layer with the pattern you applied. Delete the other layers and with the pattern layer, change the Blend Mode to Multiply, then go to Edit>Transform>Warp. Use Fish Eye for the Warp and then move the controller to reduce the size of the warp in the middle. Use the image below for reference.
After that, change the Opacity to 20%.

Step 20
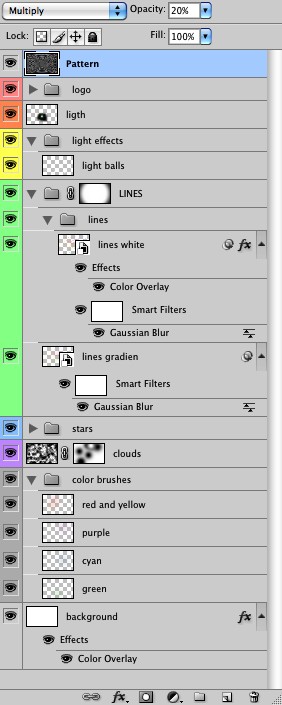
This is the order of the layers I have so you can have an idea and use it for reference.
Conclusion
The light effect we created here is nothing new, I've shown you how to create this quite a few times. However this time we played with patterns and the warp transform to add a very nice effect to the image. Once again I was inspired by a skateboard deck design and wanted to reproduce that in Photoshop. The whole idea of this tutorials is that we can play with the tool and learn at least something new.
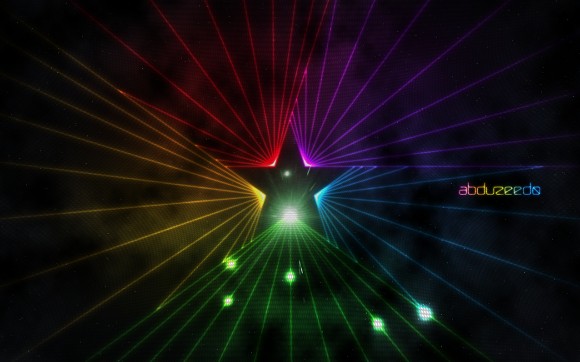
Click on the image for full preview
Download the Photoshop File
Click here to download the Photoshop File used for this tutorial


