Reader Tutorial: Extinction by ChanitoListThumbs

Reader Tutorial: Extinction by Chanito
We have a great tutorial sent by one of our readers, Chanito from Panama. In this tutorial he will show you how to create a good 3D type explosion with Adobe Illustrator, Cinema 4D and Adobe Photoshop. We will use basic tools to make this artwork. Good Luck!!!
For more information visit Chanito's Deviantart at http://chanito.deviantart.com/
Step 1
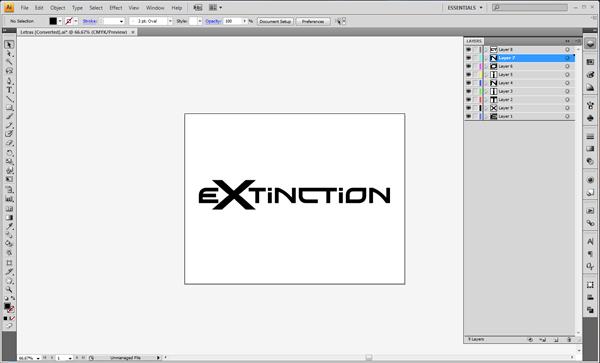
Open Adobe Illustrator and find the font that you want to use in your artwork, in this case I used Xirod Font and tweaked it a little. Make it outline and save it in Adobe Illustrator 8. (Cinema 4D just open vectors in this Adobe Illustrator version).
Step 2
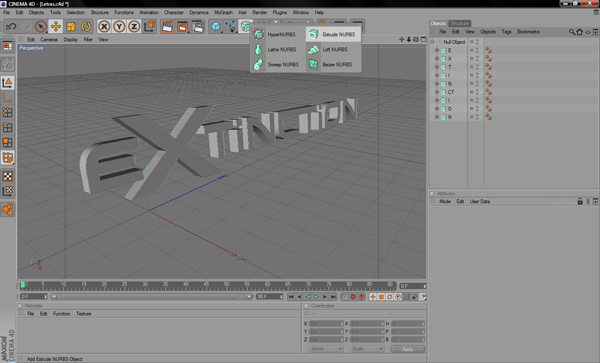
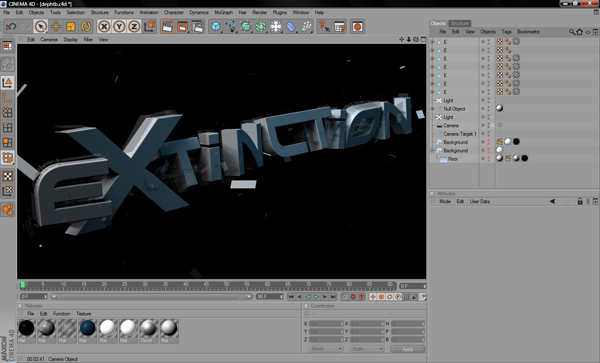
Go to Cinema 4D and open your Illustrator file, when you open it in Cinema 4D you can see that it is inside of a group. You need to ungroup them and add the extrude NURBS to each letter of your word. Then when you have each letter with extrude you need to add lights (I used 2 area lights, in the front and the left side) and target camera (optional, you can use whatever you want).
Step 3
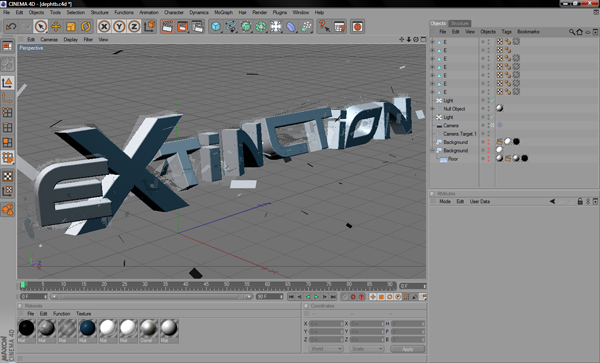
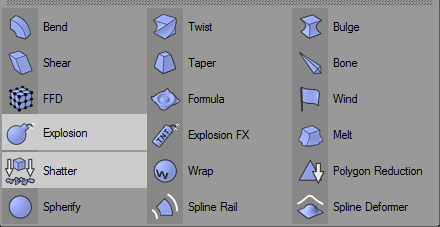
Well, we have our 3D text and we need to add more details before we go over to Photoshop. We're going to duplicate our 3D object 8 times to make it editable and we are going to add explosion and shatter. You need to play with the settings to see how you want your 3D text to look like. Just apply 3 explosions and 3 shatters to it and make a preview, you will see where to add more details and where not to.

Step 4
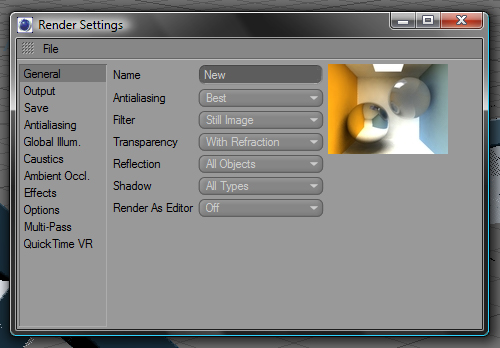
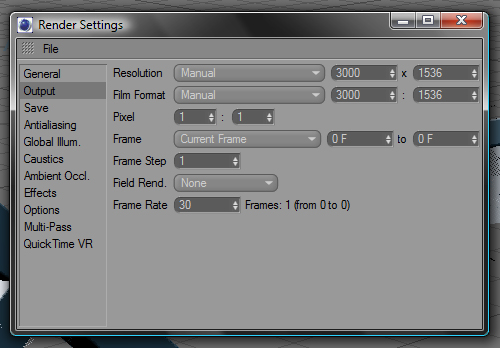
Go to render settings and put these following settings. Make the render and save in 300 DPI TIFF format with Alpha Channel.
Step 5
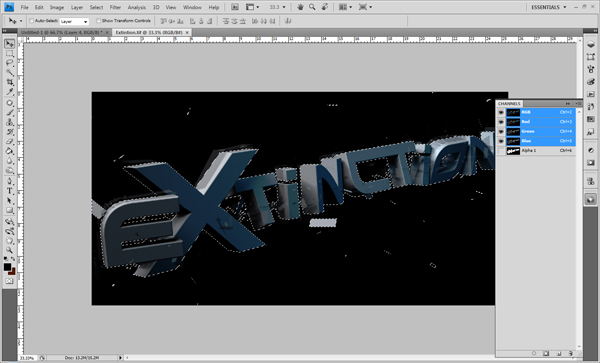
Take the render into Photoshop, go to the Channels windows and choose the Alpha Channel. Make your selection, cut your 3D text and paste it in another layer. Then you can work just with your 3D text and after, with your background.
Step 6
We're going to create the background and paint some areas with dark blue. I used the basic soft brush and 50% opacity to achieve the effect that I wanted.
Step 7
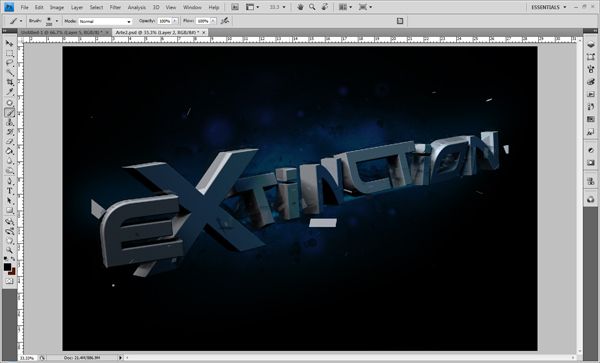
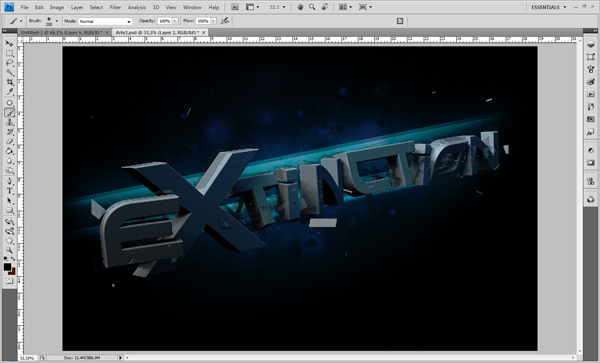
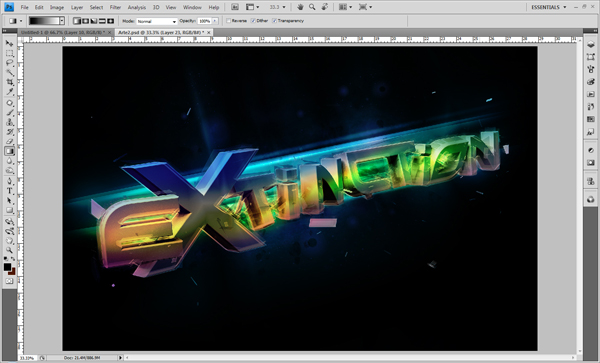
Now we're going to add more details to the background and we also need to create some highlights behind the 3D text to make it stand out.
Step 8
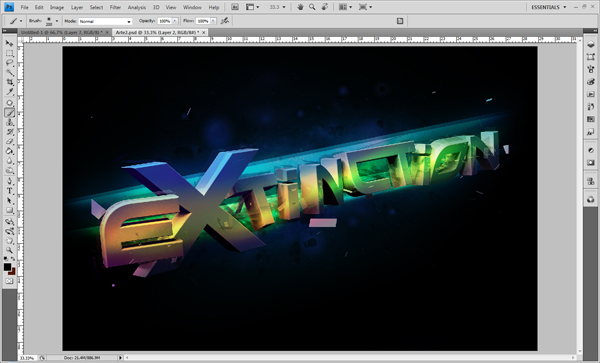
Time to add some color to our 3D text. You can do this in different ways. I just used the basic soft brush and painted over the 3D letter and made some masks.

Step 9
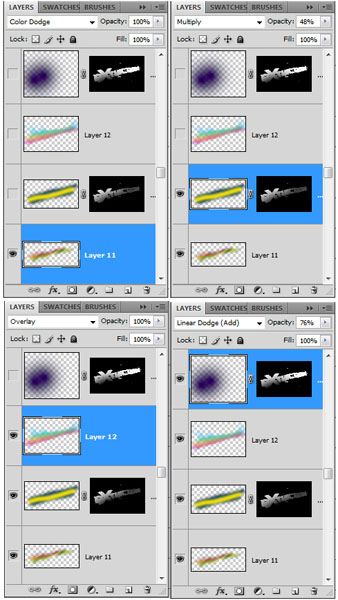
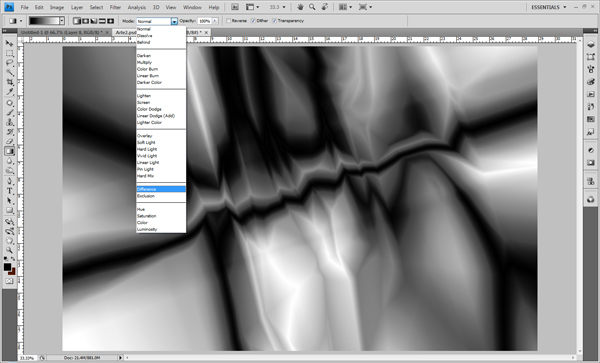
We need to do a special effect to apply in front of our 3D letters. To do this, choose the Gradient Tool and change the mode to Difference. Make gradients in different directions. After, select the text and make a layer mask in this effect layer. Change the blend mode to Soft Light and Opacity to 70%
Step 10
Next, select the 3D text, go to Modify - Contract and use 10 to 20 pixels. Delete then deselect and go to Effects - Blur - Motion Blur use Angle: 15 and Distance between 60 to 70 pixels.
Step 11
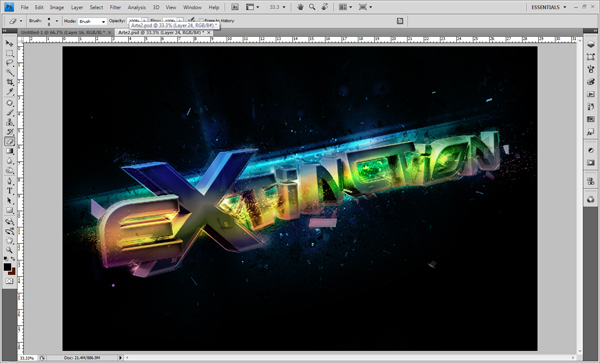
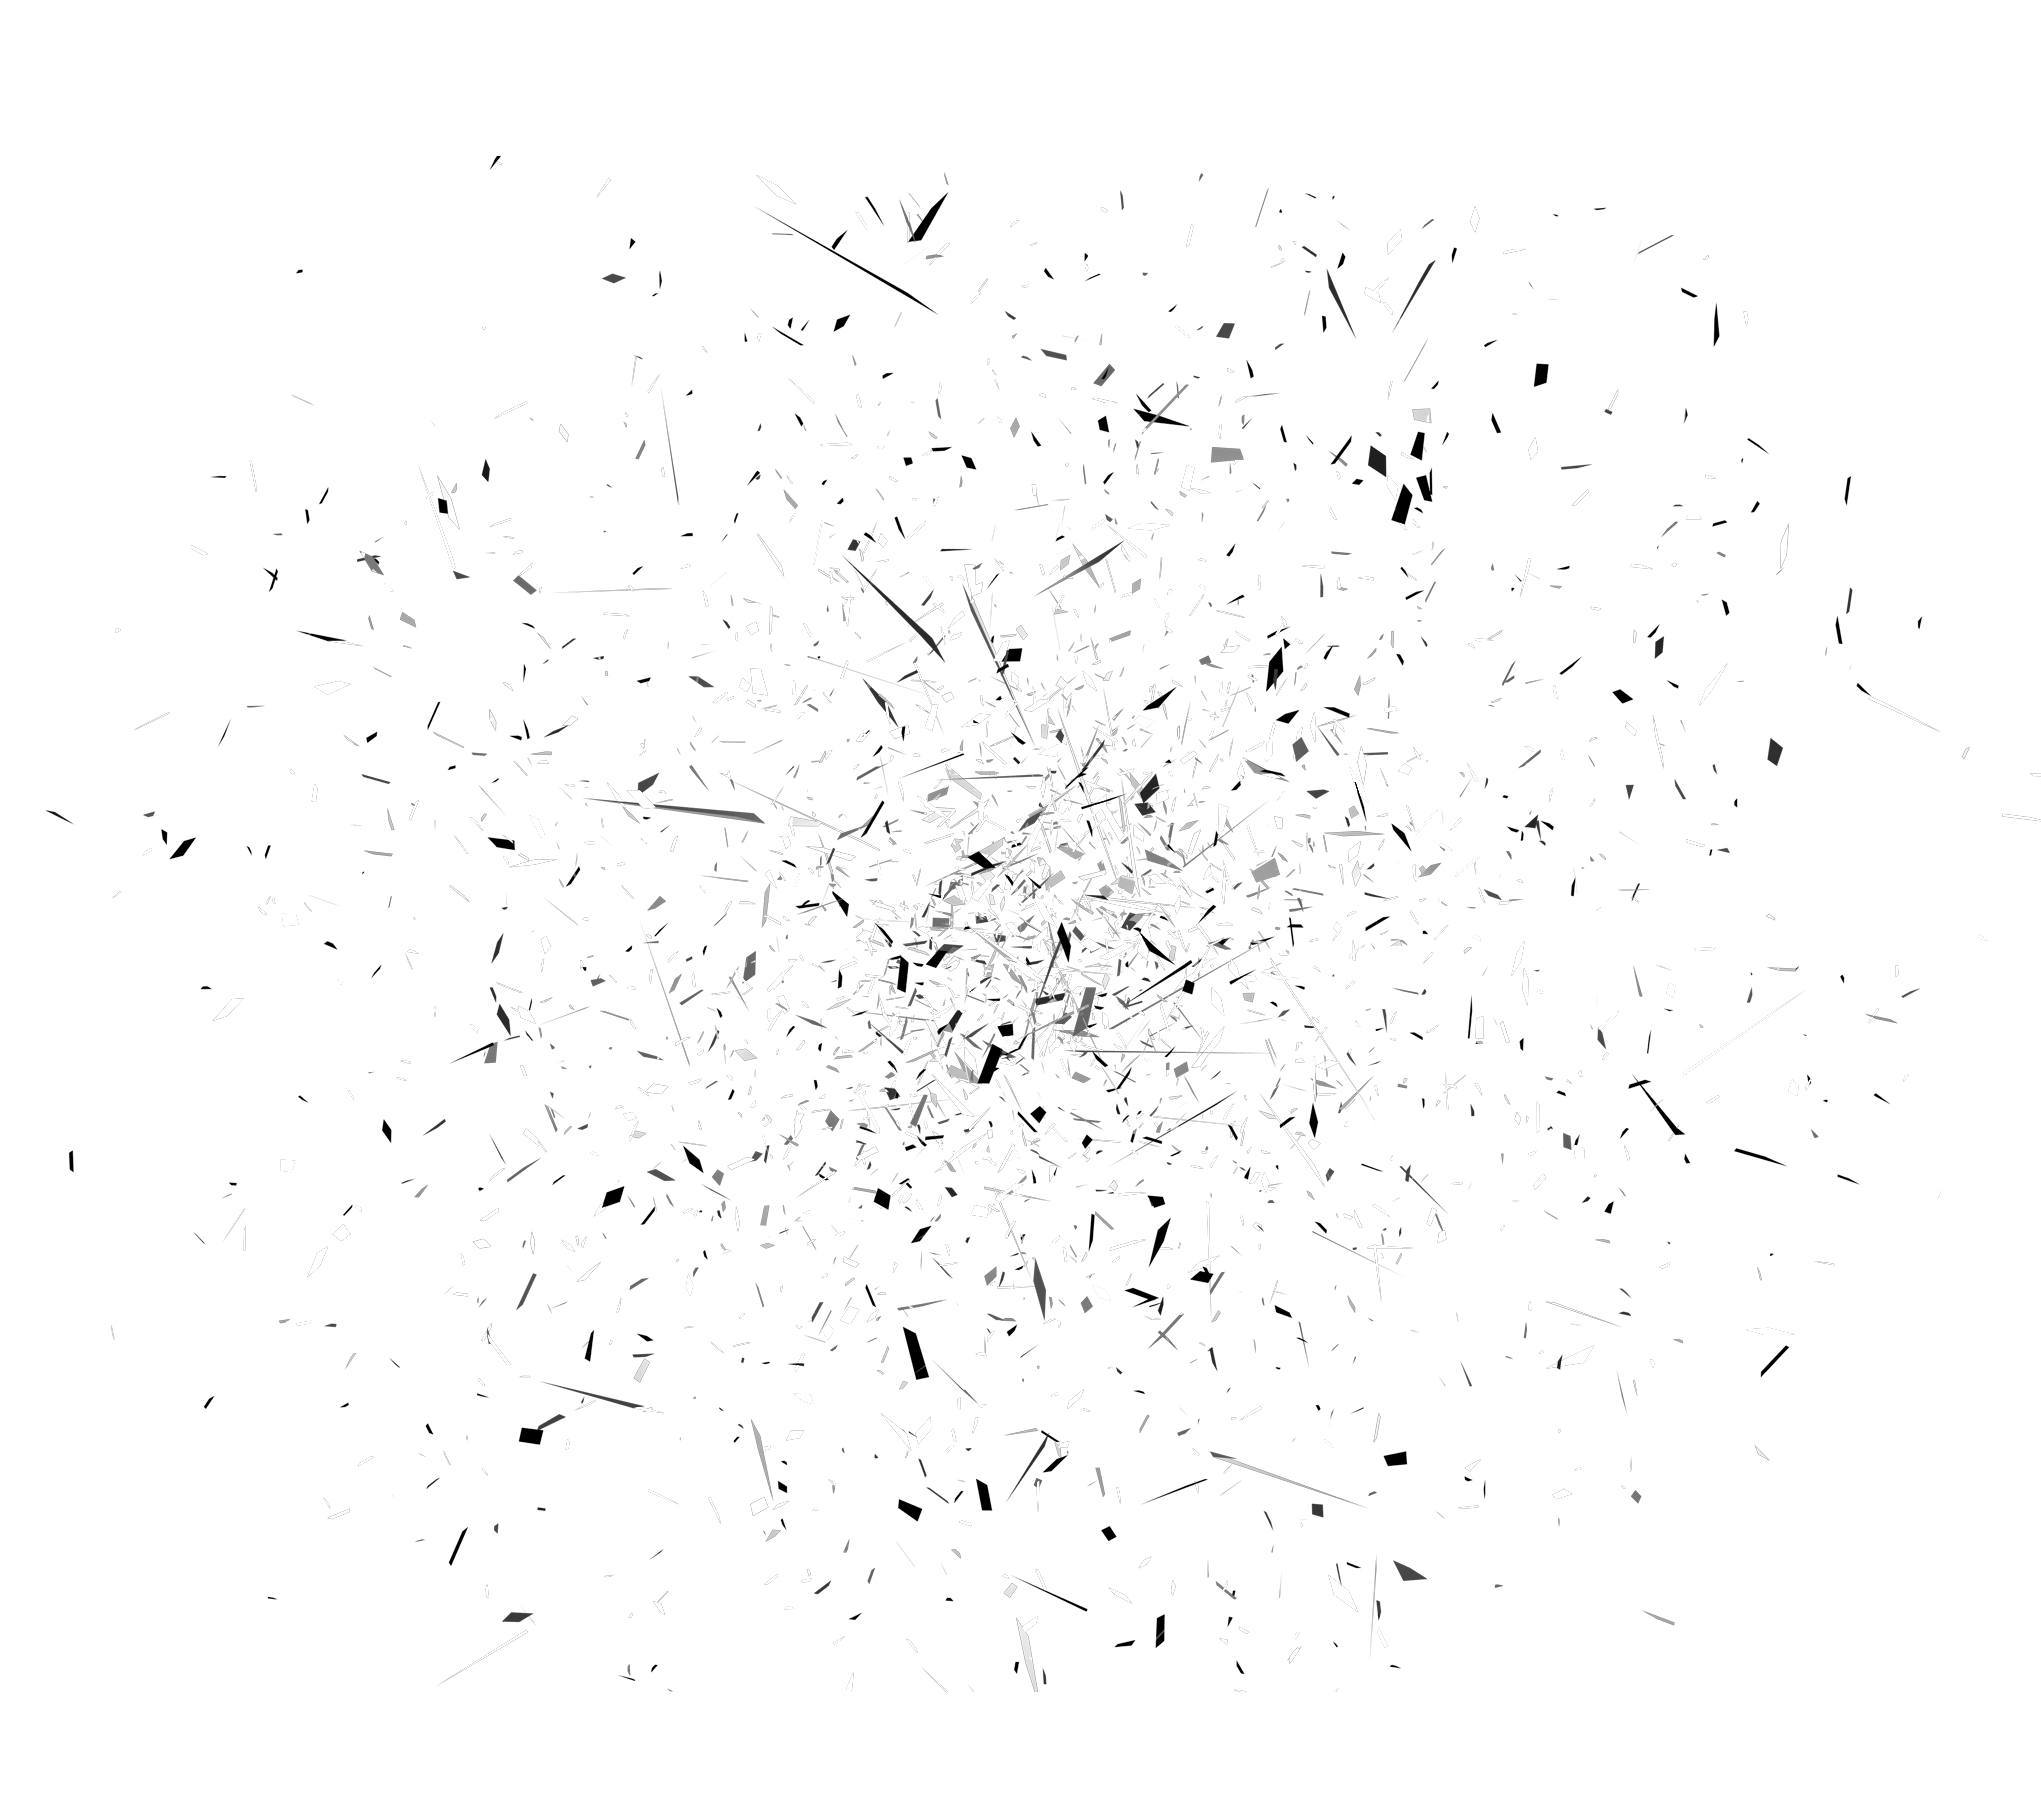
Now we'll add more detail to our 3D text. Choose a good splatter brush and paint wherever you want. To generate the back of the explosion you need to add broken glasses behind text. (http://psdtuts.s3.amazonaws.com/208_Break_Down/pieces.png). Add some highlights to make it stand out.
Step 12
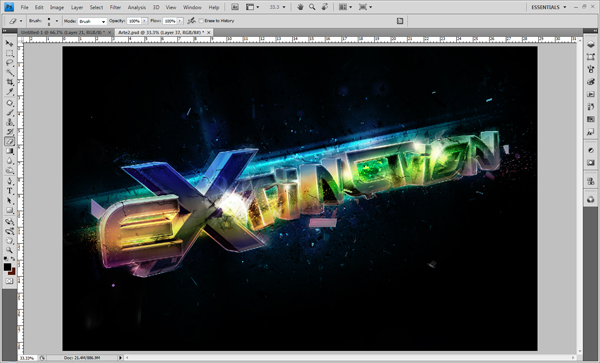
Add some shadows inside of the 3D text with the Polygonal Lasso Tool and the Gradient Tool in Black to Transparent.
Step 13
Now add some crack brushes in the 3D text to make the explosion more real. Put a crack on the letter you want to brake, in my case, the x.
Step 14
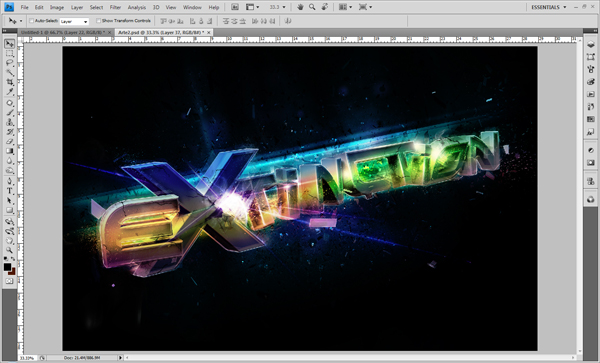
Add highlights on the border of each letter to give it a real explosion feeling. To create the beginning of the explosion add a mini explosion brush to the inside corner of the x.
Step 15
Make some lines and flares in the explosion point in different ways. Use different colors to give it a great look.
Step 16
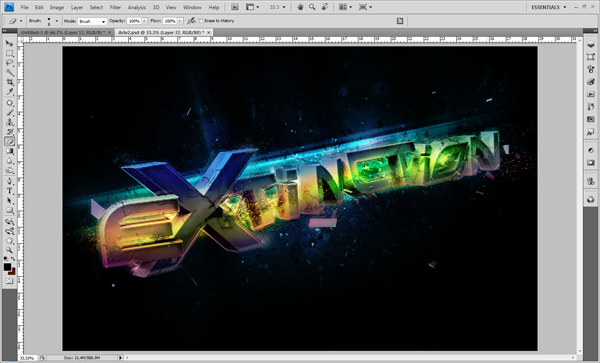
Add the broken glass image on top of your 3D text and change the Blend Mode to Overlay. Duplicate it, go to Edit - Transform - Flip Horizontal and change the Blend Mode to Normal.
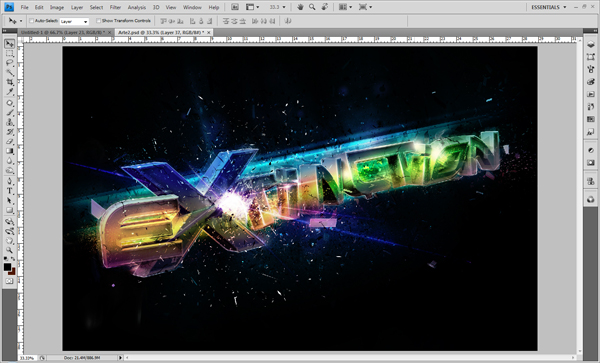
FINAL
This is the final image. Hope you enjoyed this tutorial!


65 Comments
Nice... Awsome Post!
www.designtuts.com.br
Cool ! :)
great job buddy.......thanks for the tuto...
Really nice.. It looks very pro :-)
Wow one of the best tuts in abduzeedo i think !
------------------------------------------------------------------
http://hybrid-creation.deviantart.com/
great work!
__________
http://lateant.deviantart.com/
Deusulivre! Ficou muito massa
sick, f*ckin SICK!!!
you sick
Nice tutorial! Few steps, great effect (Y)
Wooow! Verry verry nice! I think i'm going to buy Cinema4D! It's just great!! Sick tutorial
Cool effects man, thanks
Absolument magnifique !
ça c'est du savoir-faire =3
Not very detailed at all.
Just a quick question that wasn't made clear...for the final render out of cinema 4d. did you use global illumination/ambient occlusion or did you use Vray?
Very nice job, thx for the sharing
Nice effect, Keep up the great work.
good work, thanks
Mt bom.
Vou esperar em portugues.
Horrible. You stink.
Very nice, that image looks awesome!
Just when I was looking for a great tutorial on Cinema4d mixed with Photoshop, then this came along. Thanks!
nice and useful
awesome tutorial. it made me wish I had cinema 4D
I saw this tuts first @ Deviantart.com and asked him for a Tut thinking he would never do it. and well few days later he sent me a message saying he had done the tut.
glad he did. BIG THANK YOU TO HIM!!!
Nice tut.
BTW you do NOT have to ungroup each spline add an extrude nurbs to each individual spline. You can place all of the splines within a group inside of the Extrude NURB modifier and check "Hierarchial" box under the "Object" tab for the Extrude NURBS modifier.
great tut. Very nice effect. Thanks
_________________
http://texturezine.com/
Awesome! This is very helpful, thank you very much for this!
woa! , like it!
Love ya
finally a C4D tutorial
:)
That's awesome!
Can you post C4D files please.
Great tutorial, thank you
amazing result! thanks for author's work!
abducted!
Hi everybody
I am very grateful by your support and comments, sincerely I'm grateful. If someone has some question about of the tutorial or some step, you can write to me to my mail and I will answer any doubt of it.
Regards and once again thank you very much to all.
My email is: chanito_19@yahoo.com
Incredible final resault, but one of the worst written tuts i've seen.
This is a wonderful and very helpful tutorial. Keep em coming!
-Andy from Megastarmedia
I love this Teutorial He convince me to Buy this C4d.. I love this Software i Wish I have It Someday... THANK"S...
This makes me wish I had Cinema 4D.......oh well I guess 3D max will have to do.
Works great with Blender3D and Gimp, thanks a lot !!!!!
Could you upload psd and c4d file? I'm confused:(
really cool
amazing real time space structured explosion!
fantastic!
awesome tuts...........dude ur tuts are very easy but........highly useful.................
can't figure out step3, you duplicate each letter 8x and then?
Can you do video tutorial on this one.
Cooooooooooooool I likeeeeeeeeeeeee
very niice... but why extinction
Nice, Thanks
great tuts...
Thank you for sharing :D
This is so cool, i really am lovin this tut... I will give it a go...
Loved it!! Thanx for sharing :)
if you provide us psd then be very great any way very nice tut.
I think its a very good idea!
But a beginner cant follow you step for step... There are no details where we can find the different functions and so on.
But nice idea!! ;)
Very Nice tutorial,
I tried to make it from your tutorial, but I didn't manage to make the same scene from Cinema 4D. I need more detail in this part.
Is it possible that you send me the cinema 4D project to try to follow this part ? (fgauharou@yahoo.fr)
The result is awesome !
fantastic typeface..give you five!
Hi!! Nice Tut! Prob is...how can I do step 2?? I never used Cinema 4D before and I don't know how to Emboss them :/ Can somebody help me? Any help would be appreciated... Would be awesome if a video is made :) Thanks again! and keep up that AWESOME work
where did you get the base font??
First off, you are truly gifted. Nice job on the final Image.
Now the mean part.
This has the be the worsted turtoal I have ever tried. If you can call it that.
I could only go threw step one with out look at other tutorials to find out how to do any of the steps your talking about.
I wanted this to be so cool, but i have now wasted 3 hours of my life just trying to do what your telling us to do.
Please redo this, so we all can try again. Or at lest add some more information to how you did each step.
I want to like this so much, but at this point it is truly poor.
Thanks and sorry for being that dick, but someone had to.
The final result looks absolutely amazing, but i think the tutorial is lacking in some detail in certain steps. It would be great to see a video tutorial of this process. Any chance you will or could do one?
Other than that it looks great.
dope shit !!!!
thx dude
so explotion....!
i hope i can.,,,
Very awesome tut, i hope you can make a video tut of it cus i cant figure it out!! or some more detail :D
anyway, thanks for sharing!
J
o autor poderia colocar o projeto do Illustrator, do cinema 4D e do Photoshop para download, ou alguem que tenha feito, para que as pessoas como eu que estao começando a mexer com o cinema 4D possam ver como cada efeito foi usado, direitinho...
Post new comment