by abduzeedo
Last year we posted on Abduzeedo a very cool post about typographic portraits, the 45 Amazing Type Faces - Typographic Portraits became one of the most popular posts on Abduzeedo, and a lot of people asked me how to create that effect in Photoshop.
We have also posted a little tutorial showing how to do that using, Flash Photoshop Quick Tips #5 - Typographic Portrait, however I decided to create a nice typographic effect using just Photoshop.
So in this tutorial I will show you how to create a really cool and super easy typographic portrait in Photoshop. We will use the Displace filter and some Blend Modes to achieve the effect. The whole process is quite simple but it might take you some time to add the texts and elements, but once you do that the rest is very straight forward.
Step 1
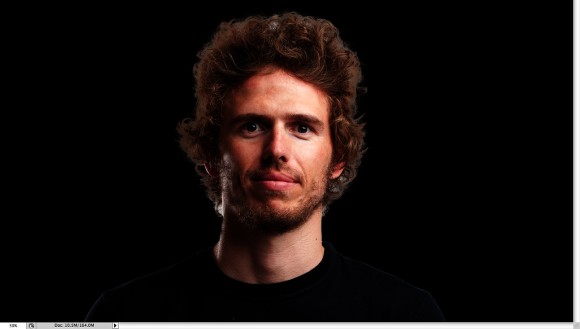
Open Photoshop and create a new document. I used 2560x1440 pixels for the size. Then import a photo of yours, I'm using a portrait taken by a John Arlington, a great photographer friend of mine. The photo I have is with white background, so extract the background.
Step 2
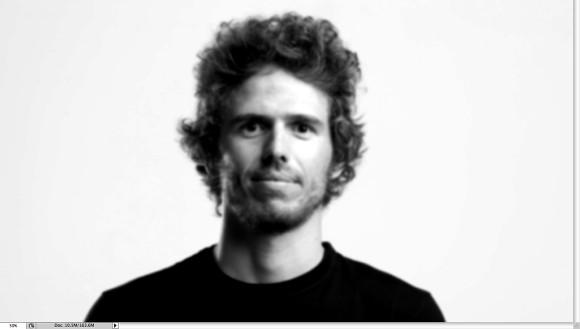
Duplicate the layer and go to Image>Adjustment>Desaturate. You will have a black and white photo. Add a white background. After that save the file, it has to be PSD otherwise it won't work with the Displace filter.
Step 3
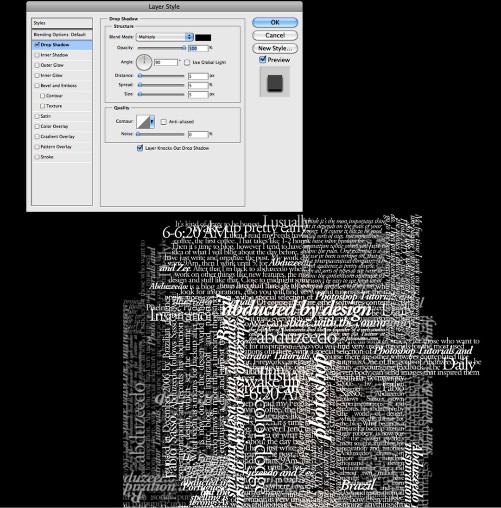
With the Horizontal Type Tool (T) create text boxes and start adding texts. The idea is to play with the texts, they don't have to be readable, or at least with normal legibility, so play with the line-heights, reduce that so the lines overlay one another.
Also make some keywords much bigger and bold, like in my case I highlight some words like Photoshop Tutorials, Illustrator, Inspiration... Also, play with italic, regular texts as well as alignments and text sizes. Tip: I used Garamond for the font, I think serif fonts look much better for this effect.

Step 4
For each layer, go to Layer>Layer Style>Drop Shadow. Use Multiply for the Blend Mode, black for the color, 90º for the Angle and 5 pixels for Distance, Spread and Size.
Also, group all the layers and the duplicate the group. Go to Layer>Merge Group and then go to Filter>Blur>Gaussian Blur. Use 10 pixels for the Radius. This blurry layer will have to stay behind the regular one. The idea is to add some depth to your text, that's why the shadow.
You can duplicate the orginal text again and move it a little bit to the top and left as well to add even more depth.
Step 5
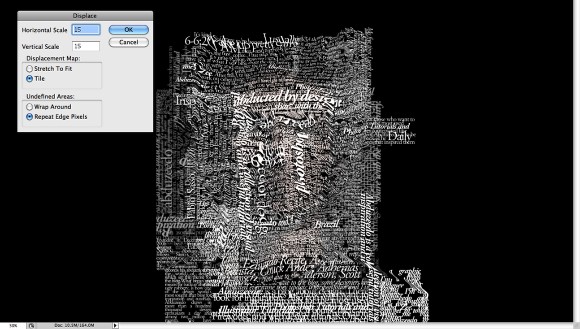
Select all the text layers and merge them into one layer only, then go to Filter>Distort>Displace. A dialog box will appear asking you to choose a file. Select the PSD file we created on the Step 2. After that for the Displace settings use 15 for the Horizontal and Vertical Scale; use Tile for Displacement Map and Repeat Edge Pixels for the Undefined Areas.
The displacement map will distort the layer based on the greyscale photo we used, the dark tones go down while the lights go up.
Step 6
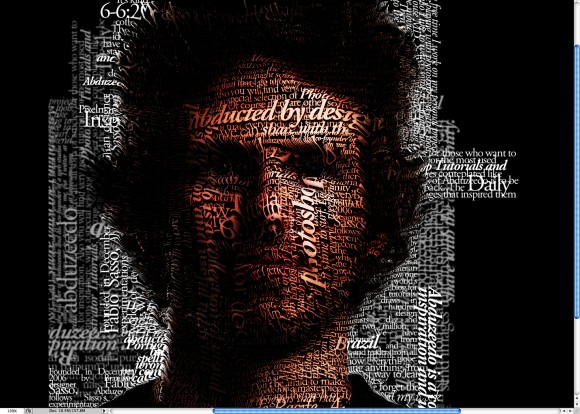
Put the photo layer on top of the white text layer, then change the Blend Mode of the photo layer to Light Burn.
Step 7
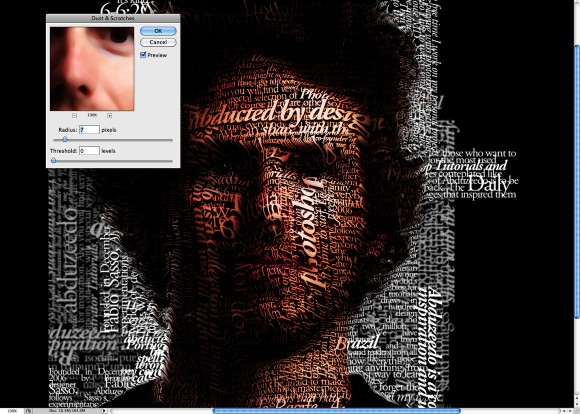
The photo has too many details, so go to Filter>Noise>Dust & Scratches. Use 7 pixels for the Radius and 0 levels for the Threshold.
Step 8
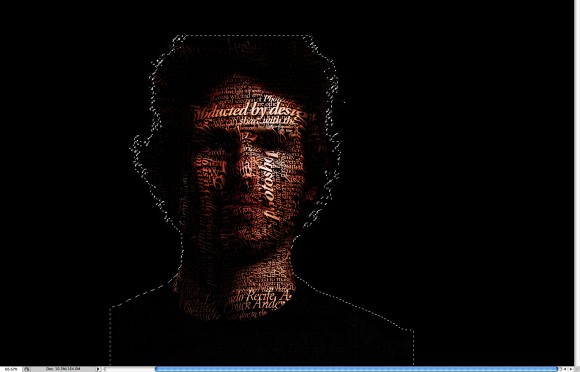
Mask the text layer so you will have just the texts over the photo.
Conclusion
You can reduce a little bit the saturation and as I mentioned before, you can add more text layers and even try different symbols and shapes.
There are many ways to create this effect, this perhaps is the easiest one, but you have to be very careful to make everything very subtle, otherwise the effect won't look as cool as we expect.
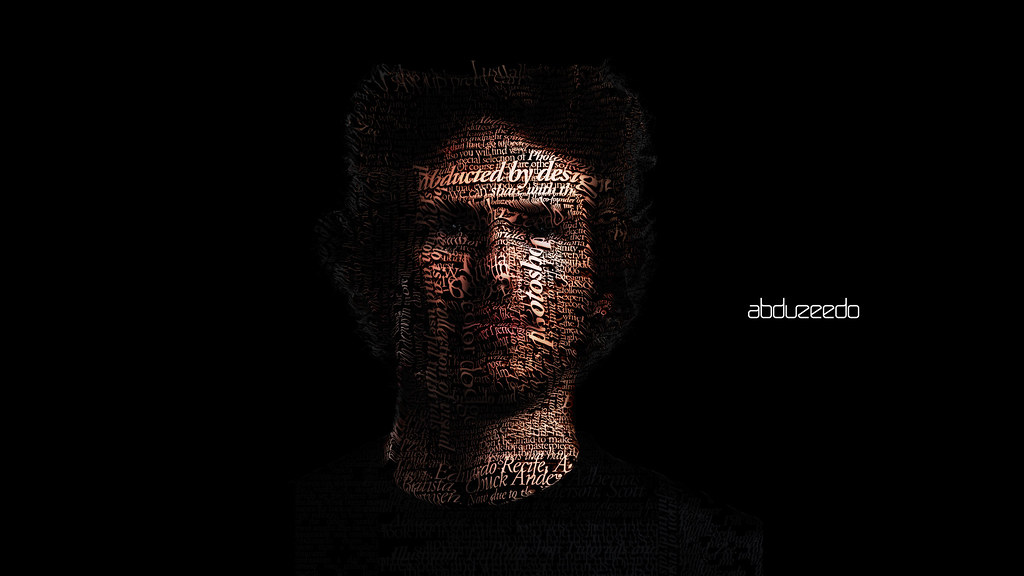
Click on the image for full preview
Download the Photoshop File
Click here to download the Photoshop file used for this tutorial
