by abduzeedo
Pixelmator is a really cool tool for image manipulations and editing. It is a really versatile tool for some photo manipulations and the new version of the tools, the 2.0 has a brand new text tool with more options. So I decided to create a light effect using Pixelmator.
In this tutorial I will show you how to create a really cool light effect playing with some photos and basic filters in Pixelmator. The effect is quite simple and it won't take you more than 30 minutes to achieve the same effect.
Step 1
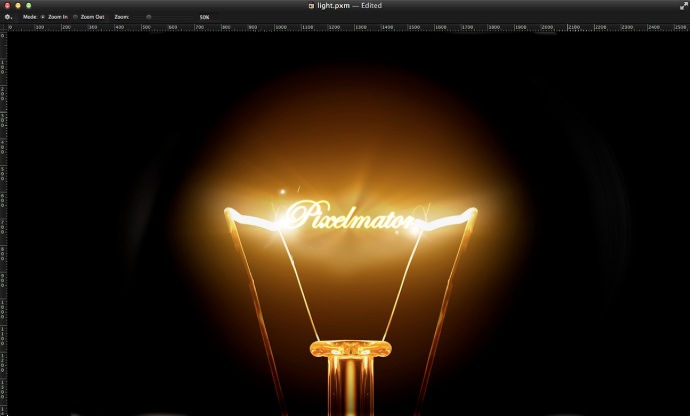
Open Pixelmator and import an image of a light bulb. The one I am using is from Tischenko Irina and it's called Glowing lamp on black background. The image is courtesy of Shutterstock. Note: Make sure that the filament is in the first plane.

Step 2
With the Eraser Tool (E) delete the parts of the glass that are being reflected.
Step 3
With the Brush Tool (B) click ALT to select a color. Pick the ones closer to the filament but not the filament, we need the yellow behind it so we can hide the filament. Add a new layer and start painting to hide the filament. That are we will add our text.
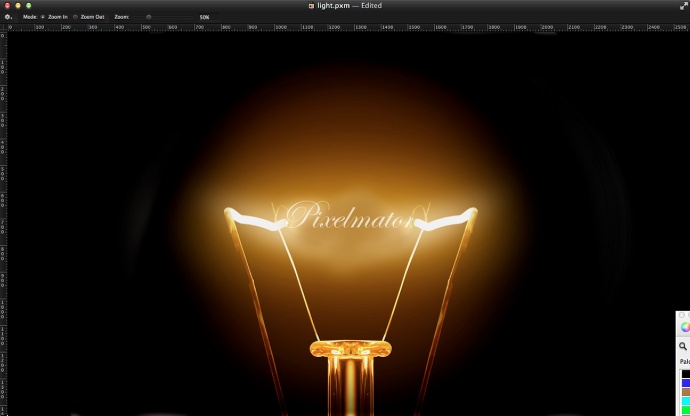
Step 4
Add the text you want. I added the word Pixelmator using Edwardian Script with white for the color.
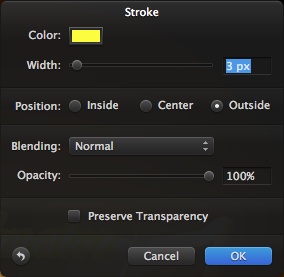
Step 5
Duplicate the text layer and then go to Layer>Convert into Pixels. After that go to Edit>Stroke. Use yellow for the color, 3 pixels for the width, Outside for the Position. Make sure that the Preserve Transparency is not selected.
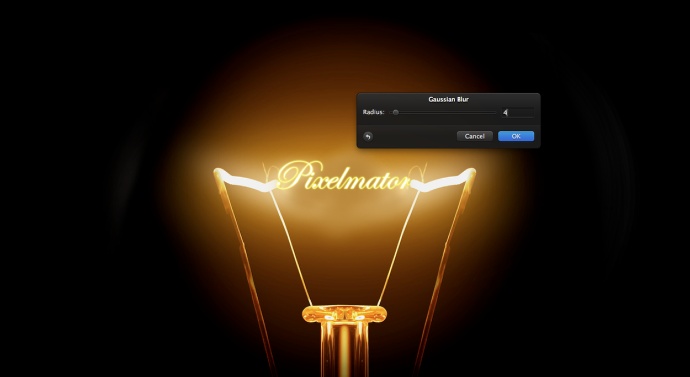
Step 6
Go to Filter>Blur>Gaussian Blur. Use 4 for the Radius. After that add a new layer and fill it with black using the Paint Bucket Tool (N). Merge the blurry layer with the black layer, then change the Blending to Color Dodge.
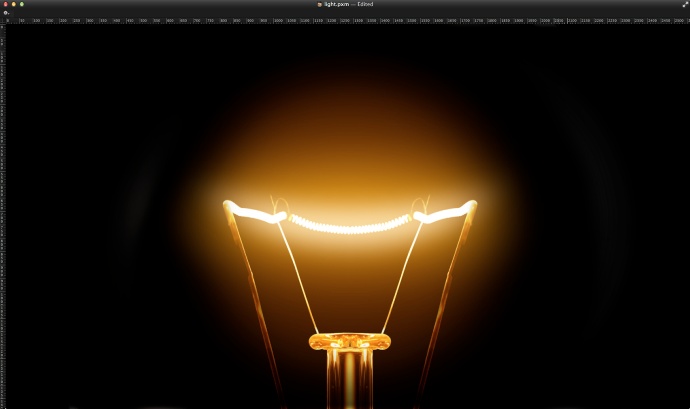
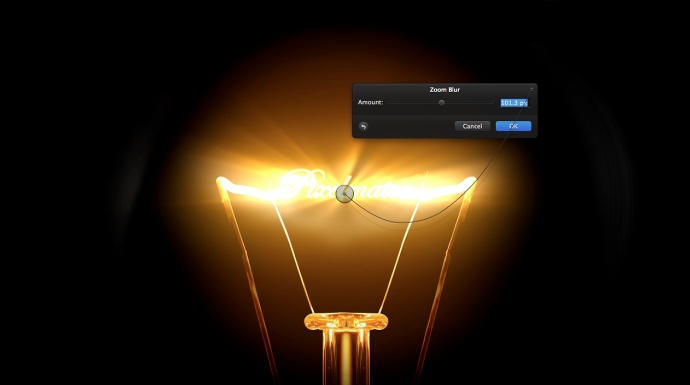
Step 7
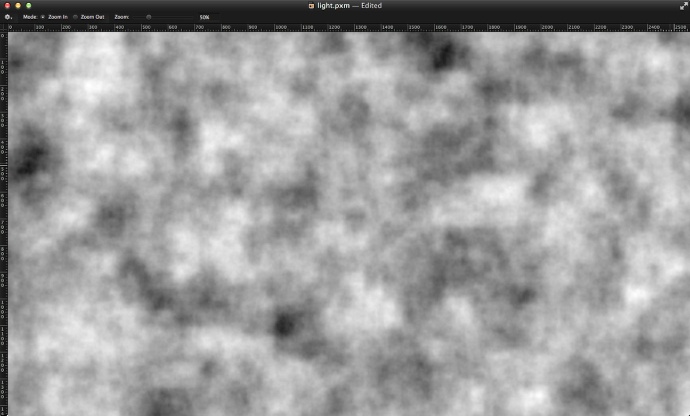
Duplicate the blurry layer from the previous step and go to Filter>Blur>Zoom Blur. Use the image below for reference. After the filter make sure that the Blending is Color Dodge and change the Opacity to 35%.
Step 8
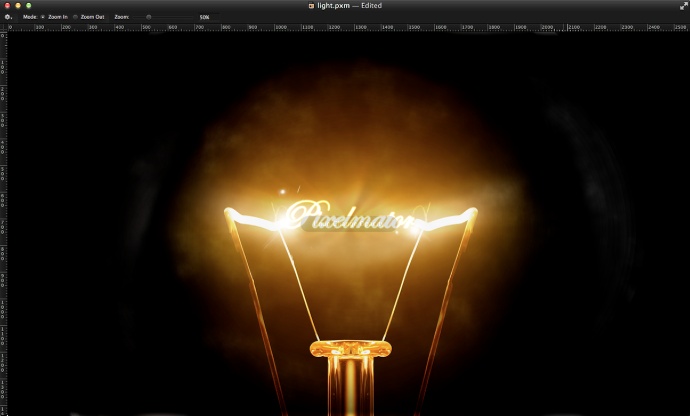
Let's import some lens flare to make the effect more realistic and a bit cheesier :) The ones I am using can be found here and then desaturate the color and increase the contrast so you have something like the image below.
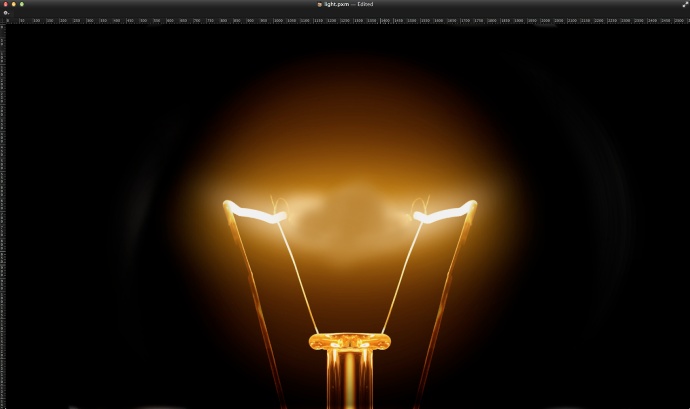
Step 9
Change the blending of the lens flares to screen. Note that I moved them to the connection of the word with the rest of the light bulb.
Step 10
Add a new layer on top of the others and go to Filter>Generator>Clouds. Make sure you have black and white for the color. Also go to Layer>Add Layer Mask. Apply the clouds filter in the layer mask too.
Step 11
Change the blending mode of the clouds layer to Soft Light at 60%.
Step 12
Select all layers and duplicate them. Merge all the duplicated icons into one and go to Filter>Blur>Gaussian Blur. Use 5 for the Radius. After that duplicate the layer. Select one layer and go to Image>Desaturate and change the Blending to Overlay at 50%. For the other layer, change the Blending to Screen at 50%.
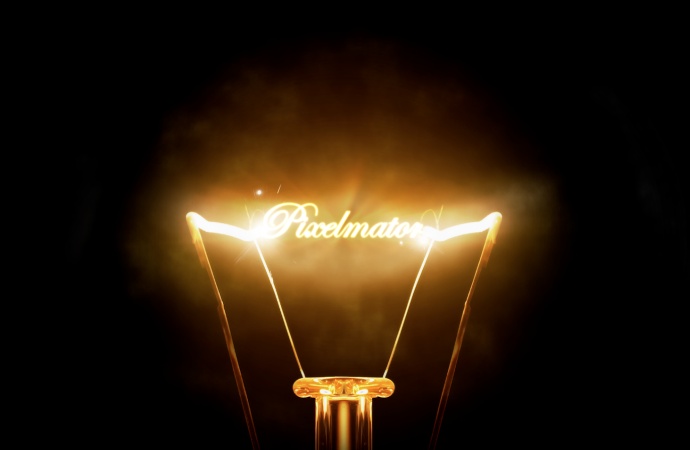
Conclusion
After a few blending changes and some basic filters we have a nice light effect done. It works really well for wallpapers and you can apply the same technique for other ideas. Now it's up to you.