by abduzeedo
The other day I was checking out old videos I, for some reason, uploaded to Youtube. I thought a few times about starting doing video tutorials, but I never moved forward. My biggest excuse/concern was that it would be too robotic. As I said, excuses… but I found this little video of how to create some quite nice water droplets in Photoshop. So I decided to give it a try and create an image with it. I just went further, I modernized with a nice chrome 80s look. So here it is.
Step 1
Create a document in Photoshop. I am using A4 format because it looks like a nice poster aspect ratio. Then with the background layer, fill it with a very subtle gradient from super dark grey to dark grey. It’s important that the background is not pure black because the Blending Modes might not work with black.
Step 2
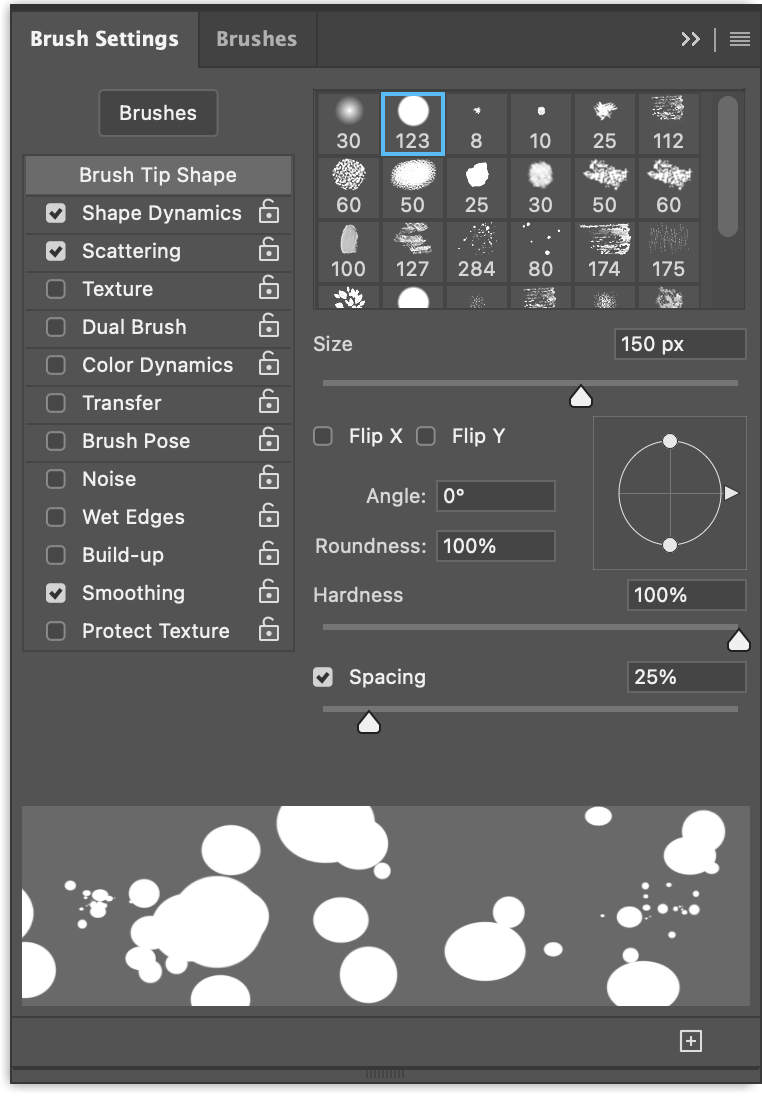
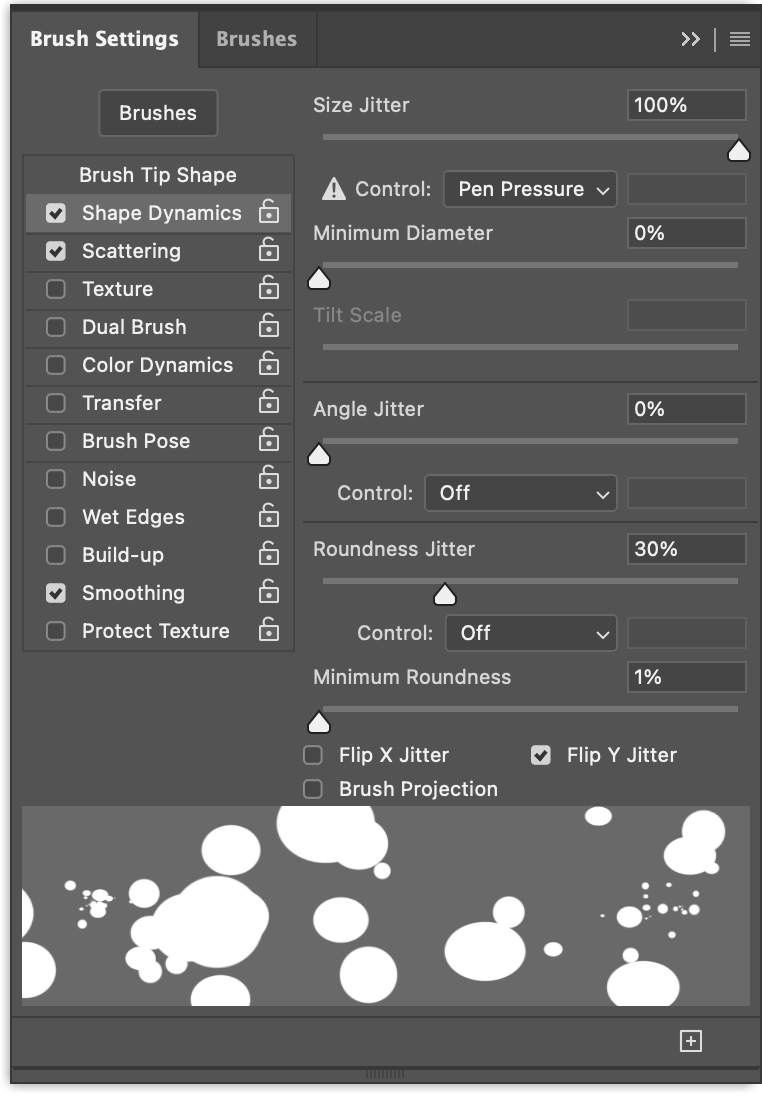
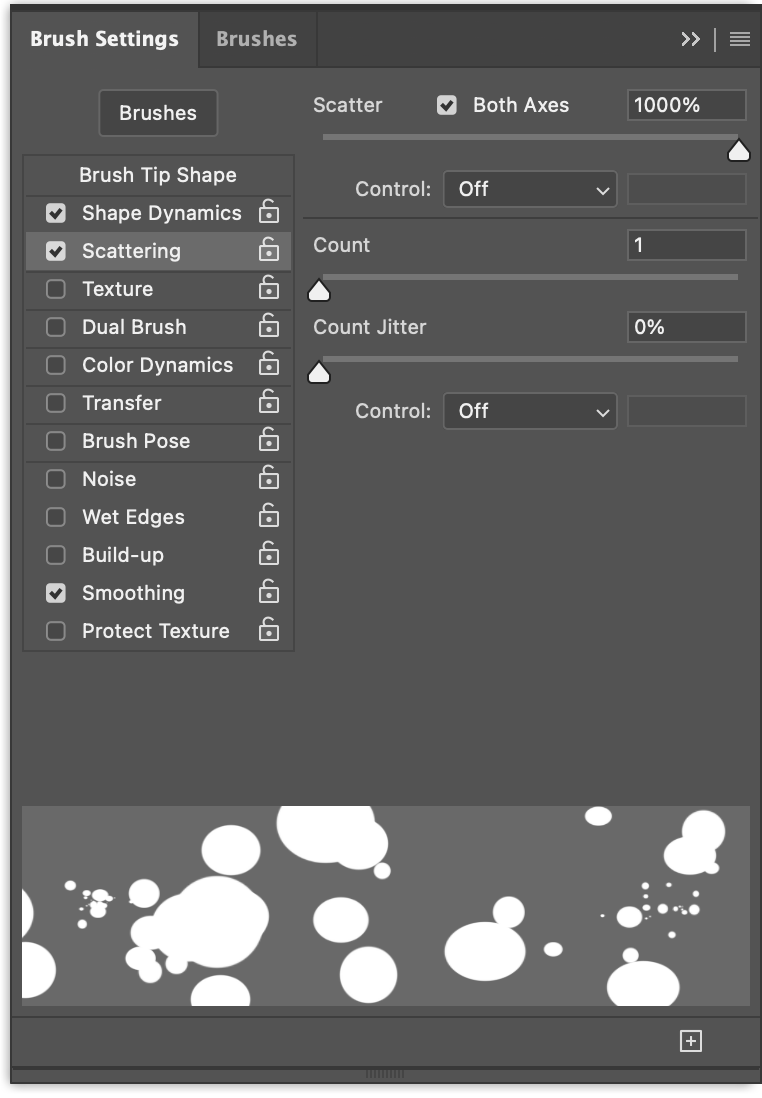
Select the Brush Tool B and let’s create a dynamic brush. Here’s what I did:
Step 3
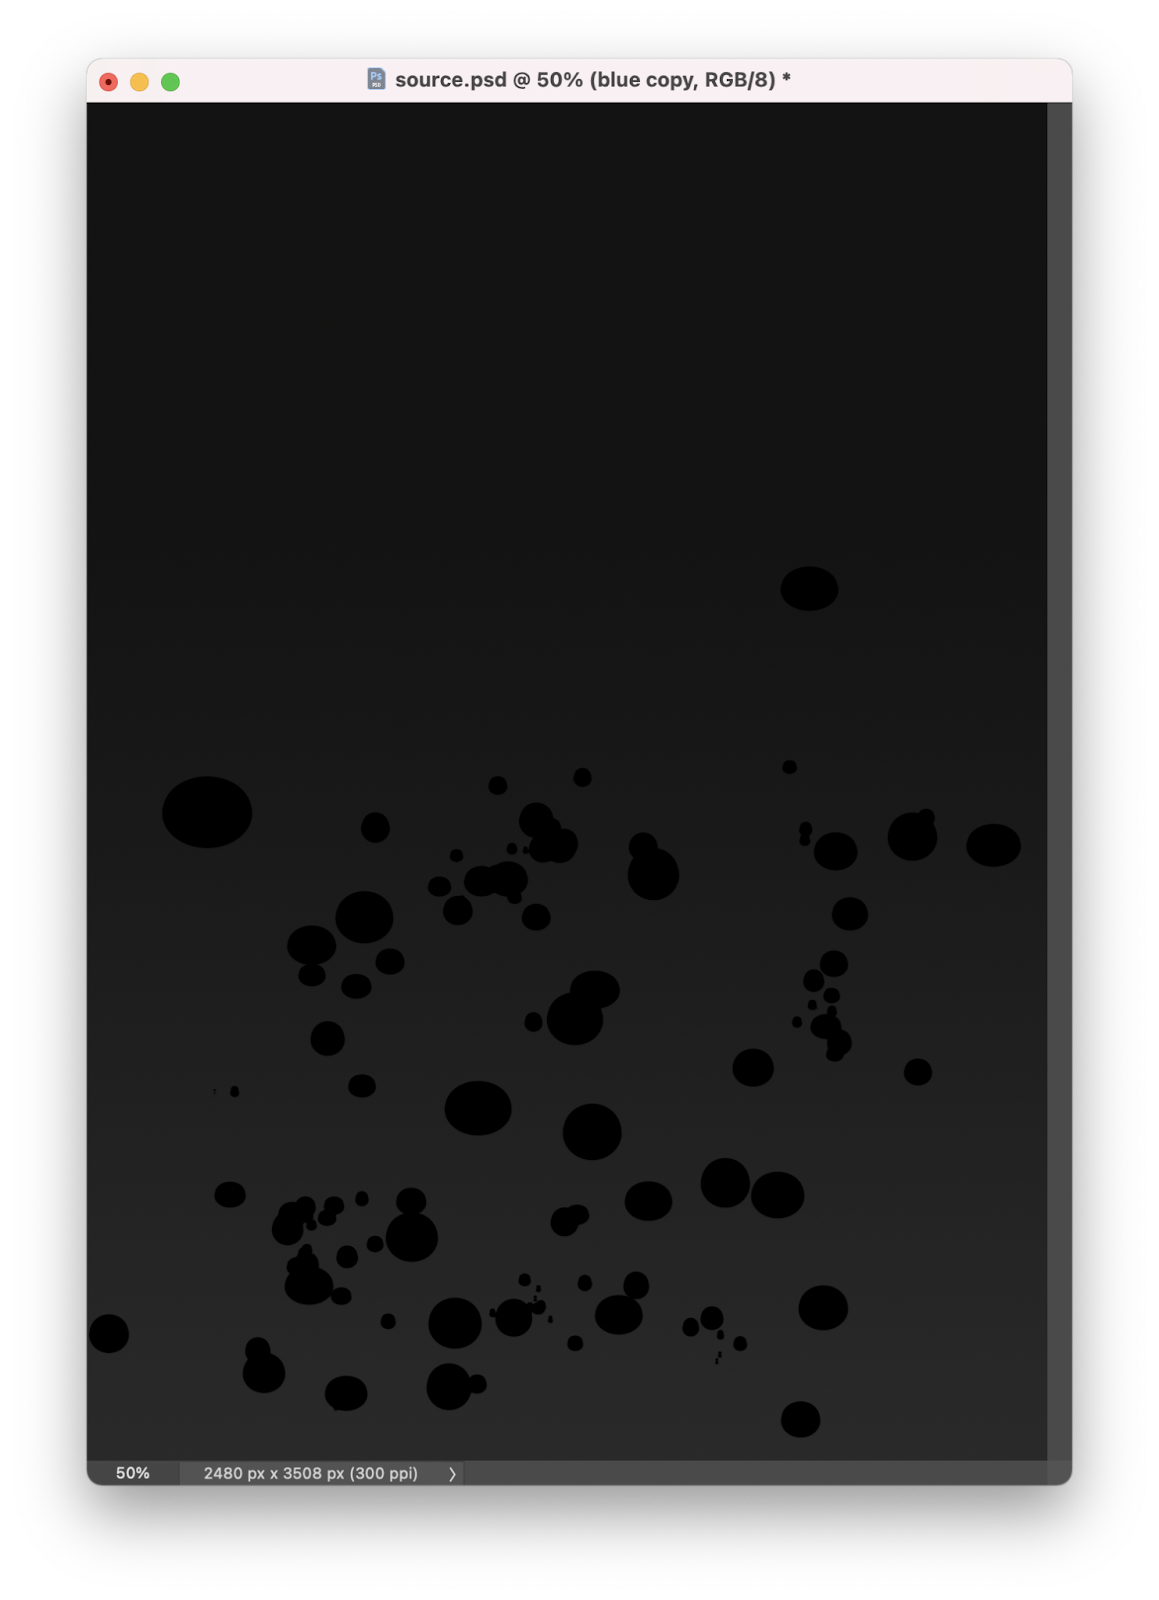
Paint the canvas with your new dynamic brush. The color doesn’t really matter because we will change it with Layer Styles.
Once you’re done I recommend you convert this layer to Smart Objects so you can change it later and it will propagate to all new instances we will create.
Step 4
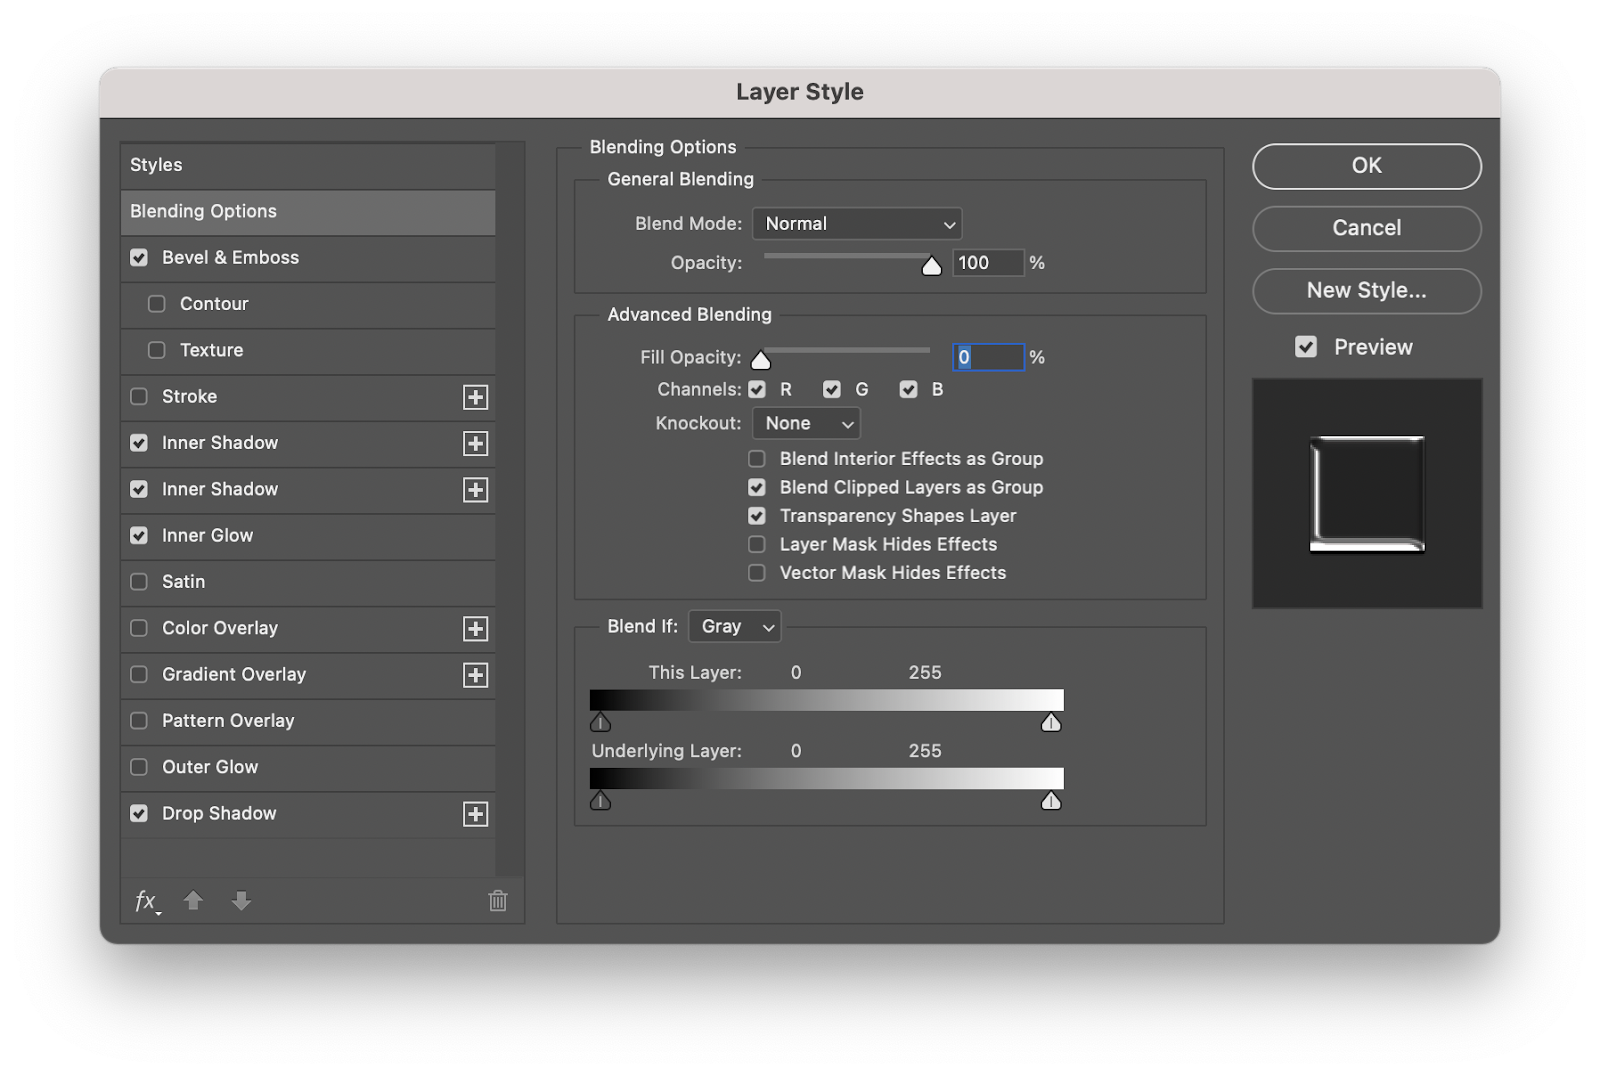
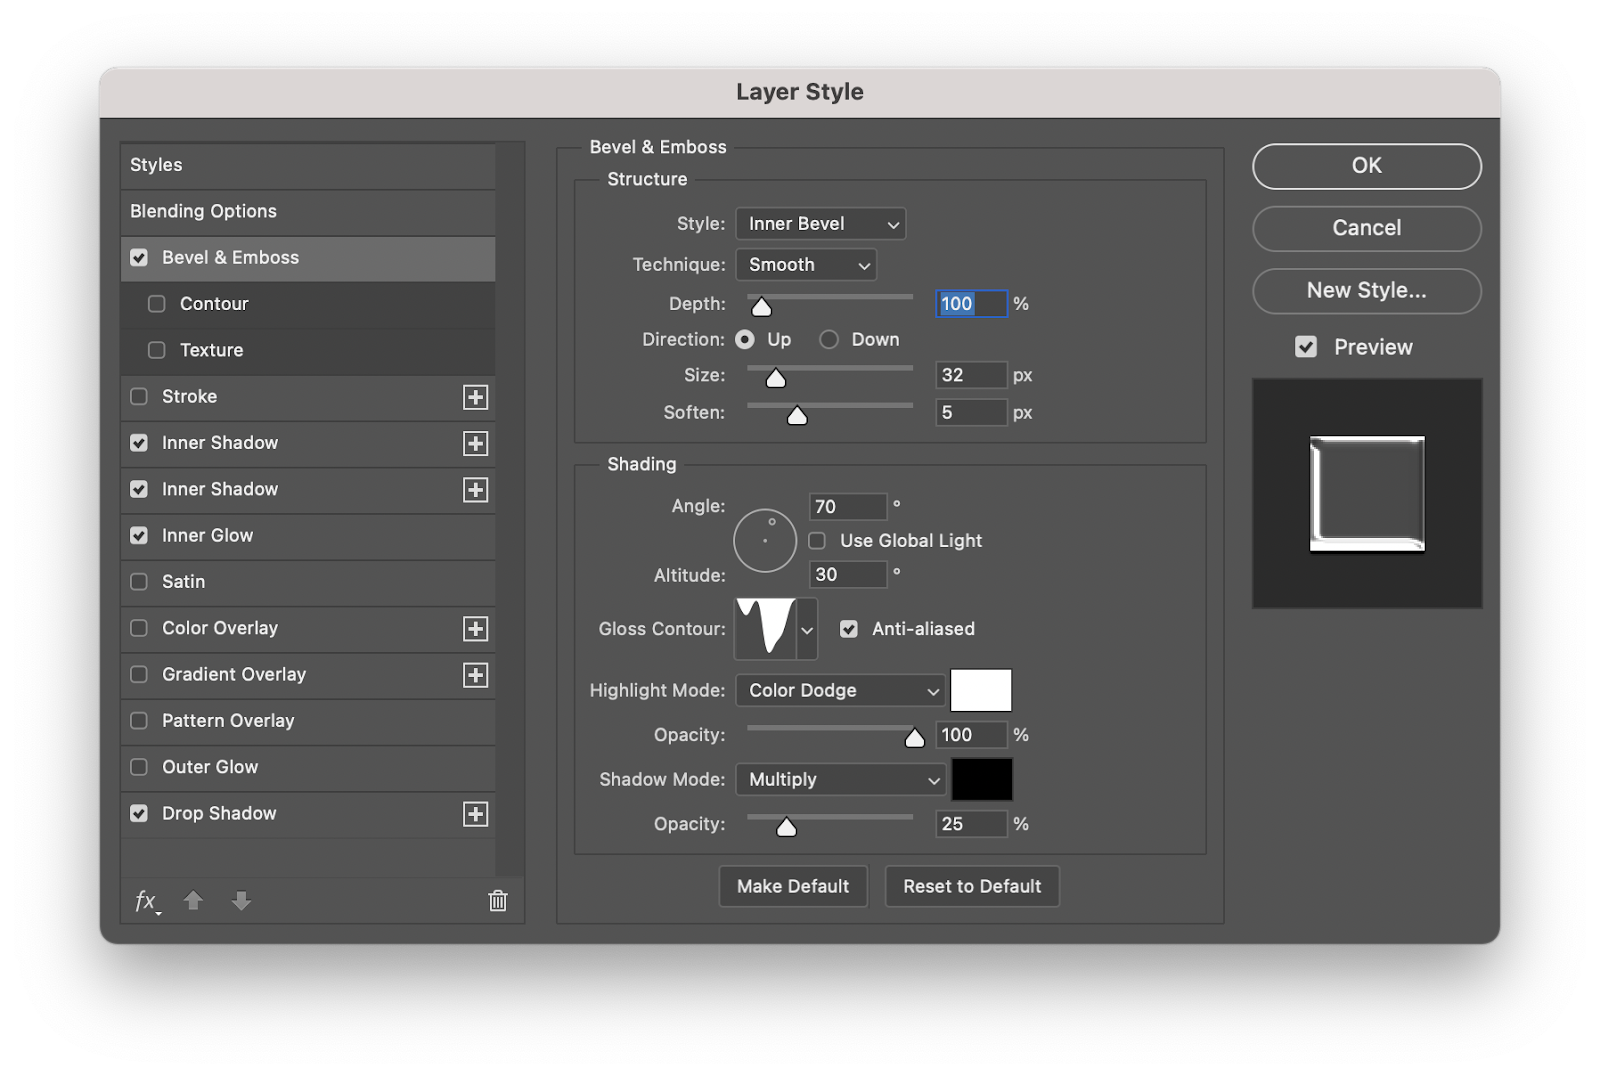
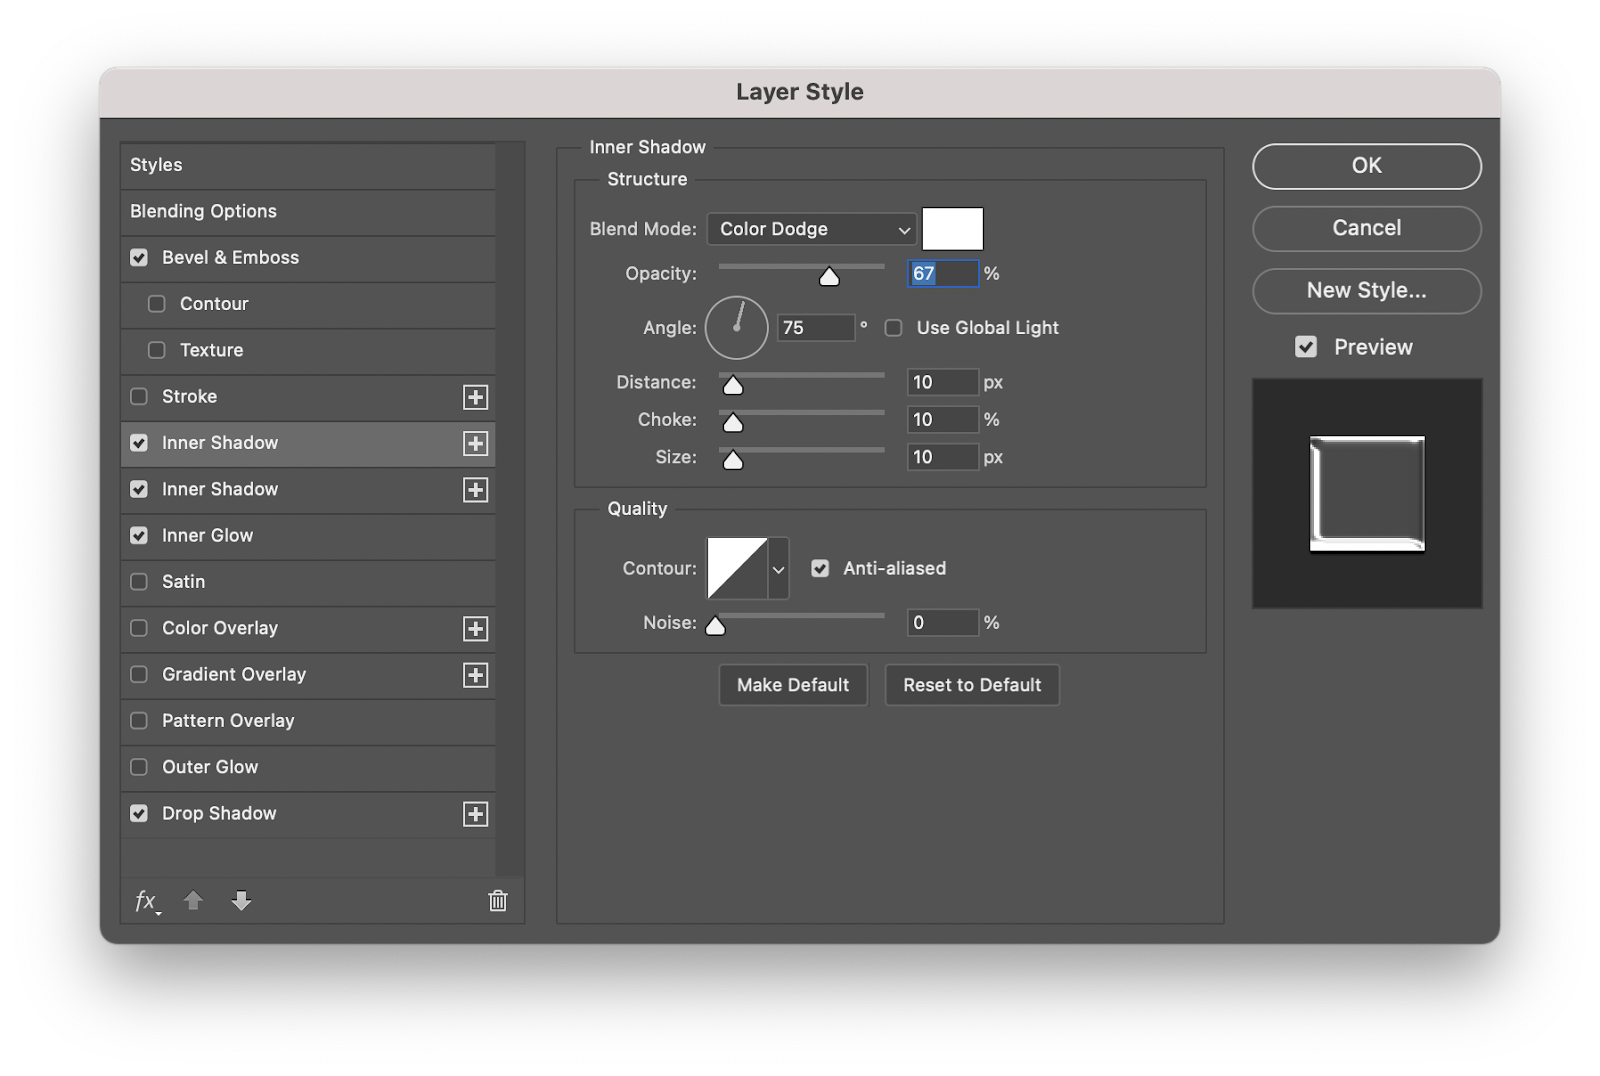
Layer Styles time. You can use the video in the beginning as reference or the images below.
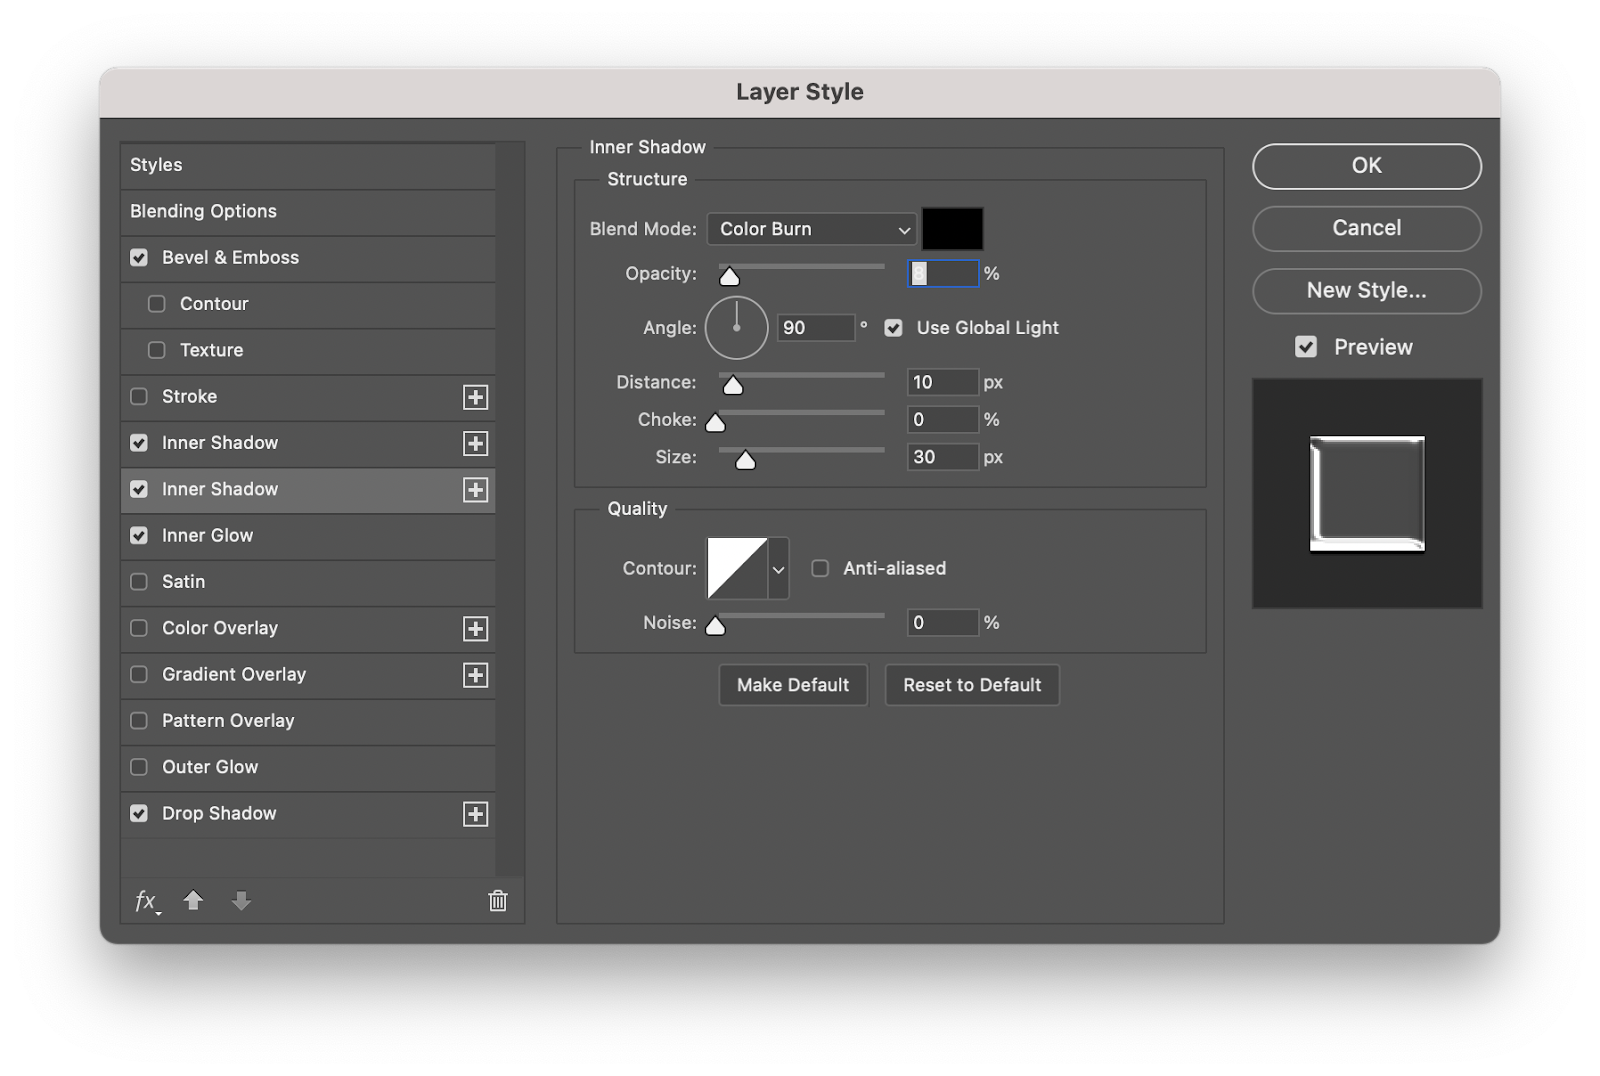
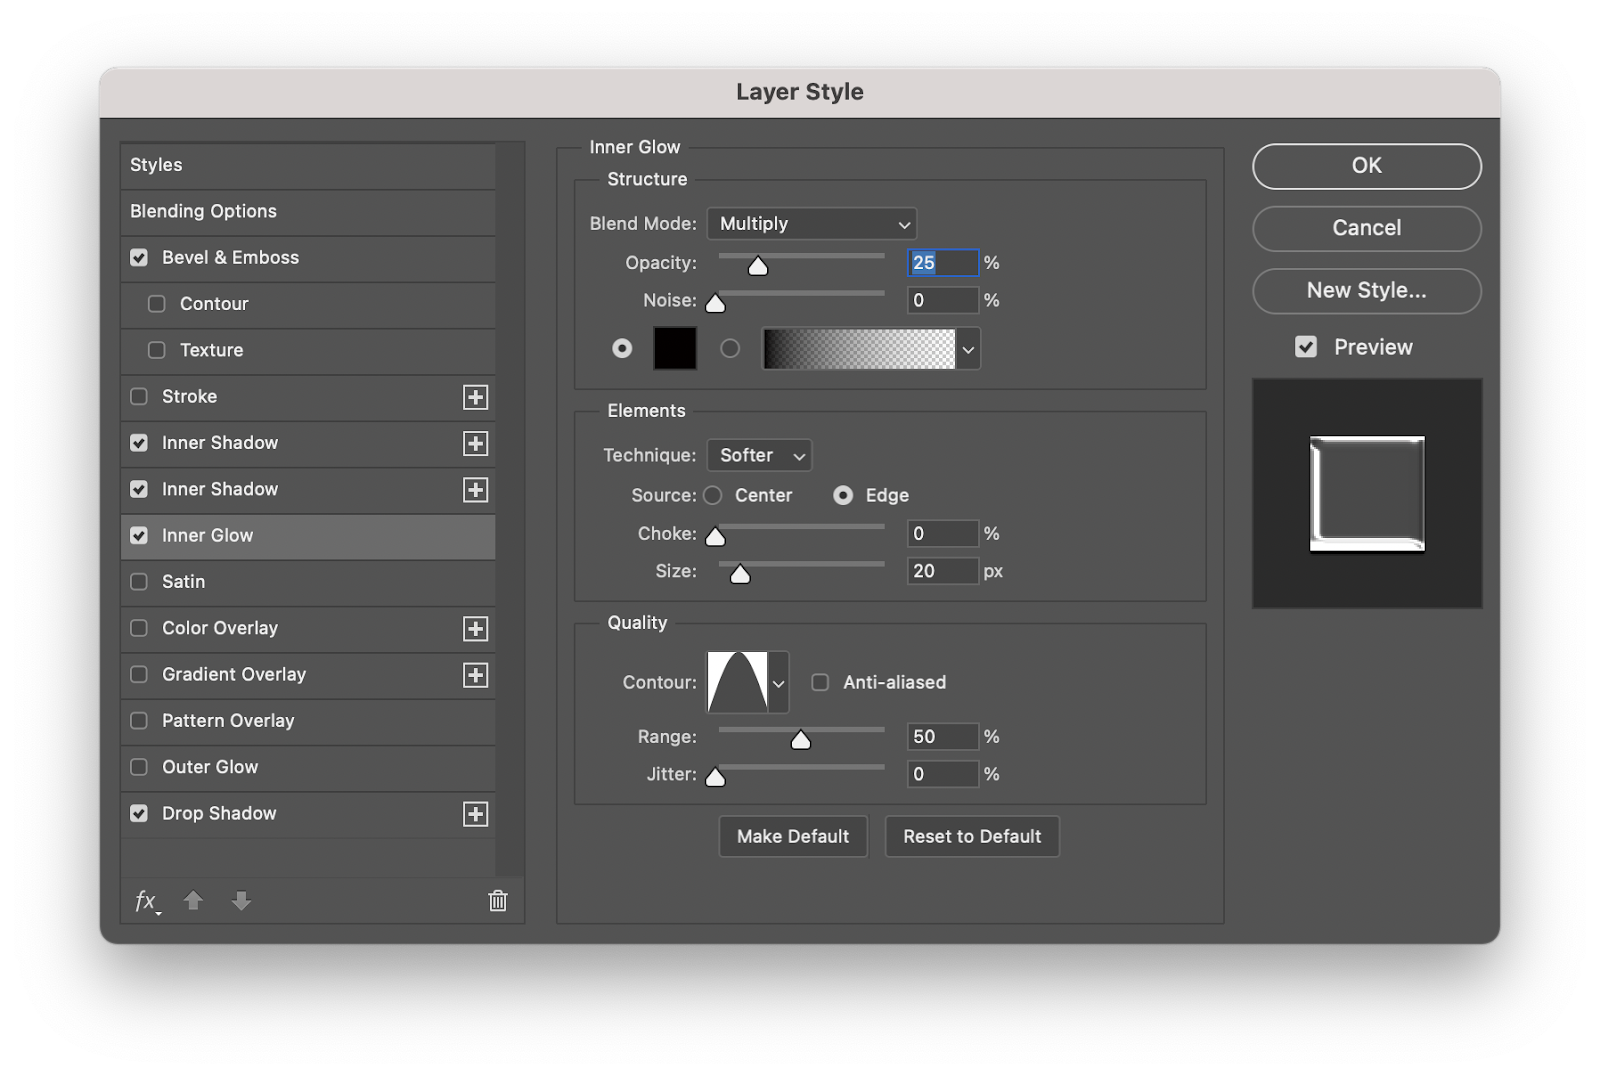
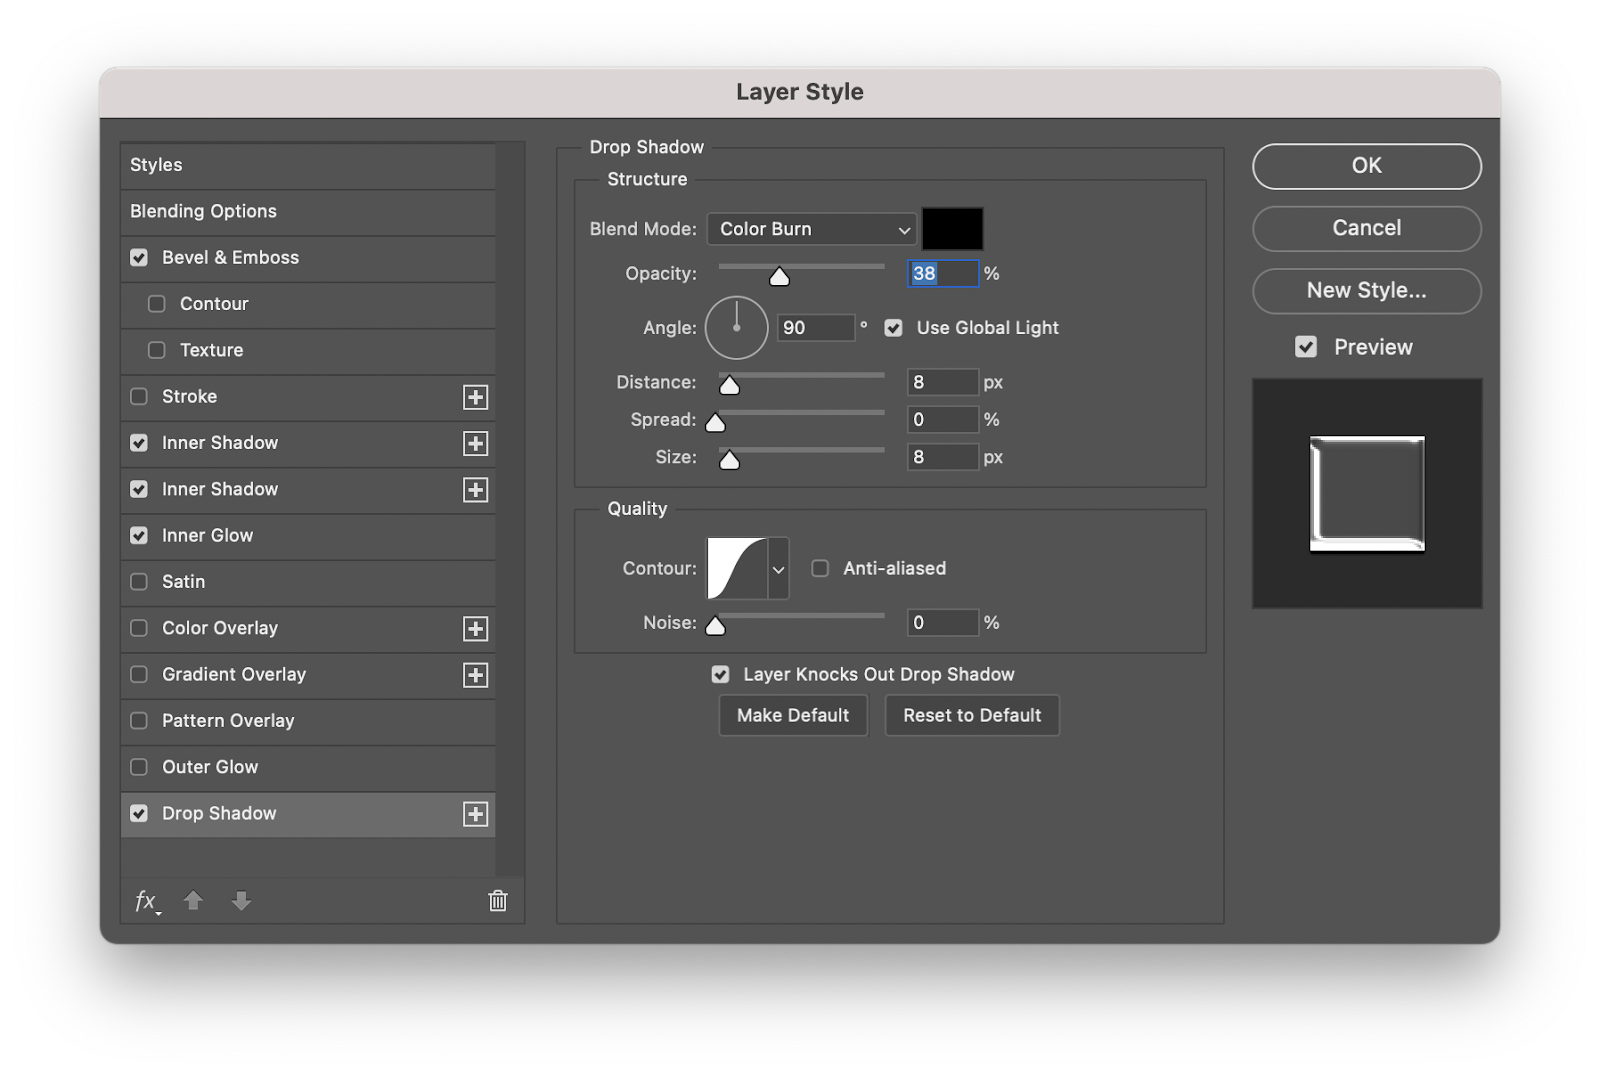
Step 5
So your brush now might look like liquid metal or some sort of retro-chrome material. Make 2 copies of that layer. You will have 3 layers then, rename them to red, green and blue.

Step 6
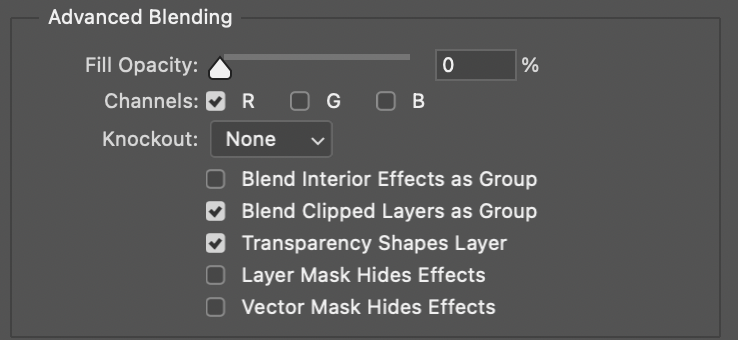
Holding shift, nudge the red layer to the left, that would move it around 10 pixels. Select the blue layer and nudge 10 pixels to the right now.
The next step is just to go to each one of the layers and disable the channels so you have just the one that is the name of the layer active.
Red channel on for the red layer
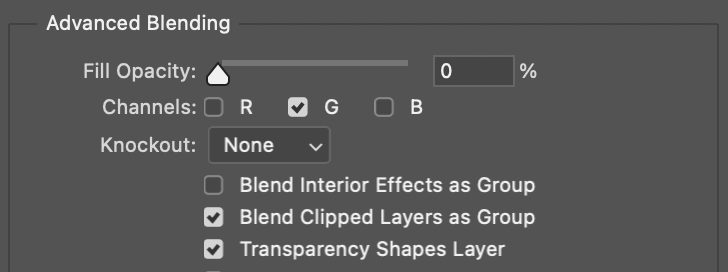
Green channel on for the red layer
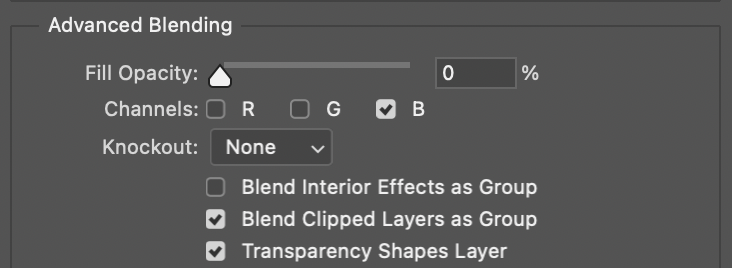
Blue channel on for the red layer
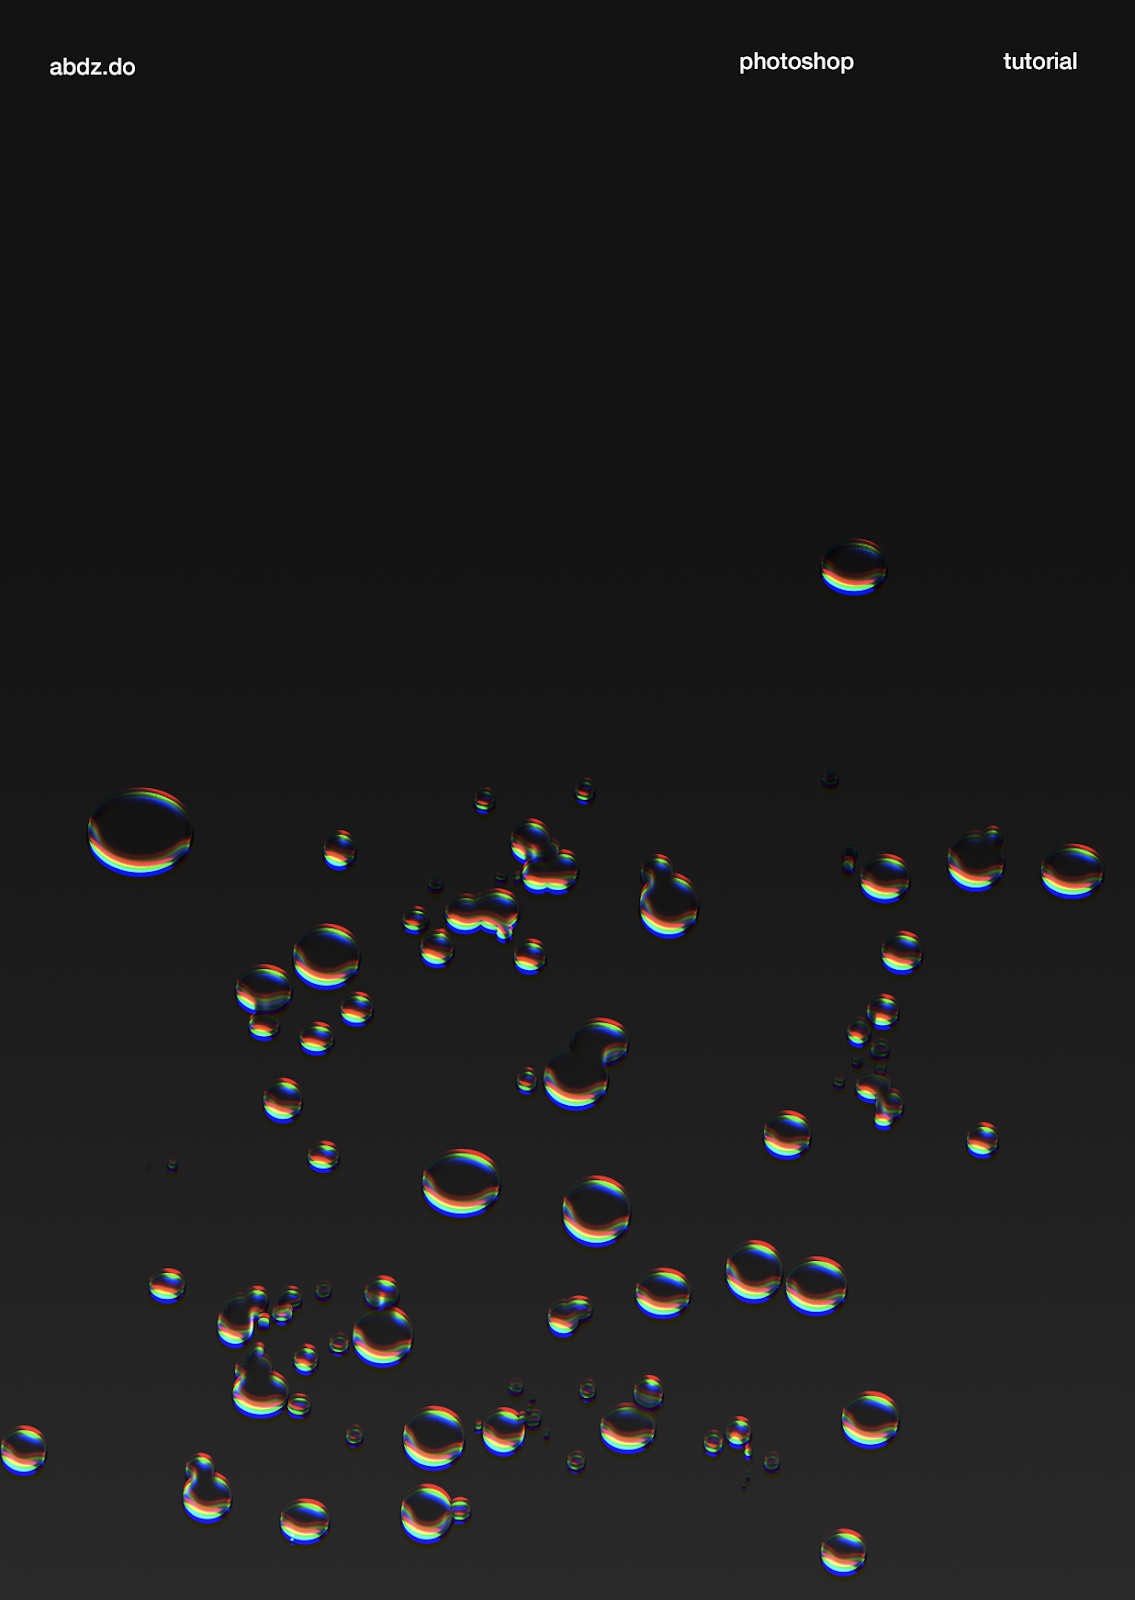
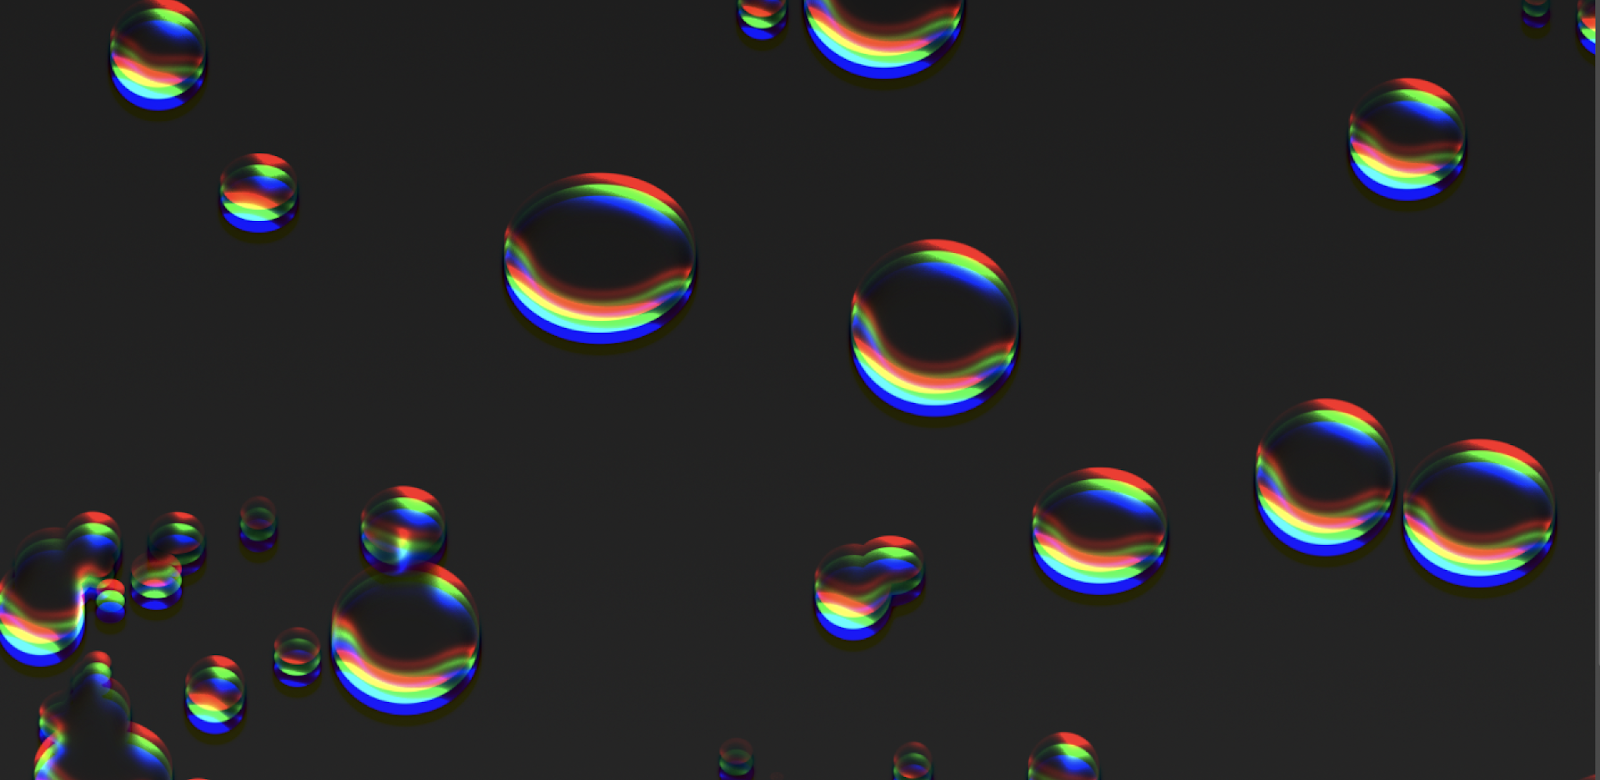
Conclusion
Here’s the result.
")


