by abduzeedo
I have been going back through old tutorials to fix some of the images that might be broken or with old formatting. The blog has changed quite a lot since we started 12 years ago. It’s incredible to see how many Photoshop tutorials we’ve written and how some of them stood the test of time. One of them was the Beautiful Water Effect in Photoshop. I love that tutorial, and it gave me the motivation that I need to continue studying After Effects. My goal was to try to reproduce the effect with some cool motion to it. With that, I would love to share a little After Effects tutorial on how I achieved the result.
A little disclaimer, I am not a pro with After Effects, on the contrary, I am learning, and my goal is to share the step by step on the things I discover along the way. I am sure there are more natural ways or better ways from other great resources, this one here is just a bit of my way of learning.
After Effects Tutorial
Step 1
The first thing to do is to try to understand how much in common After Effects and Photoshop have. In Photoshop this effect is quite simple, you use a displacement map. For my surprise, After Effects also have one.
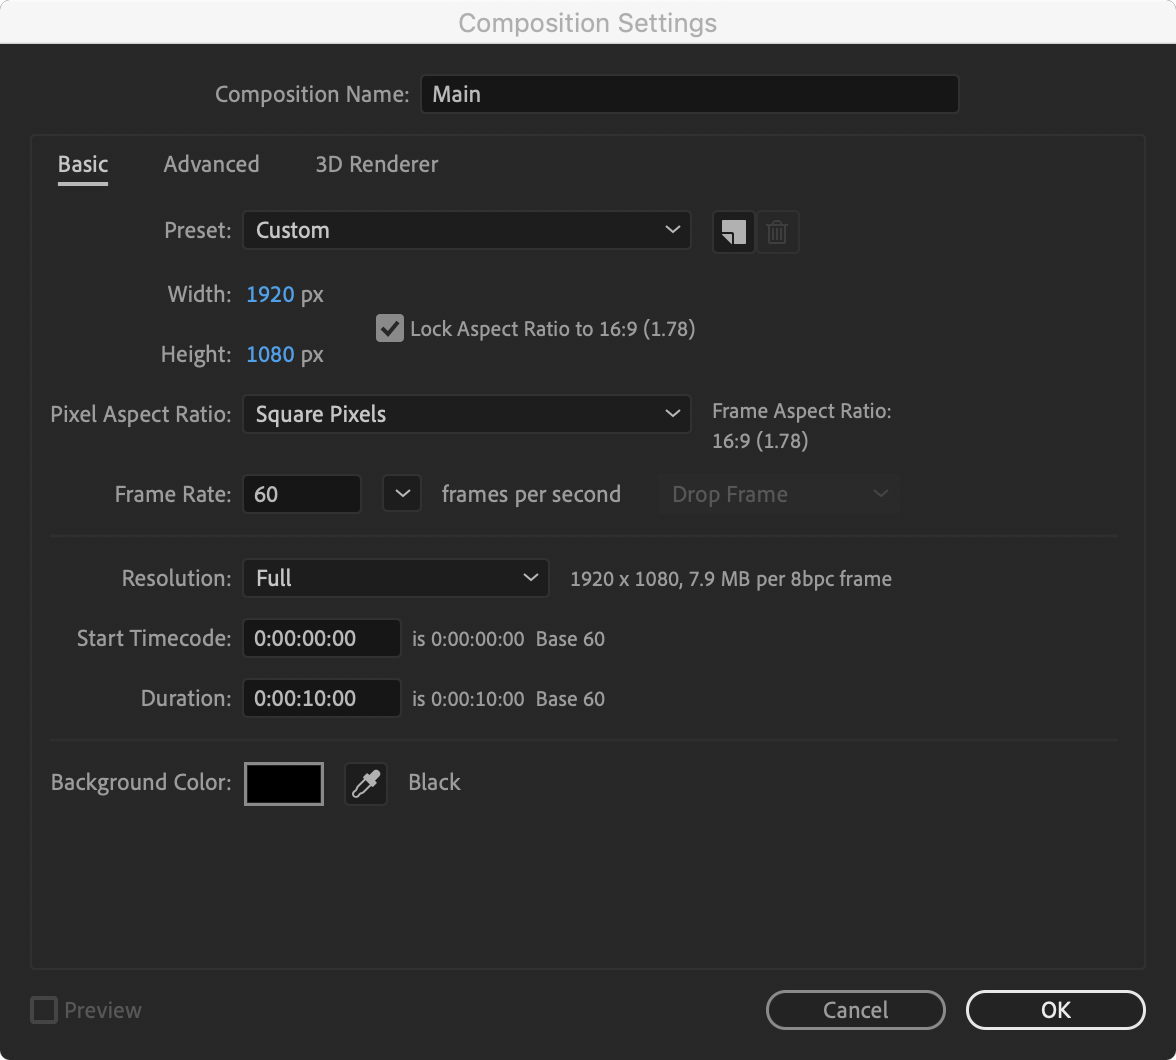
So let’s get this started. Create a new project and add a new composition. Composition>New Composition.
Step 2
For my Photoshop image, I used a photo of ocean waves. So now we need to find a video for this project. It’s amazing how similar things feel when I started doing Photoshop tutorials. It was tough to find high-quality resources; we didn’t have Unsplash back in the day.
Now for photography, we have a plethora of excellent places. For video, the story is a bit different. I started this project using a sample for Adobe Stock, however, after searching I found a right place, it’s called Pexel Videos. The clip I am using is from there; it’s titled Close-Up Video Of Water Ripples by Stas Knop.

Step 3
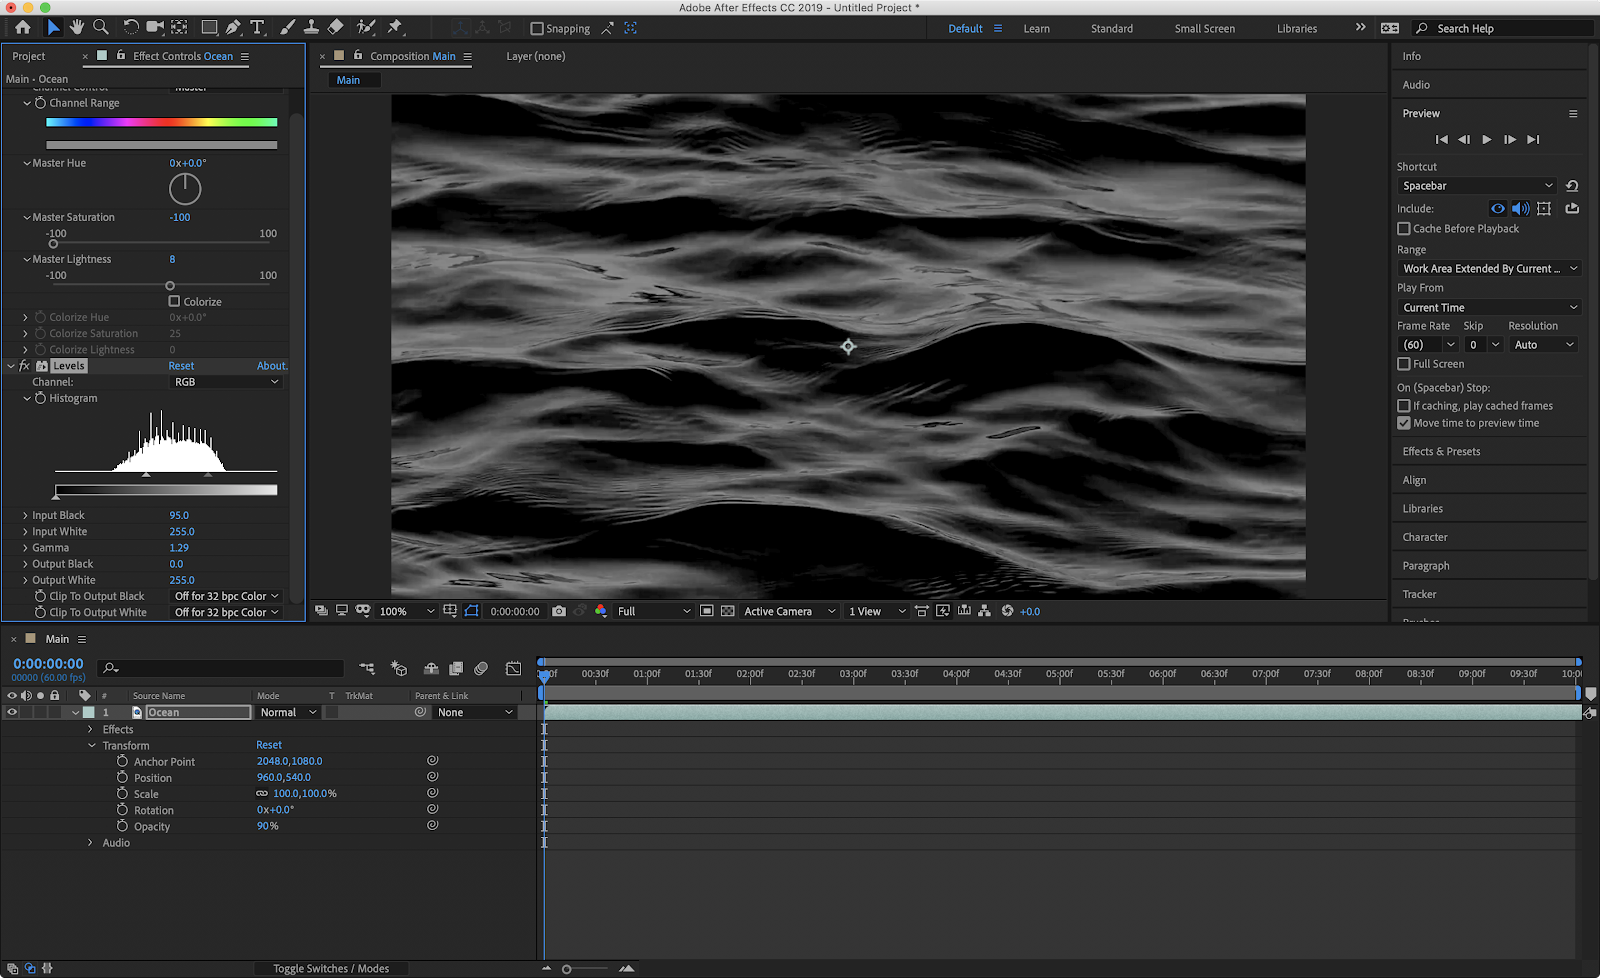
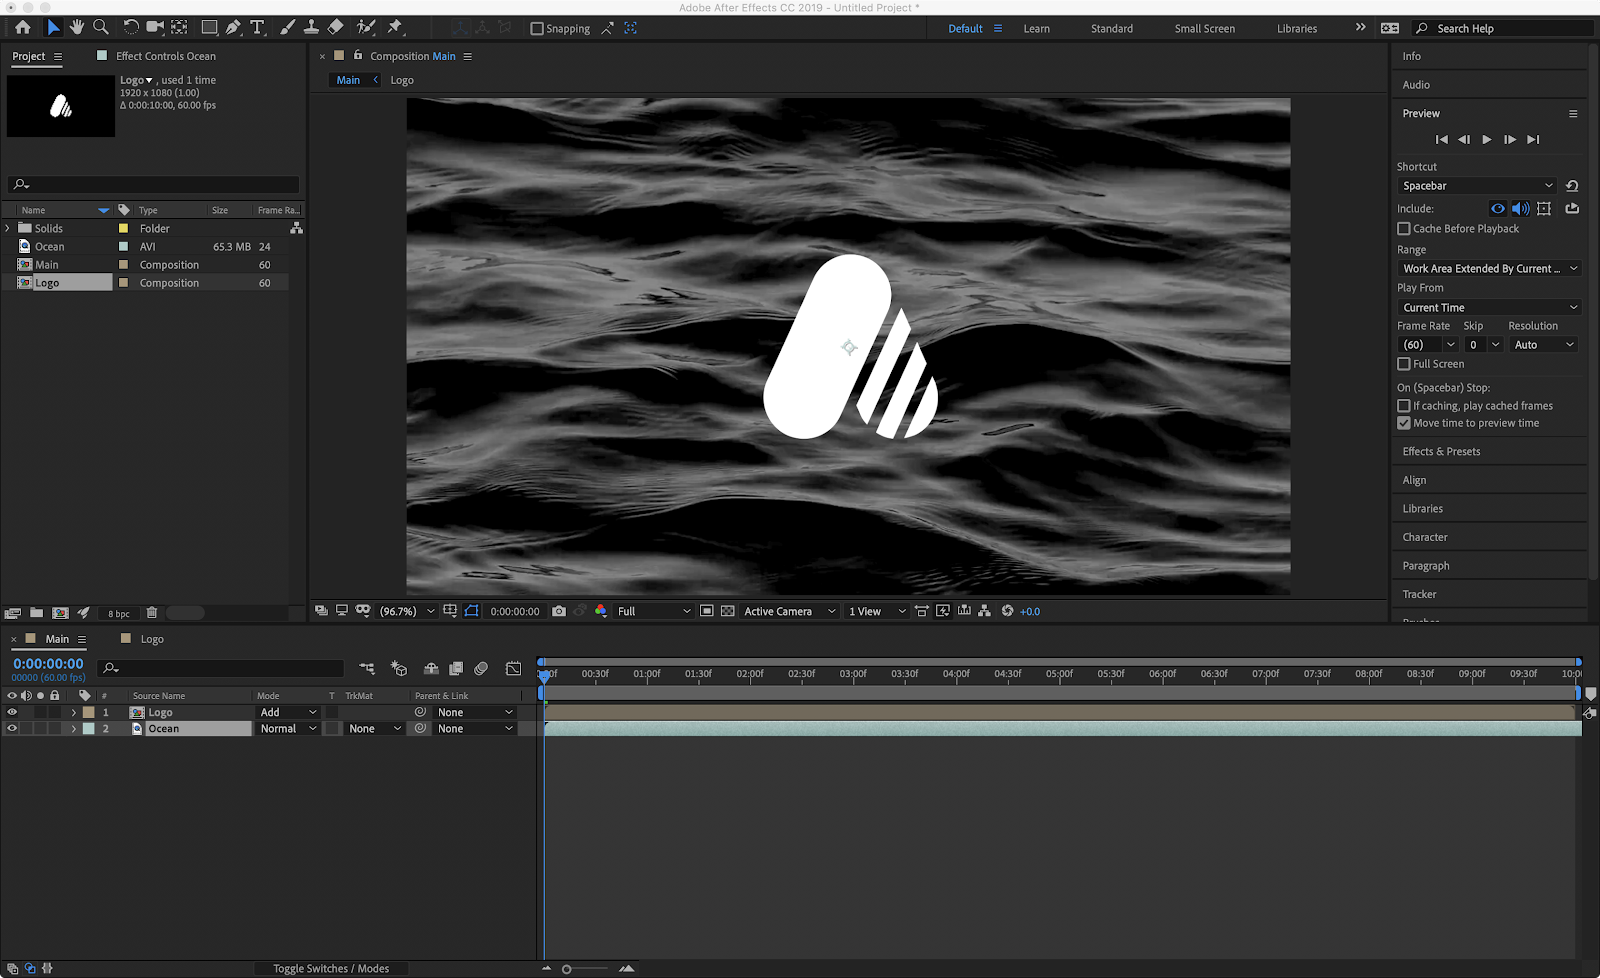
Download the video and drag it to your Project panel. In Project pane, select the clip and hit “Enter,” to rename it. I like to keep the names short. I just called mine “Ocean.”
After that, drag the “Ocean” clip to your composition timeline panel. That way it gets centralized automatically.
Step 4
Let’s change opacity to 90%. In the timeline, expand the Ocean object, the expand Transform, and you will see Opacity. Just turn it to 90%

Step 5
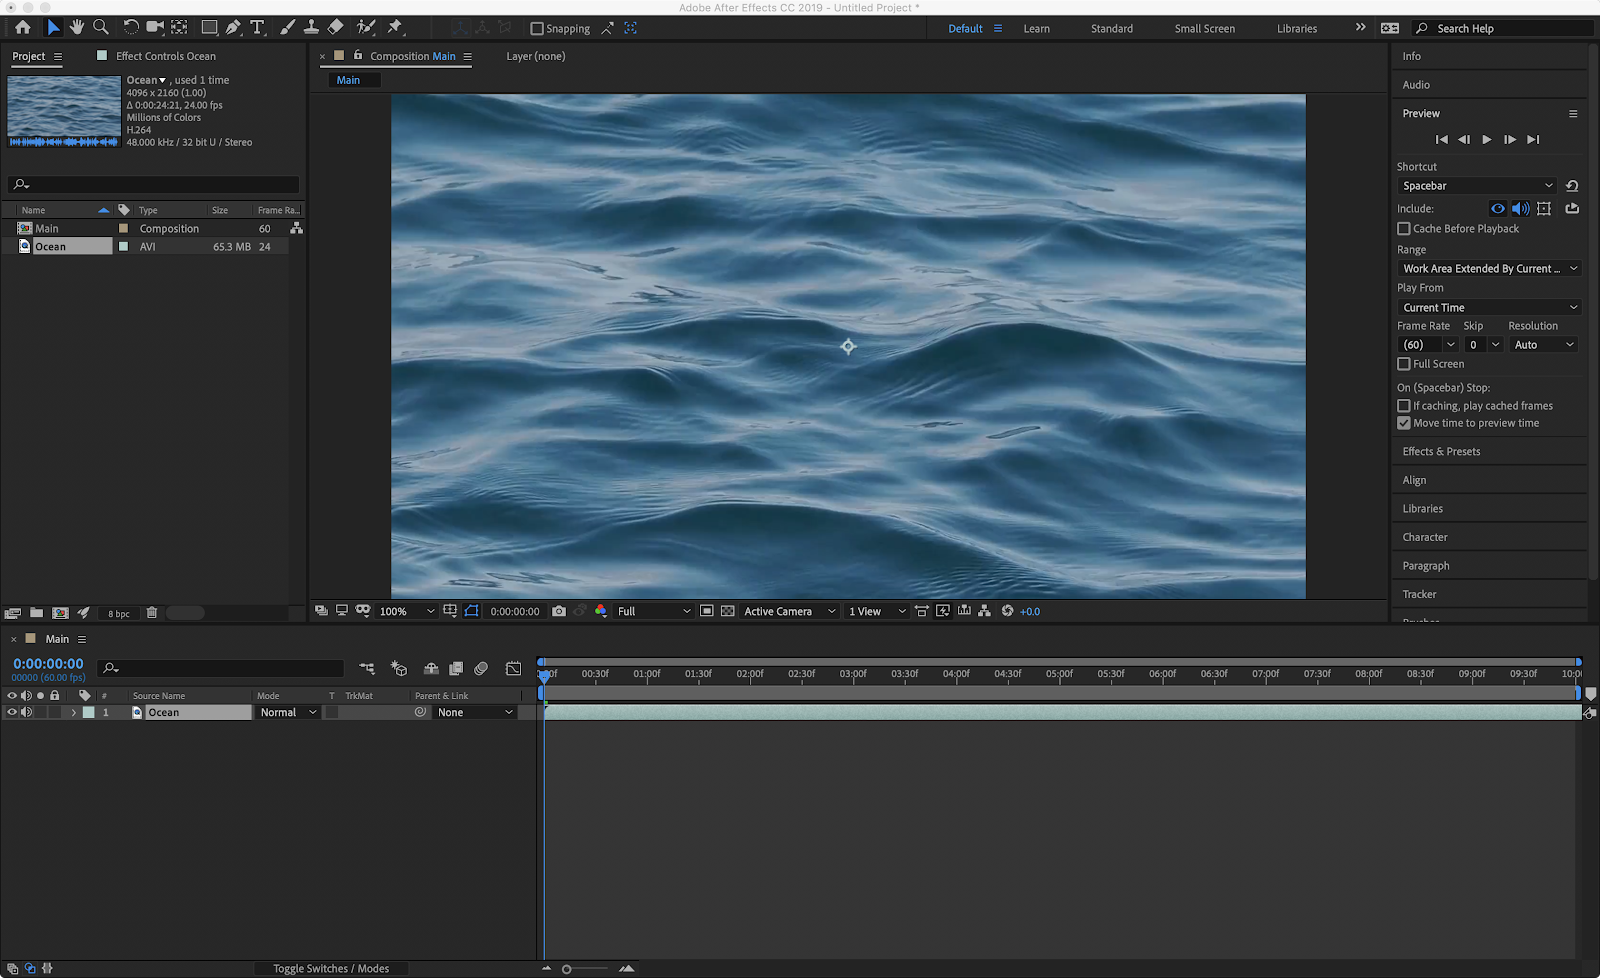
Now let’s adjust the colors. Go to Effect>Color Correction>Hue/Saturation. Reduce the Saturation to -100.
Step 6
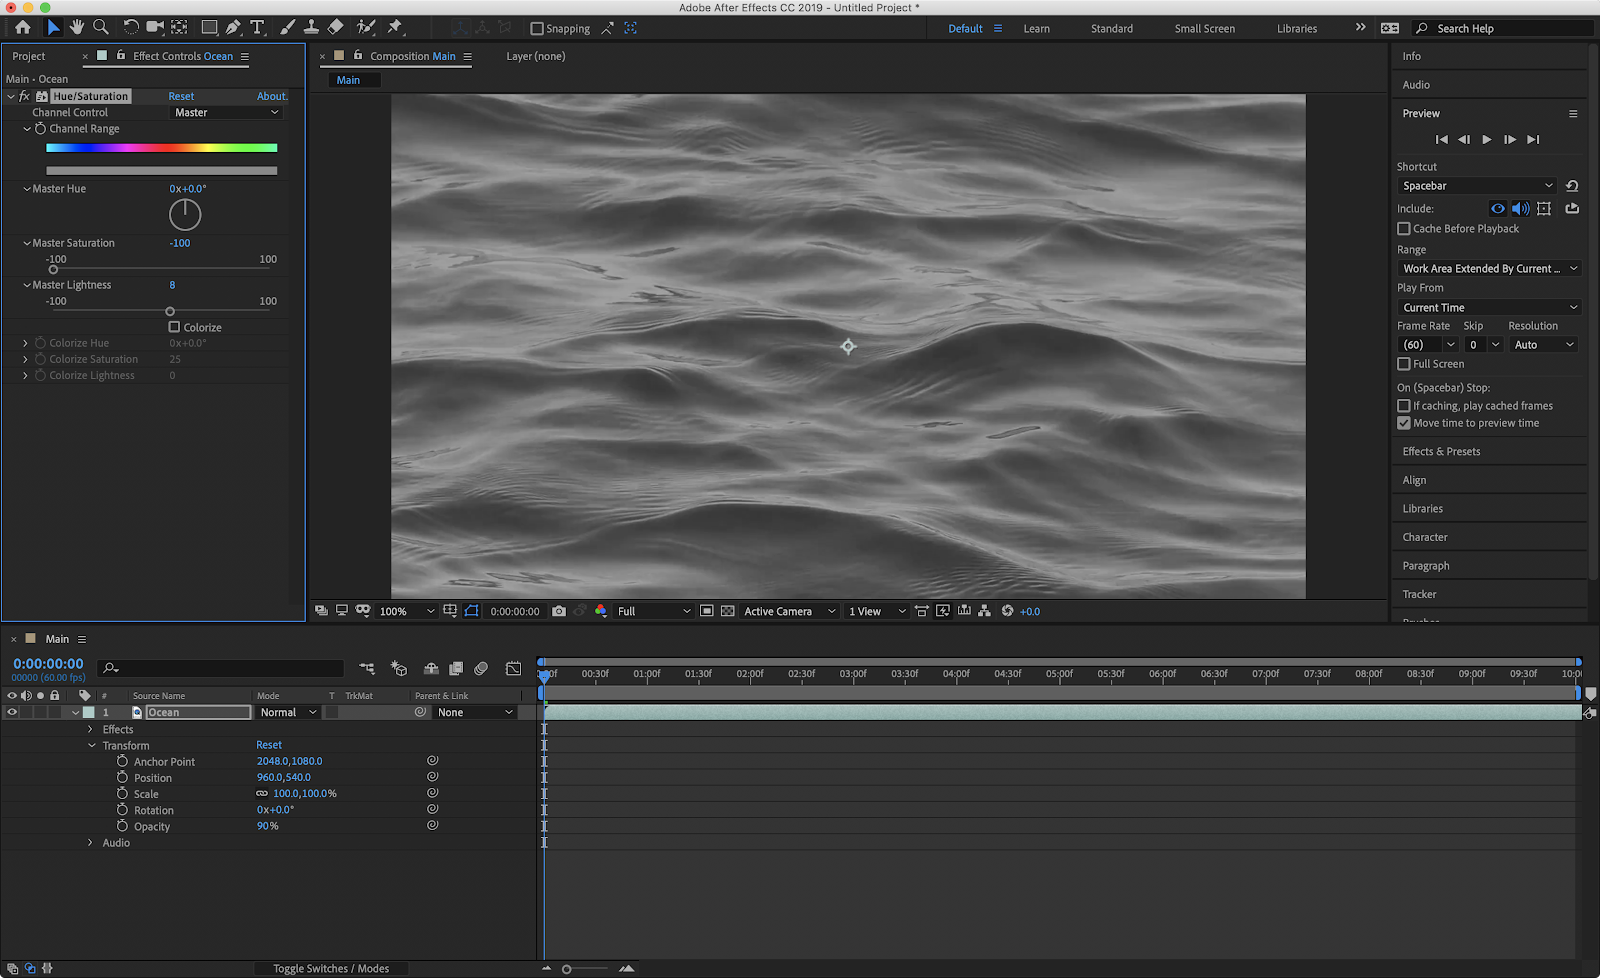
Let’s tweak the Levels now to remove the greyish look. Go to Effect>Color Correction>Levels. Use the values below.

Step 7
Let’s import the artwork we want to use for the displace effect. I am using the Abduzeedo logo. My logo is in vector format in Illustrator. Importing it to After Effects is straightforward. Again, I don’t know if it’s the right way, but this is how I did.
- Select the vector in Illustrator and copy it.
- In After Effects add a new solid layer. For the name use Logo and make sure the color of the layer is white.
- Paste the logo in the composition as a path mask, and that’s it.
- Select the layer in the timeline and go to Layer>Pre-Compose. The reason for this is if you want to replace the paths later you can do it without worrying about the timeline, imagine Smart Objects in Photoshop.
Step 8
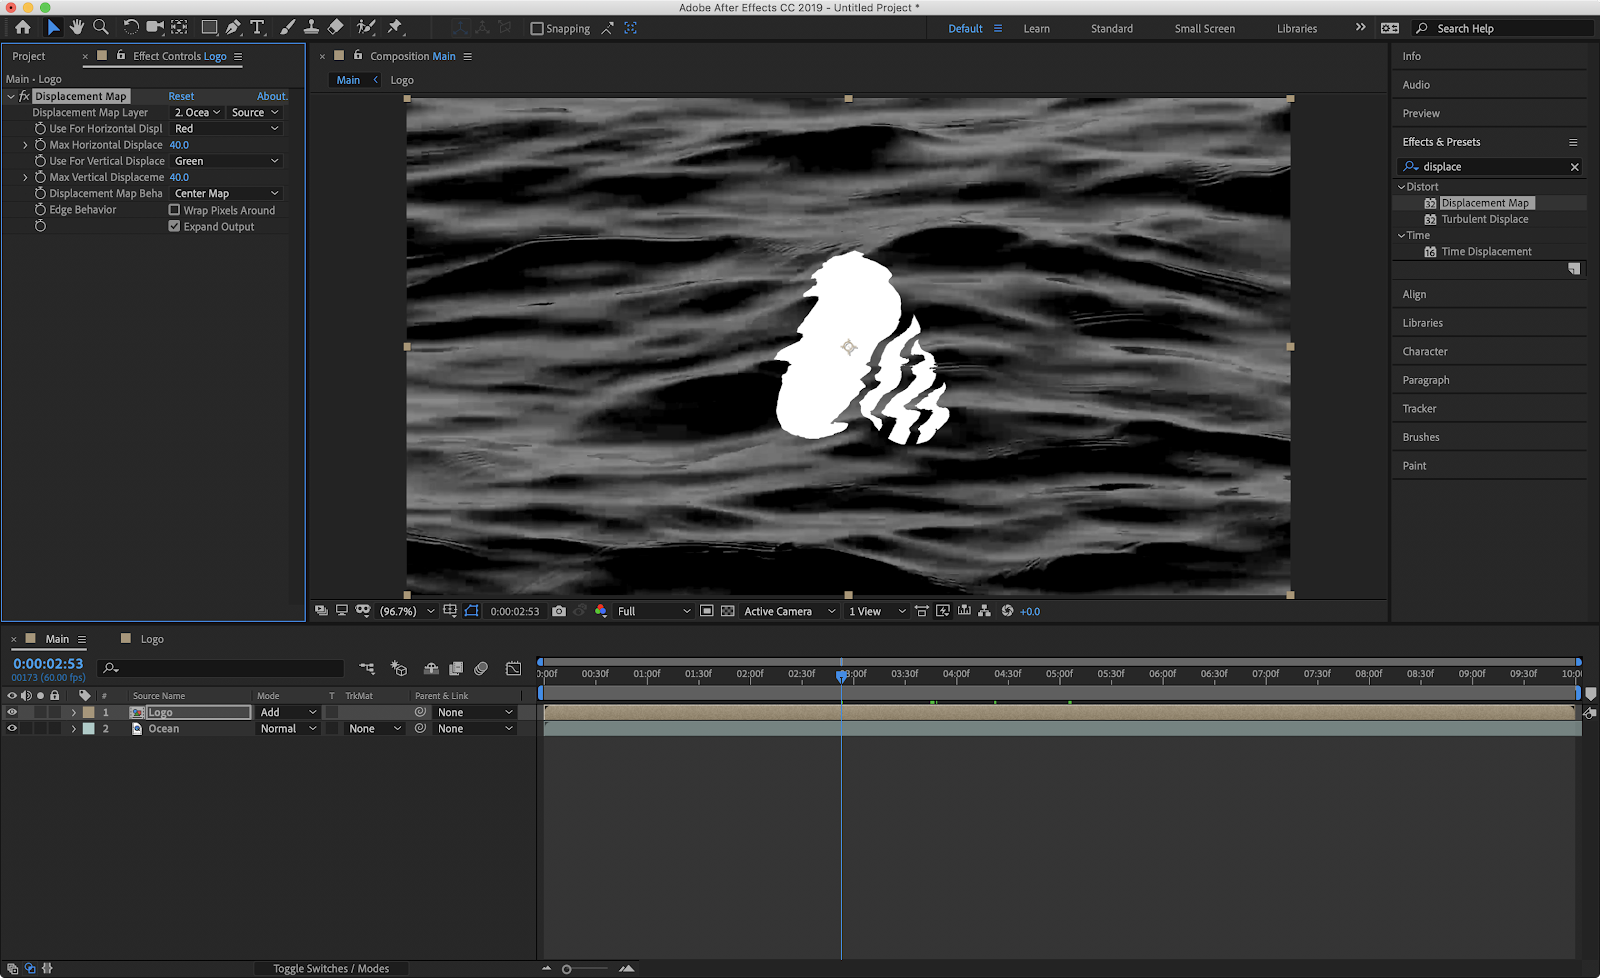
Time to add some magic, at least it feels like that for me. One thing that I love about After Effects is that it does have some neat tricks, for example, the Effect & Presets panel has a search box. So you can type Displacement and boom, you will find what you need. In our case the Displacement Map. It can also be found via Effect>Distort>Displacement Map.
Make sure the Logo layer is select and just double-click on the Displacement Map option. You will notice on the left side there’s a new panel called Effect Controls. Let’s tweak these numbers to apply the effect to our layer.
- For the Displacement Map Layer select the Ocean layer.
- Tweak the Max Horizontal and Vertical Displacement. Depending on the logo and how much distortion you want. The cool thing is that you can animate these values too. I will show you an example at the end.


Step 9
To make it more realistic, duplicate the Ocean layer and reorder, so it’s on top of the Logo layer. After that change the Blend Mode to Multiply. After that change the opacity to 70%.

Step 10
The effect is pretty much done, but you can also try to add a little radial gradient to focus everything on the center of the composition. I haven’t found an easy way to add one, but here’s my hacky way.
- Create a new composition. Make sure the background is black
- Add a new solid layer with white color.
- With the Ellipse Tool Q add a Circle in the center. It will mask the white layer.
- Go to Effect>Blur & Sharpen>Gaussian Blur. Apply a significant value according to the gradient you want.

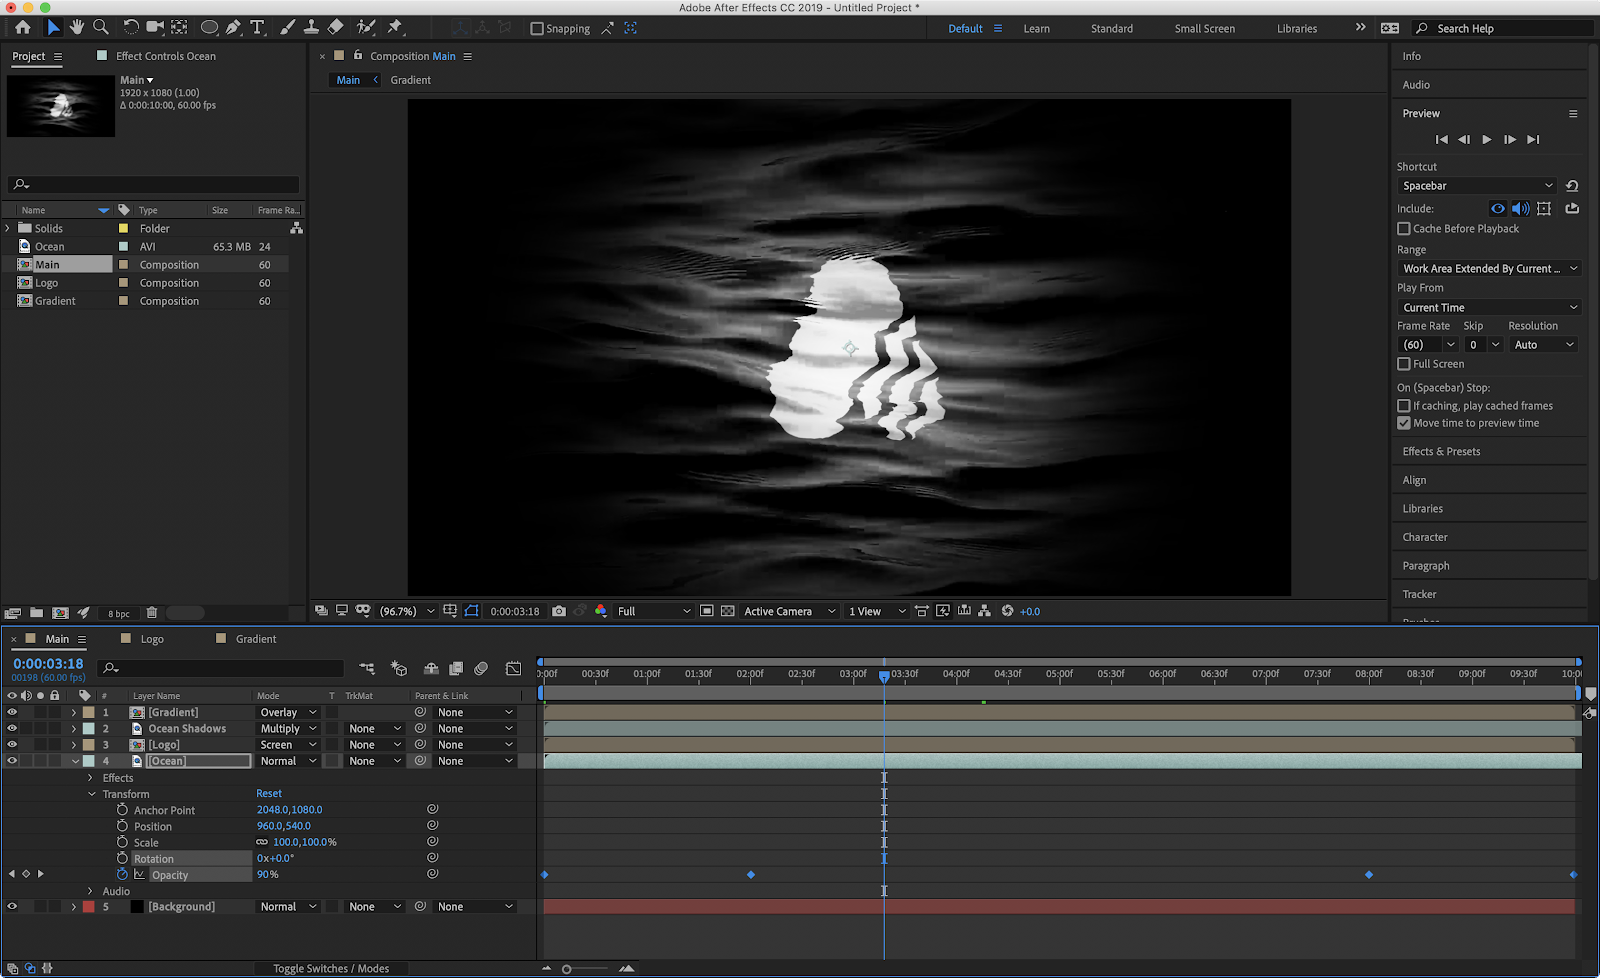
Step 11
Back to the main composition. Drag the Gradient composition to the timeline, below the logo but above the Ocean layer. Change the Blend Mode to Overlay.

Step 12
That’s it. The necessary effect is done. What you can do now is try to animate the in and out of the composition. You can do that by tweaking some of the values of the displacement, for example:
- Select the Logo and go to Effect Controls>Displacement Filter.
- Make sure the timeline is in the 0s. And click on the little Clock/Time watch icon next to Max Horizontal Displacement and Max Vertical Displacement.
- Move the timeline to 3s and add keyframes. It’s the little diamond icon on the left side
- Move to 7s and add more keyframes
- Move to the end of the timeline and add two more keyframes. For these, change the values of the displacement to 300.
- Move to the beginning and change the displacement values to 300 as well.
- Select all keyframes, then with the right-click select Keyframe Assistant and then select Ease Ease.


Step 13
Let’s make the ocean fade in and fade out. To do that is quite simple.
- Select the Ocean Layer and go to the 0s of the timeline. Expand the layer and select Transform>Opacity.
- Click on the little stopwatch icon to add a keyframe.
- Move to the 2s time and click on the “add keyframe” diamond icon.
- Move to 8s and add another keyframe.
- Move to the end of the timeline and change the opacity to 0%. It will automatically add a keyframe.
- Select all keyframes, then with the right-click select Keyframe Assistant and then select Ease Ease.
- With the keyframes selected, copy them. Select the Logo layer, go to Opacity and paste them to replicate the keyframes on that layer.
Conclusion
The effect is pretty much done. You can adjust the timing and add more finesse. That for me is the most challenging part, so have fun and let us know if you have any questions.
Download After Effects File


![Neon light effect in Photoshop [revisited]](/sites/default/files/styles/square_1x1/public/originals/hero_neon.png?itok=lP4mbIak "Neon light effect in Photoshop [revisited]")