by abduzeedo
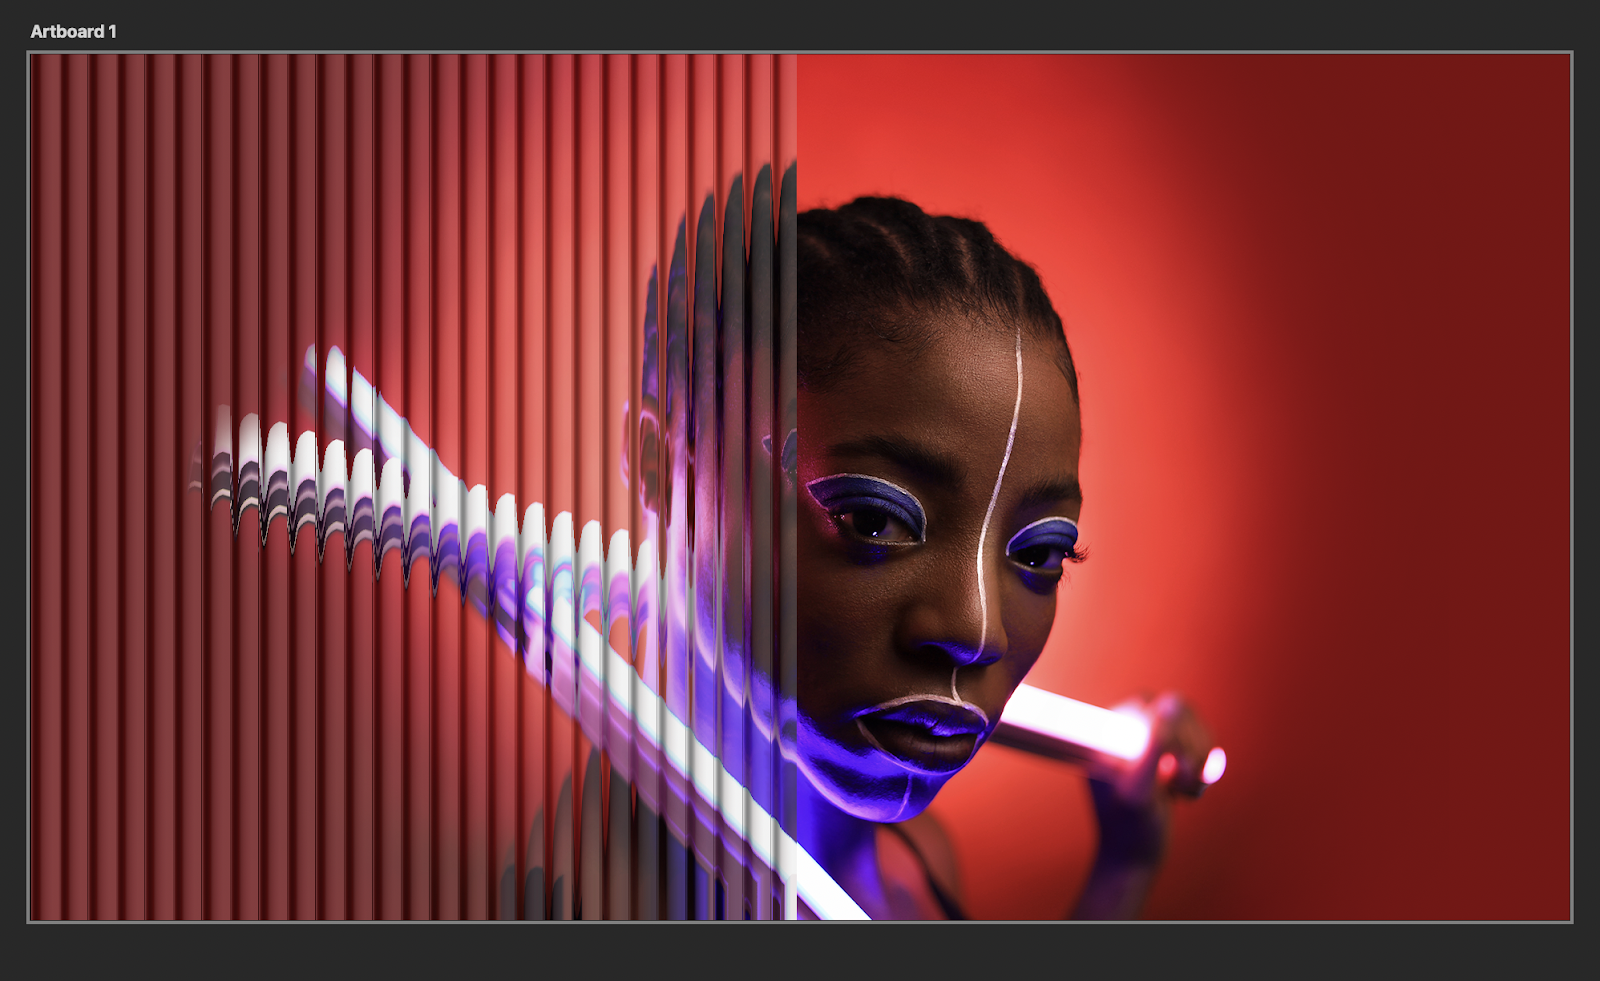
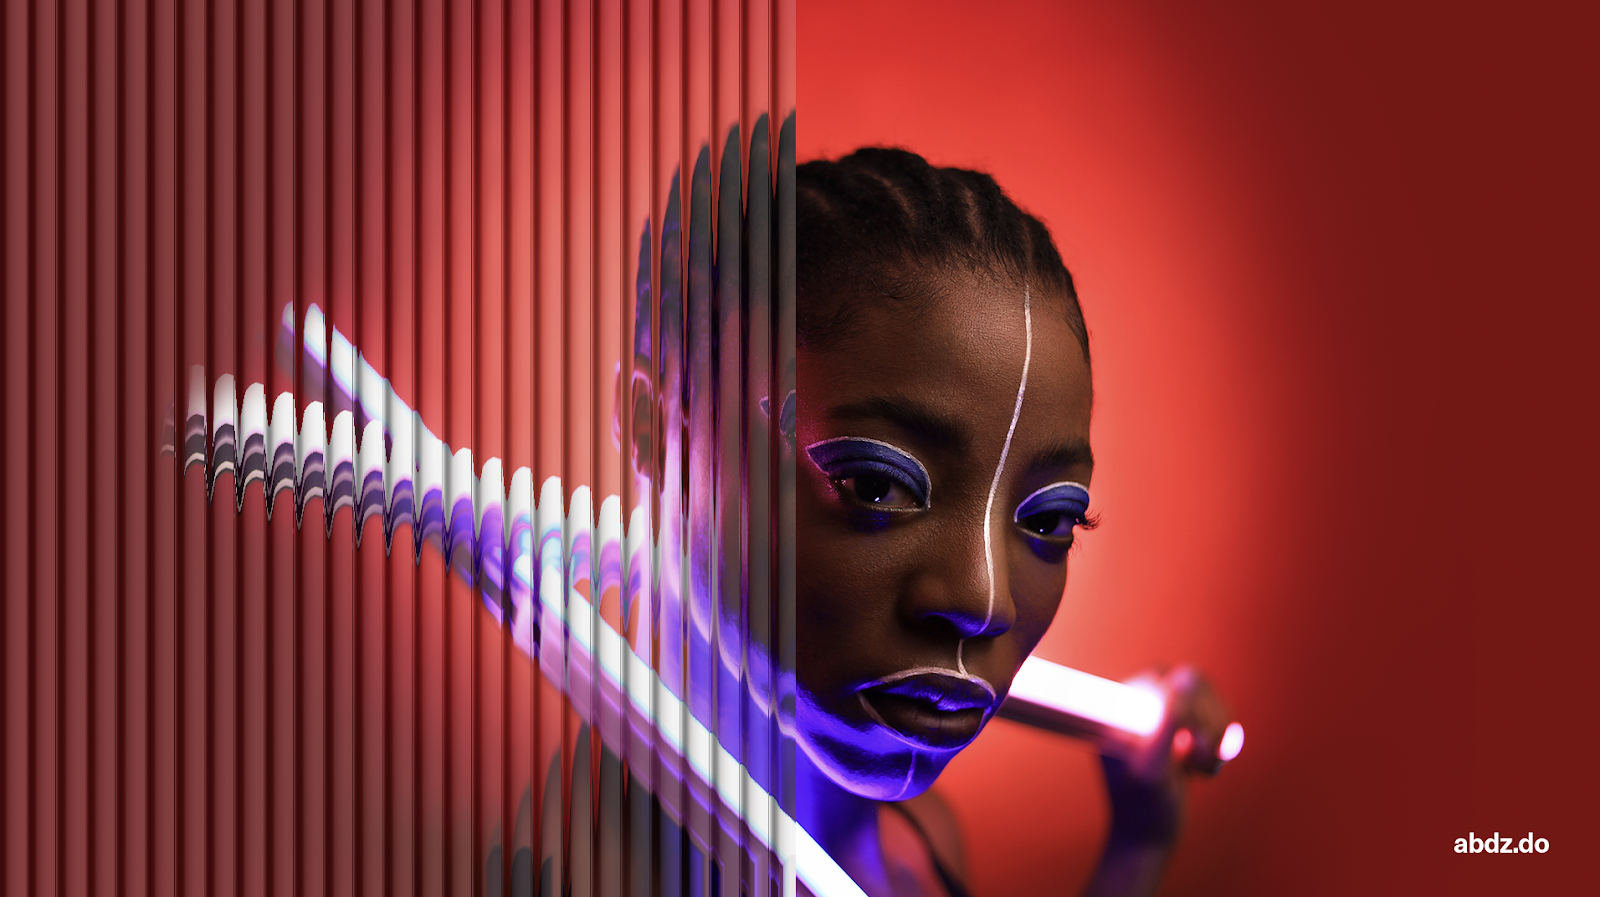
Have you ever seen those beautiful designs with a reeded glass effect on Pinterest or Savee.it? It's a common technique used to add a touch of elegance and sophistication to your designs, and it's not as difficult to achieve as you might think. In this Photoshop tutorial, we'll show you how to create a stunning reeded glass effect using just the Displace filter. Whether you're a graphic designer or just looking to add some creativity to your projects, this technique is a great way to enhance your artwork and make it stand out. So, let's get started!
Photoshop tutorial
Step 1
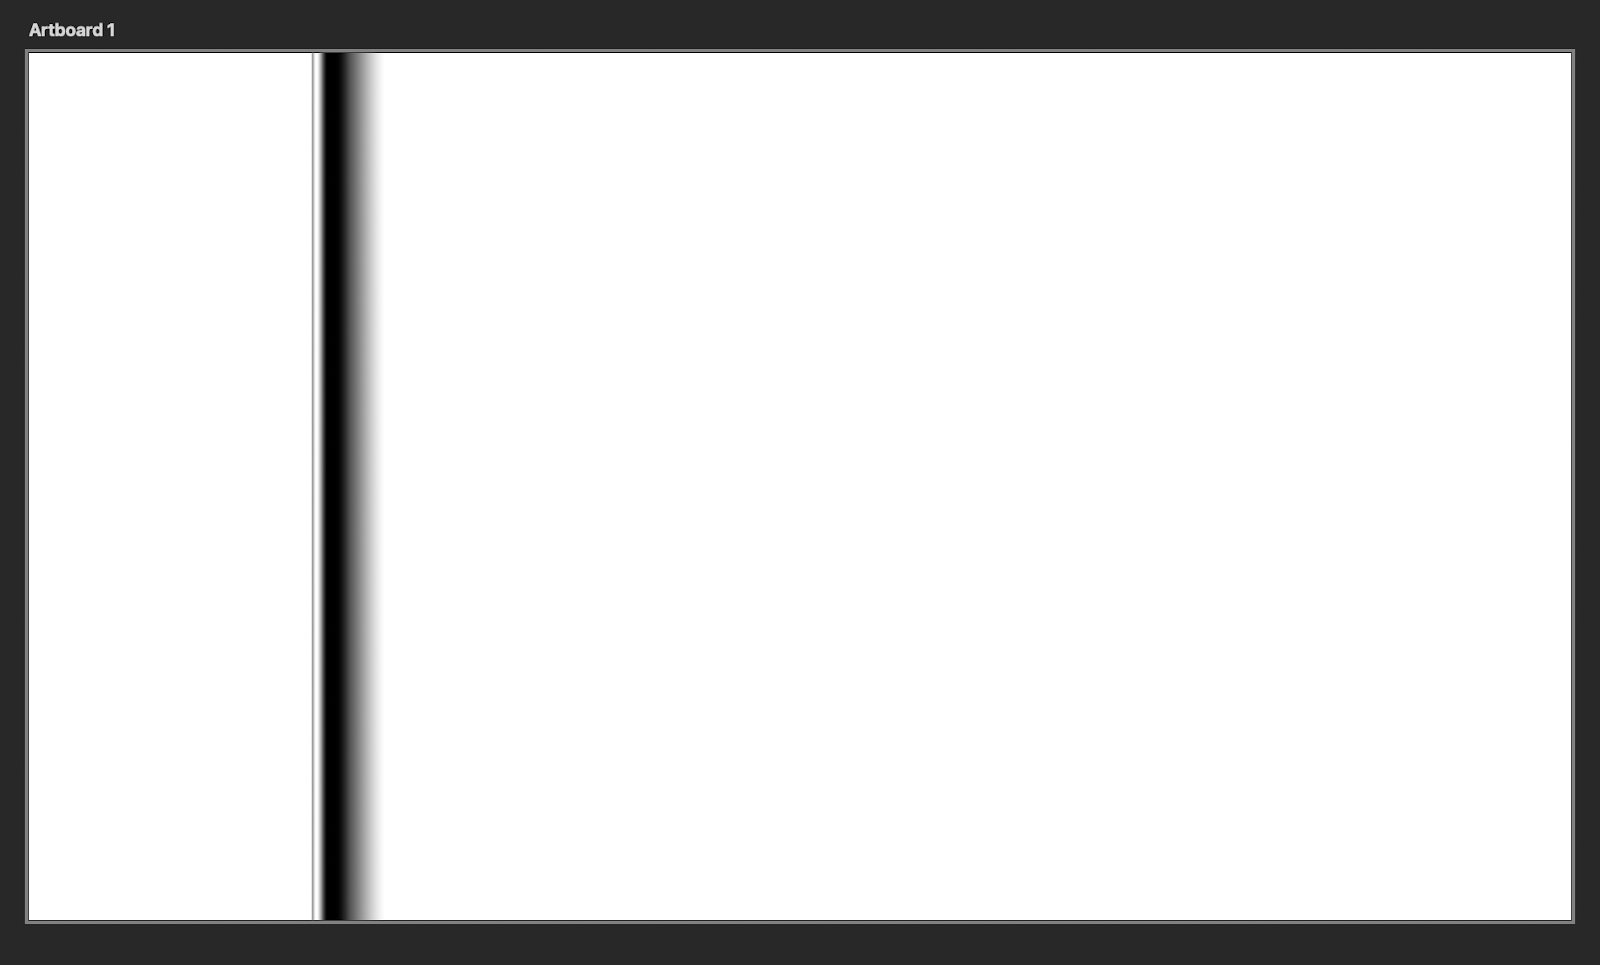
Create a new document then with the Rectangle Tool U add a new rectangle. The width is not that important, you will be able to change it later.
Then with the gradient tool create a gradient similar to the image below. Look at some reeded glass textures for reference.
The last part here and probably the most important. Select the rectangle and go to Edit>Define Pattern. Name your pattern. We will use it for the next step.
Step 2
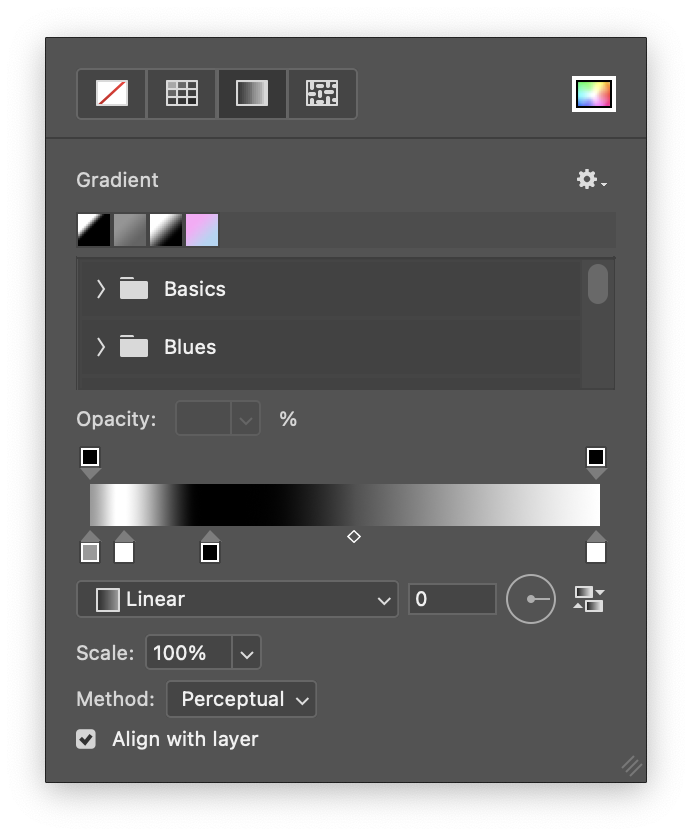
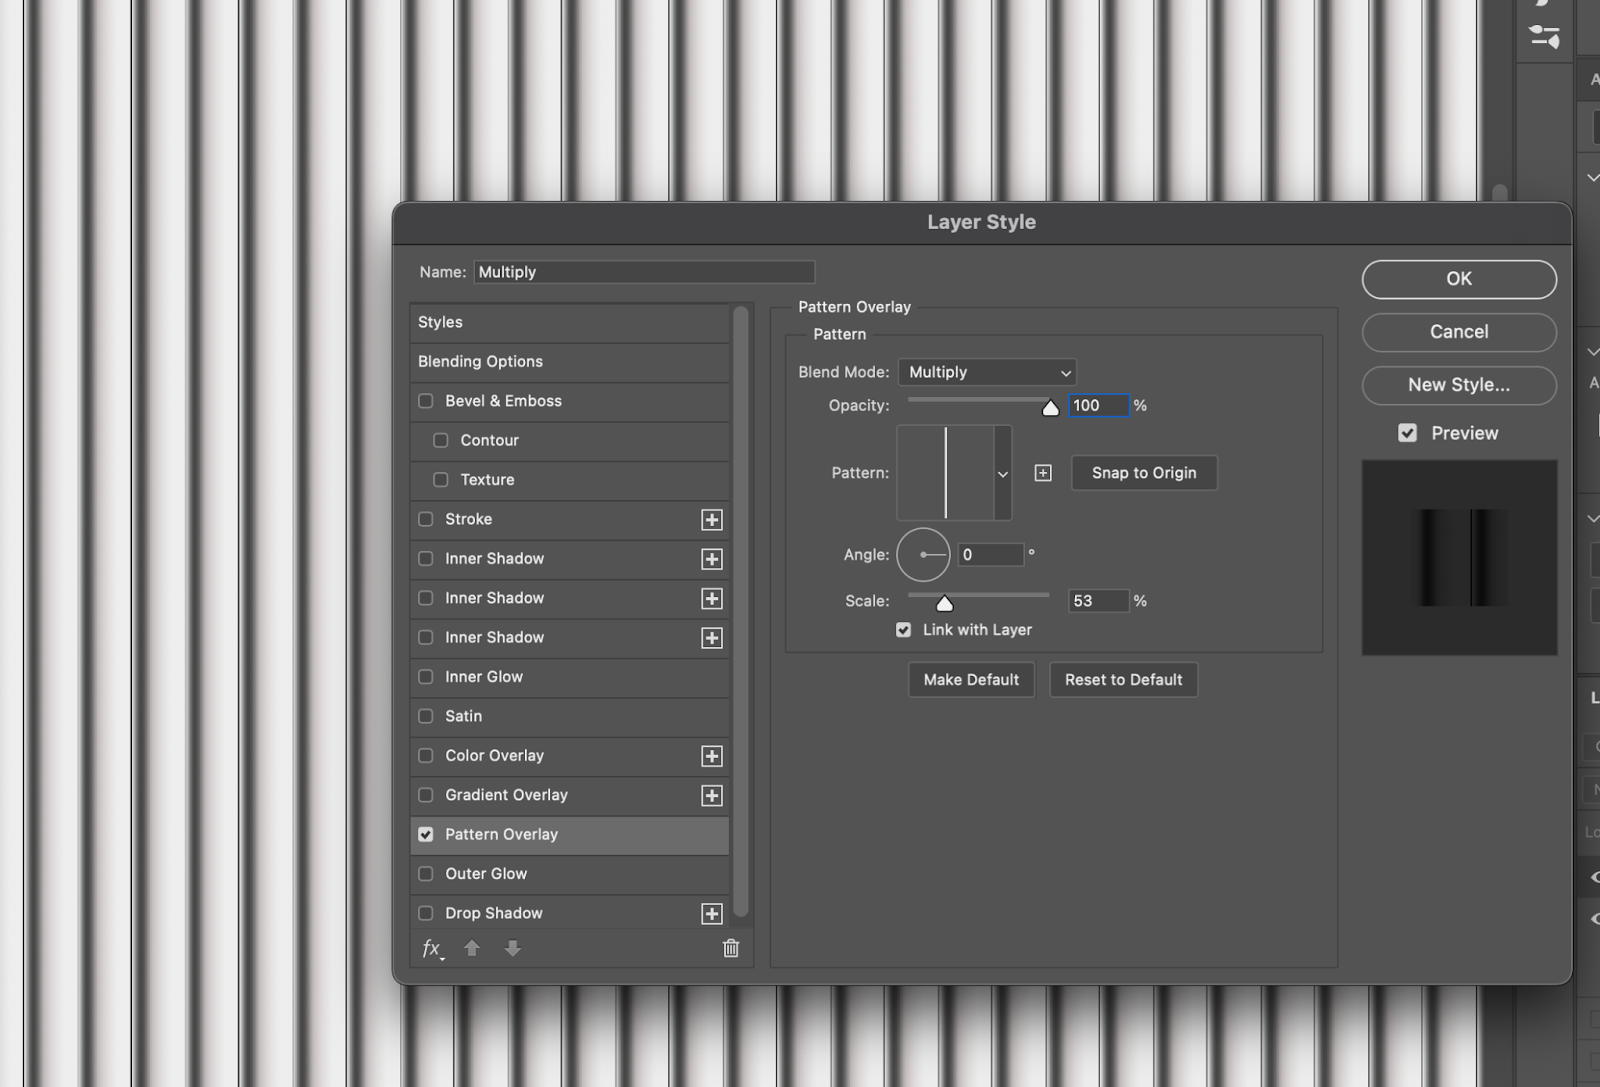
Add a new layer then go to Layer>Layer Style>Pattern Overlay. Select the pattern you created. Change the scale if you want it to be bigger or smaller. After that save this file and name it “displace-map”. It will be the way we will distort our image.
Step 3
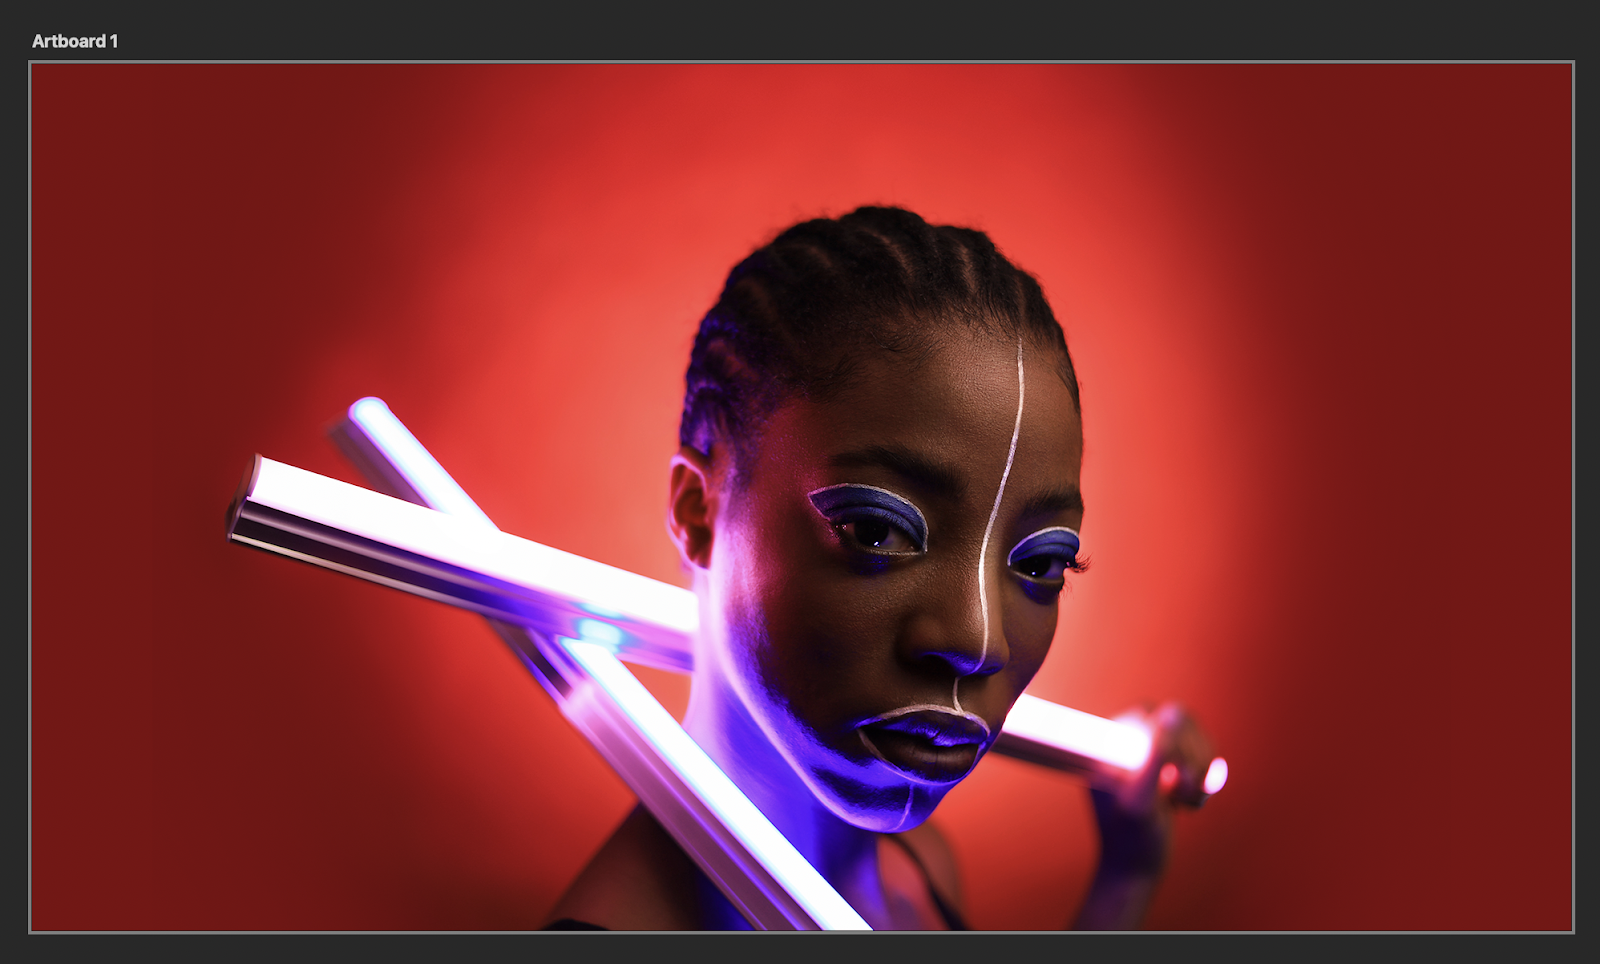
Select your image of choice. For this tutorial I am using a photo by Andrey Zvyagintsev on Unsplash.
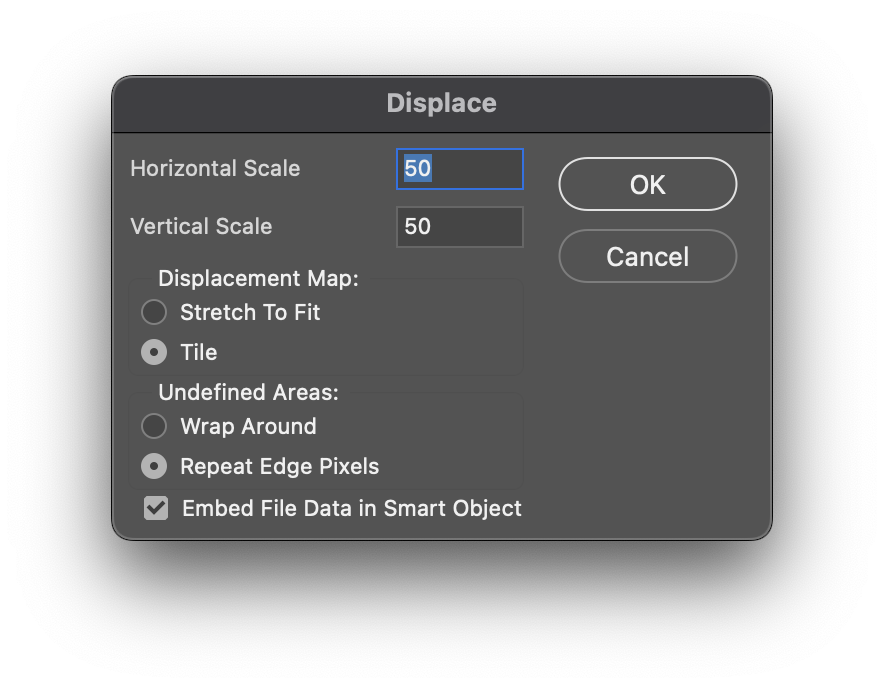
Step 4
Convert the image to Smart Objects and go to Filter>Distort>Displace. Play with some values, for this image I used the values below.
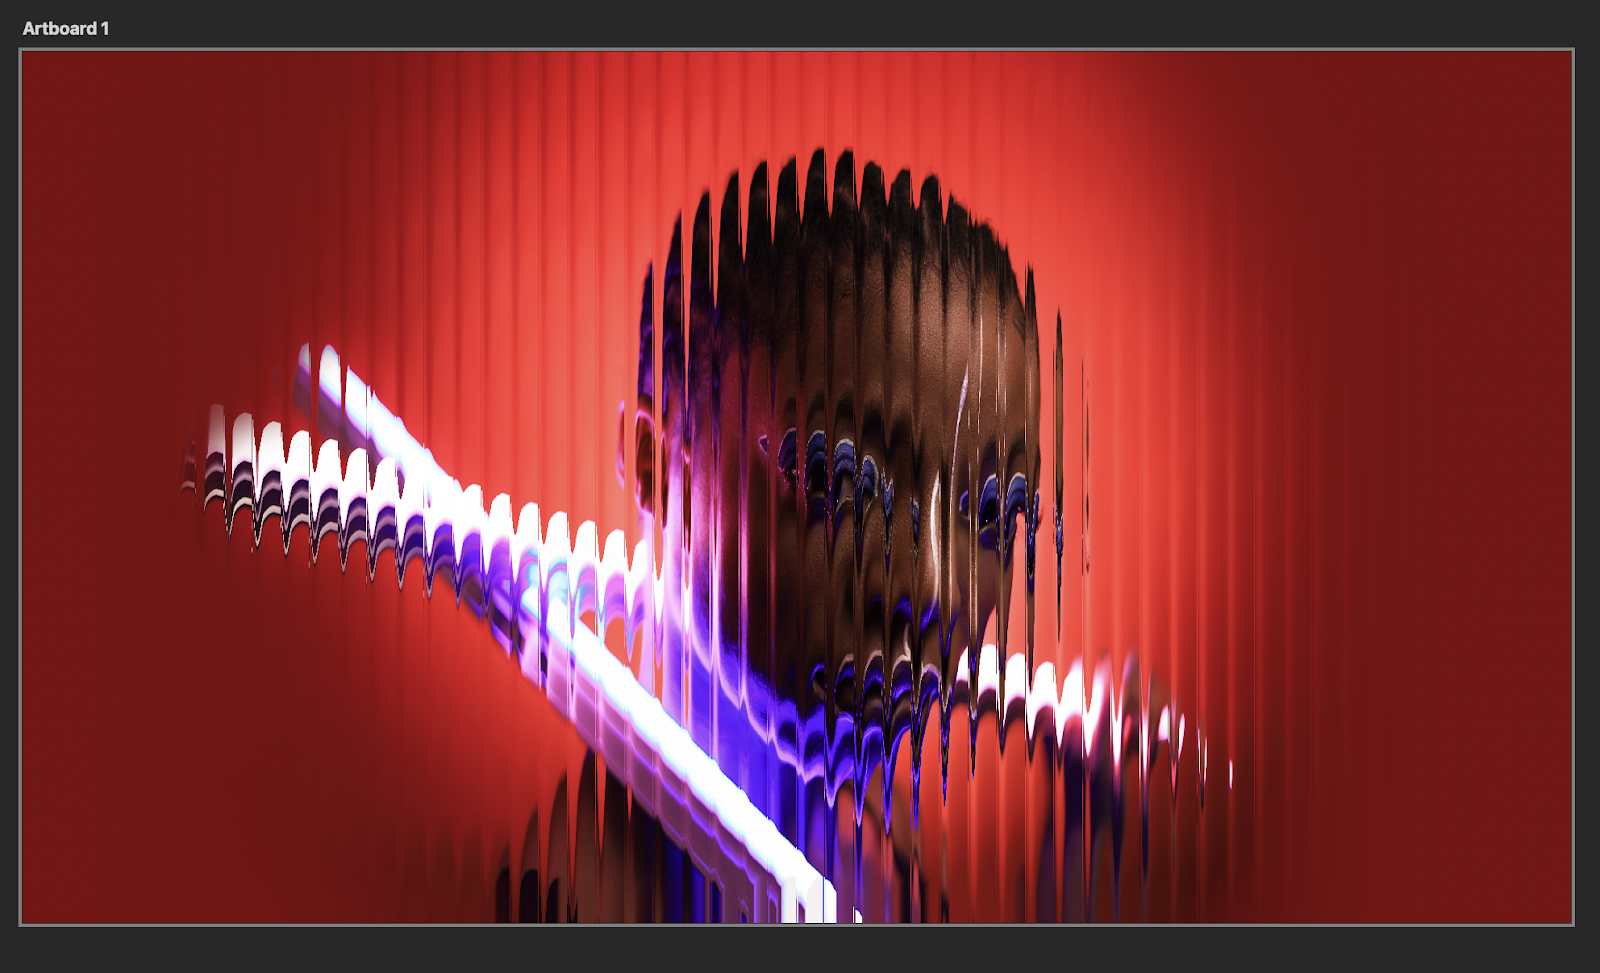
Step 5
If you make a selection then select the Filter mask you can hide or expose the filter from the image. Pretty much mask the filter. I selected half of the canvas and filled it black so half of the photo has the displace effect and the other half not.
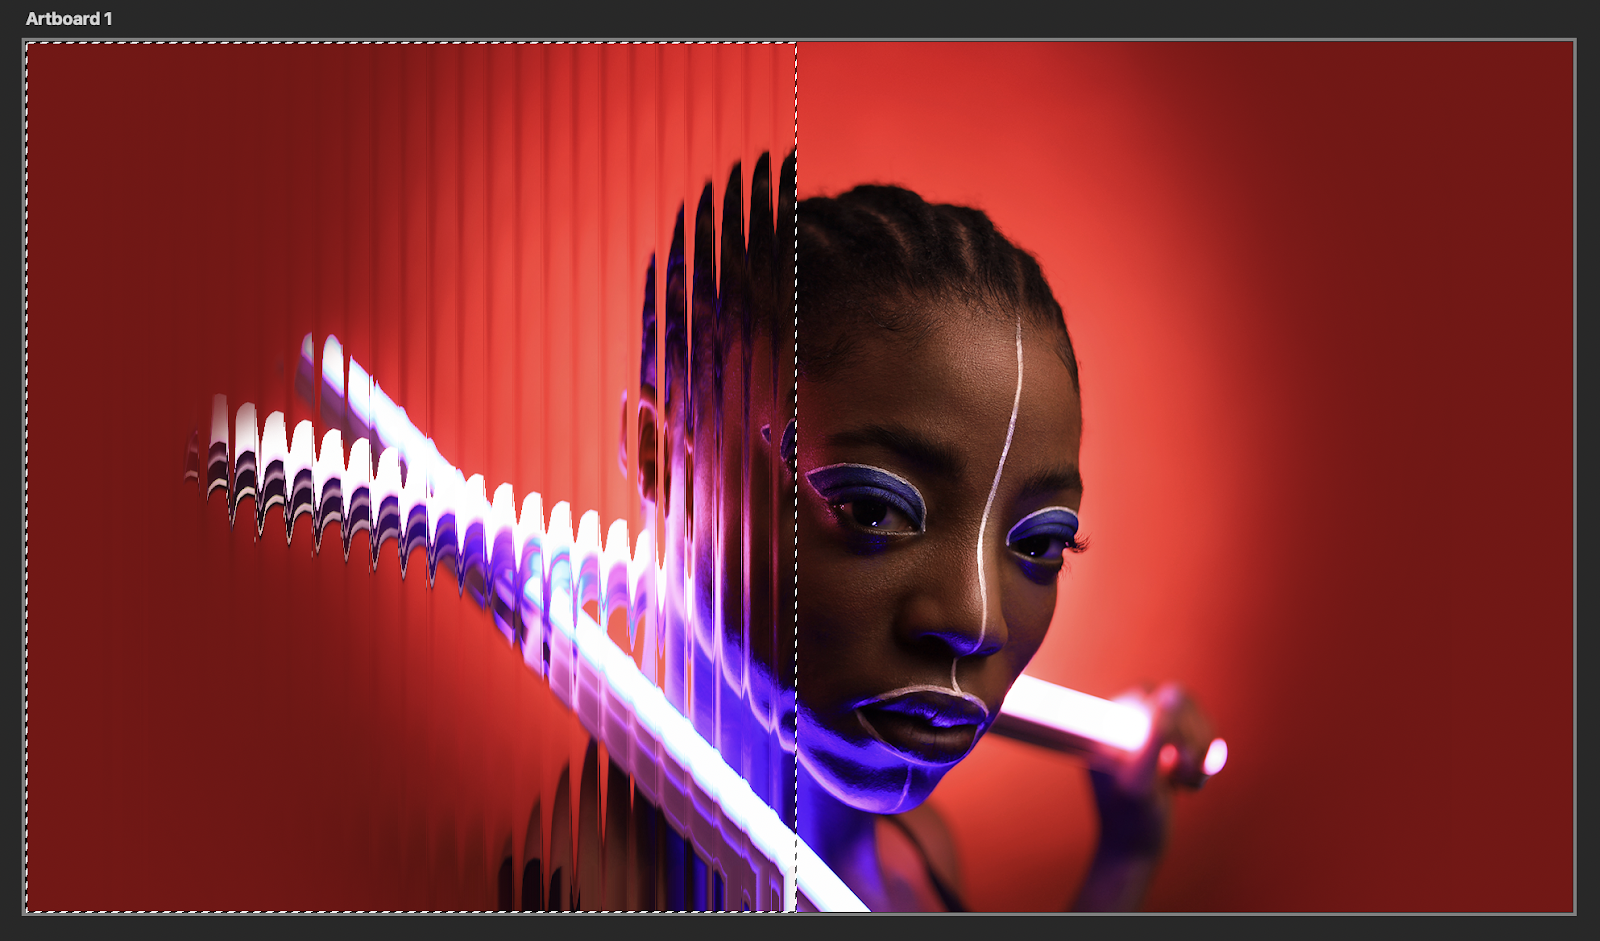
Step 6
Now I use the same layer from step 2 and then move it to be over the photo. Then I change the blending mode of the Pattern Overlay to Multiply at 70%.
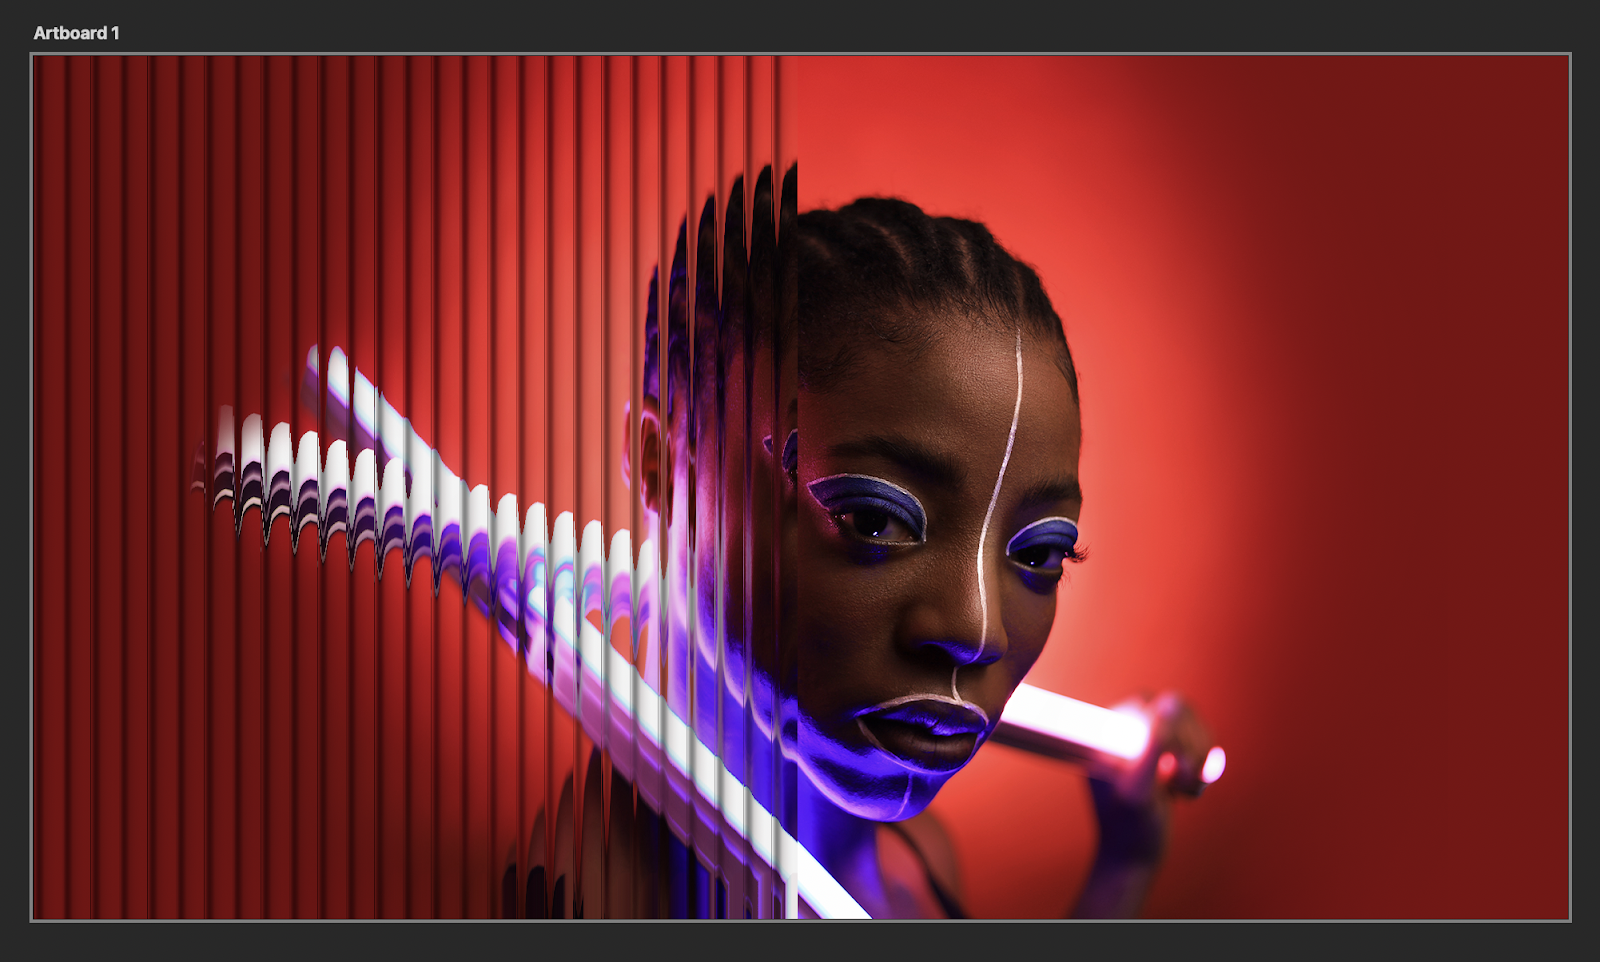
Step 7
Duplicate that layer then change the Pattern Overlay Blending mode to Pin Light at 25%. That will give a nice glass look to the image.
Conclusion
There it is, a super simple way to create a glass distortion or reeded glass effect in Photoshop. You can probably do the same in any tool that supports this type of displace filter.
Get the source file
You'll have access to all the necessary layers, textures, and patterns used to create the reeded glass effect in this Photoshop tutorial. This will save you time and effort in recreating the effect from scratch, and you'll be able to use the source file to create your own designs with ease.
The source file is fully editable, so you can tweak the settings and adjust the effect to suit your own preferences. Whether you're a professional designer or a hobbyist, this source file is a valuable resource for creating high-quality designs that will impress your clients and followers. So, why not give it a try and take your designs to the next level?


")