by abduzeedo
I love learning new things. That was the reason for doing tutorials, I was learning and then sharing what I learned. It helped me evolve as a designer. From time to time I go back to that and you probably remember a couple of weeks ago when I posted a Photoshop tutorial on how to create the iPhone SE Wallpaper. Then I decided to do it in SwiftUI. I shared that one last week. This week I decided to do the same but this time in Jetpack Compose for Android. I’ve never used it before but in a way it’s quite similar to SwiftUI, a bit more verbose, but the idea is the same. So check it out.
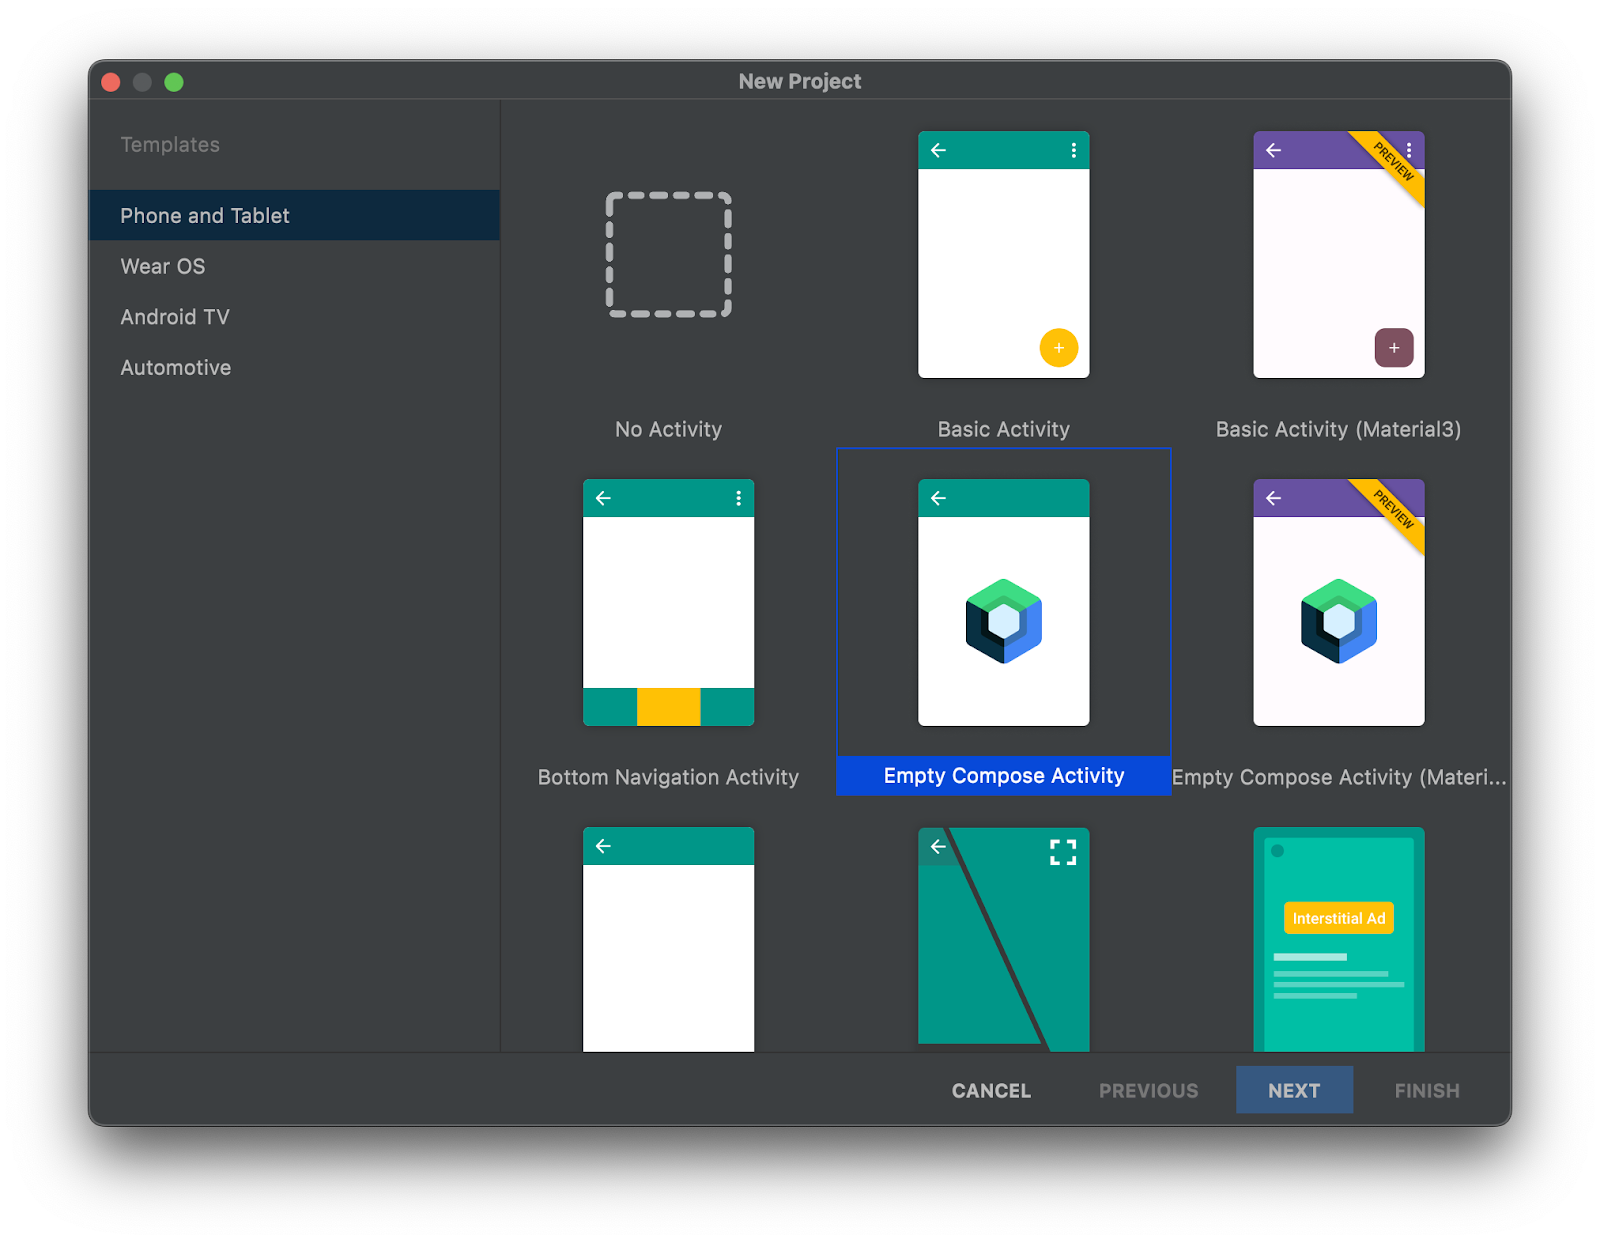
Step 1
Start a new Android Studio project and select Compose activity.
Step 2
Now let’s create the rectangle to use as our base.
@Composable
fun Bar() {
   Box(
       modifier = Modifier
           .fillMaxHeight()
           .fillMaxWidth()
           .clip(RectangleShape)
           )
   )
}
Step 3
In order to add the gradient I found out that I need a way to convert hexadecimal to jetpack color. A good Google Search and StackOverflow had the answer. I used this object that does the job.
object HexToJetpackColor {
   fun getColor(colorString: String): Color {
       return Color(android.graphics.Color.parseColor("#" + colorString))
   }
}
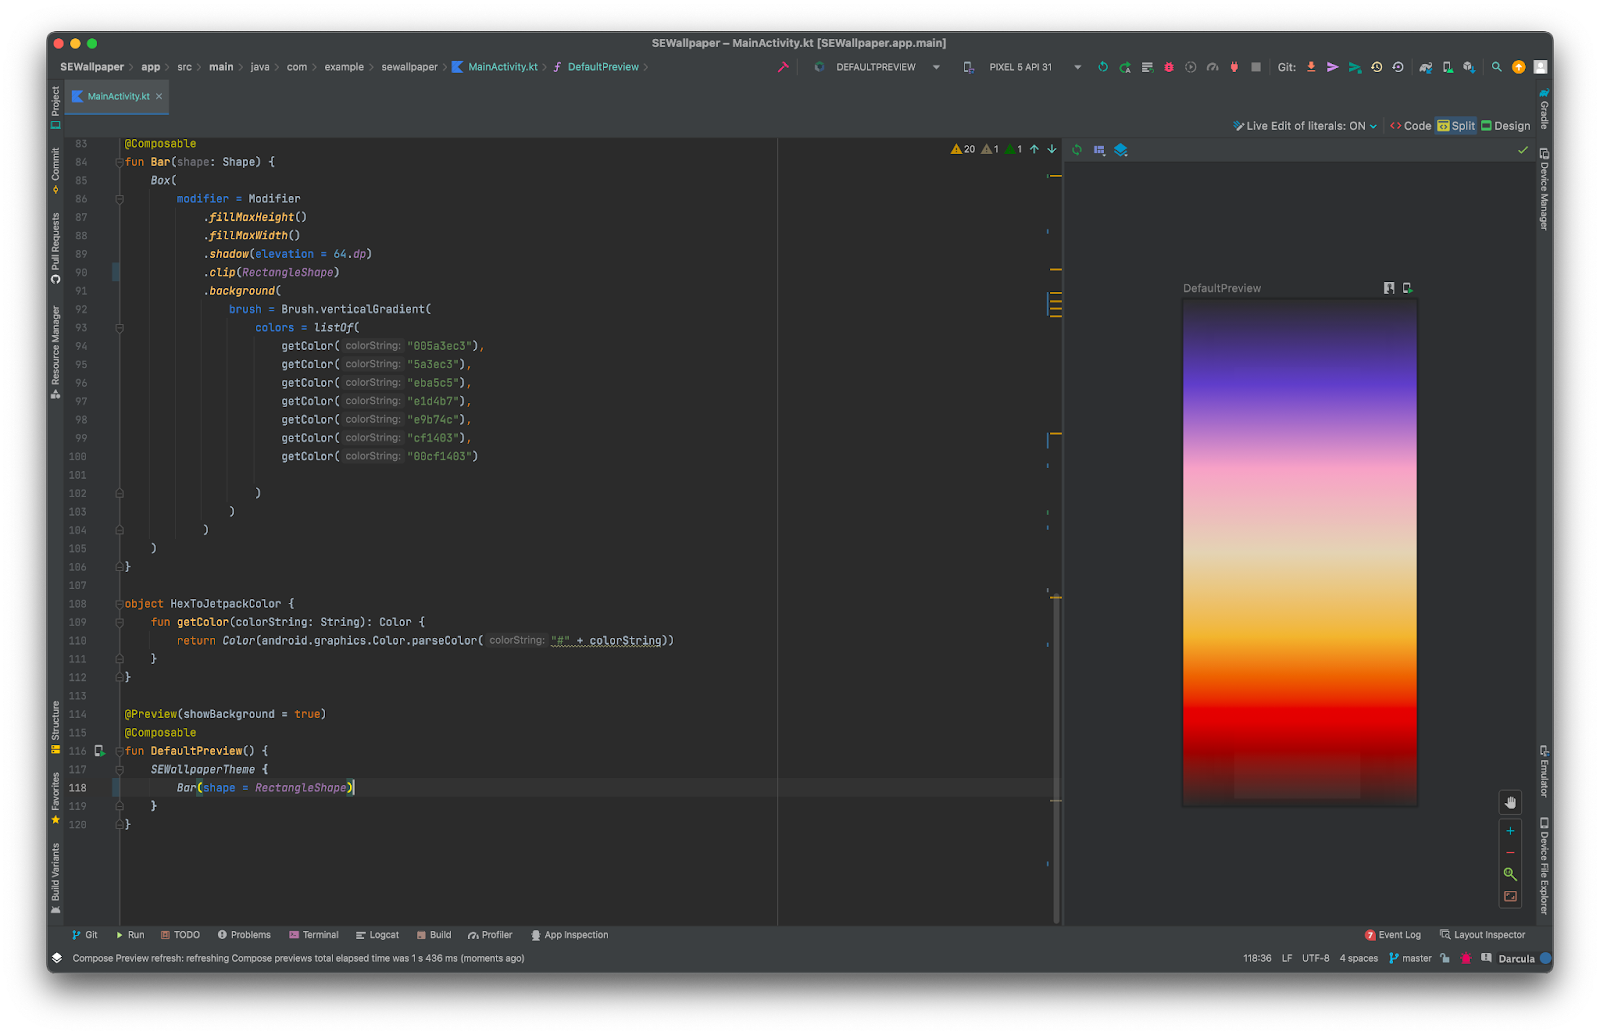
Step 4
For the gradient you use the .background modifier with “brush”, then just add the colors you want in hexadecimal.
@Composable
fun Bar() {
   Box(
       modifier = Modifier
           .fillMaxHeight()
           .fillMaxWidth()
           .clip(RectangleShape)
           .background(
               brush = Brush.verticalGradient(
                   colors = listOf(
                       getColor("005a3ec3"),
                       getColor("5a3ec3"),
                       getColor("eba5c5"),
                       getColor("e1d4b7"),
                       getColor("e9b74c"),
                       getColor("cf1403"),
                       getColor("00cf1403")

                   )
               )
           )
   )
}
Step 5
Now let’s create another composition and add the multiple bars. To do that I added a Row() then inside of the row I added a Column() which I will manipulate the weight and the height. Inside of that column I will add the bar.
Here’s the code. Notice I added a gradient background for the row to match the original wallpaper.
@Composable
fun BarStackManual() {
   Row(
       verticalAlignment = Alignment.CenterVertically,
       modifier =
       Modifier
           .fillMaxSize()
           .background(
               brush = Brush.verticalGradient(
                   colors = listOf(
                       getColor("1a0047"),
                       getColor("300604")
                   )
               )
           )
   ) {
       Column(
           modifier = Modifier.weight(1f).fillMaxHeight(1f).zIndex((6).toFloat())
       ) {
           Bar(shape = RectangleShape)
       }
   }
}
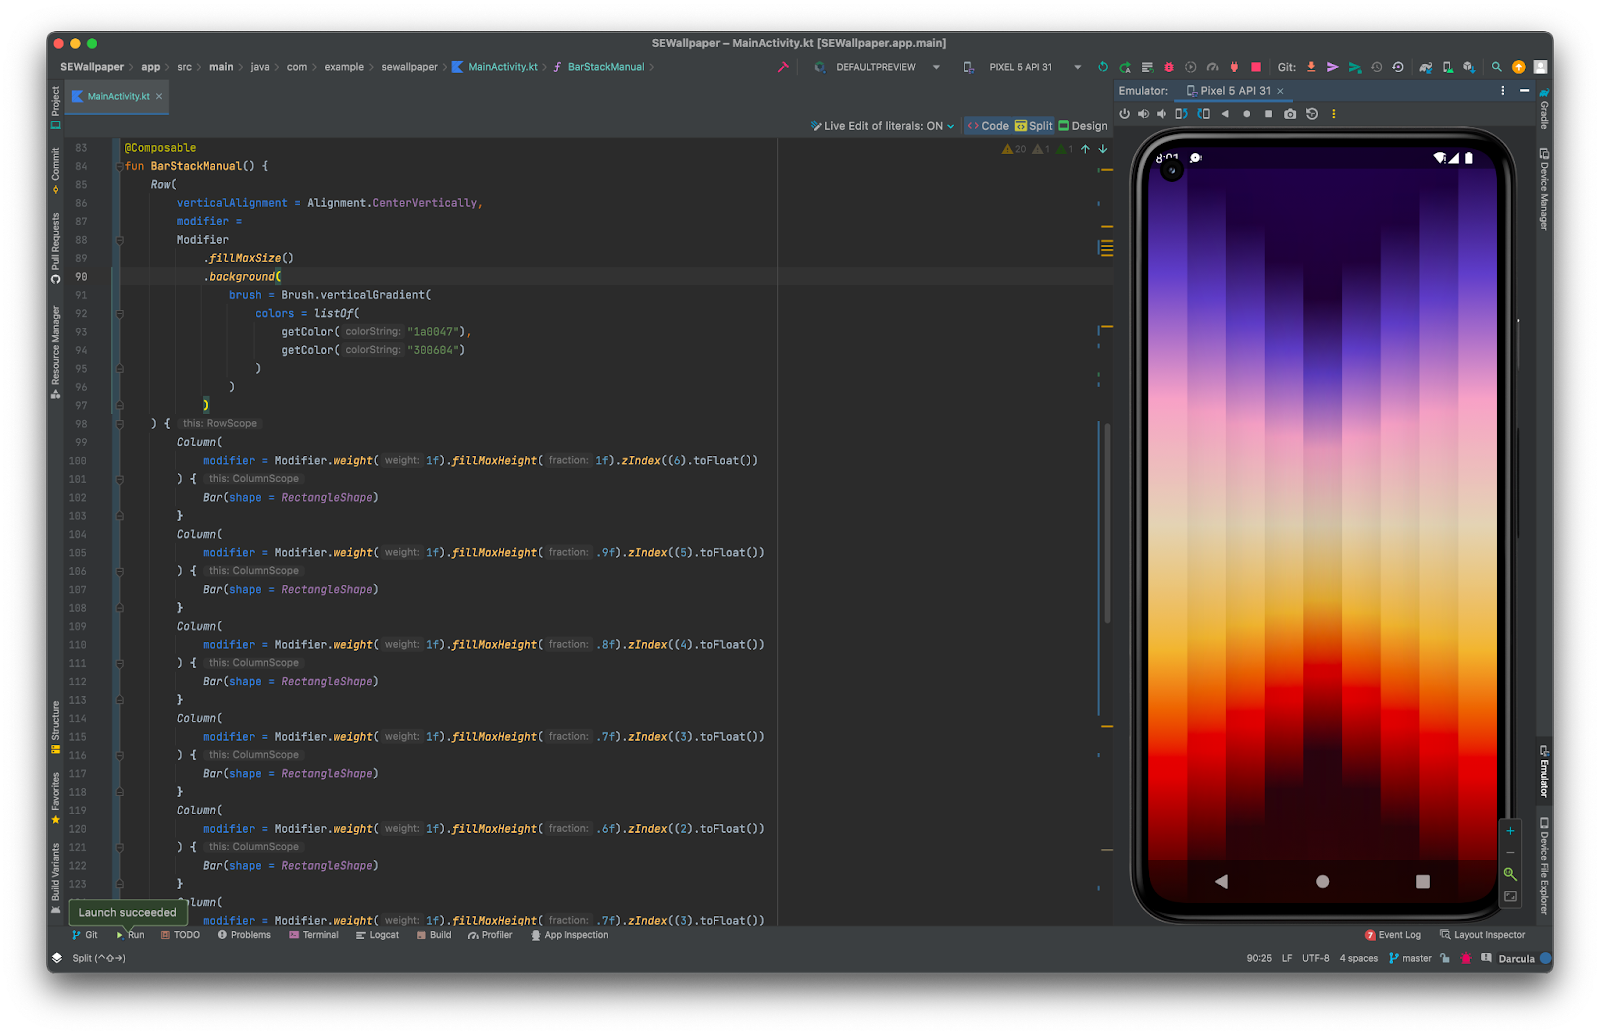
Step 6
Add as many Columns (bars) you want. Make sure you change the .fillMaxHeight() fraction and the .zIndex() so the big ones are above the smaller ones. Here’s the sample:
@Composable
fun BarStackManual() {
   Row(
       verticalAlignment = Alignment.CenterVertically,
       modifier =
       Modifier
           .fillMaxSize()
           .background(
               brush = Brush.verticalGradient(
                   colors = listOf(
                       getColor("1a0047"),
                       getColor("300604")
                   )
               )
           )
   ) {
       Column(
           modifier = Modifier.weight(1f).fillMaxHeight(1f).zIndex((6).toFloat())
       ) {
           Bar(shape = RectangleShape)
       }
       Column(
           modifier = Modifier.weight(1f).fillMaxHeight(.9f).zIndex((5).toFloat())
       ) {
           Bar(shape = RectangleShape)
       }
       Column(
           modifier = Modifier.weight(1f).fillMaxHeight(.8f).zIndex((4).toFloat())
       ) {
           Bar(shape = RectangleShape)
       }
       Column(
           modifier = Modifier.weight(1f).fillMaxHeight(.7f).zIndex((3).toFloat())
       ) {
           Bar(shape = RectangleShape)
       }
       Column(
           modifier = Modifier.weight(1f).fillMaxHeight(.6f).zIndex((2).toFloat())
       ) {
           Bar(shape = RectangleShape)
       }
       Column(
           modifier = Modifier.weight(1f).fillMaxHeight(.7f).zIndex((3).toFloat())
       ) {
           Bar(shape = RectangleShape)
       }
       Column(
           modifier = Modifier.weight(1f).fillMaxHeight(.8f).zIndex((4).toFloat())
       ) {
           Bar(shape = RectangleShape)
       }
       Column(
           modifier = Modifier.weight(1f).fillMaxHeight(.9f).zIndex((5).toFloat())
       ) {
           Bar(shape = RectangleShape)
       }
       Column(
           modifier = Modifier.weight(1f).fillMaxHeight(1f).zIndex((6).toFloat())
       ) {
           Bar(shape = RectangleShape)
       }
   }
}
Conclusion
That’s pretty much it. You can make the bars dynamic by creating a for loop. But then it’s up to you. This was just a little example of how fun it’s to build something in Jetpack Compose. You can download the full code on Github.


")

