by abduzeedo
Another year, it's our 11th here over at Abduzeedo land and we cannot believe it's been already over a decade. We started as an inspiration and tutorials website, especially Photoshop tutorial. Looking back it's crazy to think that we created and shared hundreds of tutorials on how to use Photoshop, Illustrator, Pixelmator and other tools. For this year I decided to revisit some of the most popular ones to see what could be improved. So to kick things off I'd like to share a simple way to create a neon light effect in Photoshop. It's very simple and the result is even better than the previous one. I hope you enjoy it and let me know what effect should we do next.
Photoshop tutorial
Step 1
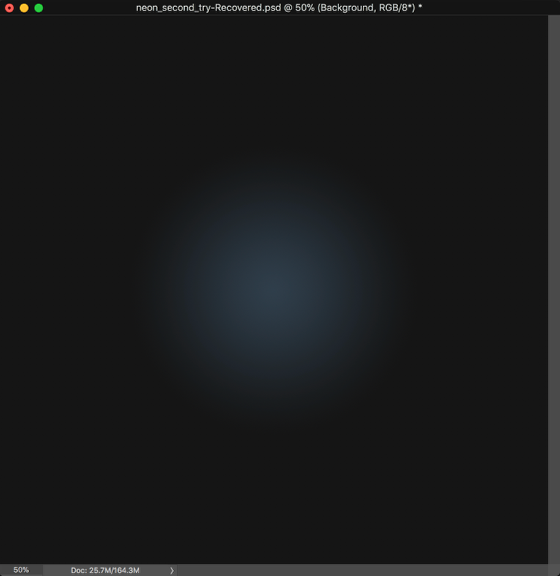
Start with a simple layer and with Layer Styles add a radial gradient. The colors here are quite important because they will define the level of realism of your design. It cannot be too saturated or too dark, otherwise the Color Dodge effect won't work. I am using #303e4a for the light blue and #151515 for the dark grey.
Step 2
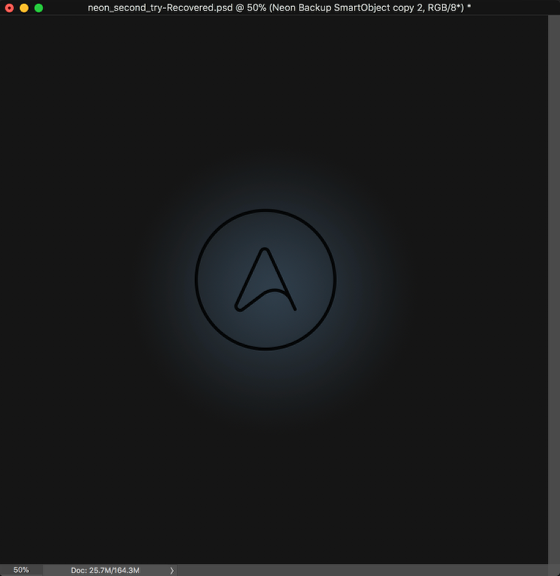
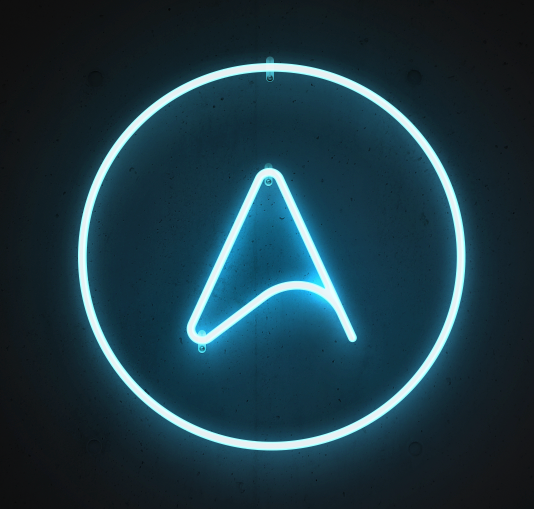
Import the logo you want to use. I am using the outine version of the Abduzeedo logo. Here's another important thing, the thickness of the outline/stroke will affect the realism as well.
Step 3
Now the Layer Style. Quite a few, but important things changed to Layer Style since I wrote the Neon tutorial more than 5 years ago. The most important thing for me is that you can have multiple styles, for example, you can have more than one Drop Shadow or Inner Shadow. That's definitely super useful for light effects like this.
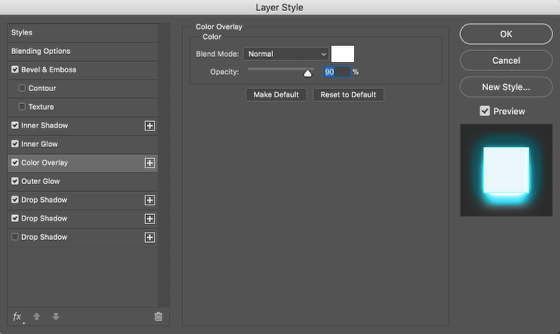
The first thing to do is to add a Color Overlay and use white for the color. If you look at how neon works, pretty much the center of the tube is very white and the color gets more visible on the edges. That's what we will try to replicate.
Step 4
So for the Bevel & Emboss. This part is just to give the glass look to our form. It's not really necessary if you look at how neon lights work, but again, it gives some more depth. Below you can see the values.

Step 5
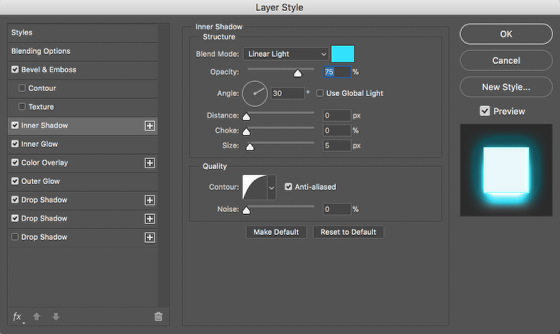
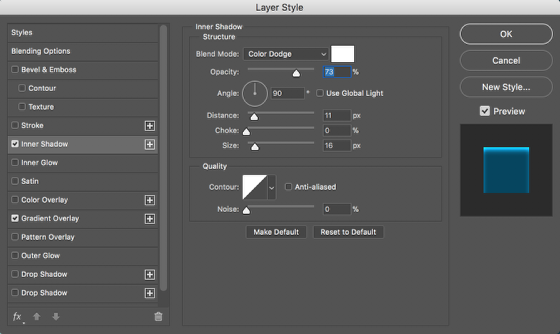
The Inner Shadow will start giving the realism we want. The Color Overlay we use is the color we want our neon light to be. I am using a nice Cyan color.
Step 6
The Inner Glow is the same thing, it wil reinforce the blend of the blue with the white. Below you can see the values.
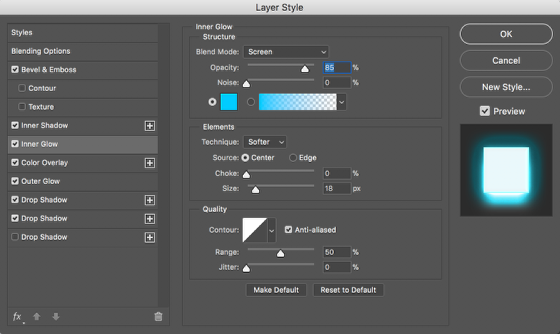
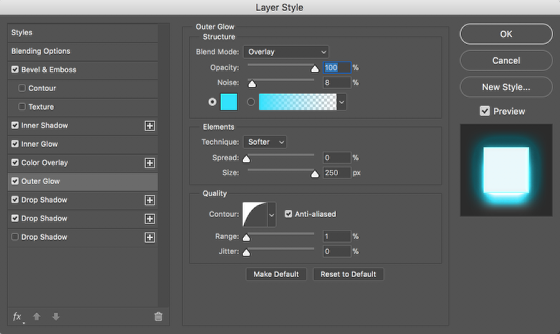
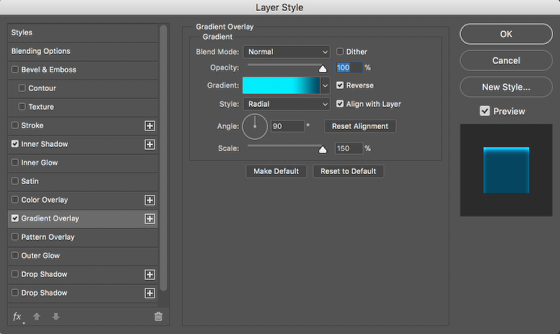
Step 7
The Outer Glow will create the light effect or how the light interact with the background and other objects. You can see that I am using the maximum size and Overlay for the Blend Mode with the same cyan color I want the light effect to be.
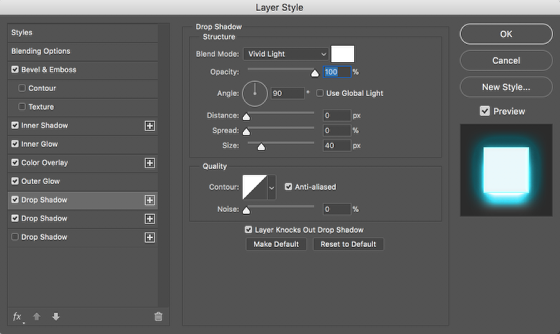
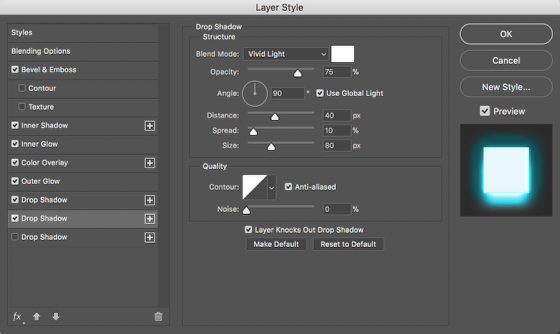
Step 8
The drop shadows will create the blend of lights. You can achieve that by using Vivid Light or Color Dodge. I am using 2 Drop Shadows. The first one will behave like an outer glow and the second one will be the light that gets reflected on the background. It will be a bit below or above depending on the angle you want people to see the logo.
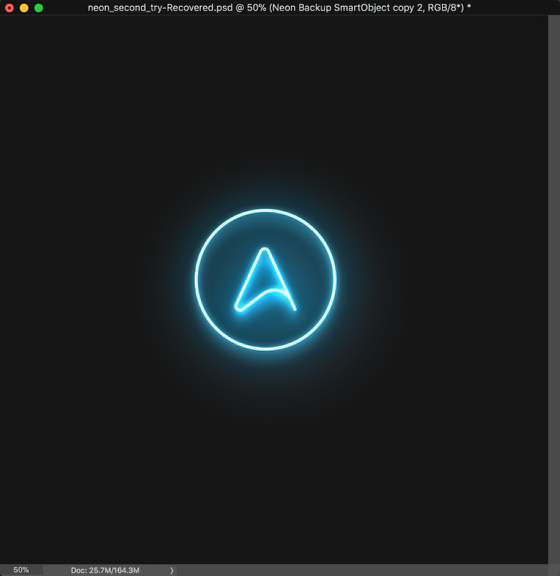
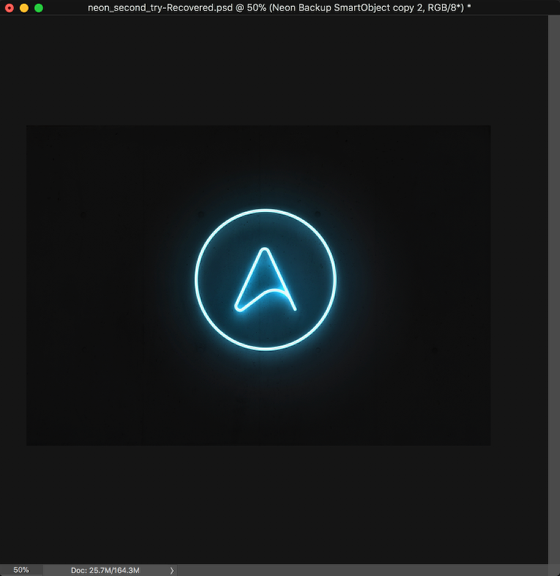
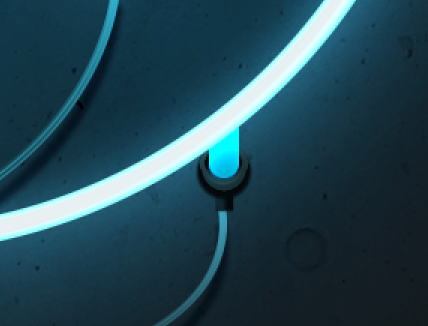
Step 9
Here's the initial result with simple Layer Style
Step 10
Now let's add a concrete texture for the background. That will dark things up a little bit.
Step 11
Here you can add some little elements, like screws, wires. It's fairly simple and they don't require too much detail.
Step 12
To connect the neon with the wire we need to add some elements to create this idea that the neon is a bit far from the wall. I just used a rectangle with Layer Style as you can see below.

Conclusion
There are 2 more important things that you can do to make it look awesome. After you finish your design, select all layers and duplicate them. Right after merge thoses in one layer and go to Filter>Blur>Gaussian Blur. Use something over 20. Duplicate this layer. You will have 2 layers, make the one below to have Overlay for the Blend Mode and the one on Top Screen @50% opacity. That will create a super cool glow effect.
Your design is done you can now repilcate that for other projects and even save it as a style.


Download Photoshop File


