by abduzeedo
Last week we published our 10th Wallpaper of the Week. It was an awesome typography/design from Ginger Monkey Design called Compassion. What I really liked about that design was how they mixed some "frilly bits" with the typeface to create an outstanding piece of work. I decided to create a tutorial showing you how to do that as well.
In this tutorial I will show you how to mix some vectors with letters to create a really nice design.
Step 1
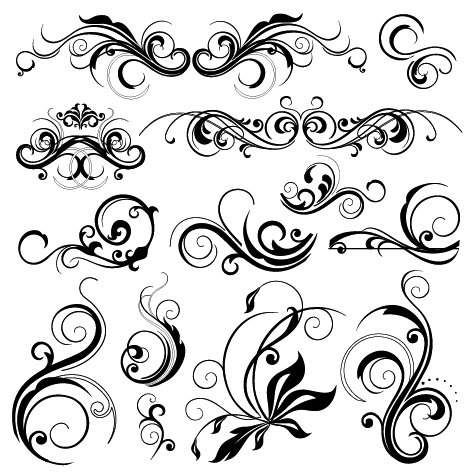
The first thing to do is to find the elements we will use. There are lots of websites where you can find nice vectors, and there's a post from Cameron Moll with a huge list of these sites. So that's a nice place to start. http://cameronmoll.com/archives/2008/05/25_resources_ornaments_fleurons/
After checking all the sites out, I bought the vectors from http://www.istockphoto.com/file_closeup/object/5836792_floral_design_elements.php?id=5836792
Step 2
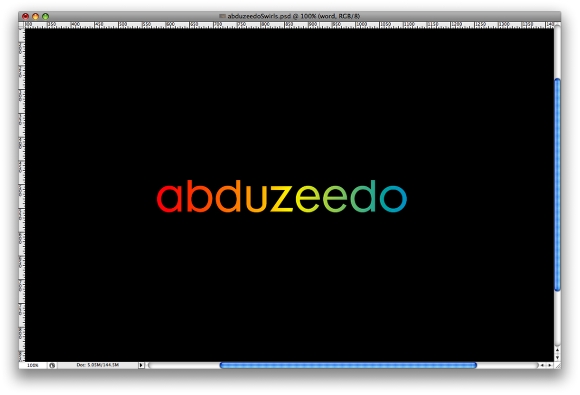
Open Photoshop and create a new document. I used 1680x1050 pixels. After that, type abduzeedo and go to Layer>Layer Style>Gradient Overlay. Use Red, Yellow, Green, and Light Blue for the colors. I used Futura for the typeface
Step 3
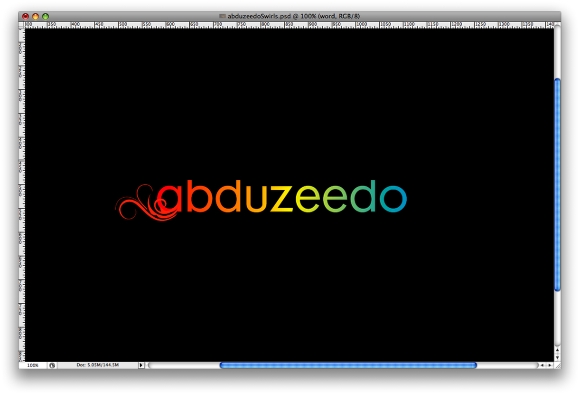
Let's start mixing the vectors with the type. First you will have to find the right "ornament" for the letter you want. Then you will have to place it in a way that it follows the shape of that letter. In the image below you can see that the "ornament" seems to be coming from the "a".
Step 3
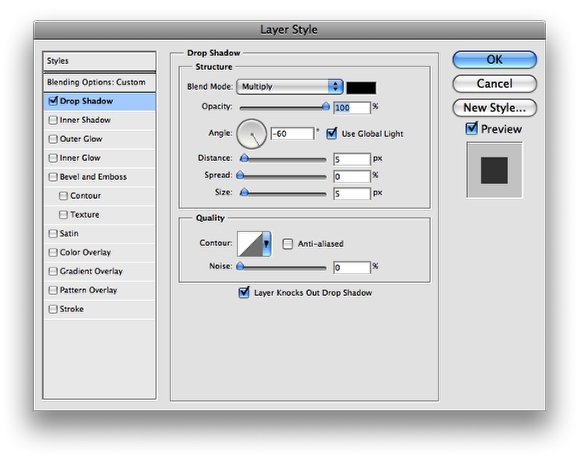
After you align the ornament with the letter, it's time to add some depth. To do that let's use the Layer Styles. Go to Layer>Layer Styles>Drop Shadow. Use Multiply for the Blend Mode, Black for the color, 100% Opacity, -60% Angle, Distance of 5 pixels and Size of 5 pixels as well.
Step 4
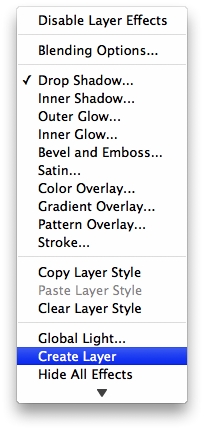
Here let's create a layer from the shadow of the layer style. To do that click with the right button of the mouse on the layer with the drop shadow. Then select Create Layer from the menu. That's it, you'll now have a layer with the shadow.
Step 5
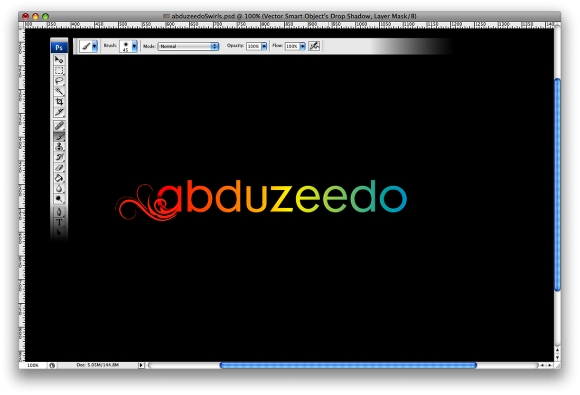
Now that you have the shadow in a layer let's apply a mask. Go to Layer>Layer Mask>Reveal All. Then select the Brush Tool(B). The color will be black and the brush will be regular with a diameter of 45 pixels and 0% hardness. Then just paint the mask to hide some parts of the shadow. The idea is to create the impression that the ornament is coming from, and passing above the letter.
Step 6
Repeat the same thing for the other letters. However it's not necessary to do that for all of them. I only did it on the A, B, D, Z, E, D, and O. After that select the ornament and word layers, group them together and rename the group to "logo". Tip: Always use the color of the exact part of the letter that the ornamet will come from.

Step 7
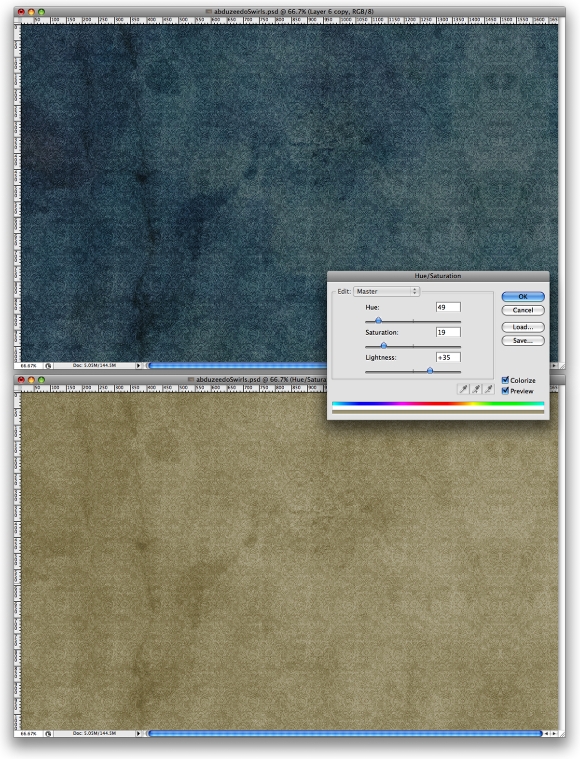
Here let's add some texture to the image. You can hide the other layers. We'll use some textures from a blog called DesignReviver, they published an article called 300+ Vintage Style Textures and Photoshop Brushes.
Download the Vintage II pack and place "Vintage10.jpg" image to the document. Because the image is 1500 pixels and the document is 1680 pixels, you'll have to duplicate the image and fill the remaining part of the document with it. After that go to Image>Adjustments>Hue/Saturation. Use Hue 49, Saturation 19, Lightness +35.
Step 8
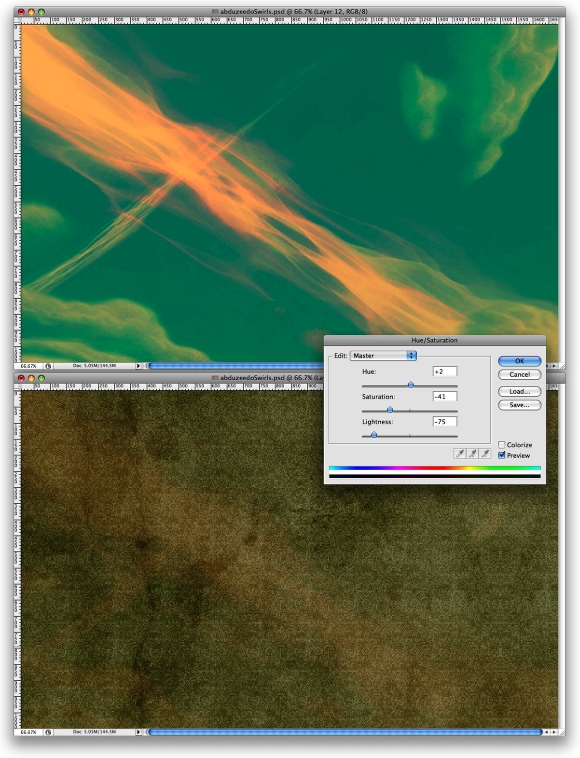
Download the "15_textures__art___vintage_by_jocosity" pack and place the "textur2.jpg" in the document. Then change the Blend Mode to Overlay and go to Image>Adjustments>Hue/Saturation. Use Hue +2, Saturation -41, Lightness -75.
Step 9
Download the "Old_Paper_Textures_by_lailomeiel" pack and place the "DSC02679.JPG" in the document. It will go over the other textures, then just change the Blend Mode to Color burn. Now, select all texture layers and group them. Rename the group Textures.
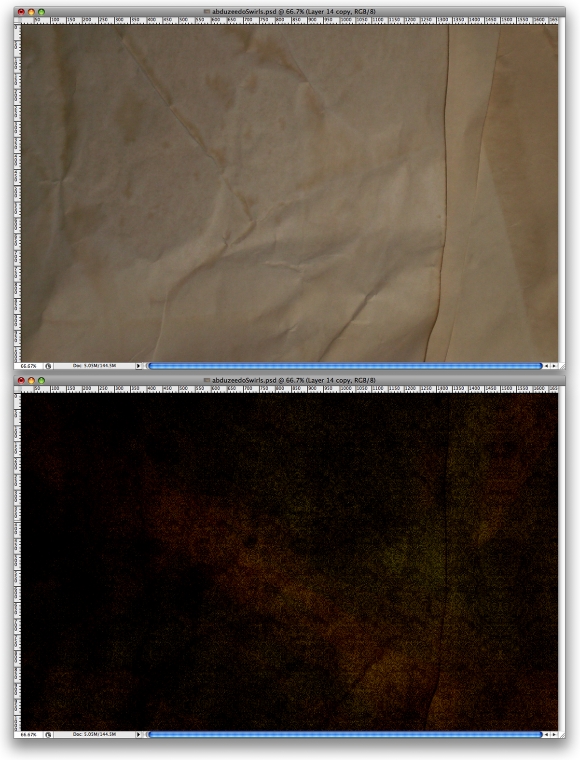
Step 10
Select the "logo" group and go to Layer>Merge Group. This will convert the layer and all groups inside it to a single layer. Then go to Layer>Layer Style>Drop Shadow. Use Color Burn for the Blend Mode, 100% Opacity, -60º for the Angle, Distance and Size of 5px.
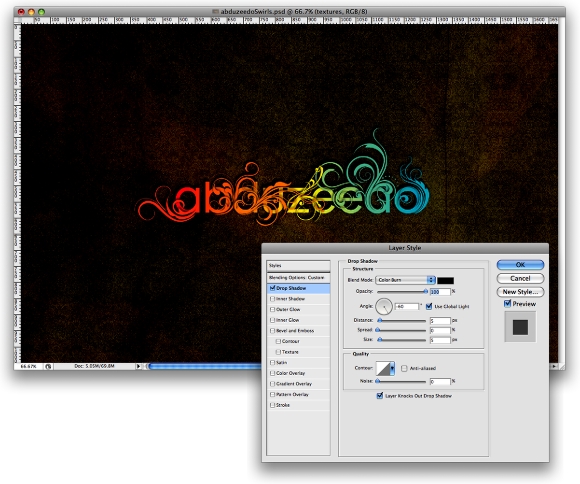
Step 11
Duplicate the "texture" group and change the blend mode of the "paper" layer to Overlay. Merge the group in order to create a unique layer from it. Change the order of the layers and put the new texture layer on top of the logo layer. Then go to Layer>Create Clipping Mask and change the Blend Mode to Multiply. Duplicate the texture layer again making sure that it is still with the clipping mask. Then just change the Blend Mode to Overlay.
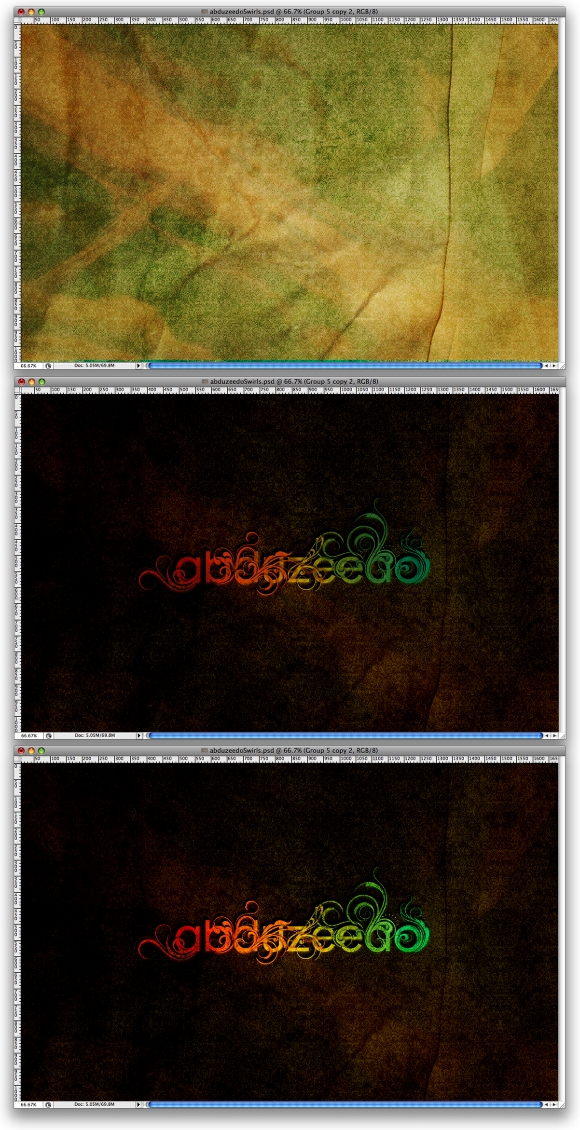
Step 12
Group the "Logo" layer with the two texture clipping mask layers. Duplicate the group and merge it to a single layer. Then go to Filter>Blur>Gaussian Blur. Use 4.5 pixels for the Radius and change the Blend Mode to Screen and 80% Opacity.
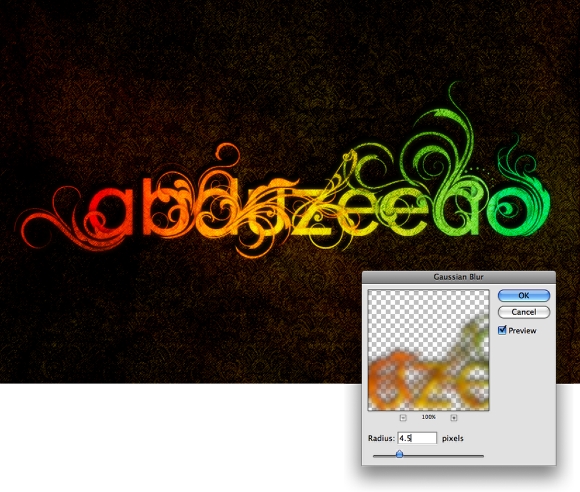
Conclusion
In this tutorial we learnt how to mix some vector ornaments with a word to produce a nice typography. We also played around with vintage textures and cliping masks that gave our image a not so "clean" look. You can create many variations of this effect. Below I added a Radial Gradient so the textures only appear where the logo is. Again it's all about experimentation.
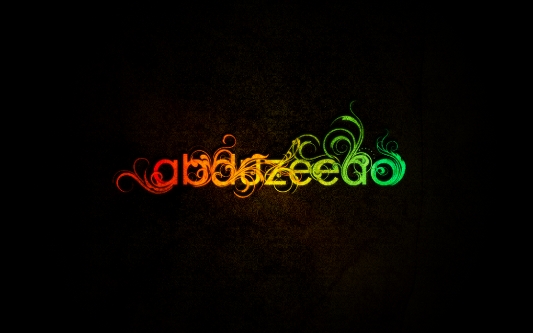 Click here to see the full preview
