by abduzeedo
A few days ago I've made a post about the Emigre magazine, one of the most important publications for the design community. Along with that magazine, another great publication was the Ray Gun magazine founded by David Carson. So, inspired by that, I've decided to create an art work using some of the photos I took this last summer. In that way, I would have a nice design to remember the summer of 2009.
So in this tutorial I will show you how to create sort of a grunge composition playing with text and rectangles. We'll use some brushes and a paper texture as well.
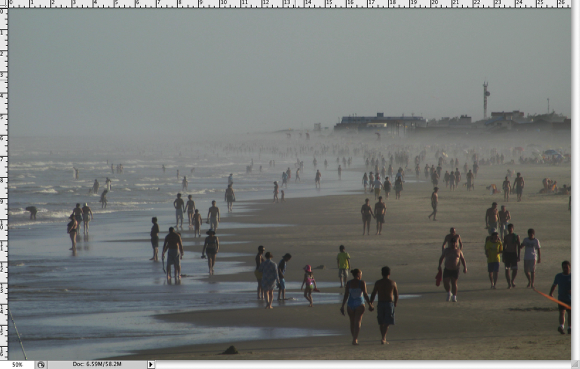
Step 1
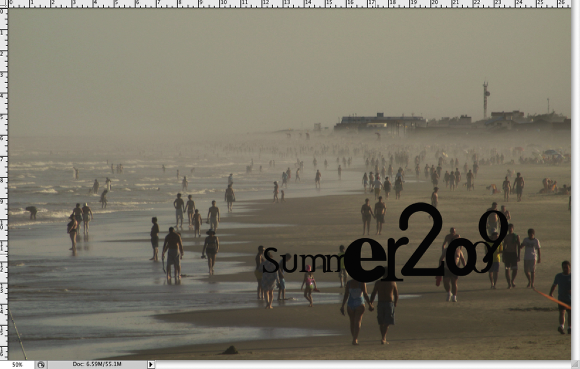
Open Adobe Photoshop and create a new document. I took this picture during this last summer and I really like the colors and the whole scene, like on the beach with sort of a hazy.
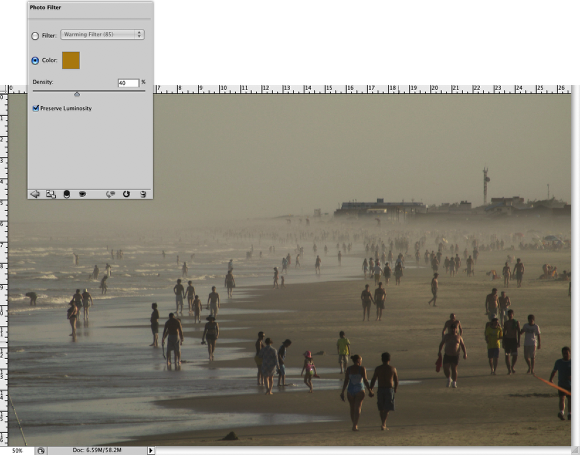
Step 2
With the photo layer selected go to Image>Adjustments>Photo Filter. Use #c99e19 for the color and 40% density.
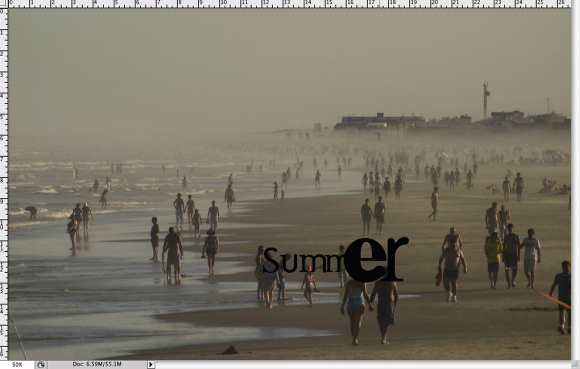
Step 3
Now let's start playing with the typography. One of the characteristics of the 90's grunge style was the crazy usage of types with different sizes and weights, along with a totally unorthodox usage of kerning and line height. Starting with the word Summer, create first the 'Summ', and reduce the kerning of the last "M" so it will be pretty close to the other. After that, type the "ER" using bold for the "E" and regular for the "R", also make them much bigger and over the last "M". Use the image below for reference.
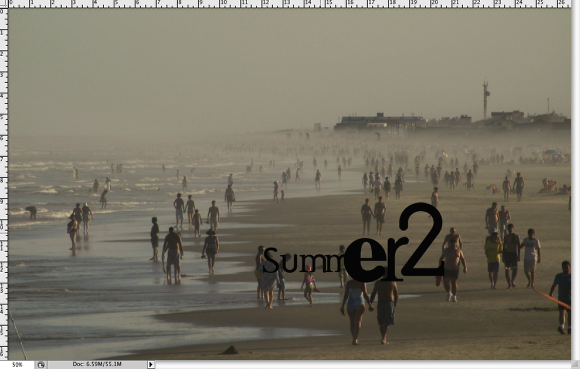
Step 4
Now add a huge number 2.
Step 5
For the "009" make the numbers with different sizes and weights, also the number "9" is over the last 0 and with a totally different vertical alignment. The idea here as I said, is to make something totally different from the traditional way.
Step 6
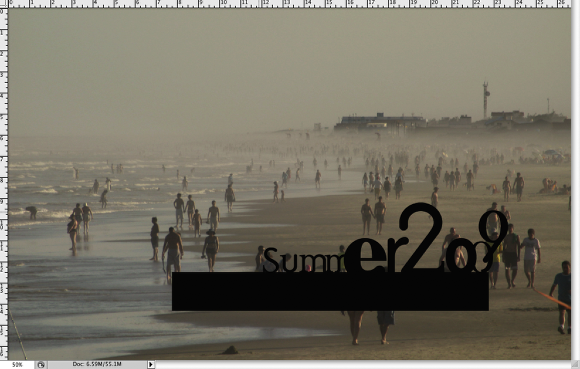
With the Rectangle Tool (R) create a rectangle using a very dark grey, it's important not to use 100% black for the Blend Mode that we will use later on.
Step 7
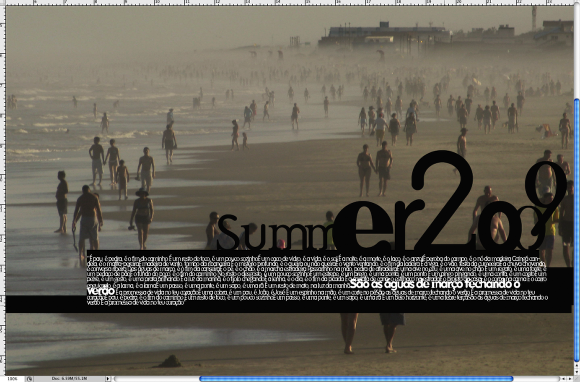
Keep adding more rectangles. Again, don't worry about alignments or size you can use the image below for reference.

Step 8
Now let's add more text. I used the lyrics of a very popular brazilian song, it's from a Tom Jobim's song, the bossa nova hit "Aguas de Marco" (Waters of March). The font I used is called DeadHistory but you may use whatever font you like. What you will have to do is change some text properties: I'm using font size 16pt, leading 12pt and -100 for the tracking. Also select a part of the text, and make it much bigger. I selected the part that says that 'it's the end of summer'. The font size I used is 24pt.
Step 9
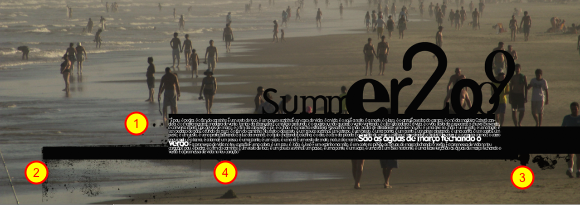
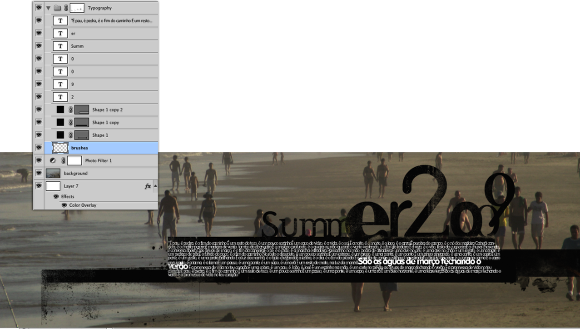
Now let's use some brushes, the Misprintedtype.com ones from Eduardo Recife. Create a new layer beneath the texts and rectangles. Using the same color of the rectangles start painting some areas. (1-4)
Step 10
Select the texts and rectangles and group them (Layer>Group Layers). Then with the group selected go to Layer>Layer Mask>Reveal Selection. After that, using the Brush Tool (B), use the misprintedtype brushes to give that dirty old style to the elemets. Use black for the color and just paint the mask layer.
Step 11
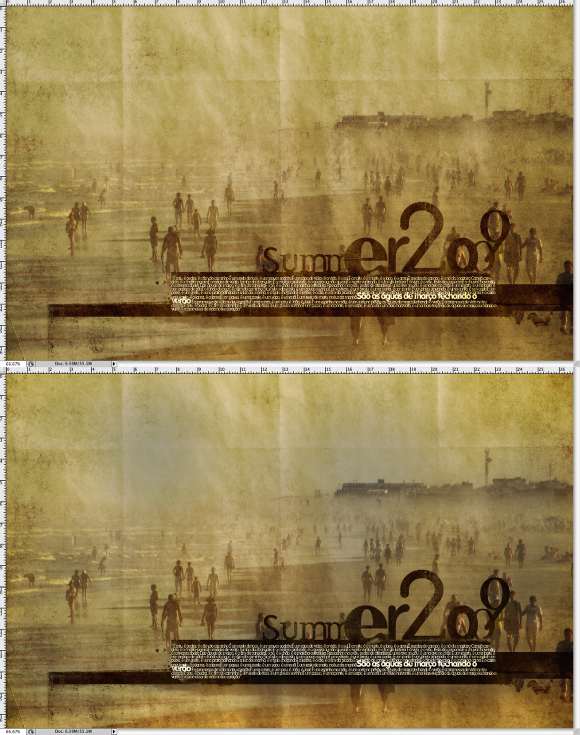
Go to fudgegraphics.com and download the old paper texture set, then import Grungepaper4. Place your image on top of the other layers. Then change the Blend Mode to Hard LIght.

Step 12
The first image is just the texture wit Hard Light, the second is the texture with 80% opacity and with some parts in the center deleted with the Eraser Tool (E).
Conclusion
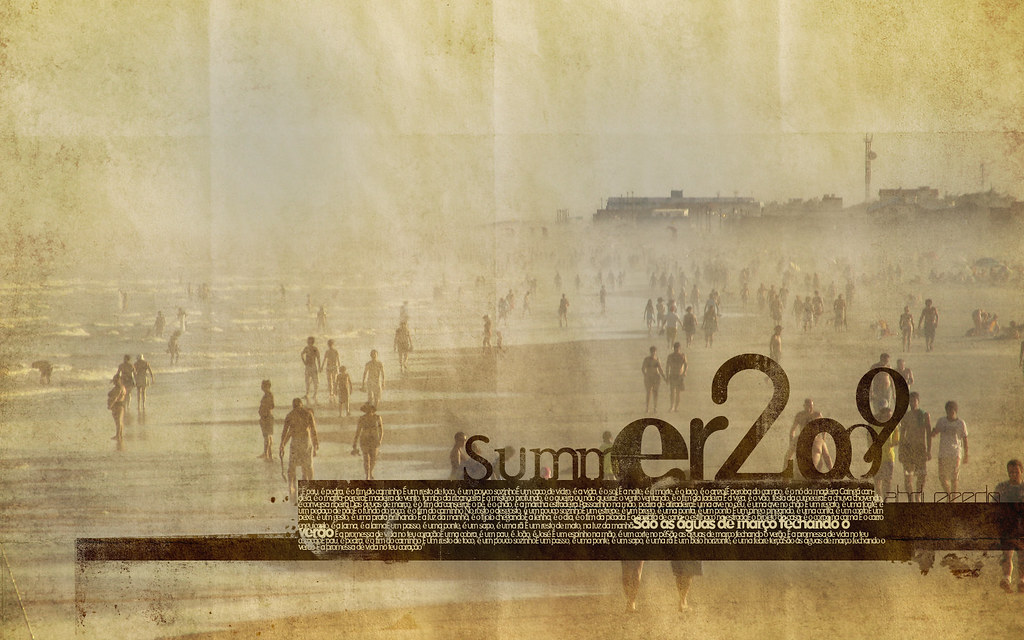
You may change the color of the text from white to a beige so it will match with the rest of the design. You may also use Overlay for the Blend Mode as well, but the text won't have the paper texture. The idea of this tutorial is that you can create some really nice artworks using your own images and, instead of having just a regular photo, you will have a nice design that when you look at it in the future, you will be able to remember not just a certain moment, but also your design skill and style.
Download the Photoshop file
Click here to download the Photoshop file used for this tutorial


")

