by abduzeedo
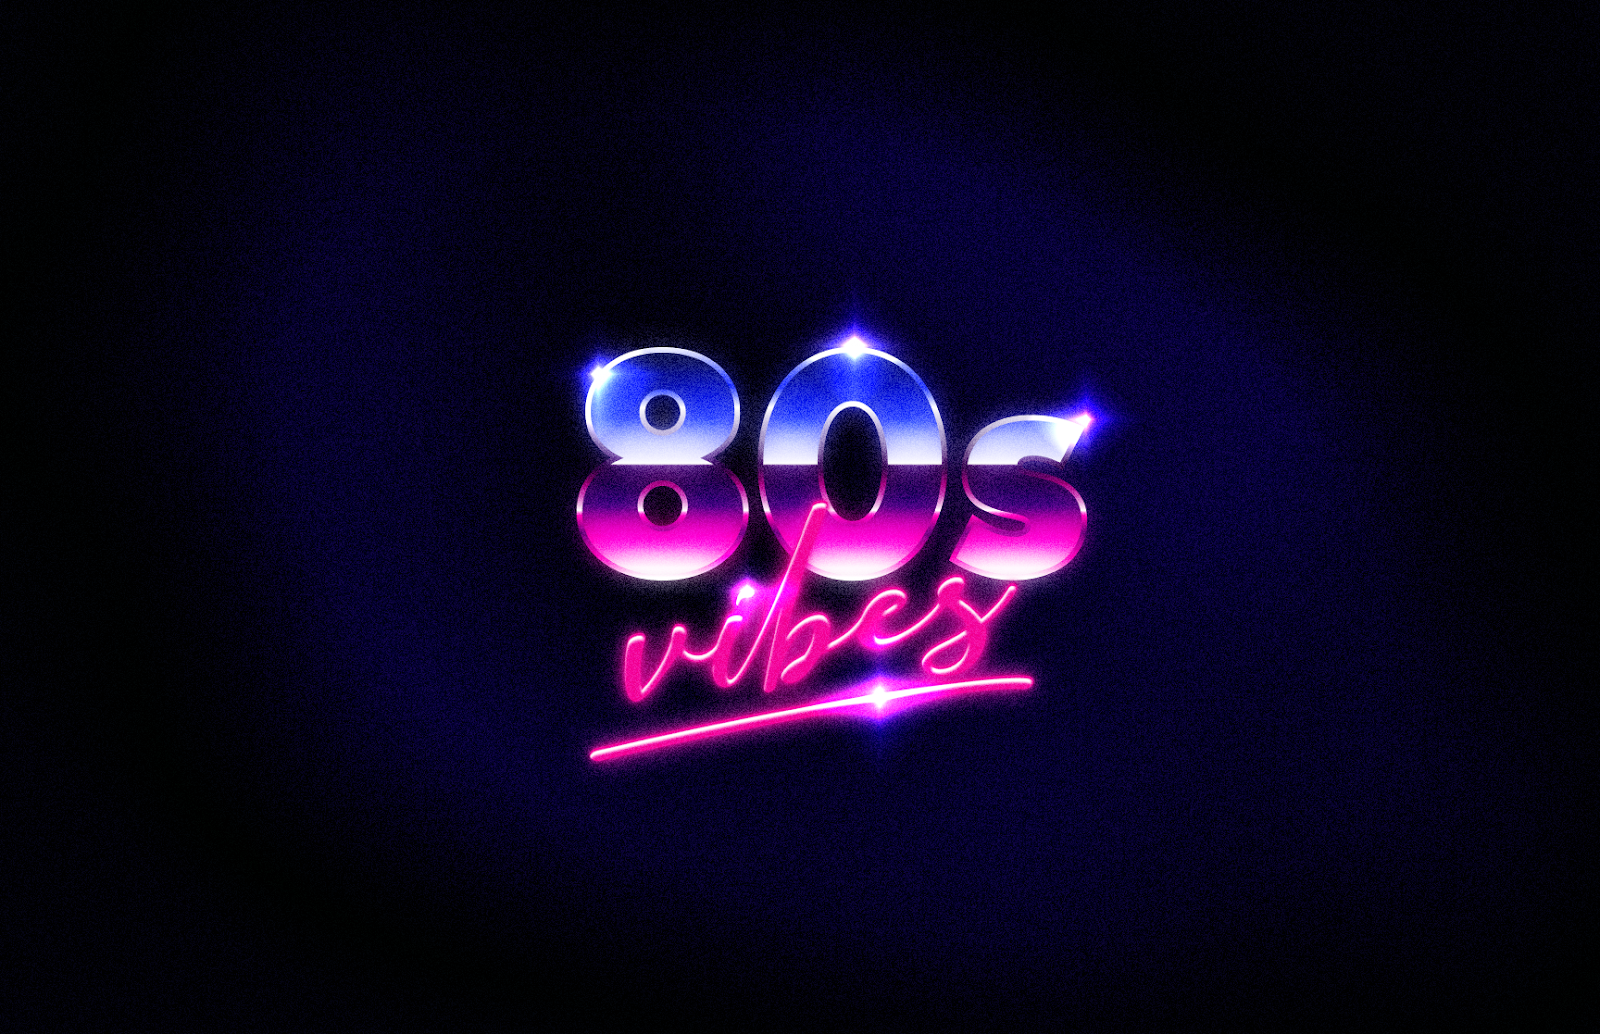
As an ardent admirer of 80s-style logotypes and the aesthetics of that era, I fondly reminisce about watching TV commercials and show vignettes as a child, which prominently featured 3D designs with chrome materials, reflection, and light effects. The 80s were a period of color extravagance and experimentation with digital images, where designers pushed the boundaries of what was possible with their creativity. It was a time when anything could be done, and everything was worth trying. That was the inspiration to try this in Figma.
Even after several decades, I find myself constantly drawn to the allure of this design style, always seeking ways to recreate it using various design tools. Recently, I have been using Figma for work for the past five years and have been continually amazed by its growing set of features and the vibrant community creating plugins to enhance the design experience.
For my latest project, I leveraged Figma's robust toolset, including its gradient capabilities, and an incredible plugin called Noise & Texture by Rogie King to create a stunning image that captures the essence of the 80s design style. The ability to seamlessly integrate these tools and plugins within the Figma platform has allowed me to bring my creative visions to life with ease, and I am excited to see where this journey takes me next.
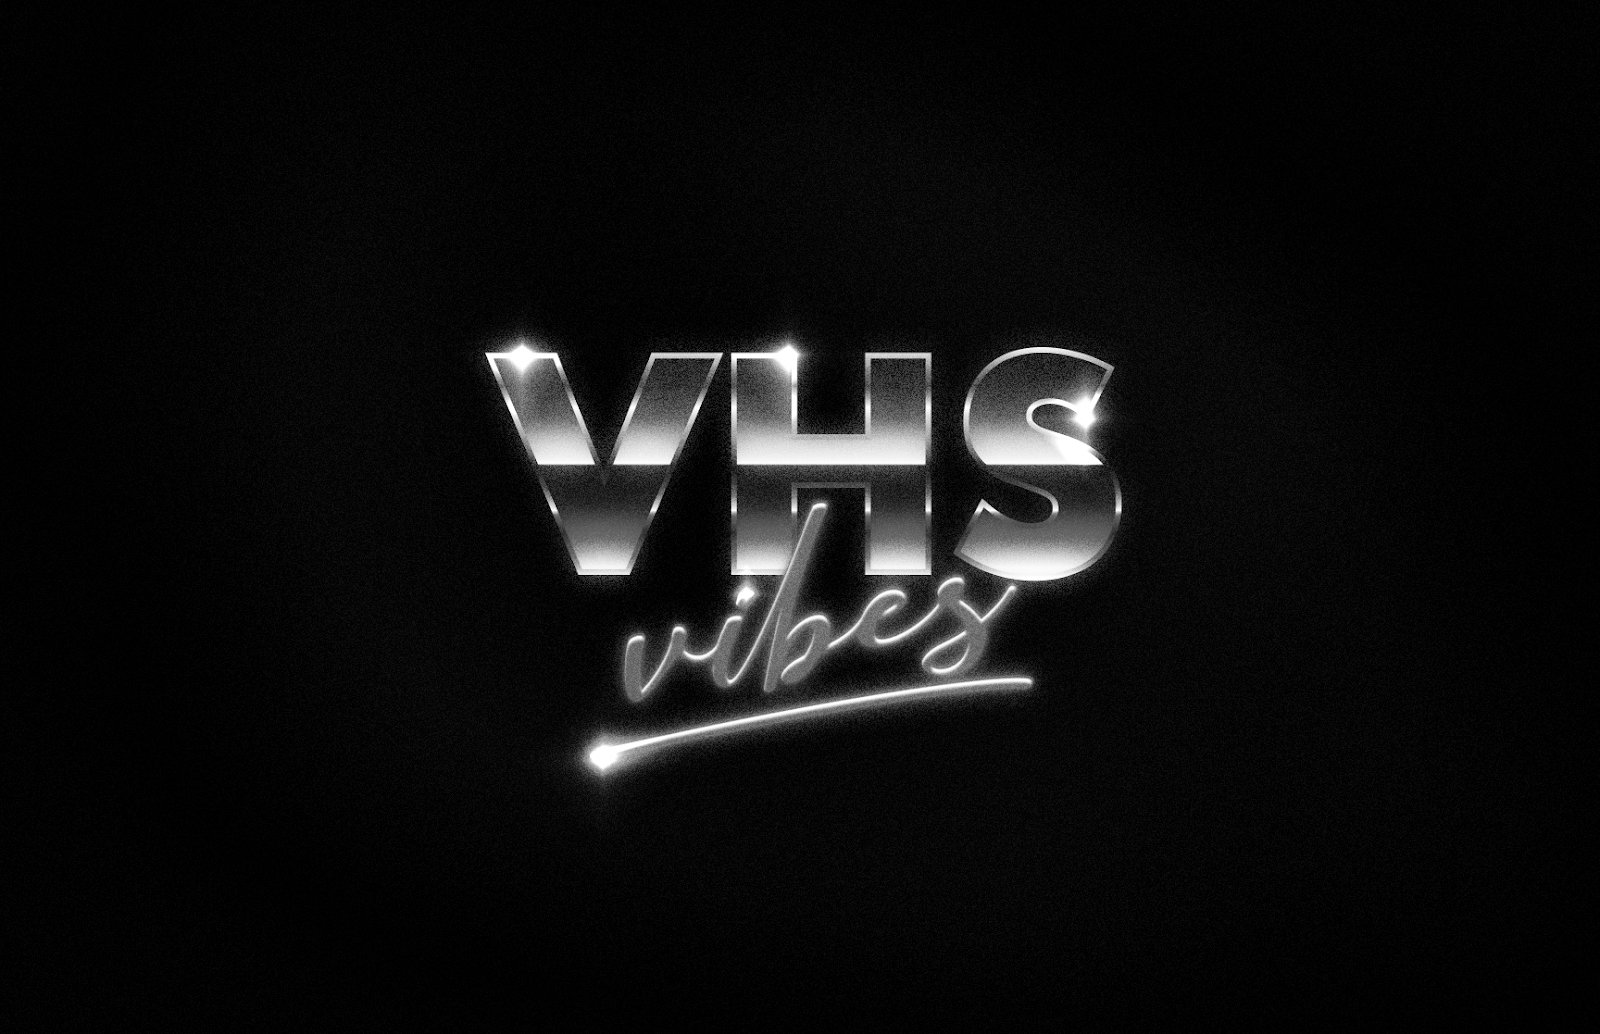
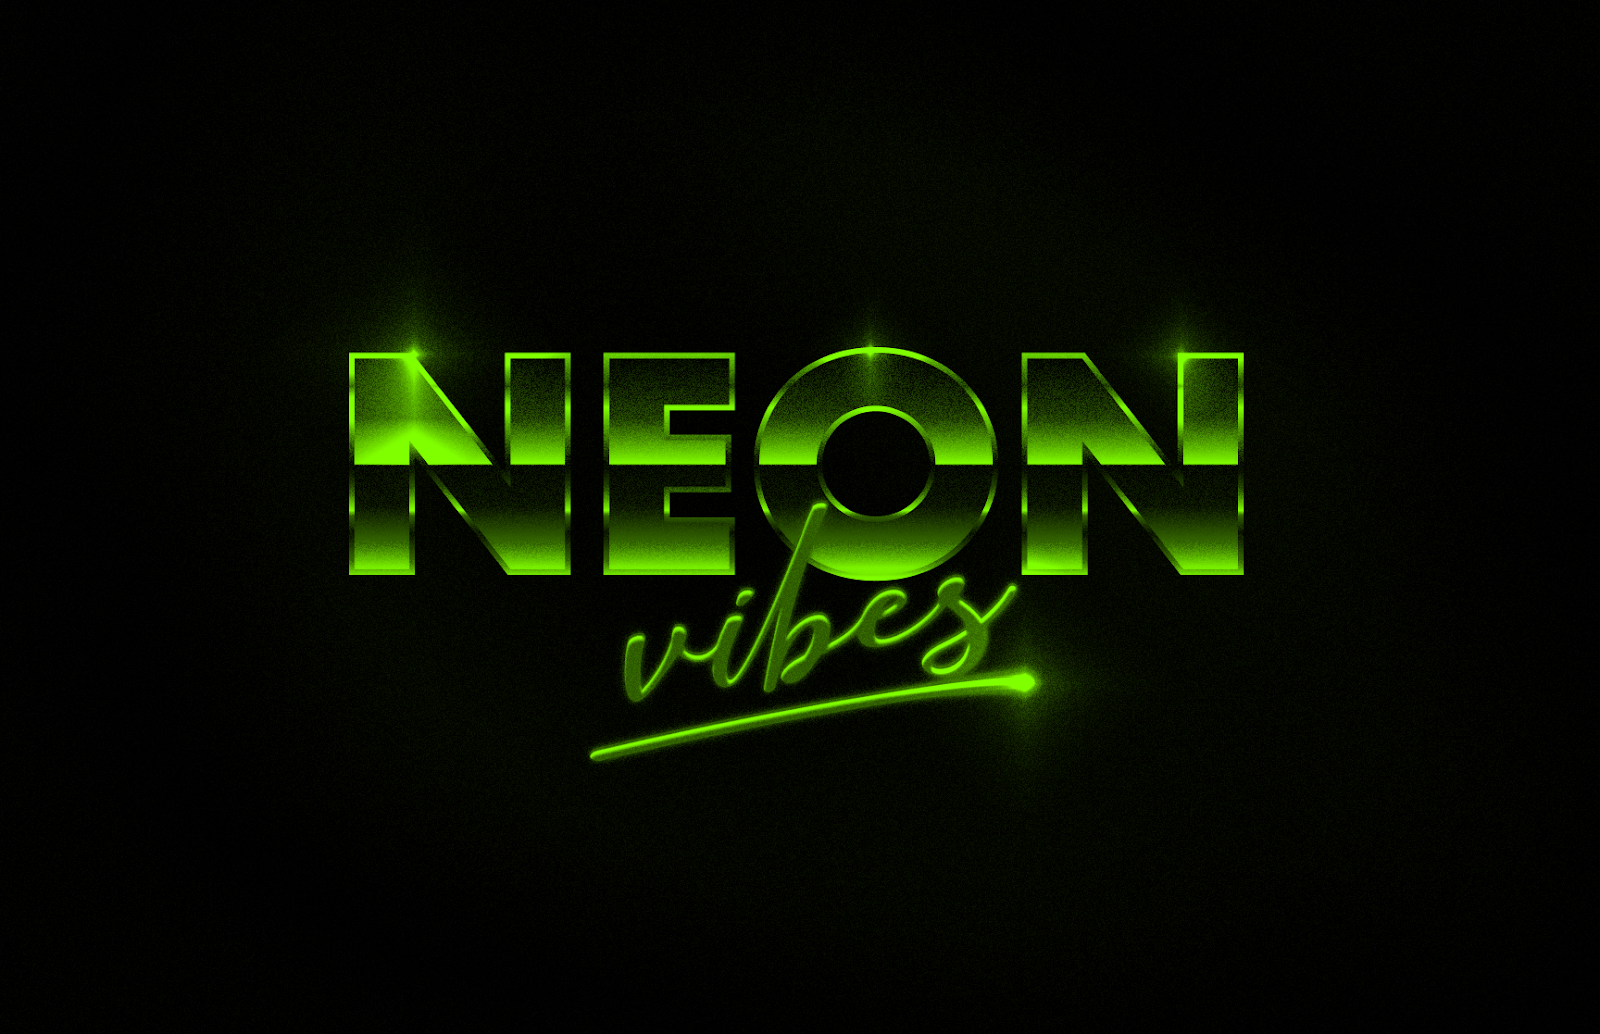
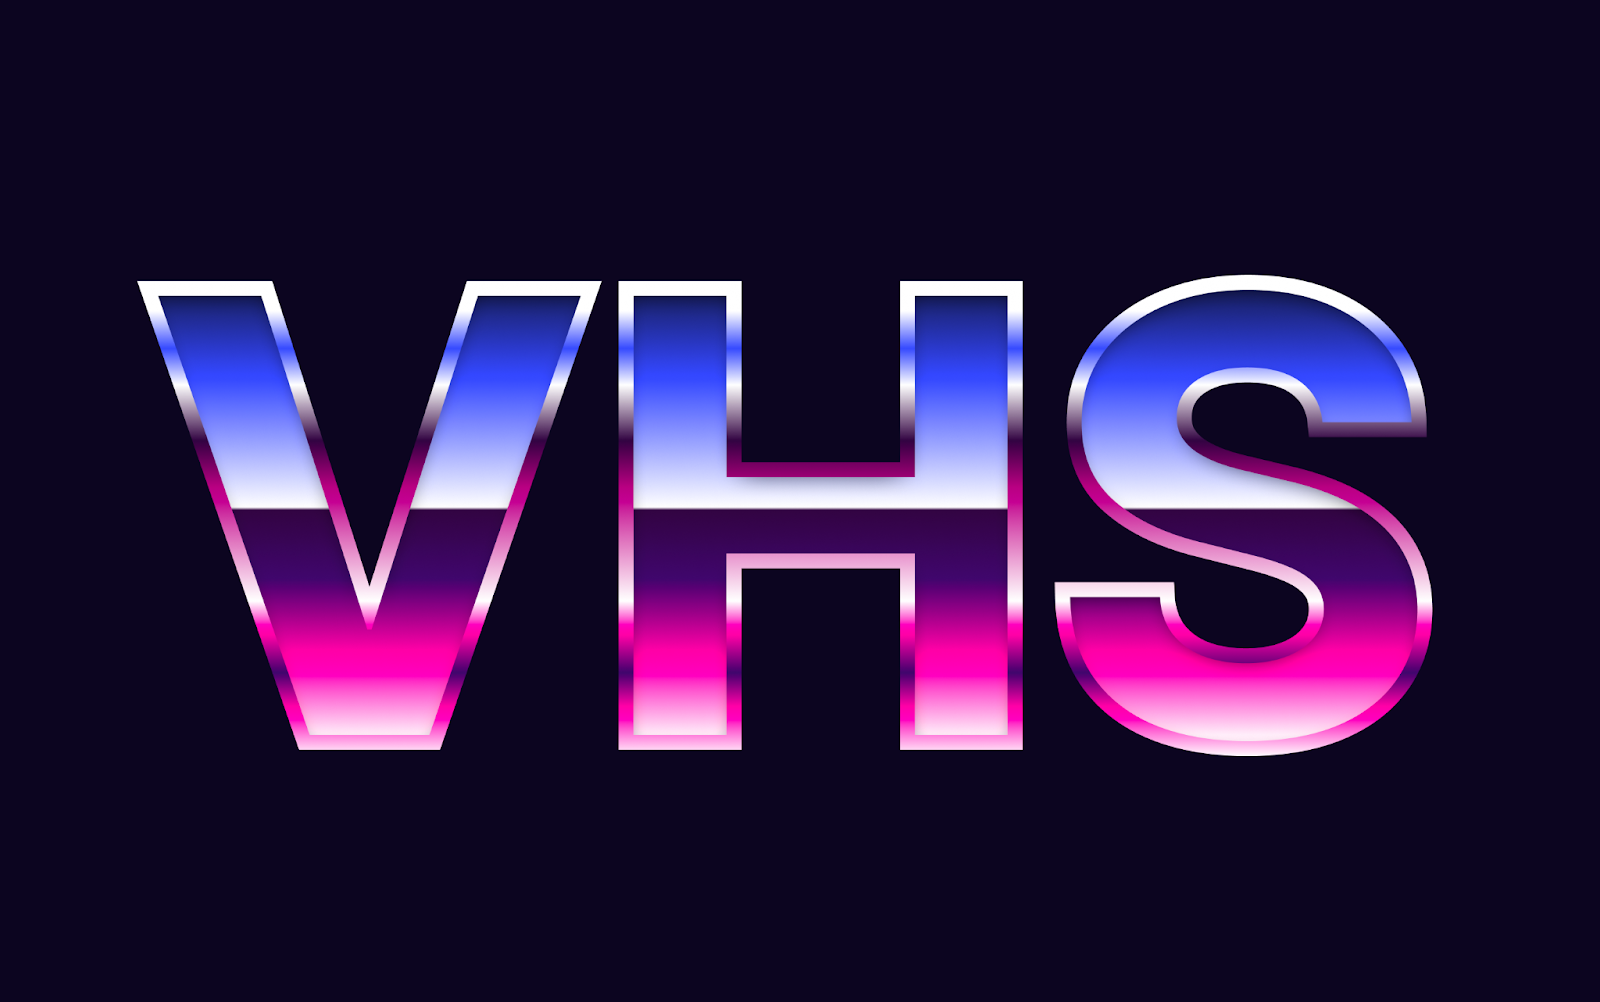
Here’s a quick preview of what I did.
Step 1
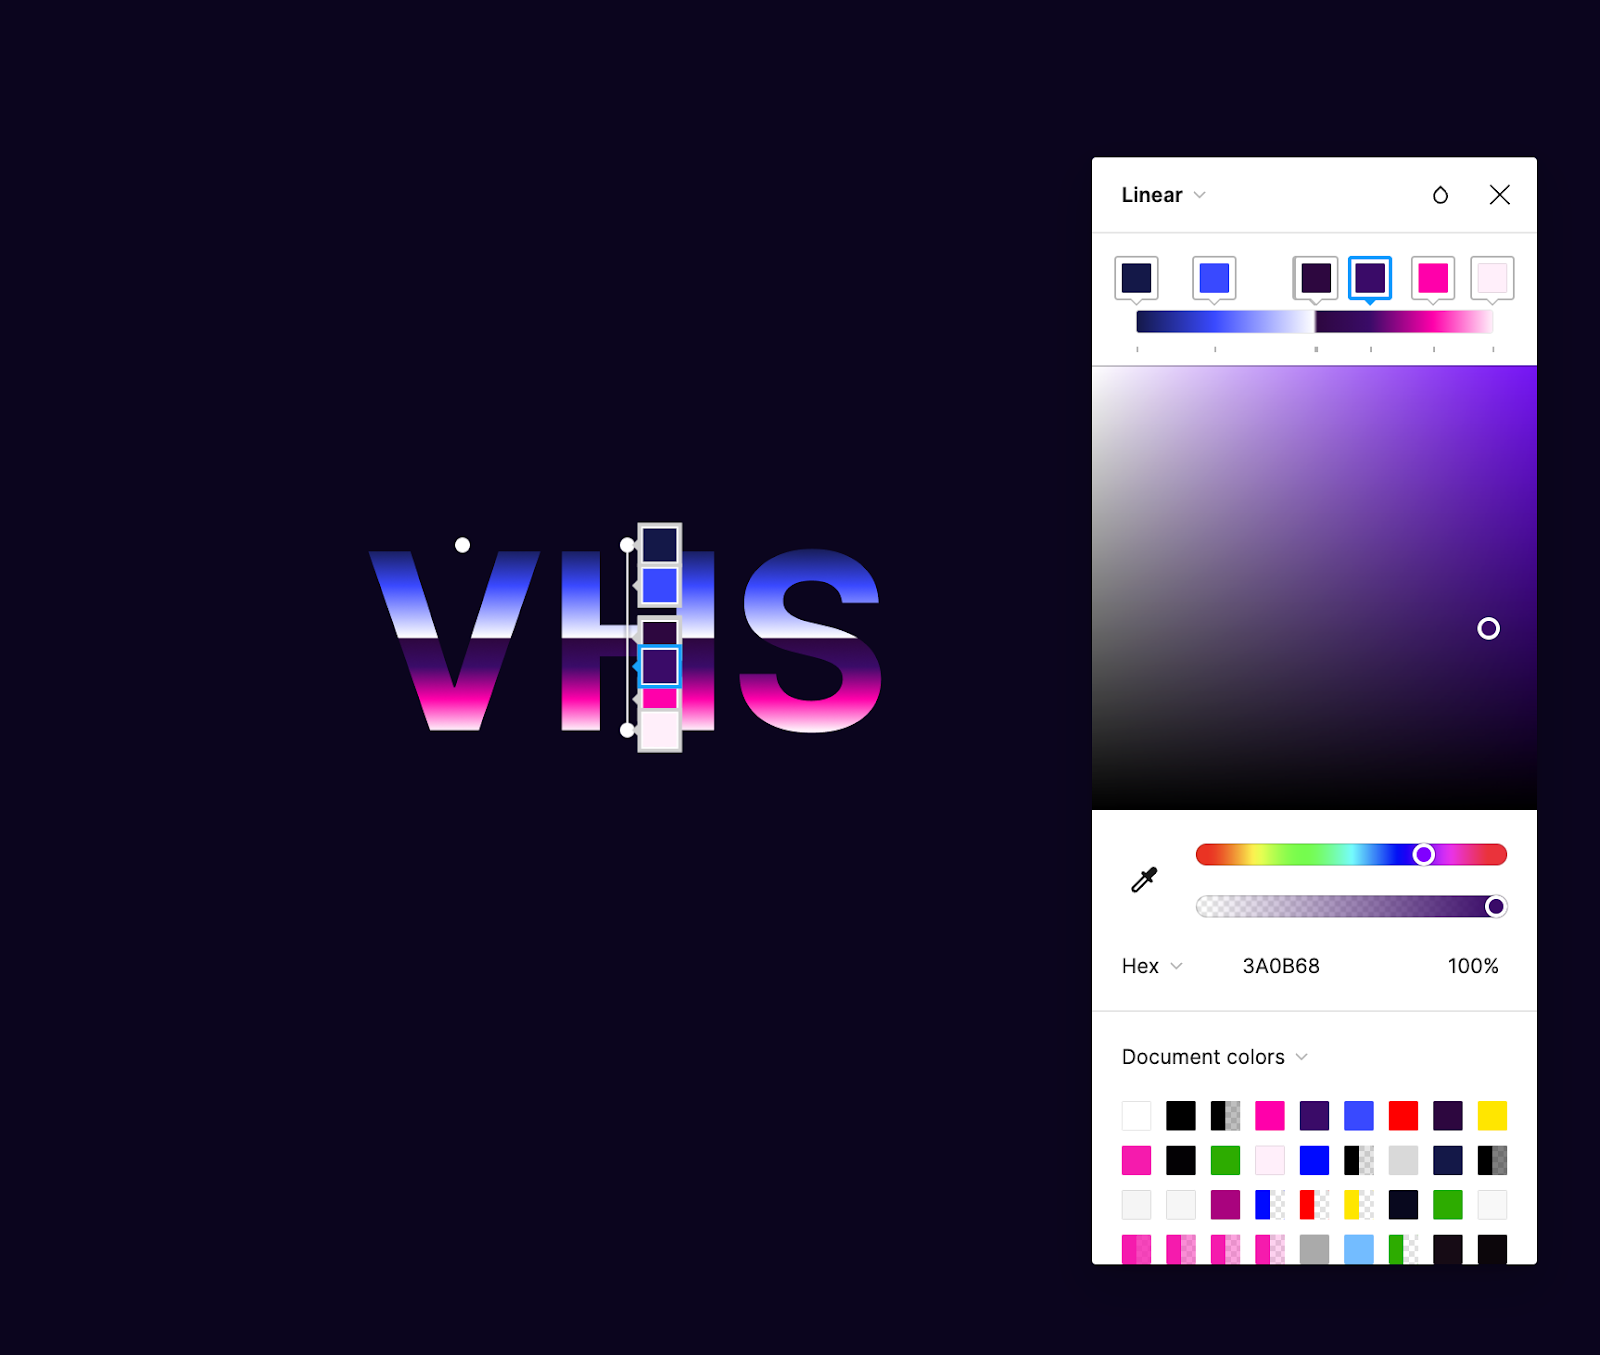
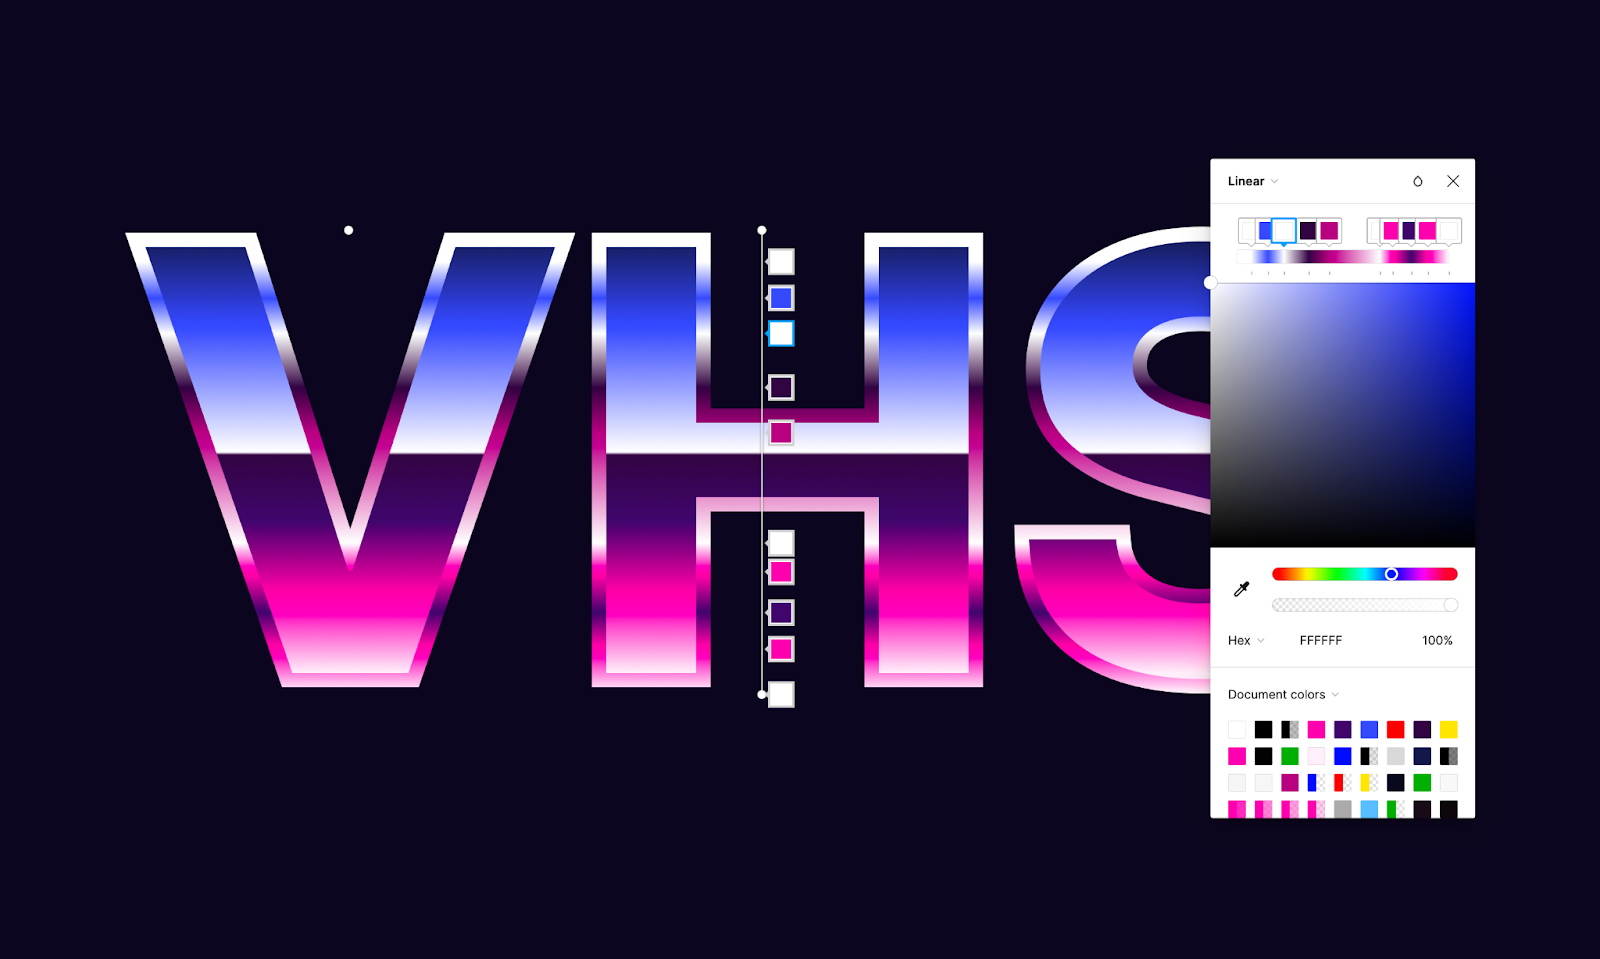
Create a text in all caps so we can have the center of the gradient the same across all letters. There are other ways to achieve it lowercase but it will require extra work with masking shapes.
For the gradient you can play with different colors but it’s important that the middle of it to have a sharp black to white transitions. Ideally you have a super light color at the bottom, like white then a dark color at the top. In between you have variations but the middle is the hard transition.
Step 2
To create the 3D look add an outside stroke. Make it bigger than 4px. Then use a gradient for the stroke color. Make sure they don’t match the fill one to create some light effects and the sense of depth What I mean is that they have in a way to have a slight offset.
Step 3
Add some inner shadows to create some more depth.
Step 4
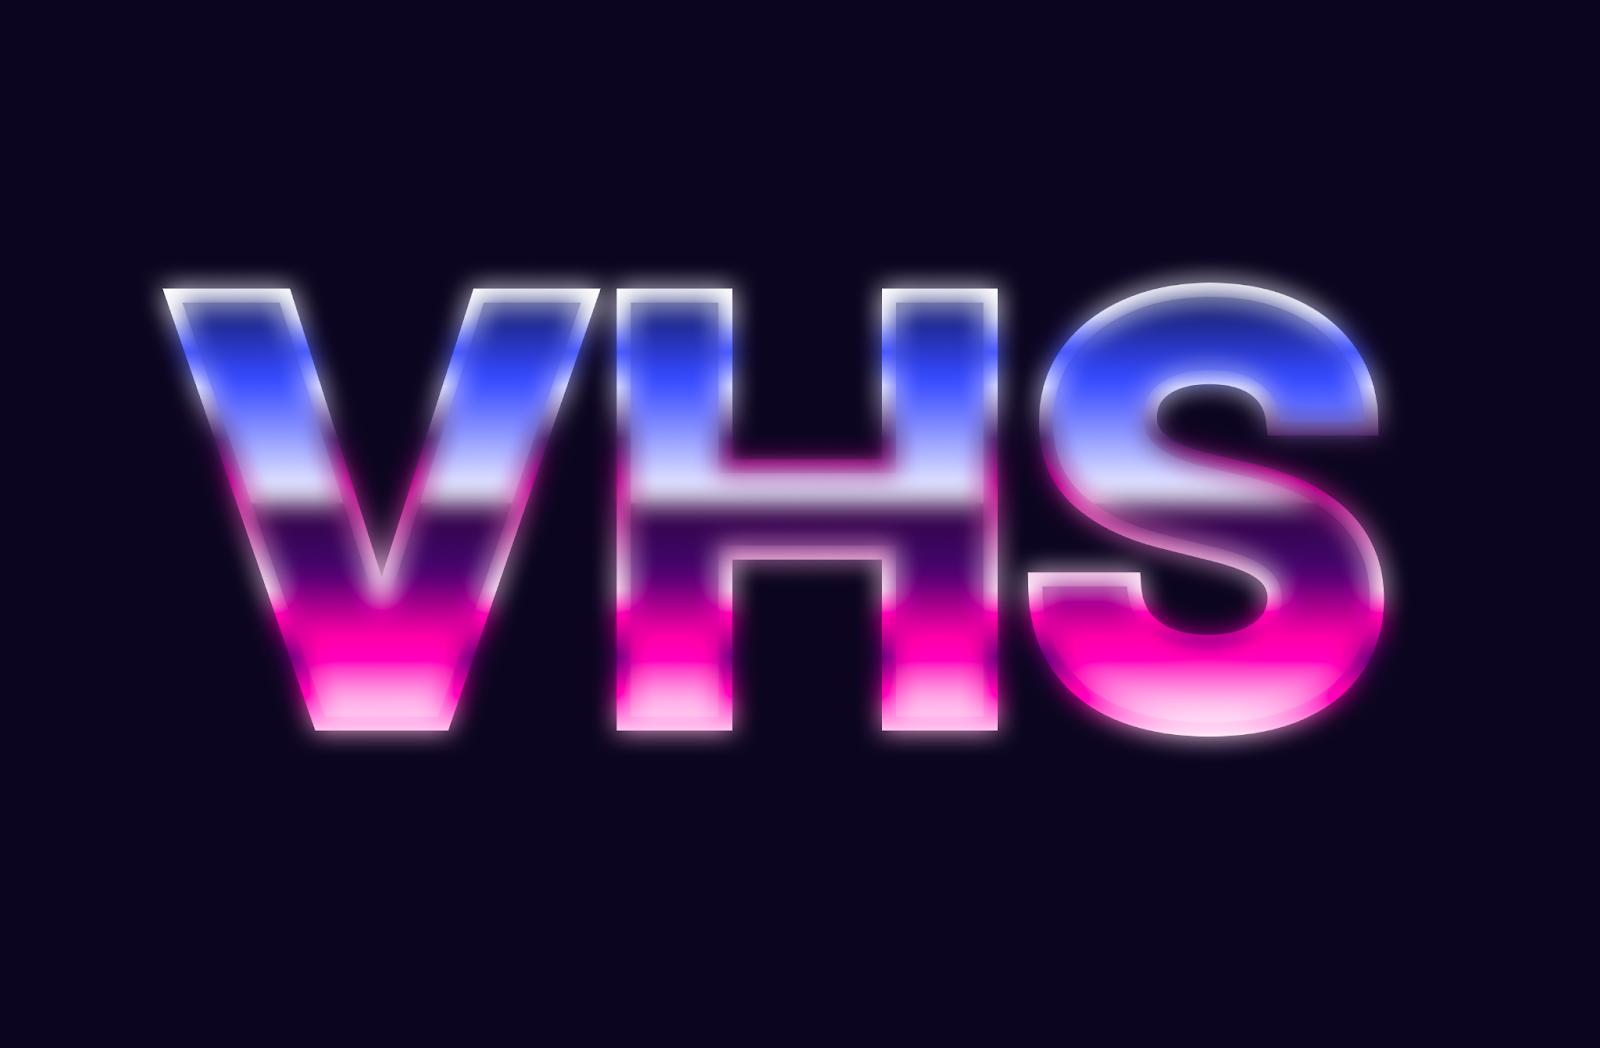
Duplicate the layer and apply the Layer Blur effect.
Step 5
Change the blend mode of that layer to Overlay and use 50% for opacity. After that, duplicate that and change the blend mode to Screen at 80%. That will create a glow effect.
Step 6
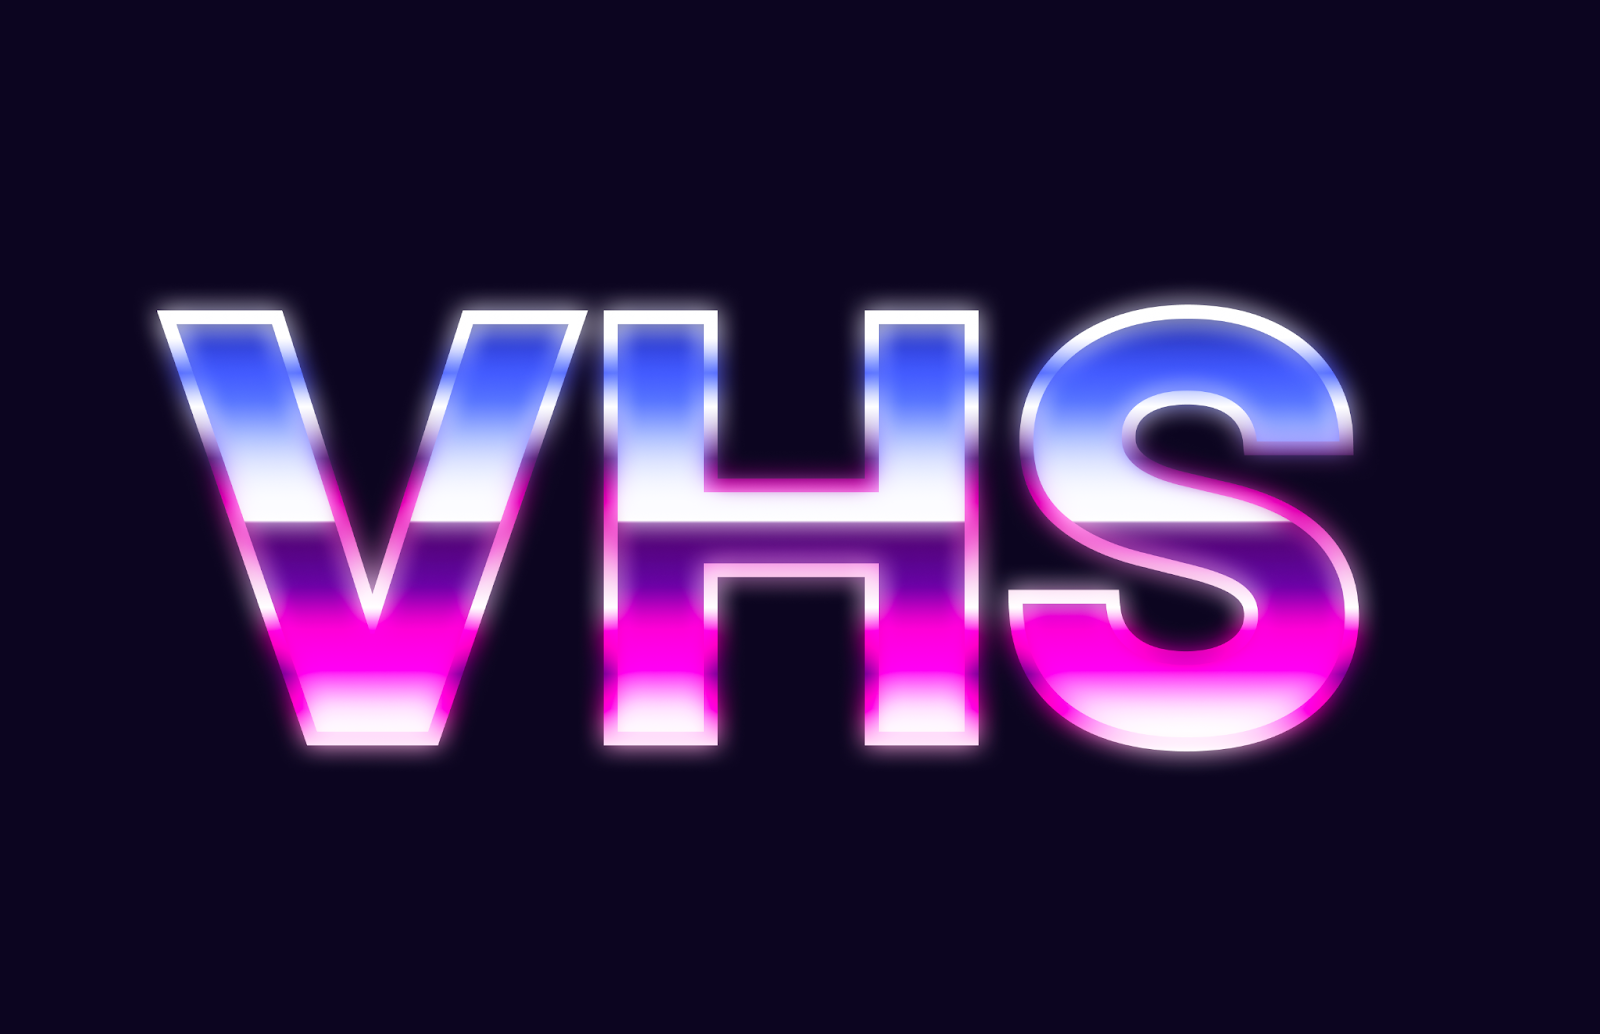
Now just add the noise effect from the Noise & Texture by Rogie King
Conclusion
To add some extra flares just create a circle and apply the Diamond Gradient. Use white for the center and black for the sides. Then just change the Blending to Color Dodge. Boom you created a lens flare. Just move them around in your design.