by abduzeedo
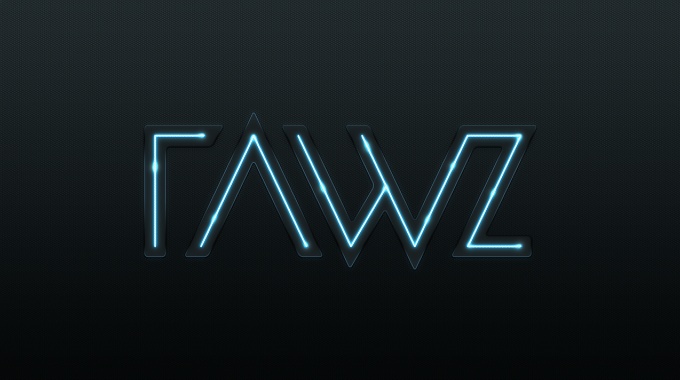
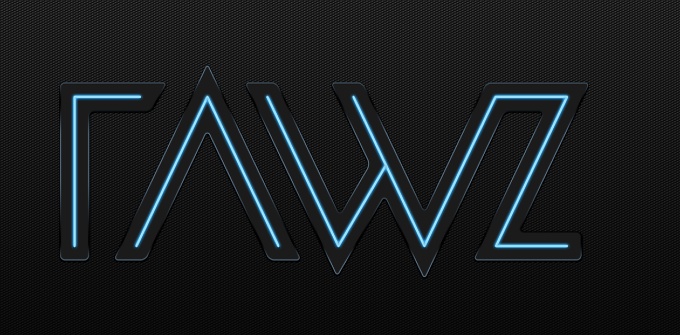
Last Friday we launched our new way for users to submit work for the Daily Inspiration at Abduzeedo. We call it RAWZ or Abduzeedo Raw Inspiration. Anybody can submit their work and we will select some to be featured on Abduzeedo. We also created a logo in Illustrator and then this cool effect in Photoshop, inspired by Tron.
So in this tutorial, I will show you how to create the RAWZ light effect in Photoshop. It's a beginner/intermediate tutorial and it will take you 45 minutes to go through it. I hope you have fun doing it as much as I had.
Photoshop tutorial
Step 1
Open Photoshop and create a new document. With the Paint Bucket Tool (G) fill the background layer with black.
Step 2
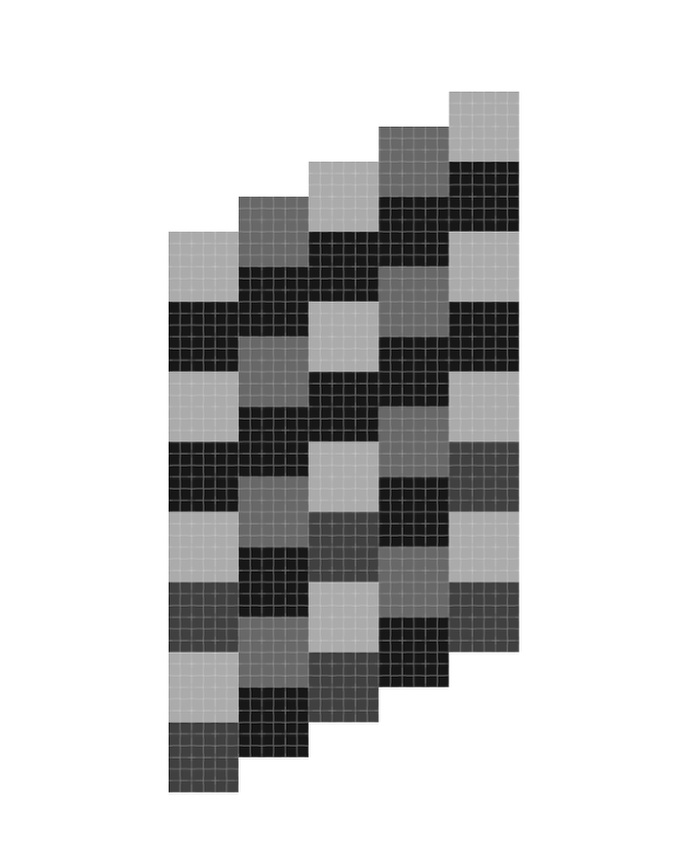
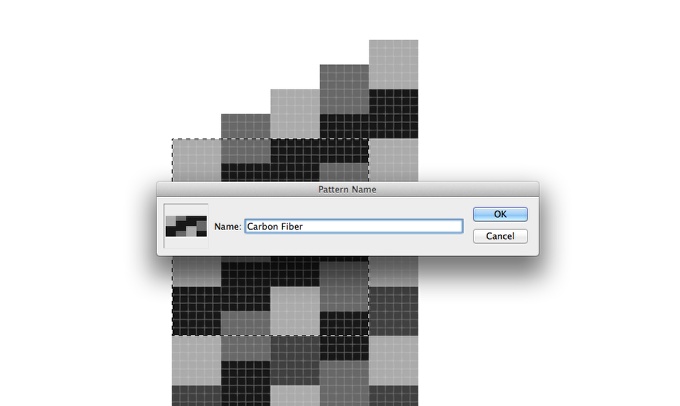
To create a carbon fiber texture is quite simple. Create a new document and using the Rectangle Tool (U) create squares in black, grey and dark grey like the image below. That will be the base for our pattern. Notice that the size is really small.
Step 3
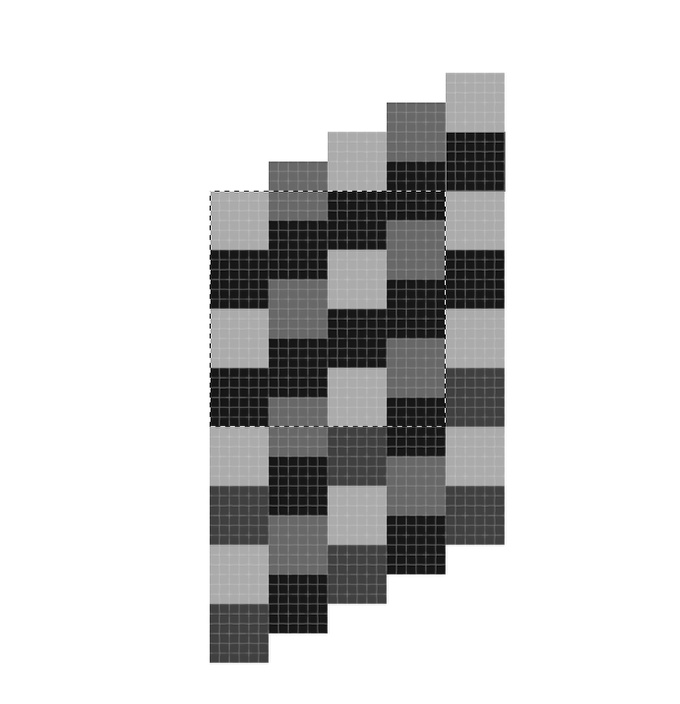
With the Rectangular Marquee Tool (M) create a square selection like in the image below.
Step 4
Go to Edit>Define Pattern. Name it Carbon Fiber. That was it for the pattern part.
Step 5
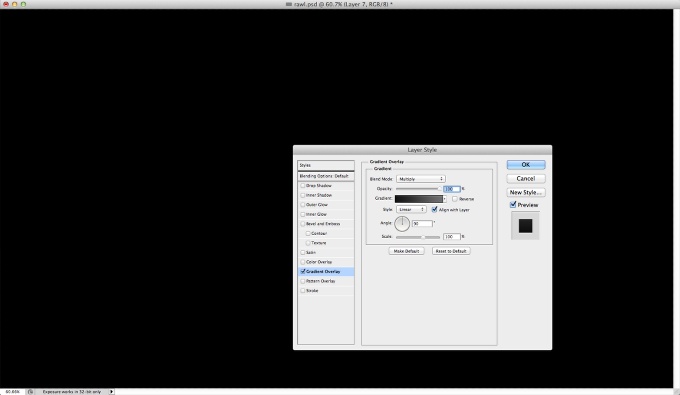
Back to the document of our design, add a new layer and fill it with black too. Then go to Layer>Layer Style>Gradient Overlay. Use dark grey for the colors. The darker one will be at the bottom. Also change the Blend Mode to Multiply.
Step 6
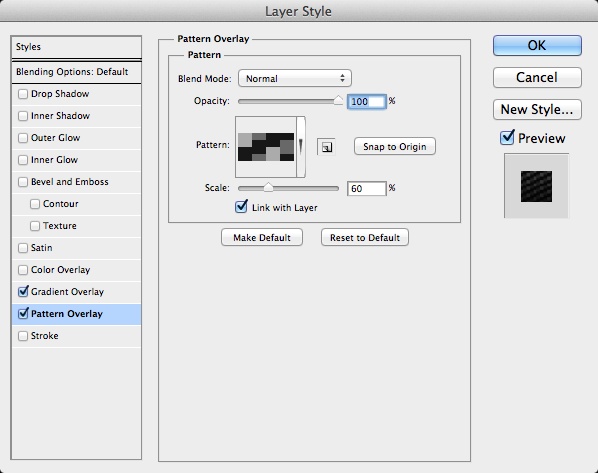
Select Pattern Overlay, then for the Pattern select the Carbon Fiber we created in the previous steps. Also change the Scale to 60%.
Step 7
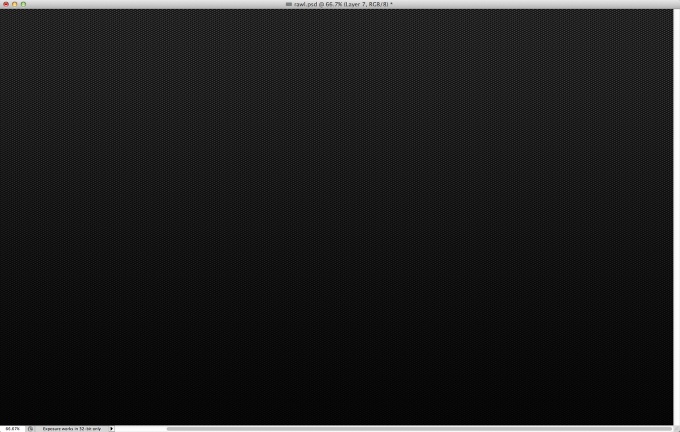
Here is our carbon fiber background.
Step 8
Import the logo you would like to use. In my case I am using the RAWZ logo I created in Illustrator.

Step 9
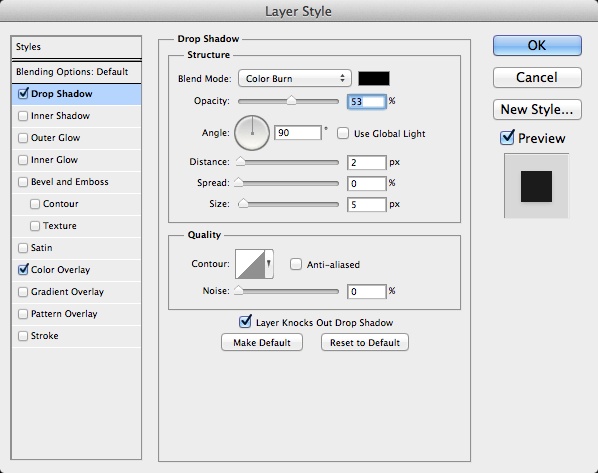
Go to Layer>Layer Style. Select Drop Shadow. For the Blend Mode use Color Burn at 50% Opacity, 90• for the Angle, 2 pixels for Distance and 5 pixels for the Size.
Step 10
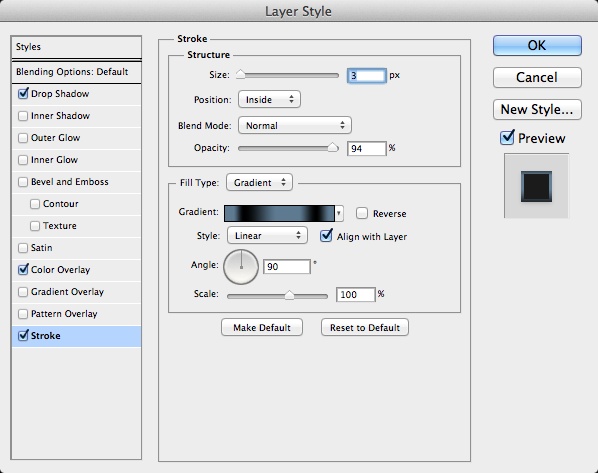
Select Stroke and then use 3 pixels for the Size, Inside for the Position, 95% for the Opacity and then for the color use #5c7a92, #000000, #5c7a92, #5c7a92, #000000, #5c7a92. For the Style use Linear and for the Angle use 90º.
Step 11
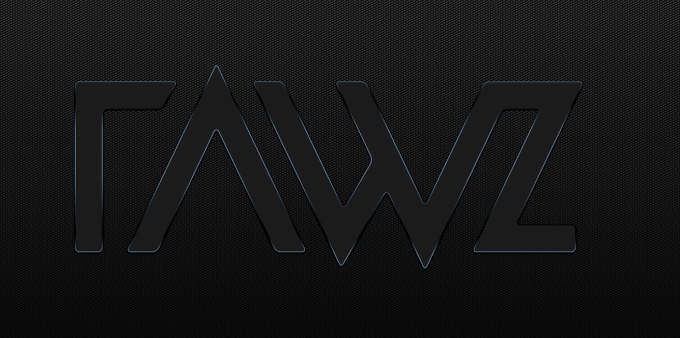
Here is the logo with the Layer Styles.
Step 12
To create the neon light in the middle is quite simple. I did that in Illustrator and imported to Photoshop.
Step 13
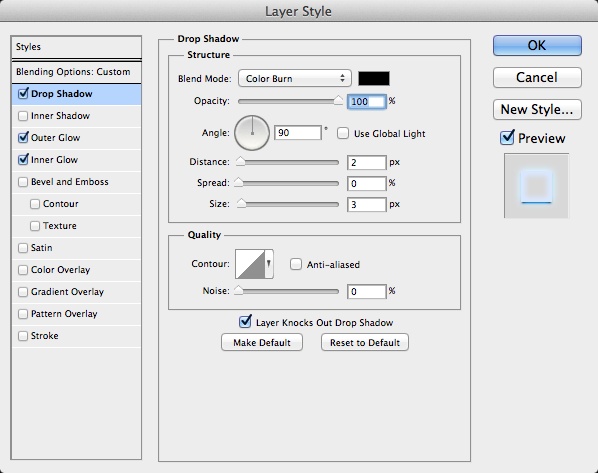
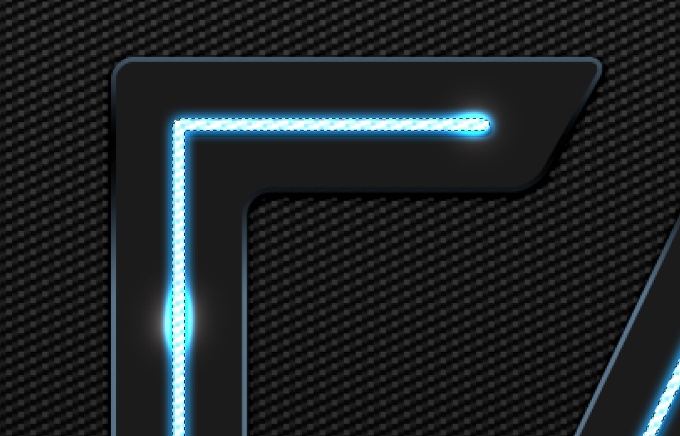
Select the layer you want to apply the neon effect and go to Layer>Layer Style. Select Drop Shadow. For the color use black, with Color Burn for the Blend Mode at 100% for the Opacity. For the Angle use 90º and then 2 pixels for the Distance and 3 pixels for the Size.
Step 14
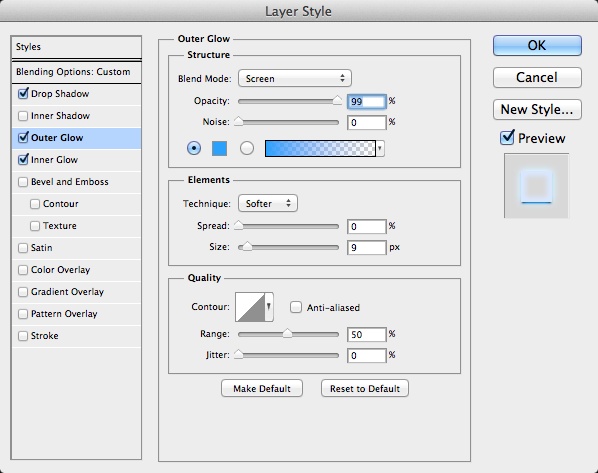
Selec Outer Glow. For the Blend Mode use Screen, for the Opacity use 100% and blue (#00a2ff) for the color. Change the Spread to 0 and the Size to 9 pixels.
Step 15
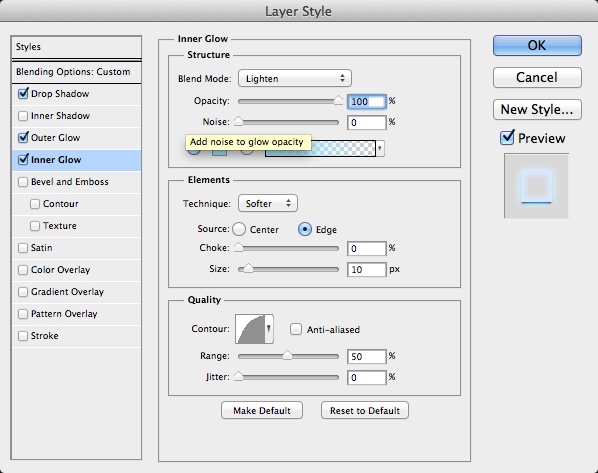
Select Inner Glow. Use Lighten for the Blend Mode with cyan for the color. Also select Edge and change the Size to 10 pixels. Over the Quality change the Contour to the same as in the image below.
Step 16
Here is the result after the Layer Styles.
Step 17
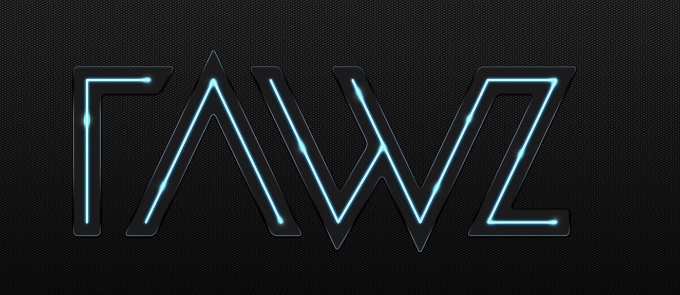
Add a new layer and group it into a folder. Change the folder's Blend Mode to Color Dodge and then with the Brush Tool (B) and a very soft brush, 0 hardness, and then paint some spots ver the neon to create those light spots you can see in the image below.

Step 18
Add a new layer inside the folder with color dodge and fill it with the carbon fiber pattern. Create a marquee selection of the neon layer by clicking on the thumbnail of the layer holding Command (Mac)/Control (PC), then with the layer with the carbon fiber pattern selected, go to Layer>Layer Mask>Reveal Selection. That will create really nice light effect on the neon.
Step 19
Here is what we have gotten so far.
Step 20
Select all layers and duplicate them, after that merge all the new layers into one and go to Filter>Blur>Gaussian Blur. Use 10 pixels for the Radius.
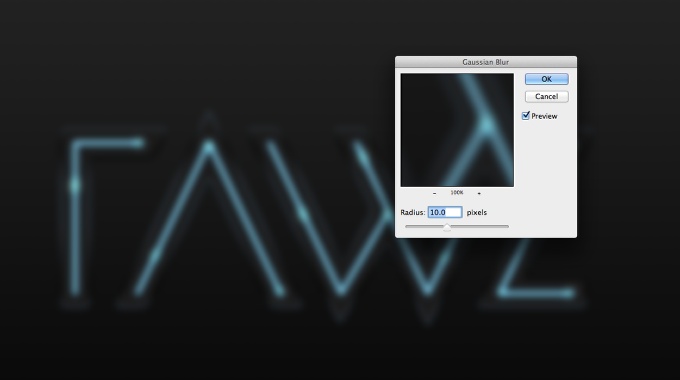
Step 21
Duplicate the blurry layer again, and change the Blend Mode of the one that is underneath to Overlay and the one on top to Screen.

Step 22
Group both layers into a folder and change the Opacity to 50%.
Step 23
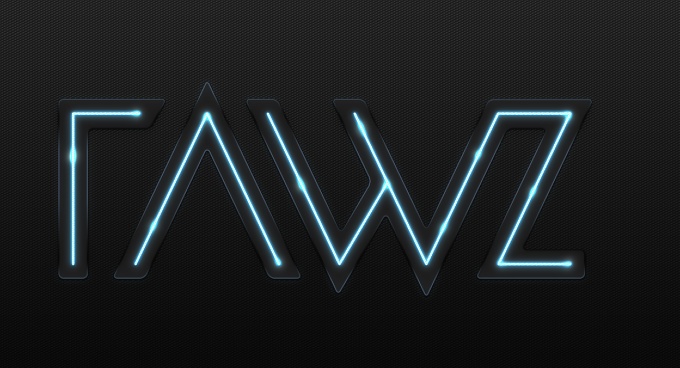
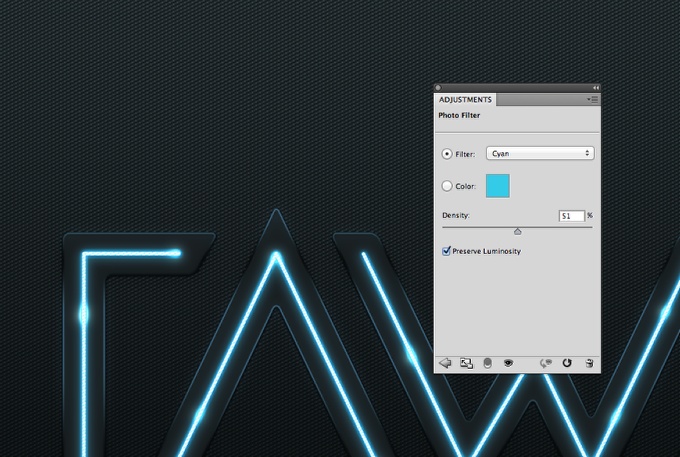
Go to Layer>New Adjustment Layer>Photo Filter. Use Cyan for the Filter with 50% Density.
Conclusion
Here is the final result. As you can see, the whole process is quite simple and this technique is very versatile, I use it all the time. The cool new thing I believe we learn here is how to create the carbon fiber background. So now it's up to you.