by abduzeedo
Lidia Lukianova shared a simple but quite awesome Photoshop tutorial. She shows us how to create a beautiful Paper Cut effect using the Pen Tool and Layer Styles in Photoshop. The result is quite realistic and below you can see a step-by-step. Lidia was also kind to share the source file, just in case you want to check it out.
You can download a practice file here: http://adobe.ly/1I2kW2C
Photoshop Tutorial
Step 1
Use the Pen tool to create the letter shapes and fill them with color.

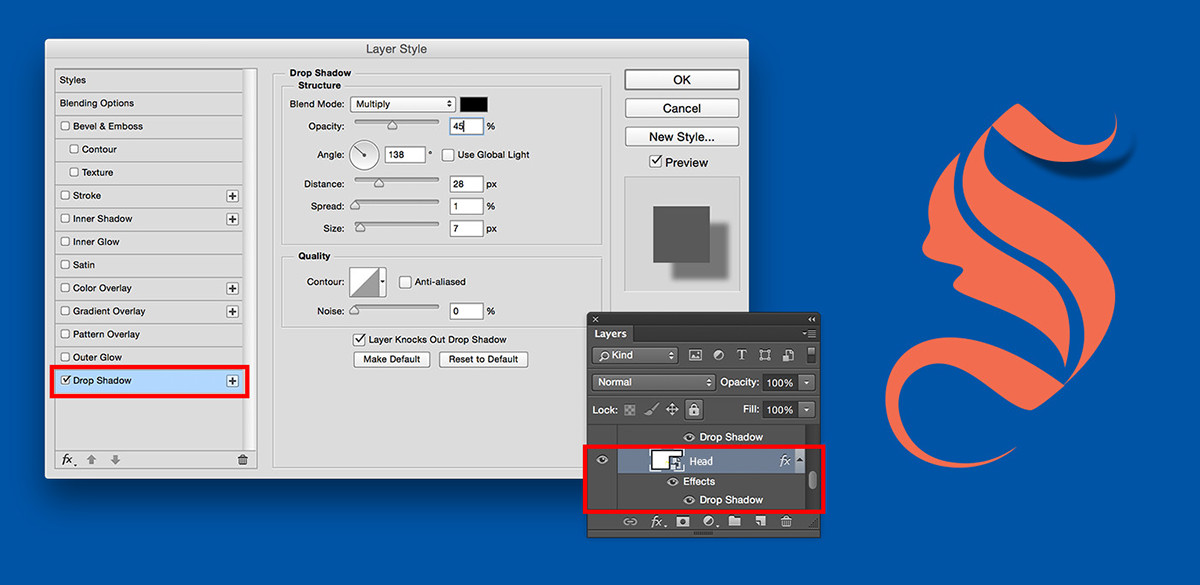
Step 2
To add a shadow to the top part of your letter, double-click its layer in the Layer panel and choose Drop Shadow. Adjust the settings to achieve the desired effect. Uncheck the Use Global Light checkbox.
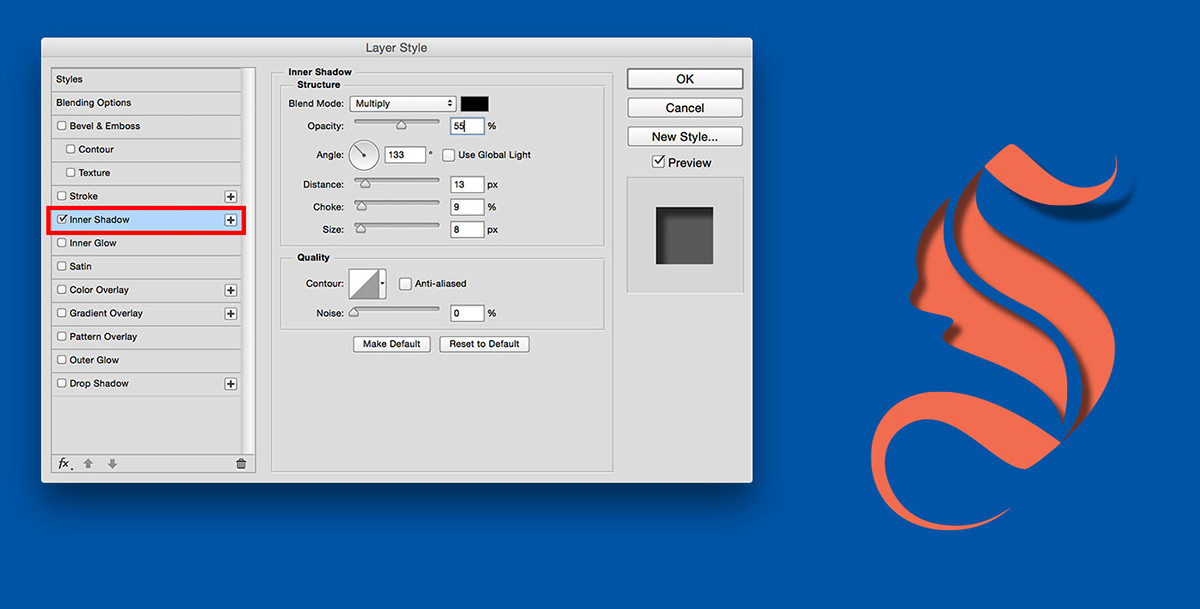
Step 3
Add Inner Shadow to the center part of your letter.
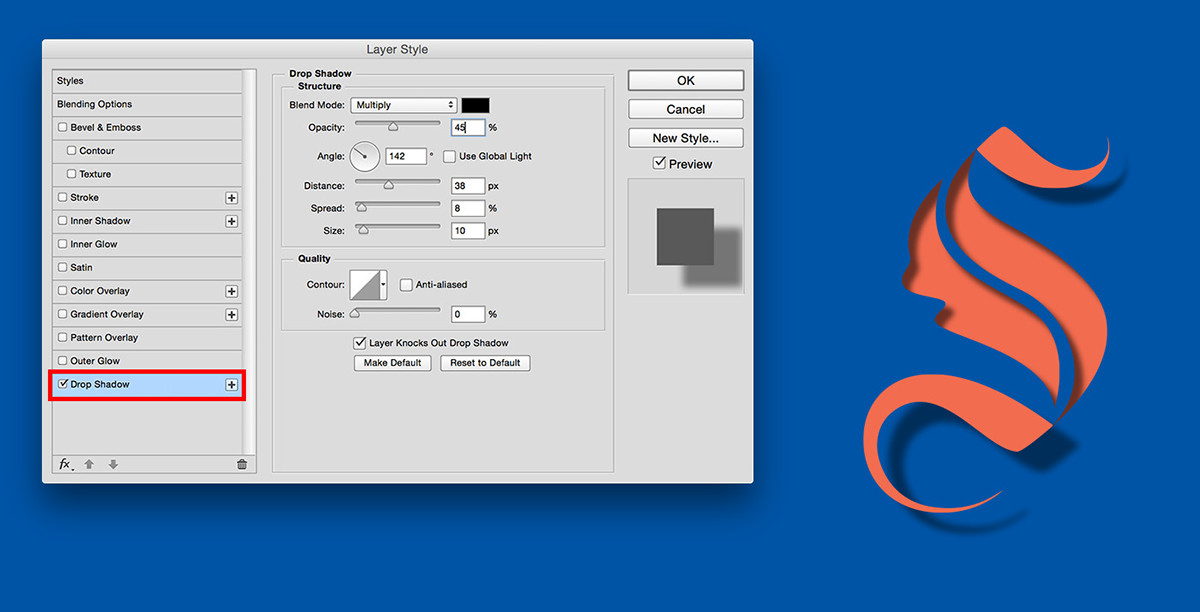
Step 4
Repeat Step 2
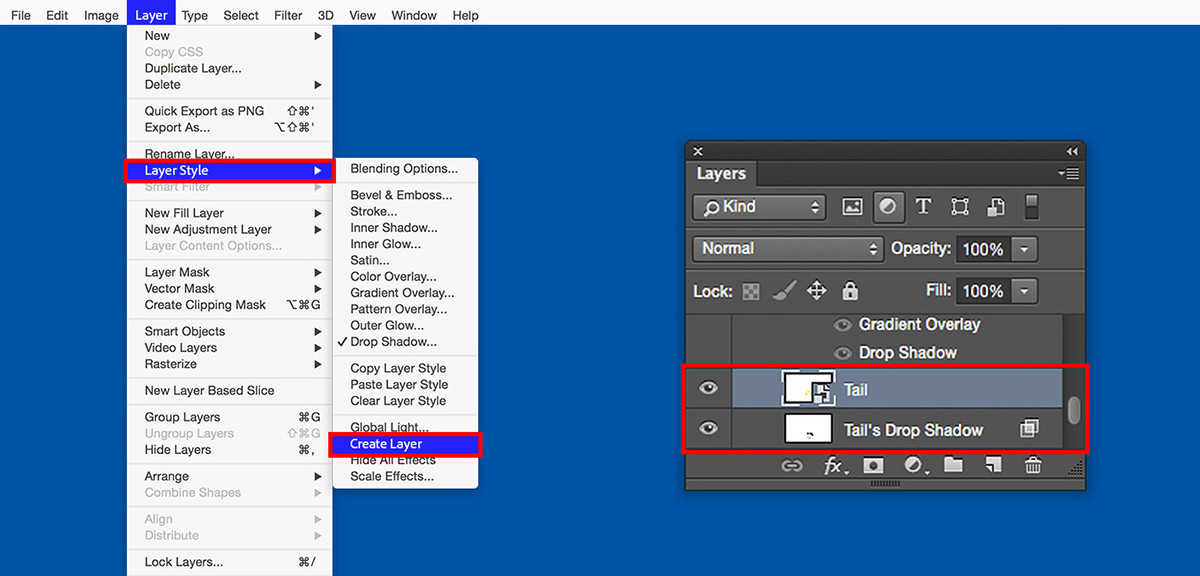
Step 5
To edit the shadow separately from the fill layer, go to Layer > Layer Style and choose Create Layer. In the Layer panel you’ll now have two layers: a shape layer and a Drop Shadow layer.
Step 6
Use the Eraser tool to remove parts of the shadow.
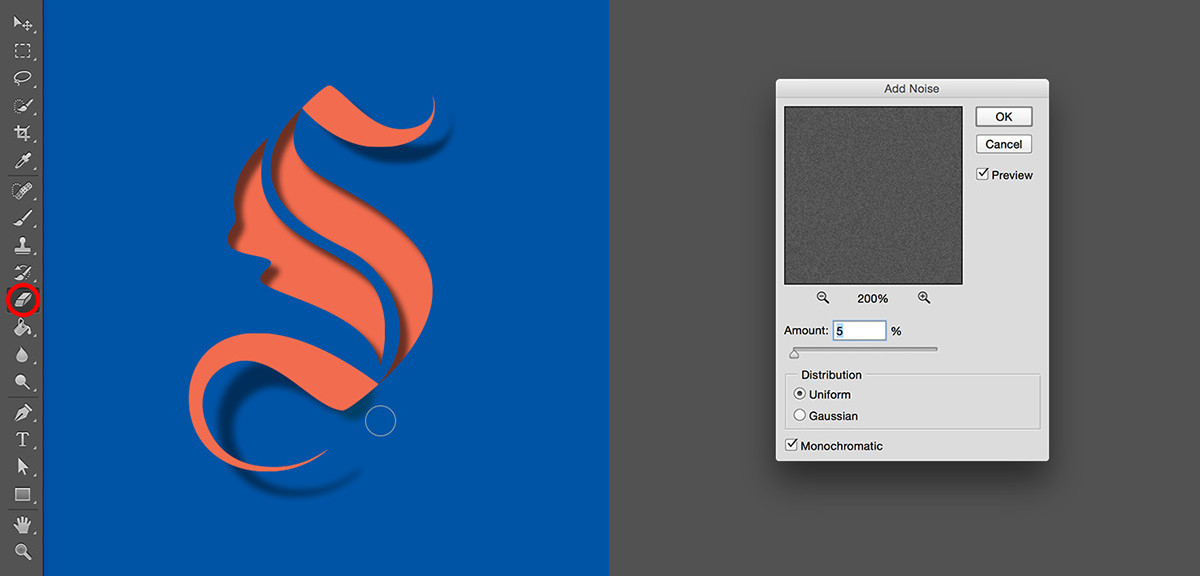
Next, let’s create a grainy paper texture. Make a new layer and fill it with grey color. Then go to Filter > Noise > Add Noise.
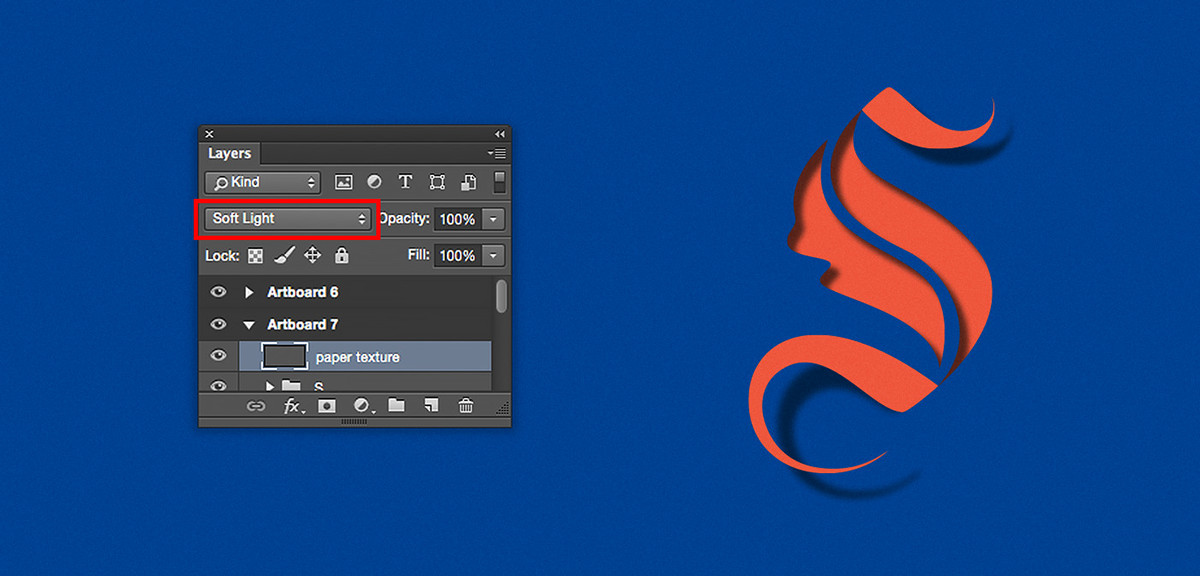
Step 7
To add a paper texture feel to your image, choose Soft Light in the Layer panel.
LEARN MORE:
- Turning sketches into vector shapes with Adobe Capture CC and using them in other Adobe applications: link
- Working with type in Photoshop and getting fonts from Typekit: link
- Syncing fonts from Typekit in Photoshop: link
Also make sure to check out Lidia Lukianova work at https://www.behance.net/lidialukianova


