by abduzeedo
It has been a little bit more than six months since I moved to San Francisco, California. As you might know, I am from Brazil so it's quite a big change, however, I've been having an amazing time here, constantly learning new things. That's why I've decided to try something different for this tutorial, a Psychedelic image using Illustrator and Photoshop.
I think it's very important for a designer to have as many visual references as possible. That is useful because it will give you more ideas when trying to come up with design solutions and that way you won't end up doing the same thing all the time. But just looking at references is not enough, at least not for me. I have to do things in order to learn the little subtleties that make a design look like a legit representation of a period in time, psychedelic in this case.
So in this tutorial, I will show you how to create a psychedelic design using Illustrator and Photoshop.
Step 1
Open Illustrator and start a new document. The idea is to create a psychedelic design using typography elements only. Start typing the first phrase you want to use, in my case I typed "Abduzeedo Six Months" using the font Butterfield Demo. You can download it at http://www.dafont.com/butterfield.font

Step 2
Add 3 more phrases and make sure they match the length. It's impossible to do that without adjusting the kerning of each sentence. So in some, you will have to increase while for others reduce the kerning.

Step 3
Once you have the 4 sentences rotate them to create a square.

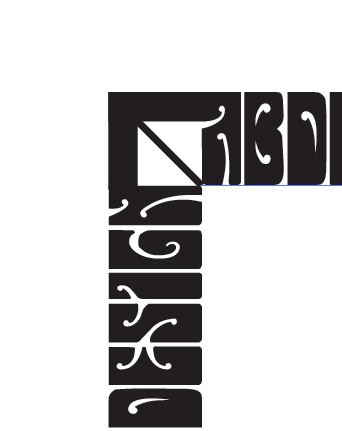
Step 4
To connect the sentences you will have to create some elements. I add some basic rectangles matching the letters that start and end the sentences. Use the image below for reference.
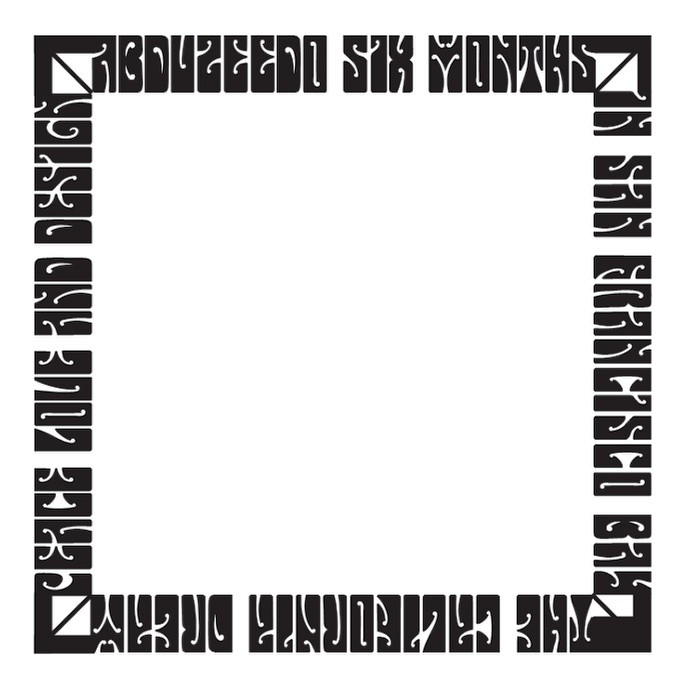
Step 5
Once you finish creating the connectors for the sentences you will have an image like the one below.
Step 6
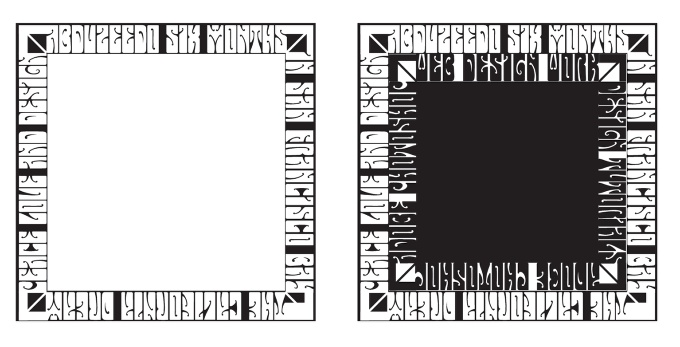
With the Rectangle Tool (M) create a square, in black, then move the square made out of the sentences on top of this square and change the color of the text to white.
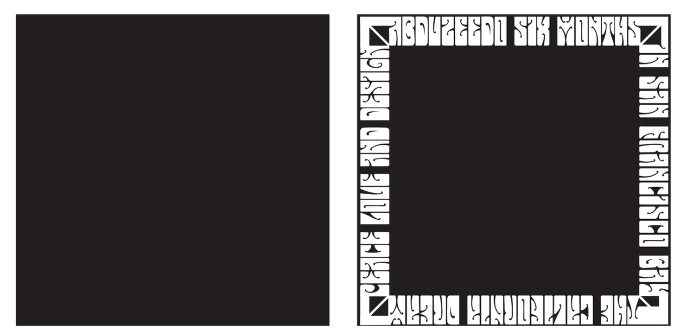
Step 7
Create a new square, this time with white like the image below. The idea here is add a new square made of texts. To do that just repeat the first steps of this tutorial. The size of the fonts will be the same, but the sentences will be shorter though.
Step 8
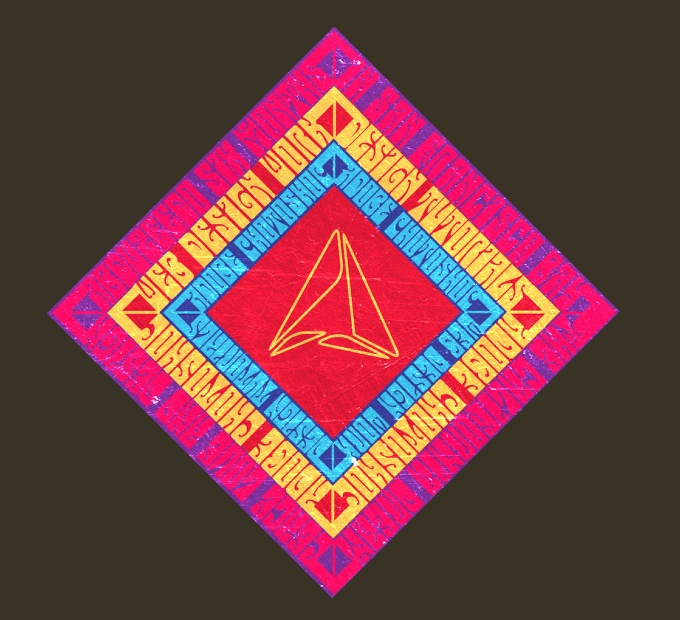
Create a third square of text, this time you can reduce the font size. I simply duplicate the second square and resized it to fit the area. Note the way I inverted the colors for each square.

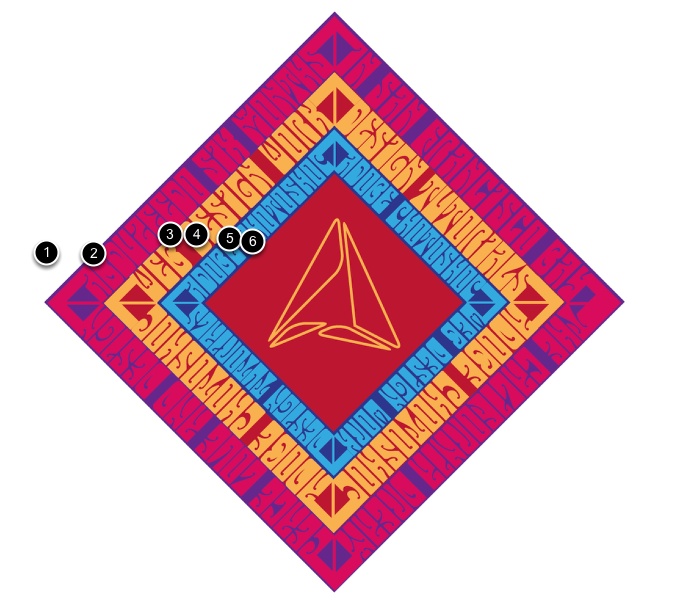
Step 9
For the colors use #662D91(1) for the biggest square, #DA1C5C(2) for the biggest text square, #BE1E2D(3 red) for the second big square, #FBB040 (4 - yellow), #2B3990(5) for the dark blue, #27AAE1 (6) for the light blue.
Step 10
Open Adobe Photoshop and create a new document. I am using 2560x1440 pixels for the size. Fill the background with #383324 for the color. It's dark green.
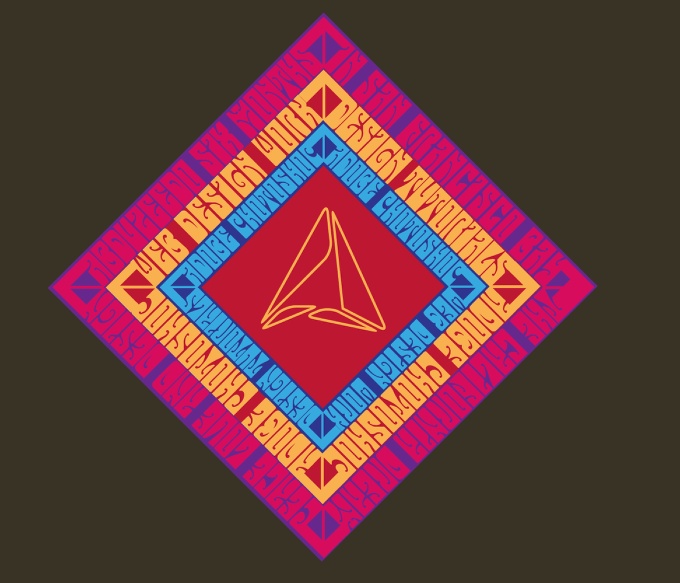
Step 11
Copy the vectors from Illustrator and paste them in Photoshop.
Step 12
Now it comes the time to add some textures in order to make the design look old and sort of destroyed. The texture I am using is a stock image courtesy of Shutterstock called Closeup of rough blue and you can find it at http://www.shutterstock.com/pic-83457697/stock-photo-closeup-of-rough-b….
Once you placed the image in your document, mask it so it will only be shown on top of the vector design.

Step 13
Change the Blend Mode to Divide. Divide is a really cool Blend Mode because it sorts of give the look and feel we are looking for when it comes to old and dated designs.
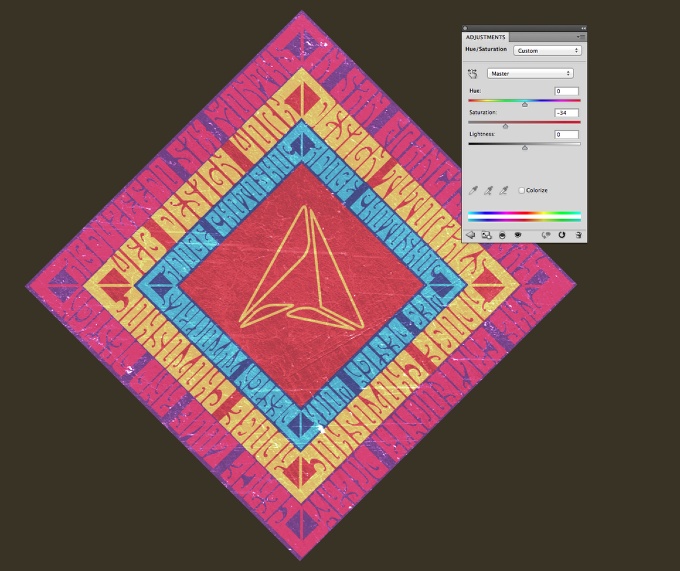
Step 14
The colors were too saturated so let's try to change that. Go to Layer>New Adjustment Layer>Hue and Saturation. Change the Saturation to -35. Make sure that this layer is on top of the vector and then go to Layer>Create Clipping Mask. By doing this the Hue and Saturation will be applied only to the vector.
Step 15
Again place the texture, this time on the whole document.
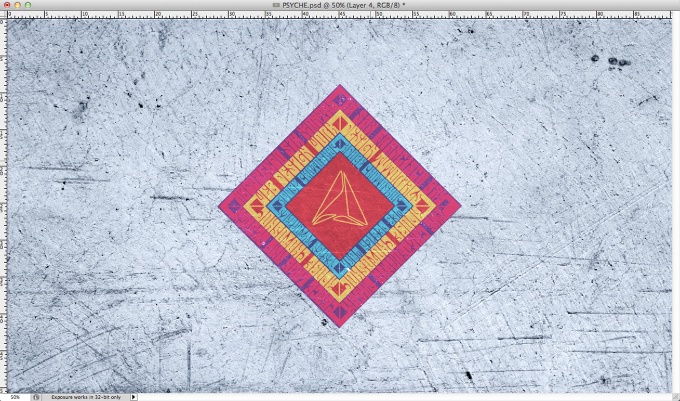
Step 16
Change the Blend Mode to Divide at 20% Opacity.
Step 17
In order to create a trully psychedelic image, we need a crazy background. I am using a nice image from Markovka called abstract seamless pattern with underwater life: fish, seaweed. Endless romantic texture with doodles, courtesy of Shutterstock.
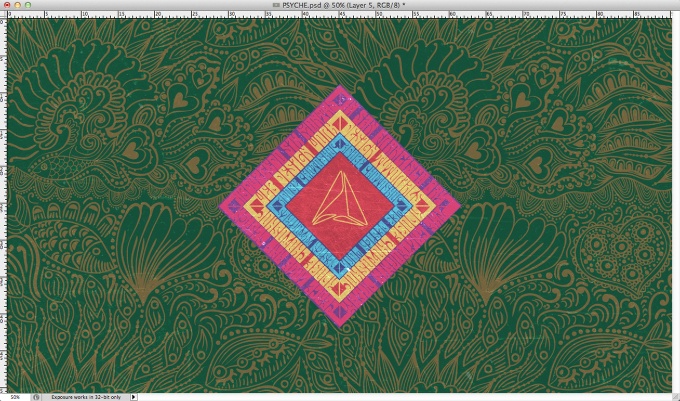
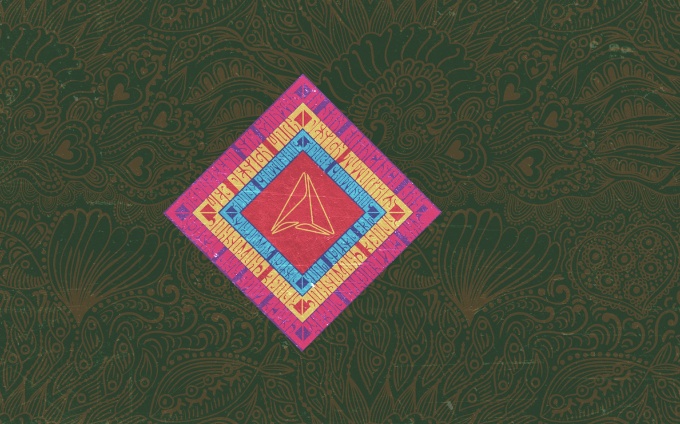
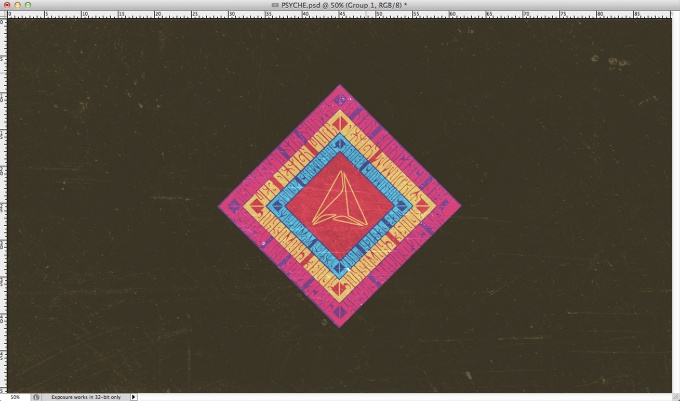
Conclusion
Change the Blend Mode to Overlay at 40% and we have a nice an subtle background. As you can see the whole process of creating a psychedelic design was quite simple. I was heavily inspired by some old posters I saw in a book and as I said before I wanted to exercise that in order to understand the little details that make a design look like that, especially the typography and combination of colors.