by abduzeedo
Abduzeedo means abducted in portuguese, the spelling is not exactly that, it should be abduzido. But the whole idea for the Abduzeedo's design is the space. I'm really fan of playing with this subject because we are sort of free to create whatever we want, and using Photoshop that really means everything.
So in this Photoshop tutorial I will show you how to create a space scene with some nice Lighting Effects in 10 Steps.
Step 1
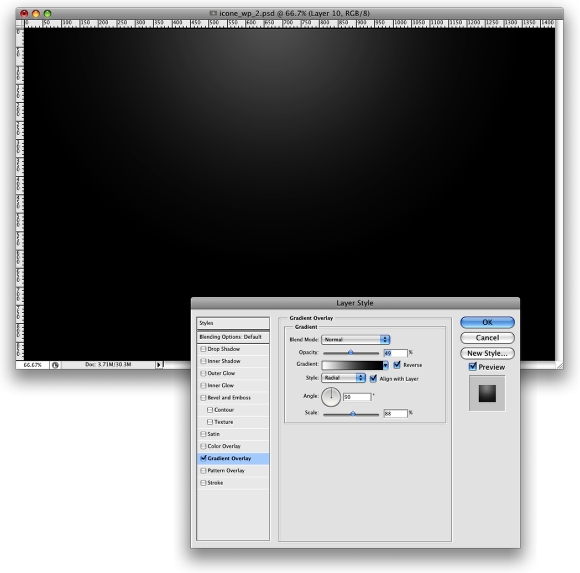
Create a new document, I'm using my computer screen's resolution (1440x900 pixels) so I can use it as a wallpaper later. Add a new Layer and fill it with any color then go to Layer>Layer Styles> Gradient Overlay. You can add a gradient layer as well, I simply prefer the Layer Styles.
Step 2 - Retro Colors
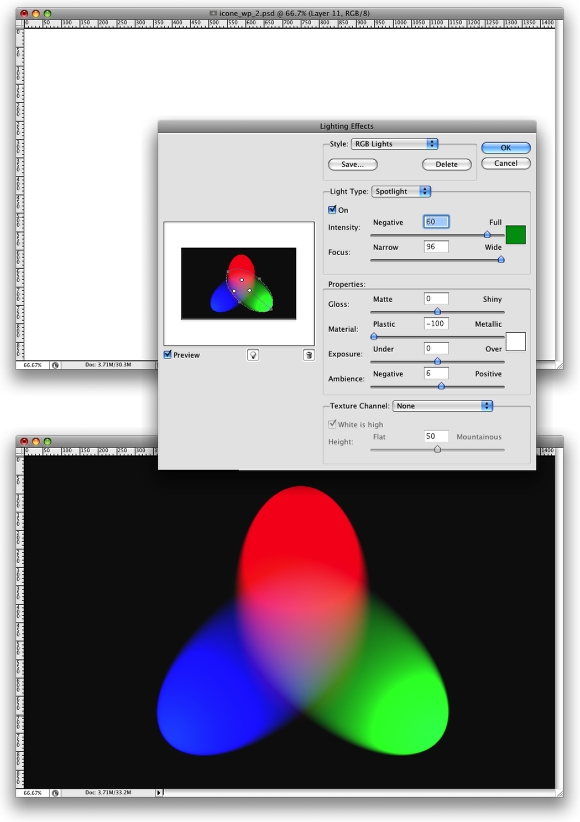
Create a new layer and fill it with white, then go to Filter>Render>Lighting Effects. Change the style to RGB lights. Use Negative 60 for the Intensity, Narrow 96 for the focus, and for the other options keep the same.
Step 3
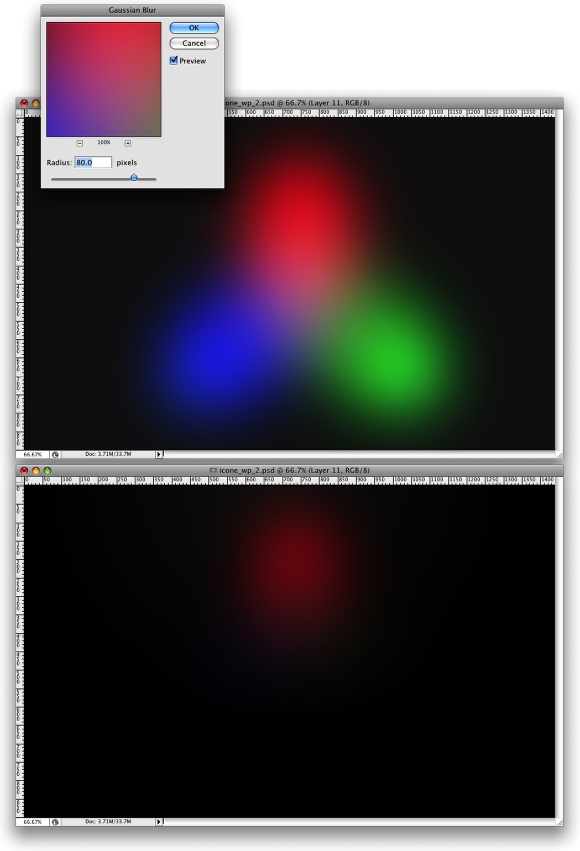
Lets add some blur, go to Filter>Blur>Gaussian Blur. Use 80 pixels for the Radius. The last thing here will be change the Blend Mode to Overlay. Doing that the RGB color will be hardly visible but later on with the other layers it will work ;)
Step 4 - Creating Stars
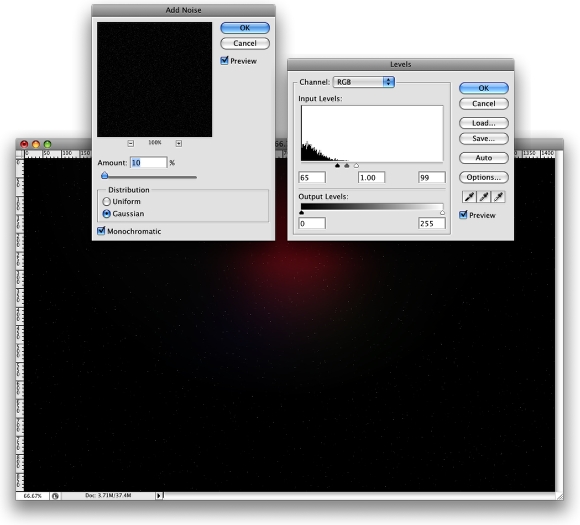
Creating Stars in Photoshop is something really easy. Create a new layer, fill it with black, and change the Blend Mode to Screen. After that go to Filter>Noise>Add Noise. Use 10% for the Amount, Gaussian for the Distribution and select Monochromatic. You will have a layer full of noise, then to create the start just change the levels of the layer, go to Image>Adjustment>Levels. For the Input Levels use 65, 1.00, 99. Doing that you will increase the black so just the bigger dots will appear, also you will increase the white, making the dots that appear brighter.
Step 5 - Nebula
Now that we have the stars and the colors and some colors lets create the Nebula. To do that create a new layer and go to Filter>Render>Clouds. Make sure that your color were black and white for the background and foreground. Then just add some Layer Styles to do that go to Layer>Layer Style. First over the Blending Options, change the Blend Mode to Overlay. After that select Gradient Overlay. use Overlay for the Blend Mode and for the colors use a Cyan, Green, Yellow, and Red. Also change the Angle to 130º and the Scale to 49%.
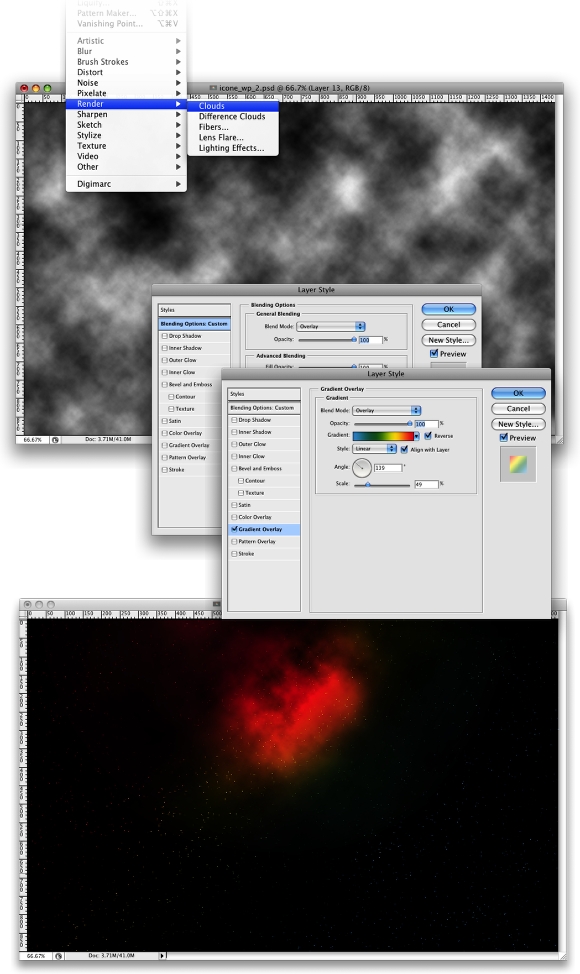
Step 6 - Lens flare
First, lets create a new layer and fill it with black, however, this time, add this layer in front of the background and beneath the other layers: (Stars and Nebula). Now go to Filter>Render>Lens Flare. This effect might be the most overused ever, like some people even say that using it you wil turn your design in an amateur piece. For me it's a nice filter and, if you use it right, it will give a nice touch to your image. For the settings use 100% Brightness and use 105mm Prime for the Lens Type.
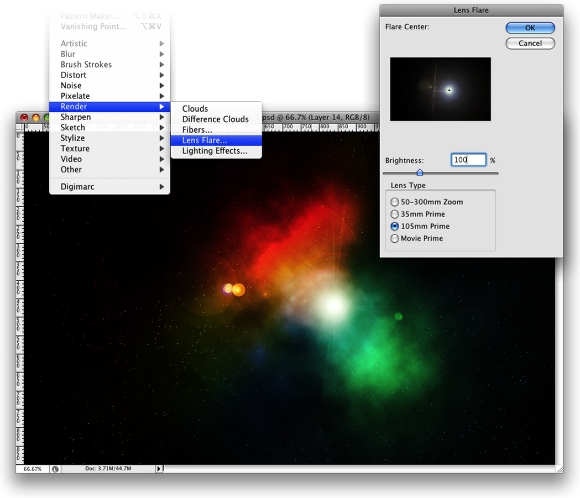
Step 7 - Rays of Light
Now lets create the "A" of ray of lights. So create a new layer in front of the Lens Flare. Then select the Rectangular Marquee Tool (M) and create a rectangular selection like half of the height of the document. Use the image below for reference. After that select the Brush Tool (B). We will use a very big brush, 800px diameter and hardness 0%. Select white for the color and with just like a a bit of the brush inside the marquee (red circle) give a few clicks on the mouse button.
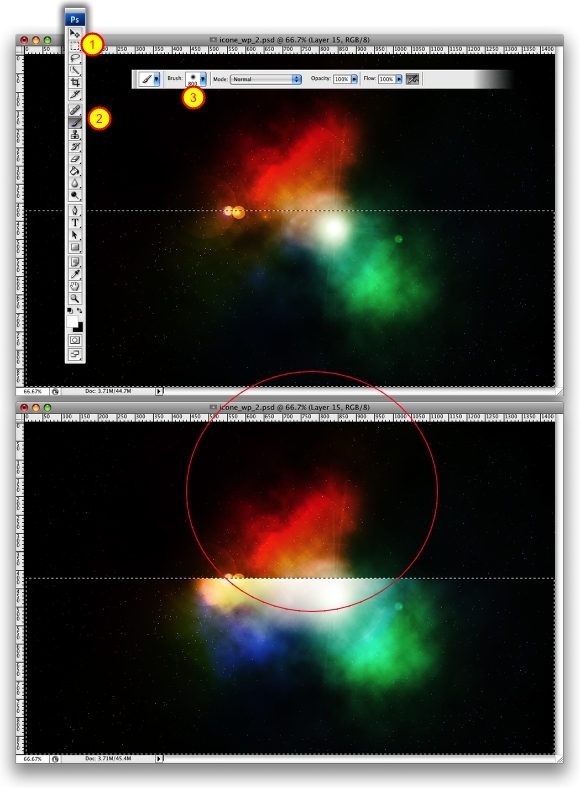
Step 8
Now it's just about duplicating, resizing and rotating. The tip here is convert the original ray of light layer to Smart Objects, so you will be able to resize and rotate in a non-destructive way. After you create the "A", change the blend mode of the elements to Screen and use 80% opacity.
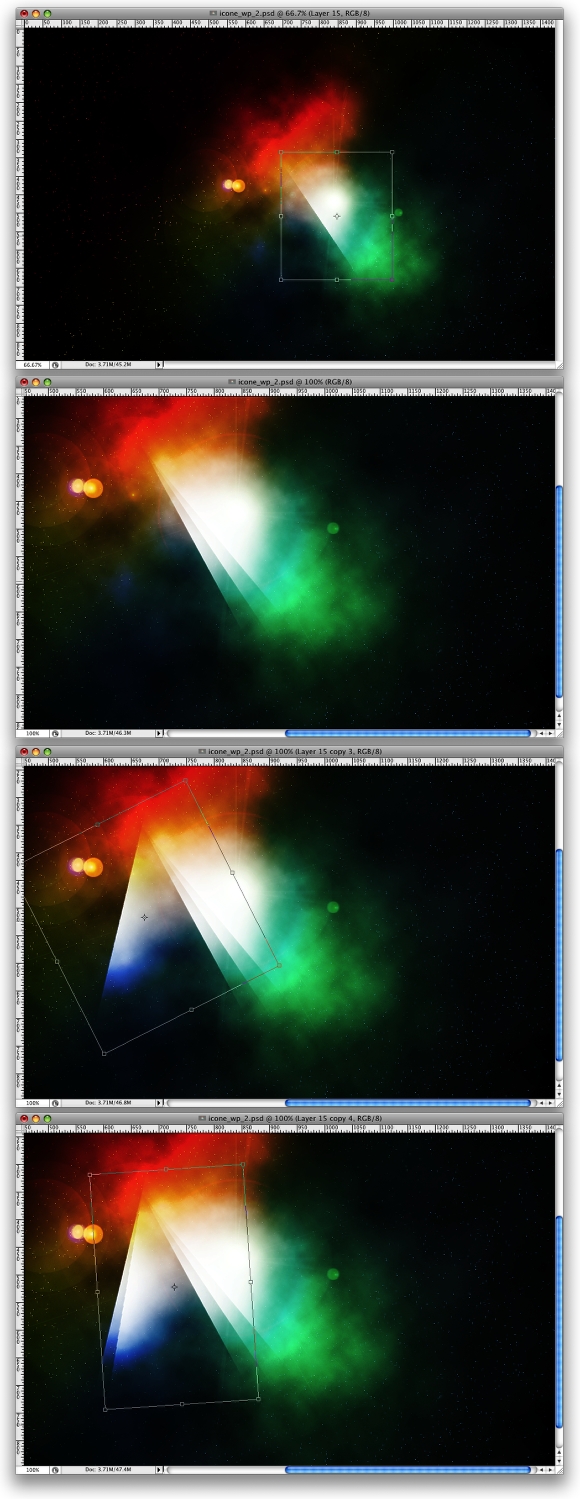
Step 9 - Adjustments
Now lets just adjust some opacities, change the the RGB light opacity to 80% and you can move the gradient overlay to test different color combinations as well.
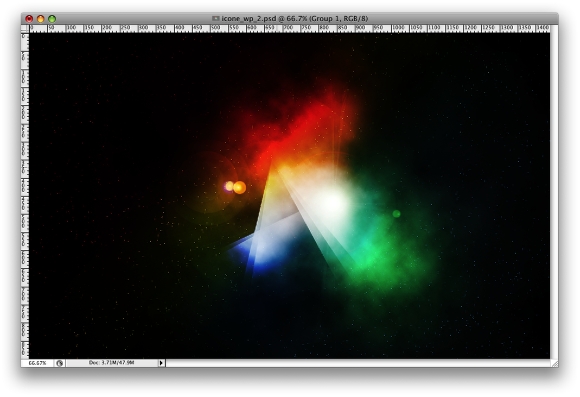
Conclusion
In this tutorial we've learned how to create a very cool light effect that we often see is some of the NoPattern designs. Of course this tutorial was just an example and now you can improve it and apply it to your needs.
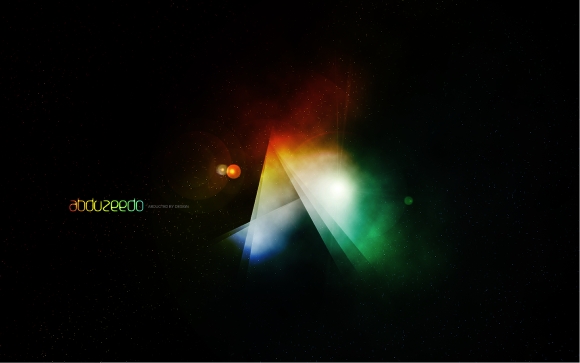 Click on the image to View full size


![Neon light effect in Photoshop [revisited] Neon light effect in Photoshop [revisited]](/sites/default/files/styles/square_1x1/public/originals/hero_neon.png?itok=lP4mbIak)

