by abduzeedo
This weekend I took 30 minutes of my time to watch Kung Fury. What a masterpiece! It's a true homage to the 80s actions movies full of the cliche styles that made that era the most creative and visually rich in my opinion. After watching the movie I had to go back and dust off my Photoshop skills to create something inspired by that. The movie is full of references and of course the computer glowing grid effect which happened to inspire this tutorial.
So for this tutorial, I will show you how to create an 80s style composition with the classic glowing grid. We will use Photoshop for most of the tutorial and a little bit of Illustrator for the vector part.
Step 1
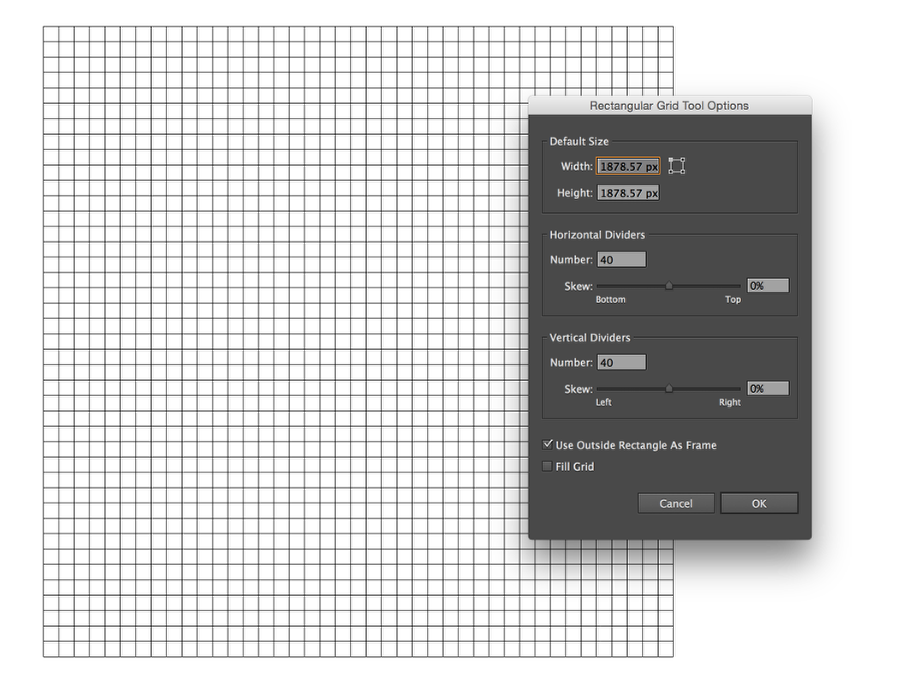
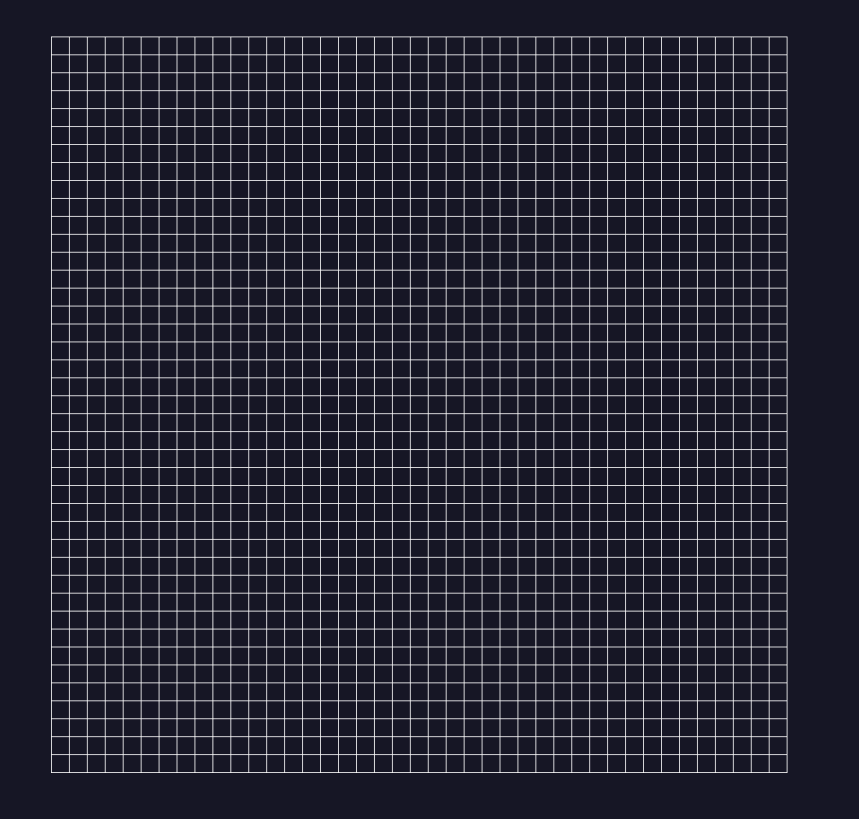
Let's start by creating the grid that we will use in Photoshop. The best way or the easiest at least, for me, is to use Illustrator and the Rectangular Grid Tool Options. Create a grid with 40 dividers for both horizontal and vertical. That's it, the next steps will be all in Photoshop.
Step 2
In Photoshop, create a new document. I am using 2880x1800 for the size. Paste the grid in the document and then with layer styles change the color of the grid to white.
Step 3
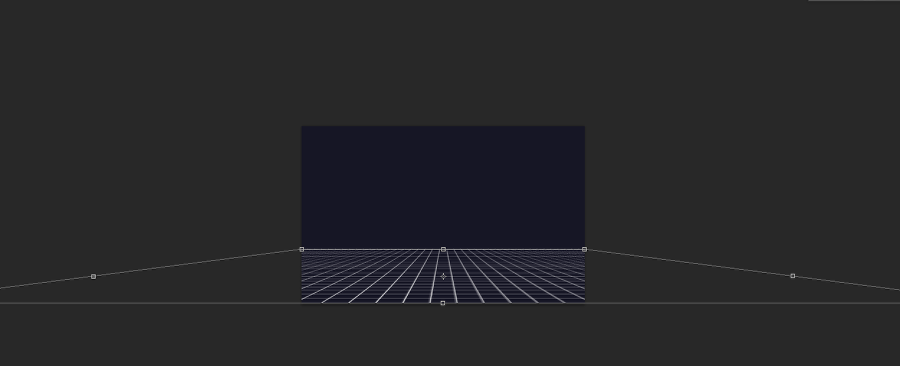
Go to Edit>Transform>Distort. Then just start distorting the grid till you get the effect you want.
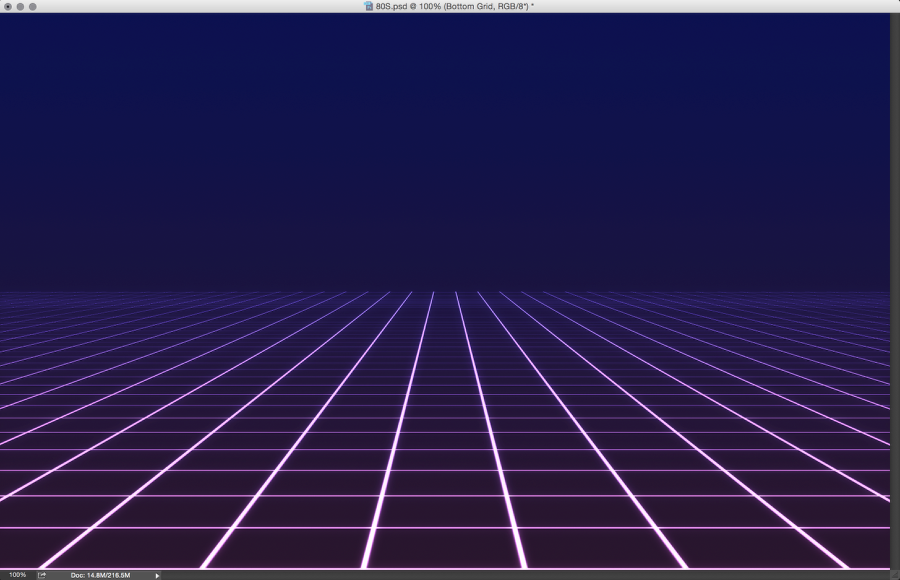
Step 4
I am pretty much using half of the screen, a little bit less actually. Below you can see my result.
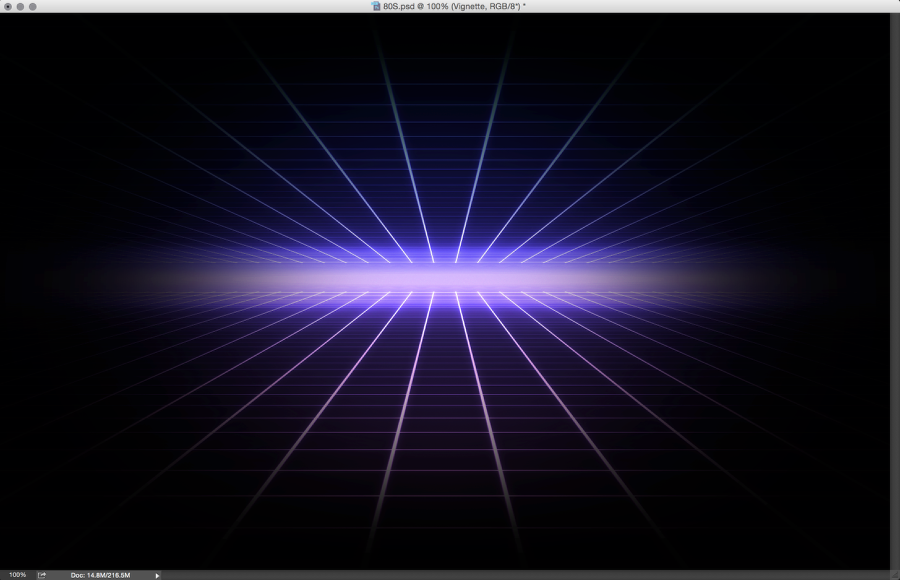
Step 5
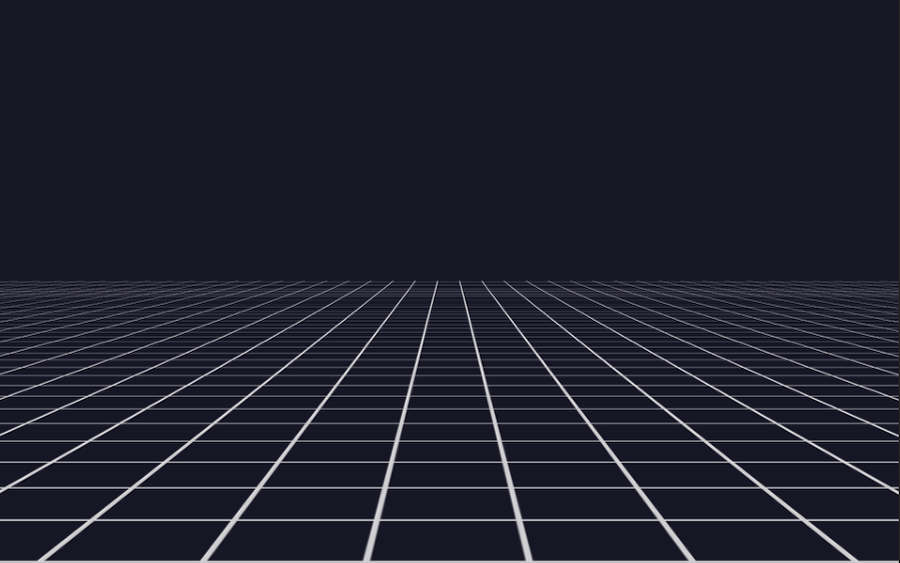
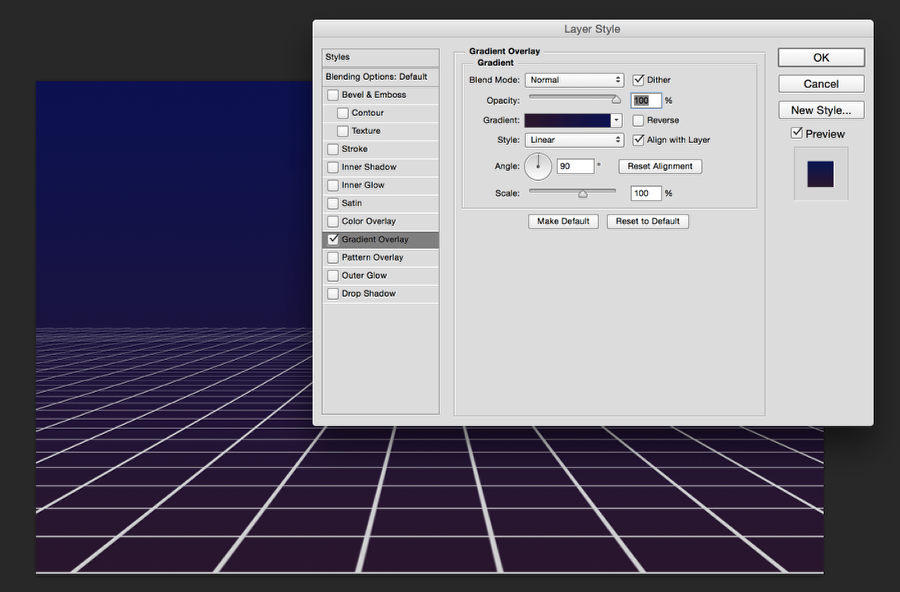
Select the background layer and then go to Layer>Layer Style>Gradient Overlay. Change the colors for purple to blue and make sure that the Dither option is selected.
Step 6
Select the grid layer and group it. Change the Blend Mode of the group to Color Dodge. After that duplicate the grid and first apply a Gaussian Blur (5px). Then for the same layer apply a Layer Style Outer Glow. Use 30px for the Size. As you can see you will have a nice glowing grid.
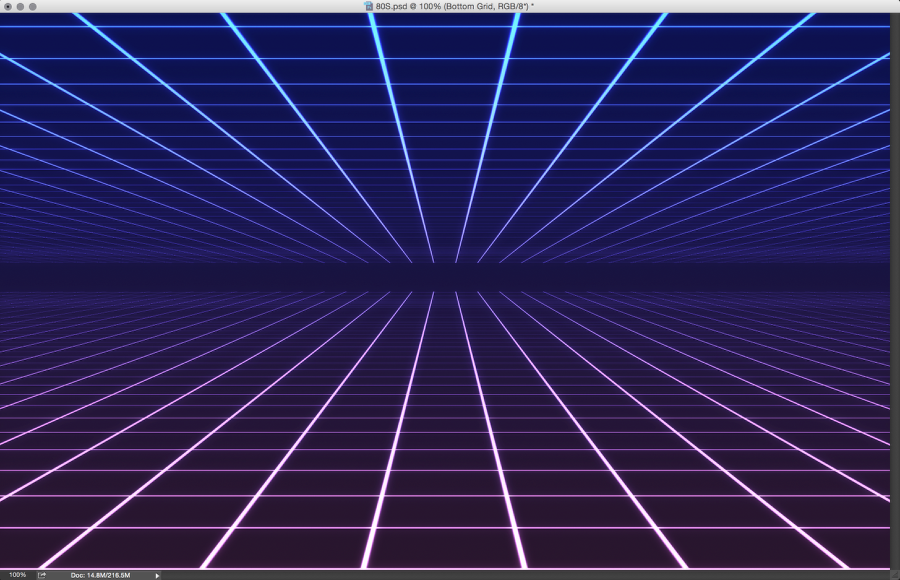
Step 7
Duplicate the group and flip it vertically so you create the top part.
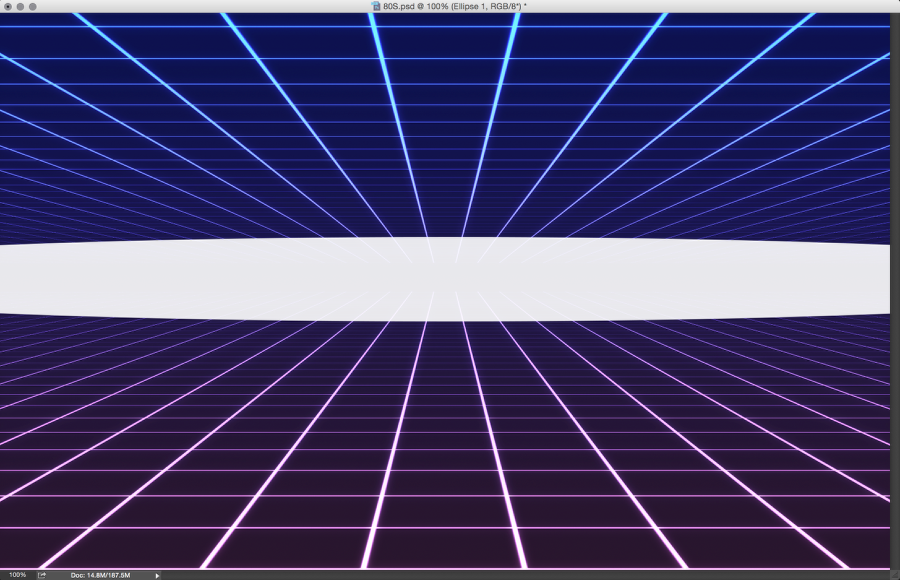
Step 8
With the Ellipse Tool create an ellipse filling the center of the screen line the image below.
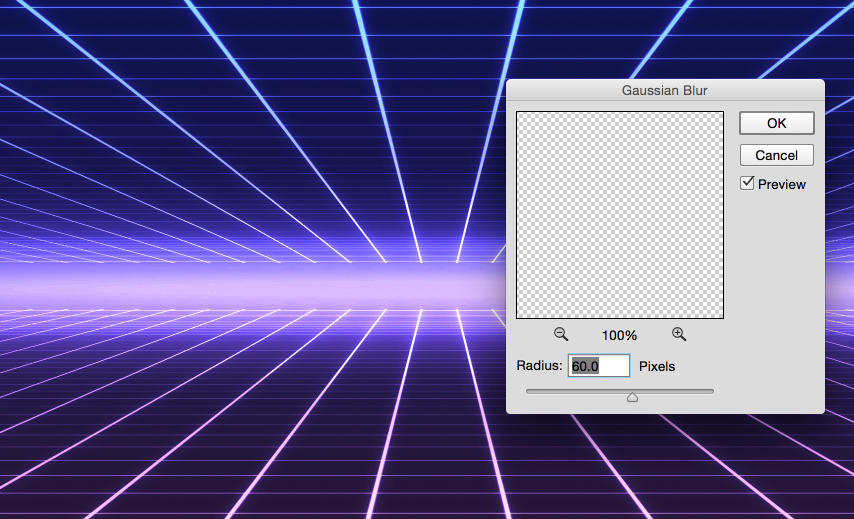
Step 9
Go to FIlter>Blur>Gaussian Blur and apply a 60 pixels radius blur to the ellipse.
Step 10
Add a new layer and fill it with black. After that with the Brush Tool create an oval brush and paint with white in the center of the document like the image below.
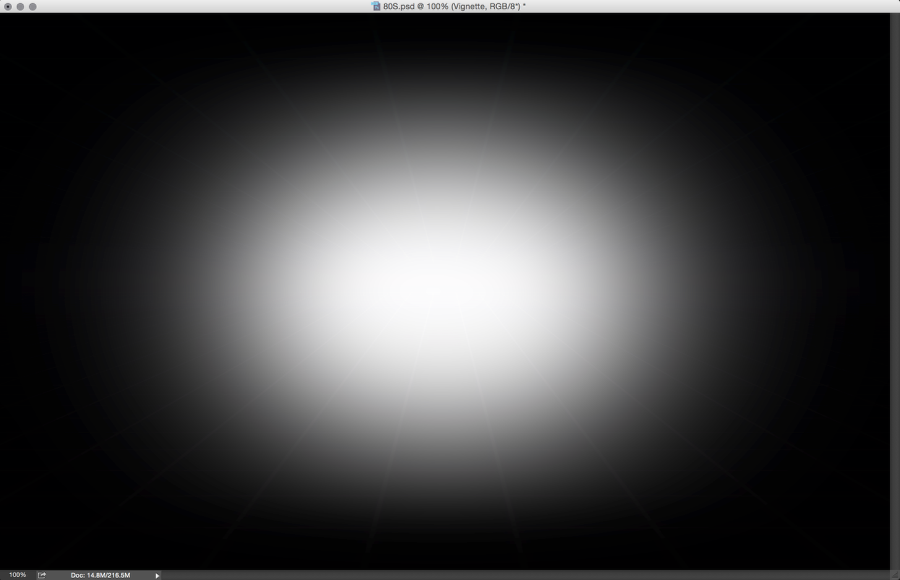
Step 11
Change the Blend Mode of the layer with the white ellipse to Multiply.
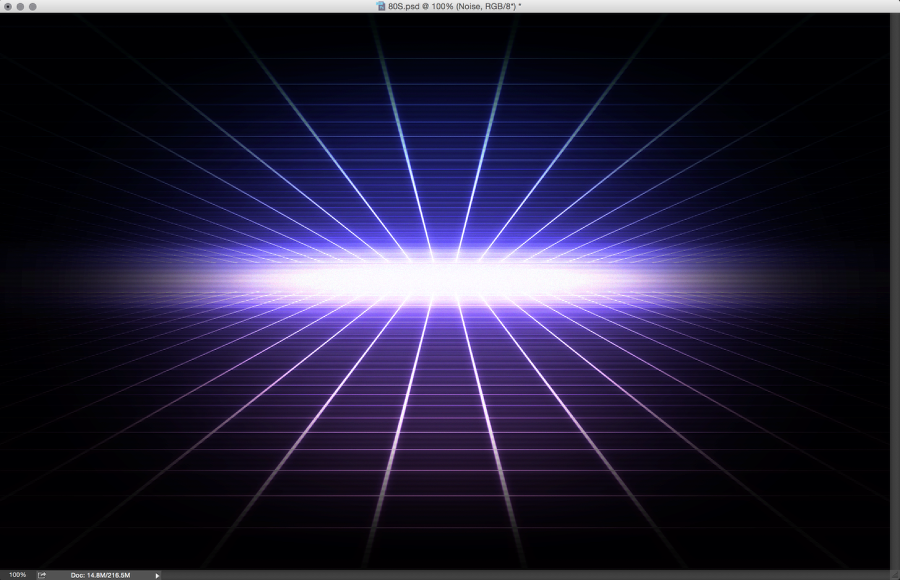
Step 12
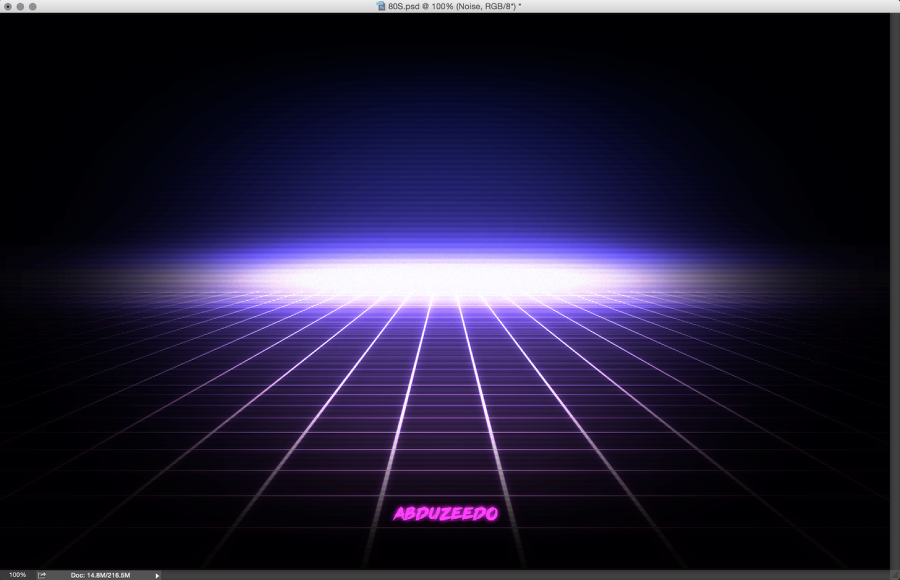
Add a new layer and fill it with white. After that go to Filter>Noise>Add Noise. Use 8% for the Amount and Gaussian for the distribution.
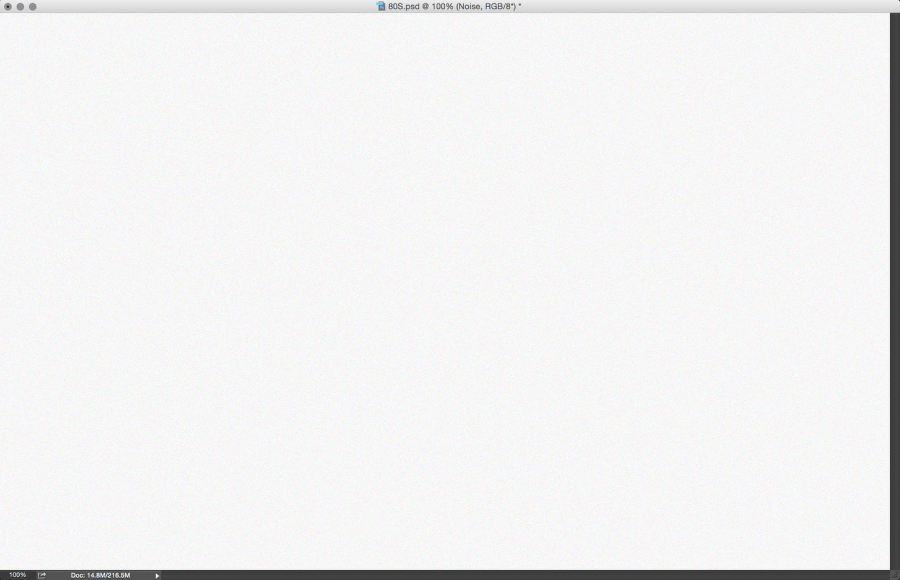
Step 13
Change the Blend Mode to Overlay.You can also add a new layer with a scanline pattern to create an even more retro effect.
Conclusion
Of course to finish the design we need to add our logo. This time we are using the beautiful SN Neo-Noire Font font by the mighty James White from Signal Noise. The font fits like a glove to this style and as you can see we are pretty much done here. You can create variations with or without the top part. I kind a prefer without it. It is up to you. Now take 30 minutes to watch Kung Fury and also get inspired to play and learn new techniques in Photoshop.