by abduzeedo
Prototyping has become a very important part of the UI/UX design process. With mobile applications taking over the web it is imperative for designers to find ways to test their designs on the devices. In the beginning most designers, including myself, relied on HTML, CSS and Javascript to emulate the native experiences that the users would see. It worked quite well and still does, however it's not a very reliable approach if you really want to understand the constraints and complexities that a developer may face when translating your designs into the final product. With that in mind, I decided to focus my efforts on the Android Platform and Java to be able to create truly native prototypes. In addition, I wanted to deliver more than redlines but reusable assets that could reduce the churn and bug fixes because of differences in the jargon used by designer tools compared to the developers.
Android doesn't have the same fame that its counterpart iOS has, however it's a great platform and it's not that complicated to learn for simple prototypes. Dare I say that it's easier than investing in learning Framer, for example, if you are designing for Android.
The benefits of learning the right tool are enormous. Here are a few points I want to highlight
- Truly knowledge of platform constraints
- Much better communication with developers
- Reusable assets and styles
- Real craftsmanship workflow
Well, enough pontificating, let's go straight to the tutorial.
Android Prototyping for Designers
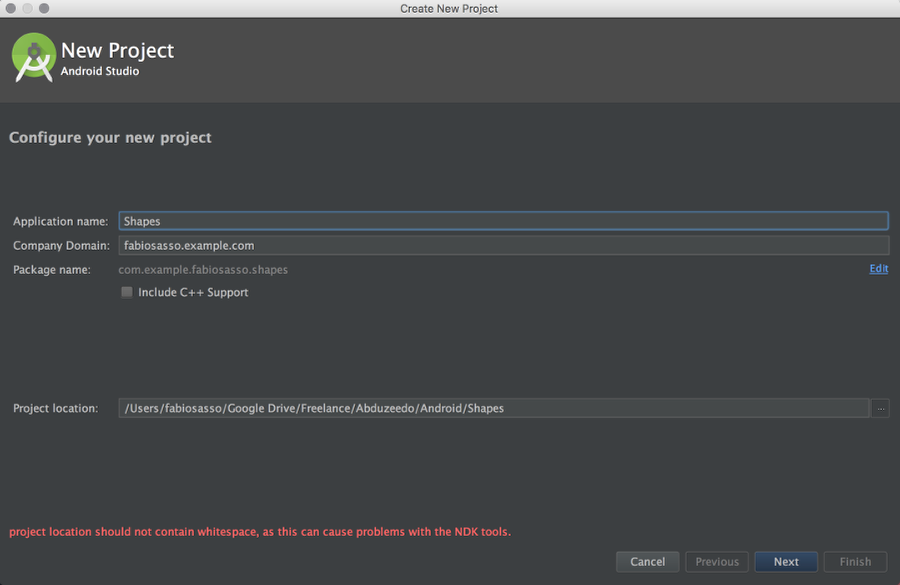
Step 1
Open Android Studio and start a new project. The Application name I used is Shapes.
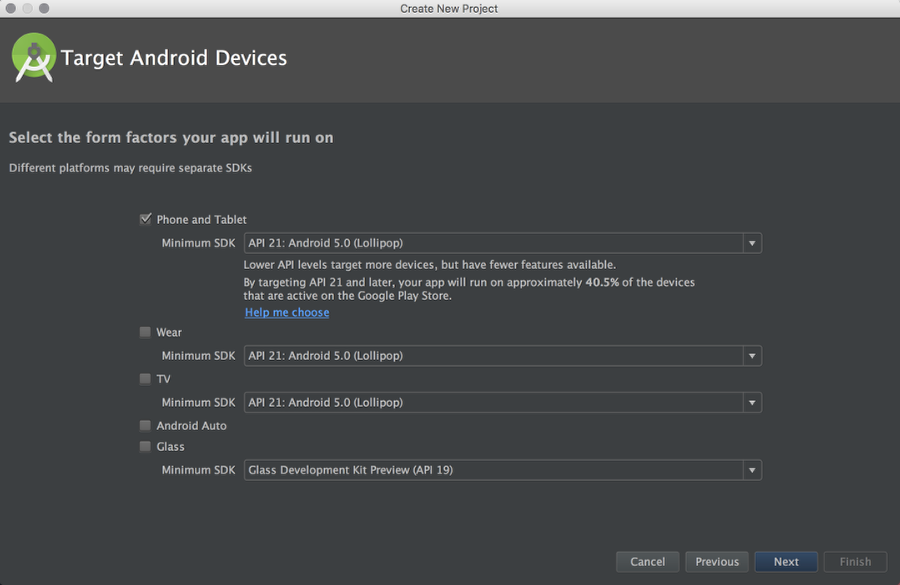
Step 2
For prototyping I don't have to worry to much about older versions of Android. Of course it's important to know which one to choose. You can use the "Help me choose" option. But API 21 is the one that has the Material Design specs, so let's go with that one. You can have the spec running on older devices with the Support Library, but that is for another post. It's quite geeky, I don't understand either :)
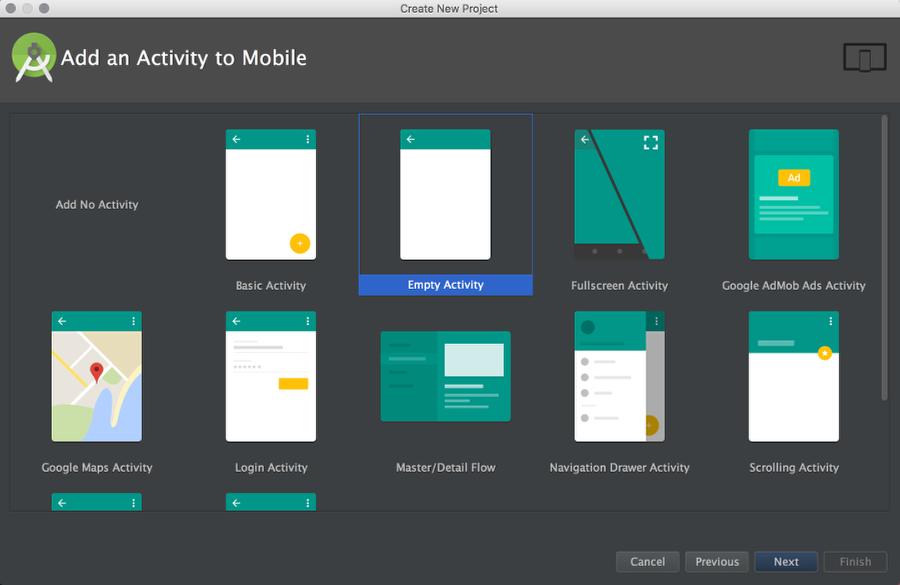
Step 3
You can select some templates to start with. For this project let's start with an Empty Activity. It will have Action Bar and some theme assigned, I will talk about that on a next post. For now, let's just play with shapes.
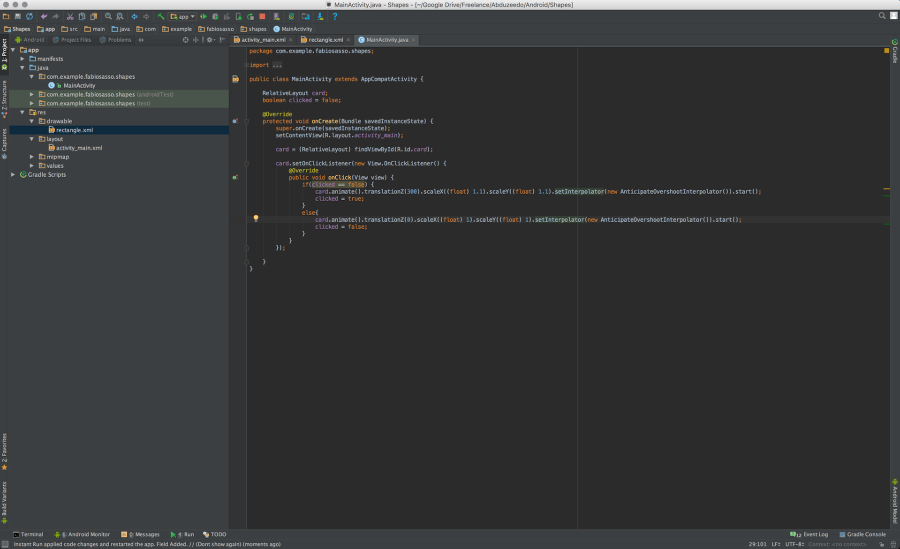
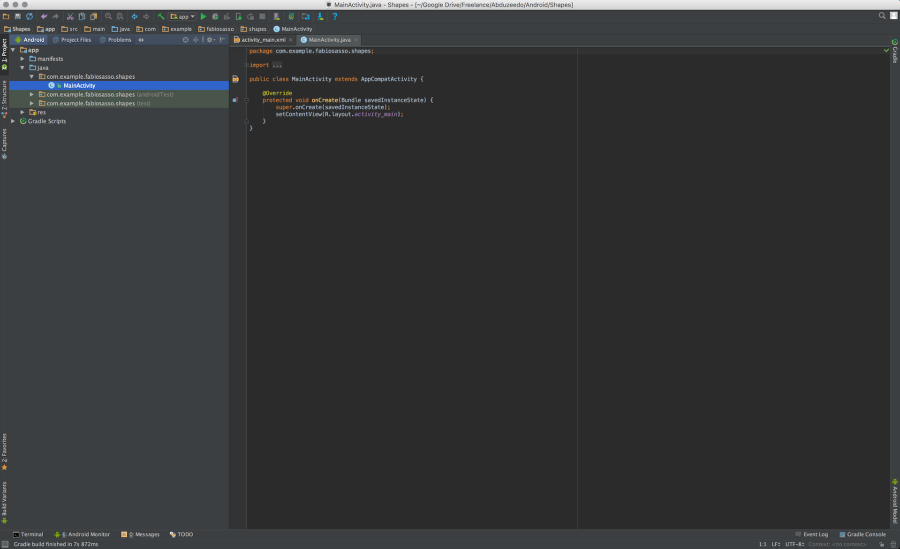
Step 4
Okay, now it's when things get overlwhelming. Don't worry it's simpler thant it looks. What you see below is the Java file, or the behavior of our prototype.
Step 5
For now let's focus on the design. On the left side, in the project tree column, select the folder "res" and then "layout". Click on "activity_main.xml". That's the layout of our prototype.
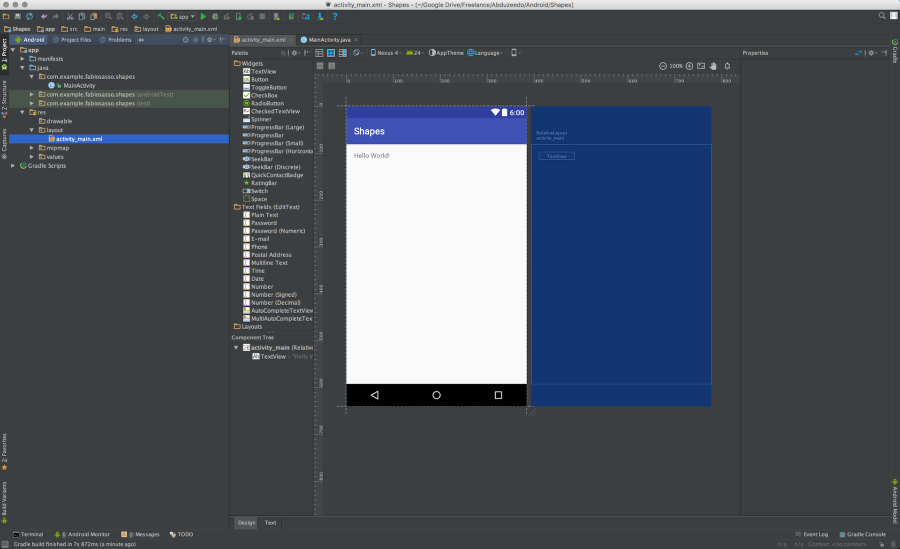
Step 6
Delete that "Hello world" string. We won't need that for this prototype. In this screen we have the layout of our app. We have a column with widgets and right below a panel called "Component tree". You see that there's a component called "activity_main (RelativeLayout)". That is the main container of our prototype. We will add more components inside this one. Note also on the right side there's a column called properties. There will will find all the properties for the component selected. I bet it sounds a bit more familiar. Especially for the Dreamweaver users out there :)
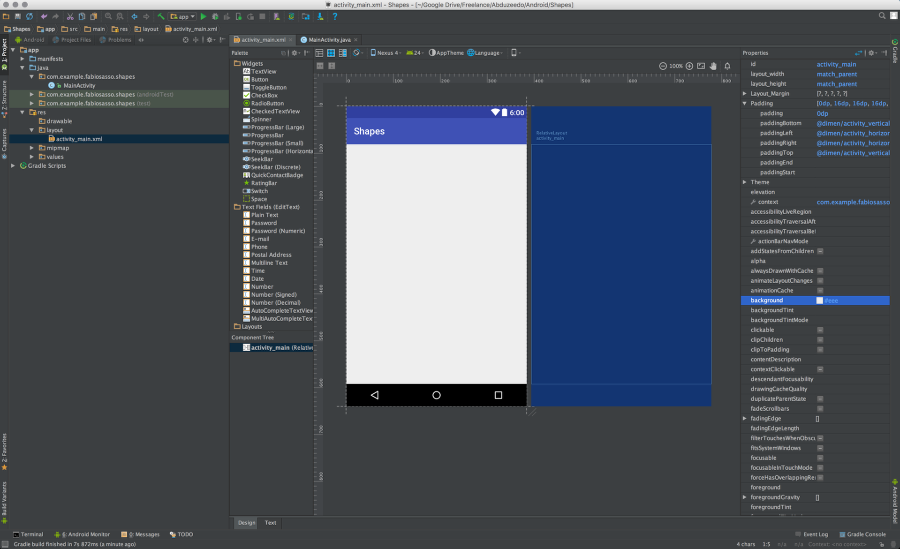
Step 7
Let's change the background color of the "activity_main" to #eee. Just select the background option and enter the value.
Step 8
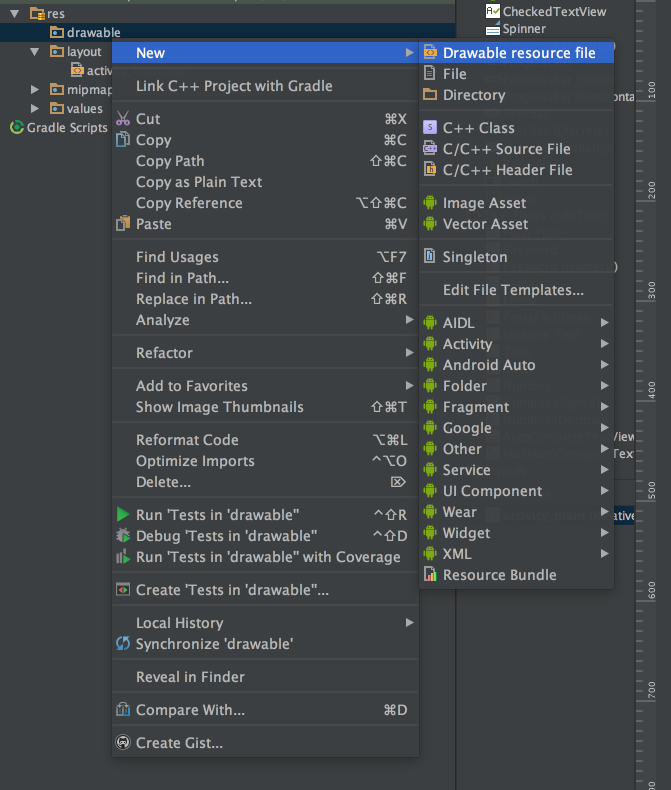
Now let's create our rounded rectangle. In order to do that we will create a "drawable" for it. It's like a vector that can be used as background and will scale accordingly to the component we use it with. So, select the "drawable" folder and click with the right click of the mouse. Select "New" and then "Drawable resource file".
Step 9
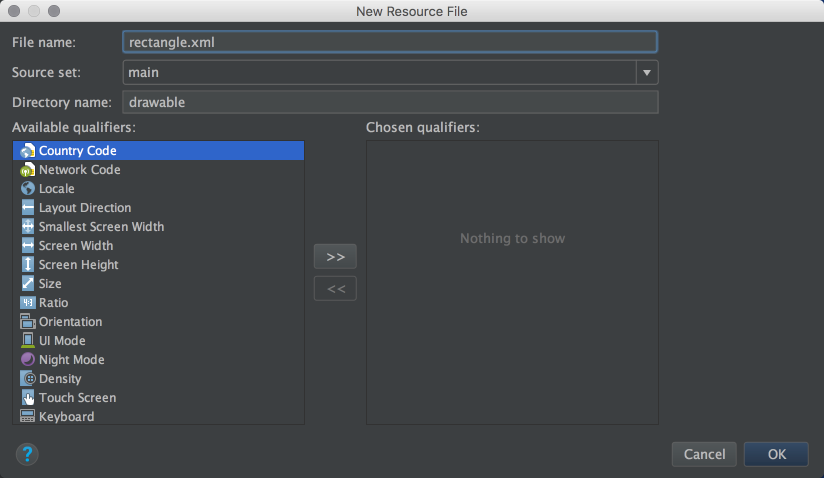
Name it rectangle.xml. In android pretty much all the files in the "res" folder will be .xml. With exception of bitmaps.
Step 10
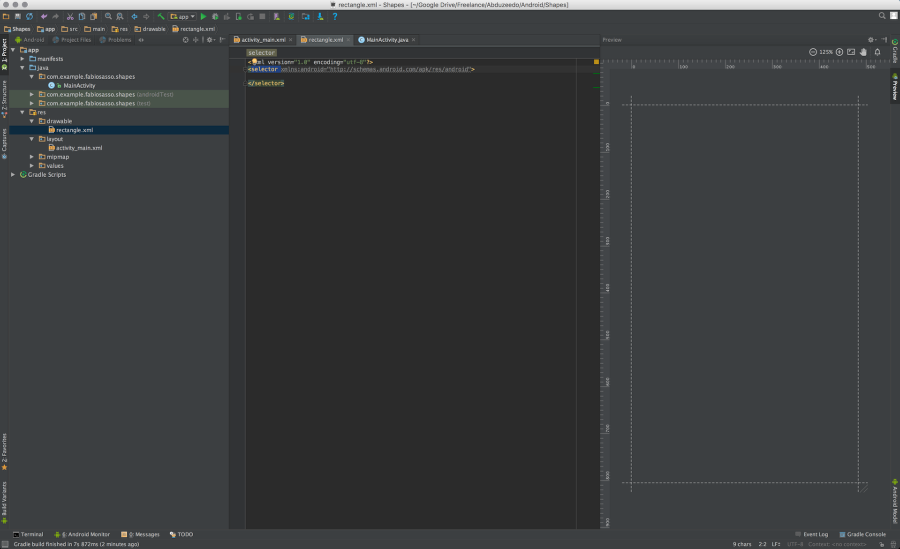
This is the default file created. It has the XML tag and a tag called "selector"
Step 11
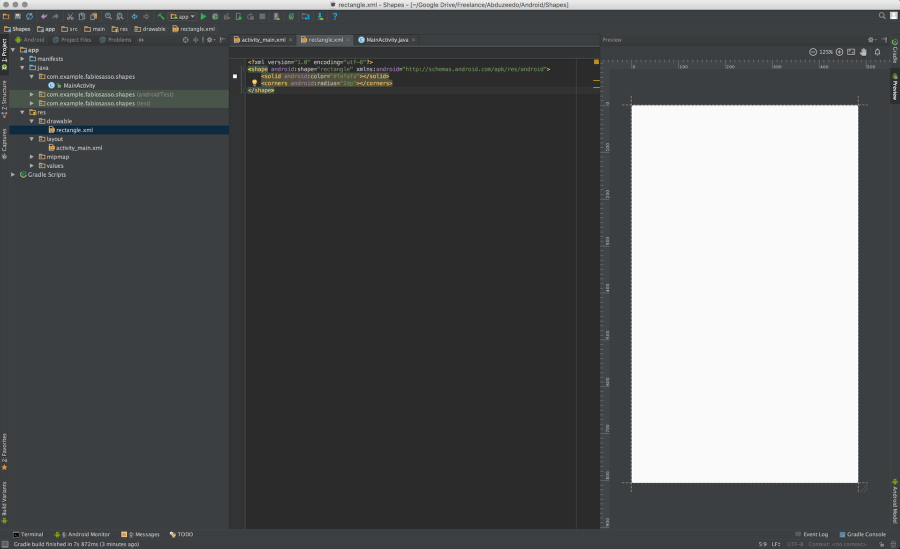
Just rename the "selector" to shape. Add a property called "shape" and use "rectangle". Inside of the shape tag add a item called "solid" with the color you want to use and another one called "corners" with the radius of the rounded corners you want. Use the image below for reference. Also take advantage of the Android Studio autocomplete. It will save you so much time.
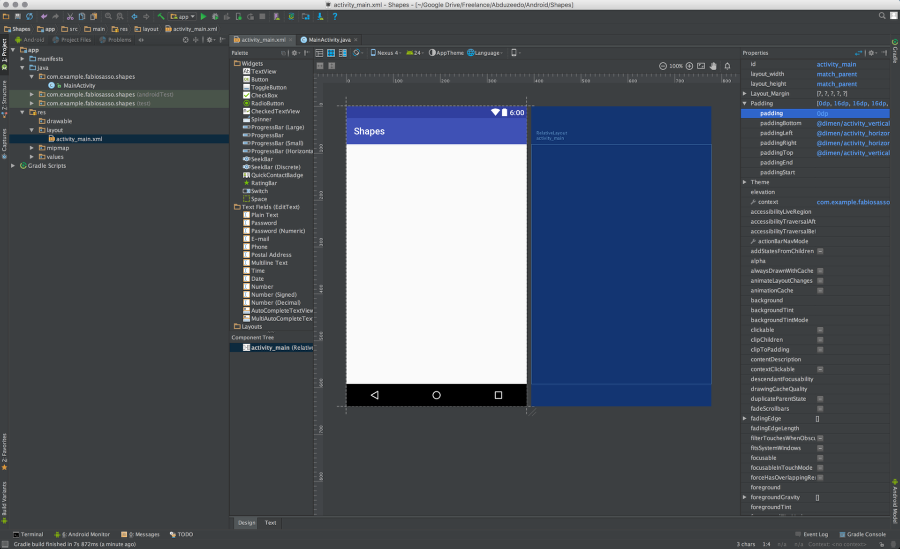
Step 12
Back to the "activity_main.xml" file. Now let's add a new component to our layout. But before make sure the activity_main component has 0dp for padding.

Step 13
Just drag a RelativeLayout component to the center of the screen. Change its height to 200dp and use 24dp for margins.
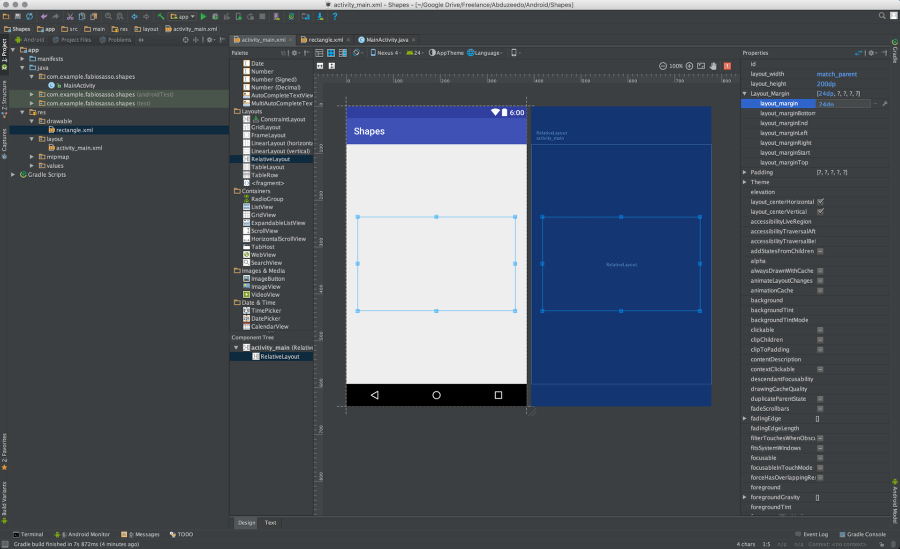
Step 14
Now let's use our drawable for the background. Find the "background" property and click on the "..." icon to open the "Resources" dialog box.

Step 15
Search for the "rectangle" drawable we created and selected it.
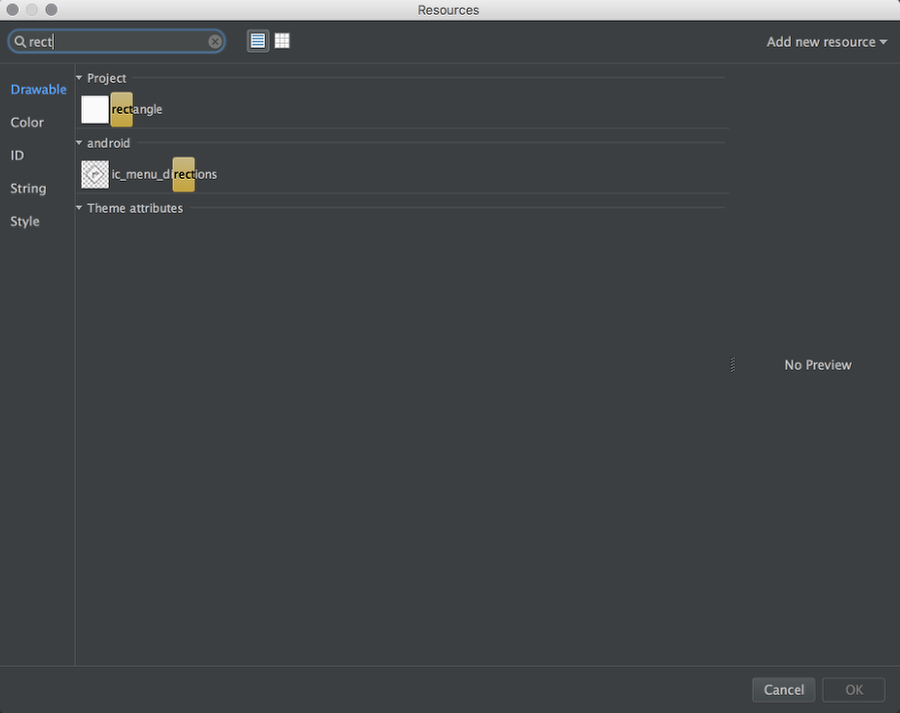
Step 16
There you go, you have a card designed in Android Studio and ready to be deployed. Now comes the fun part. With Material Design we have the light properties that we can play with. Android renders that in real time. You can use either "elevation" or "translationZ" to cast shadows.

Step 17
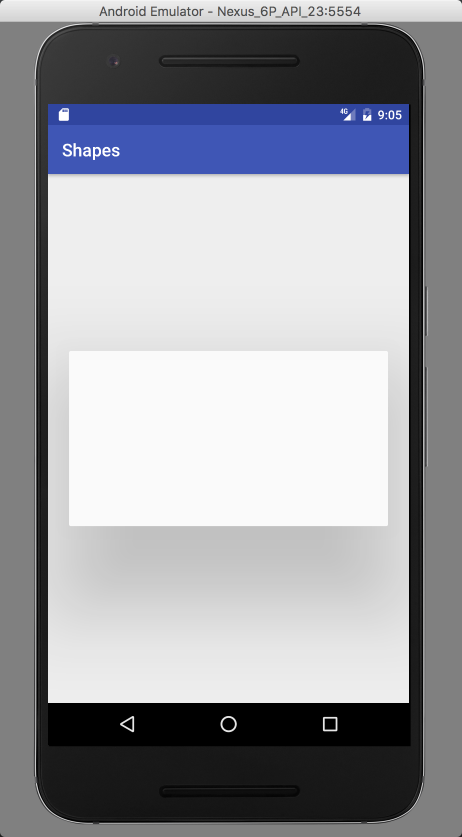
Let's try elevation. Set it to 4dps and Run your prototype in the emulator.

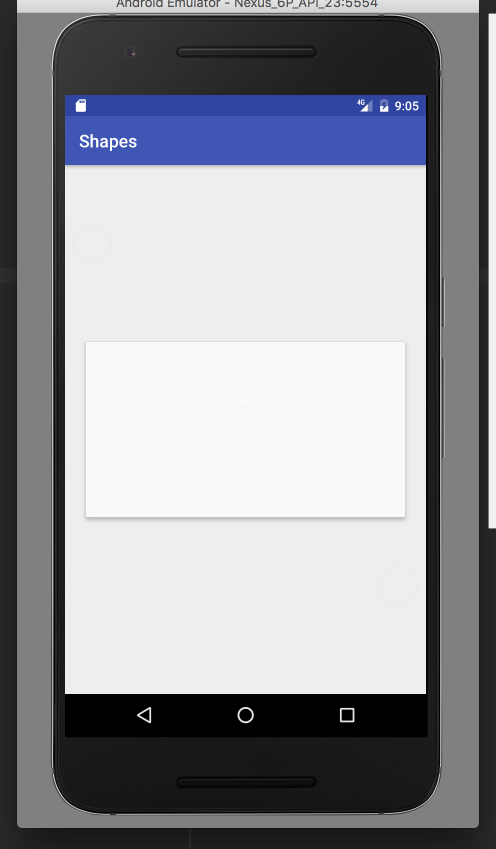
Step 18
And there you have it. A nice card, rendered natively using nothing but XML. It's as easy if not easier than using HTML and CSS.

Step 19
Now let's get a bit more advanced and try to add a click event to this card. The first thing we need is an "ID". Enter and id name "card" to the card, very creative :)

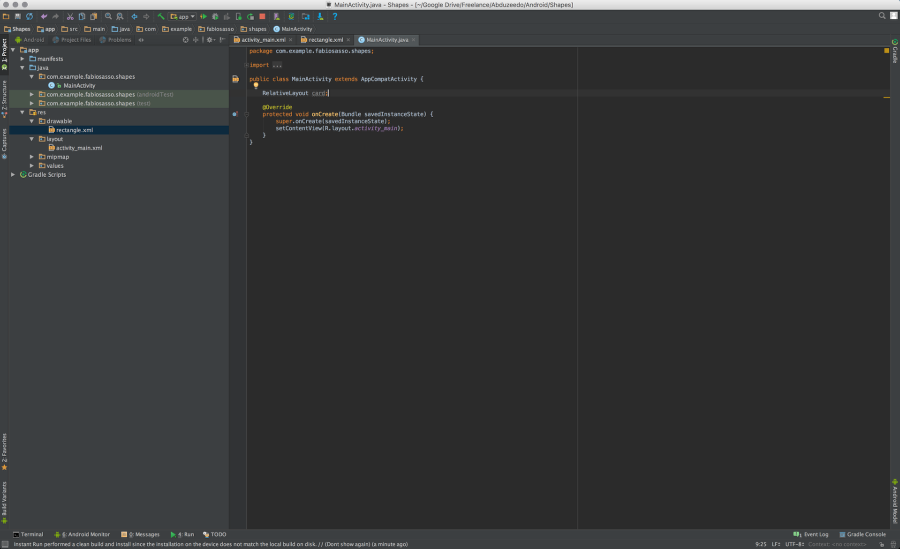
Step 20
Now open the MainActivity.java and let's write some JAVA code. In order to access the card layout from the XML file we need to declare and bind the data. The first thing to do is to create a JAVA variable that will be a RelativeLayout like the component we use. To do that just write "RelativeLayout card;" Use the image below for reference. Note the position of that variable is important, write before the OnCreate method.
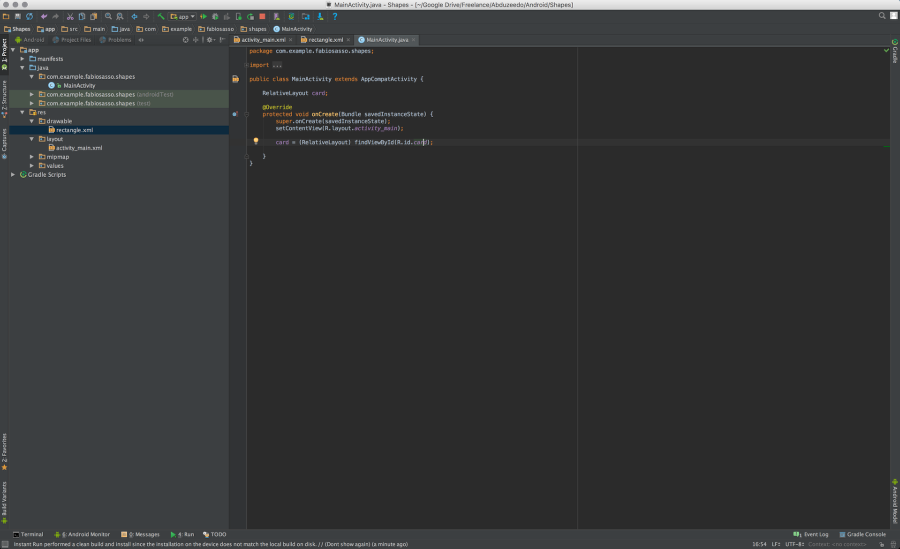
Step 21
Once we have the "card" variable created, let's linked to our xml card. To do that bind it using the ID. The code is quite simple: "card = (RelativeLayout) findViewById(R.id.card);" - Don't ask me what the "R" is. I still don't know.
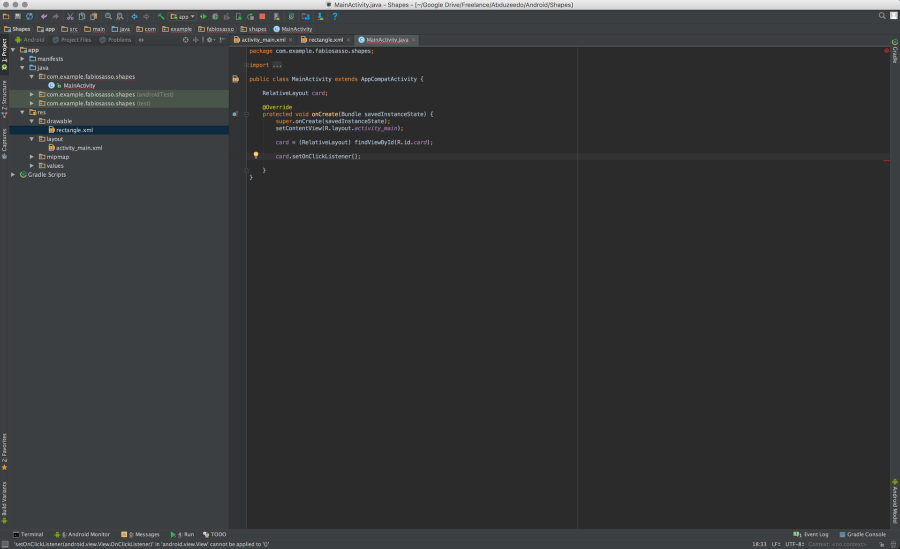
Step 22
After that, it's almost like JavaScript. Just create a ClickListener event. Use the auto-complete. Note, every time you see the red underline alert press "Command+Return" to show the options.
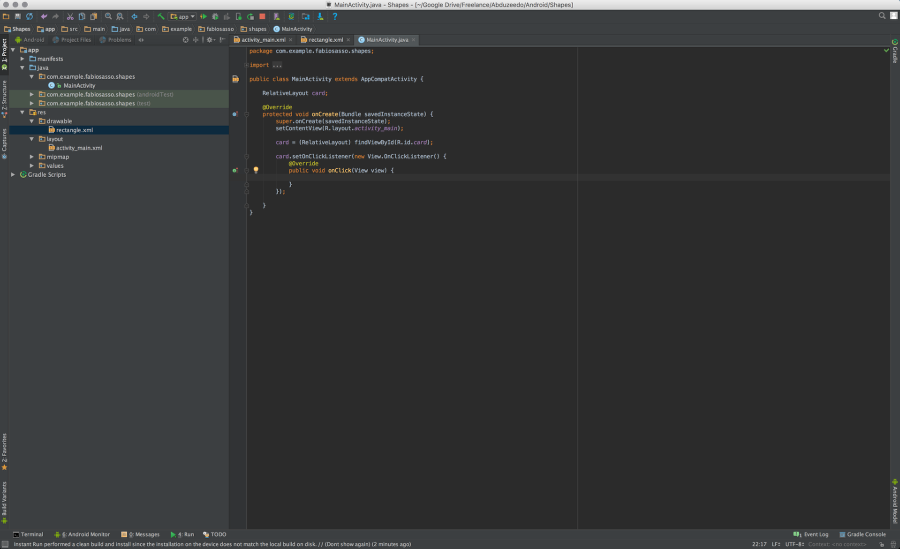
Step 23
Here's the auto-complete OnClickEventListener{...} - once you select that it will create the necessary methos and overrides for you.

Step 24
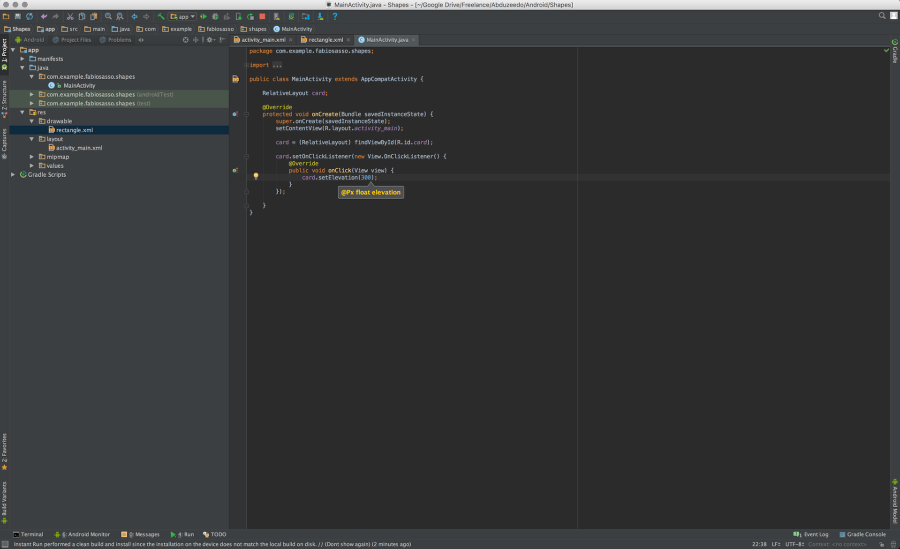
Step 25
Now just change the cards properties. Here I just set the elevation to 300. So when you click the card will pop out.
Step 26
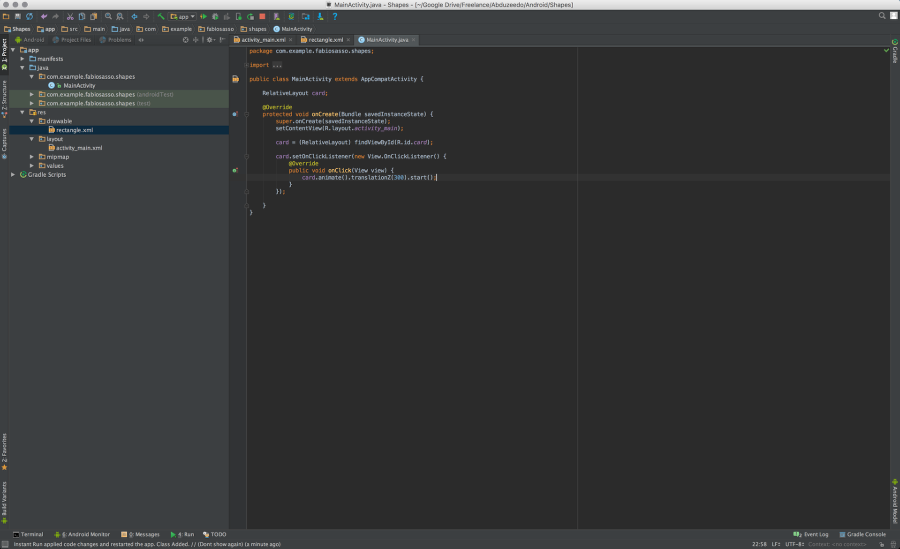
So let's get a bit fancy. Instead of using setElevation, let's animate. To do that is even simpler. Just write "card.animate().translationZ(300).start(). That will animate with the click.
Step 27
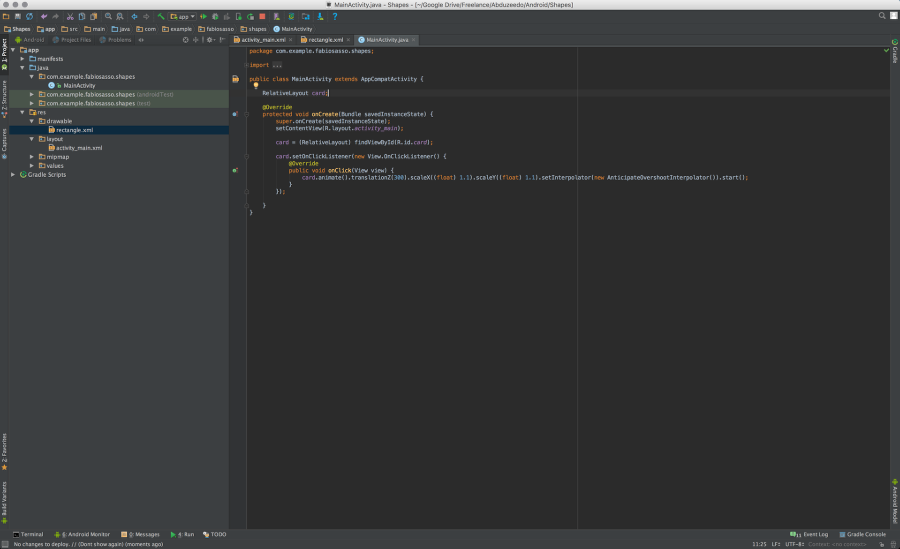
Let's also make the card scale X and Y.
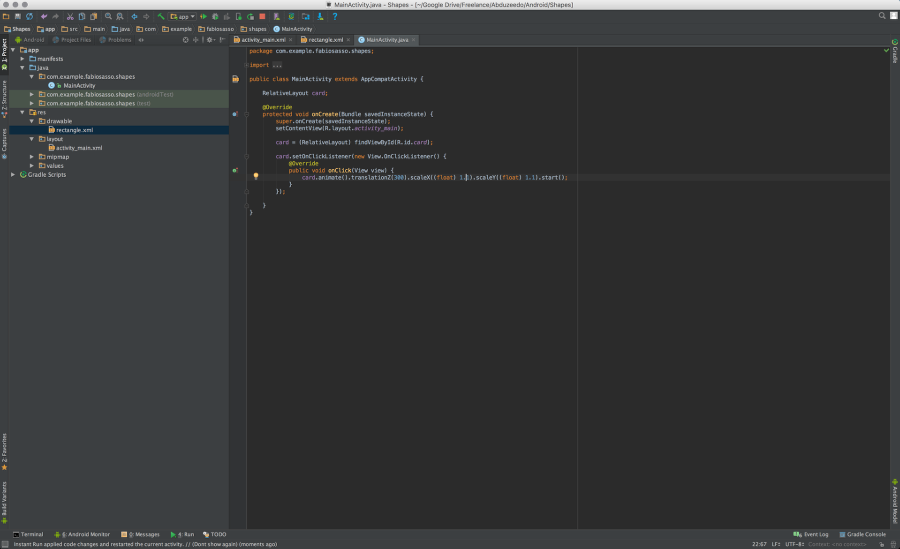
Step 28
In order to change the curves in android we have to use something call Interpolator. Here I am using a subtle elastic one called "AnticipateOvershootInterpolator()". It's pretty much the same thing as translation, you just add "setInterpolator(new AnticipateOvershootInterpolator())".
Conclusion
If you want to get fancier you can create an "if" statement with a "boolean" value to go back from one state to the other. Again, it's quite similar to JavaScript in my bad coding knowledge. The best thing is that you get full native experience and understanding about the medium you are working with. That, for me, is the true definition of craftsmanship. Knowing the tools, the materials and having the skills to do it. I hope you enjoy this uber long tutorial. I'll endeavor to write shorter ones for the forthcoming parts.