by abduzeedo
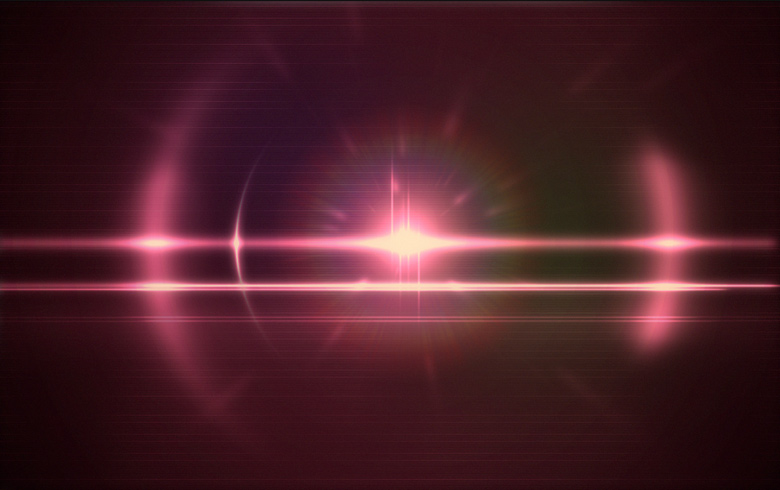
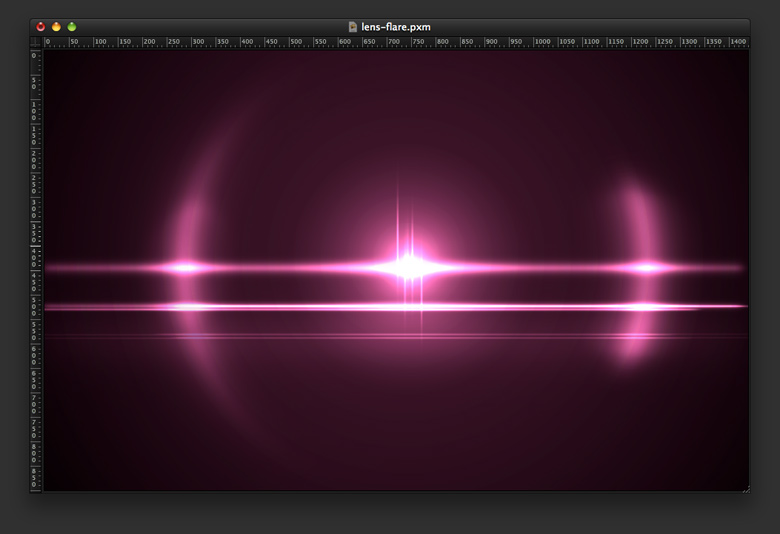
In this tutorial I will show you how to create a very neat lens flare effect in Pixelmator. It’s true: the terrifying lens flare is back, and it can be really cool to use as wallpaper, as I’ve been doing.
This tutorial is part of series of tutorials I have been writing for the Pixelmator Learn site.
Step 1
Open Pixelmator and create a new document. Go to View > Show Gradients. Create a new radial gradient using purple (#4b0026) and black for the colors. Fill the background with the radial gradient so the purple is in the center.
Step 2
Add a new layer and change the Blending to Color Dodge, then create a new gradient preset. Use Radial for the type and black and white for the color. Fill the new layer with this gradient so the white is in the middle. Because of the color dodge, you will already have a really nice light effect.
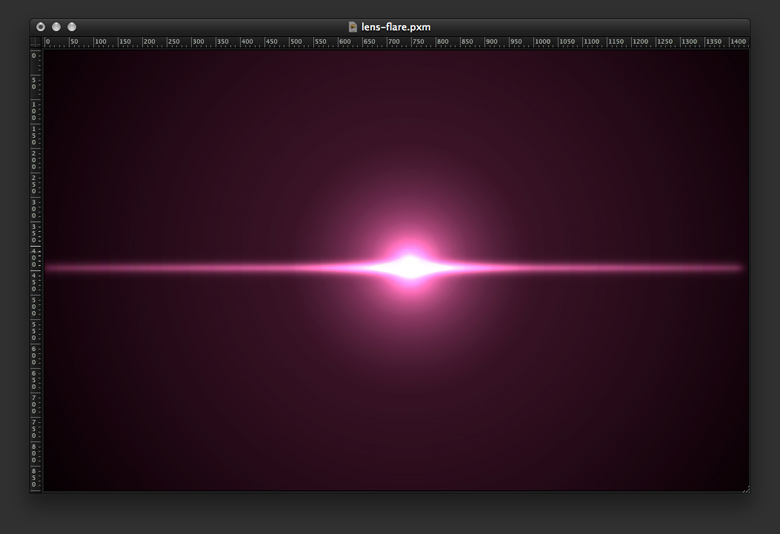
Step 3
Add a new layer. Using the Rectangular Marquee Tool (M), create a rectangle and fill it with black, then create a narrower rectangle and fill it with white. Go to Filter > Blur > Gaussian Blur. Use 10-15 for the Radius.
Step 4
Change the Blending of the rectangle to Color Dodge to create another light effect.
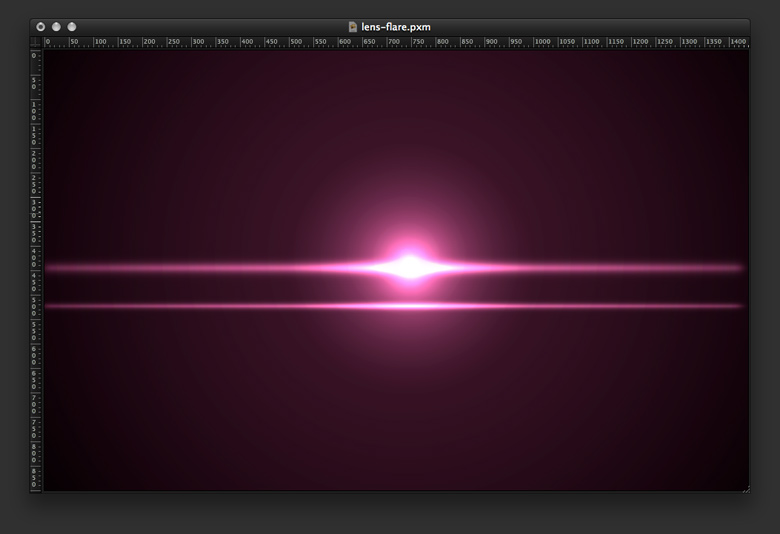
Step 5
Duplicate the layer that has the rectangle light effect and move it down slightly. Resize it to make it thinner.
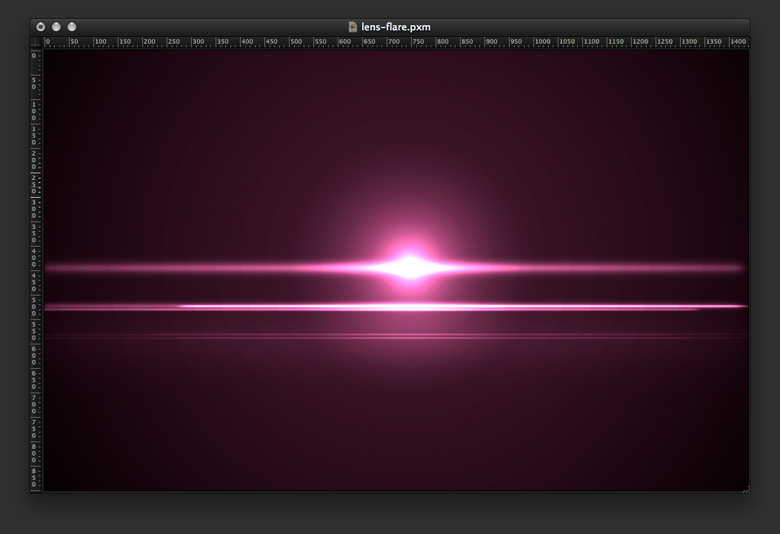
Step 6
Add a few more light streaks using the same technique.
Step 7
Add a new layer and fill it with black. Change the Blending to Color Dodge. Using the Brush Tool (B), select a regular soft brush with white, then create a few vertical lines in the center of the document. To make the effect more realistic, go to Filter > Blur > Motion Blur. Use 90º for the Angle and 20 for the Amount.

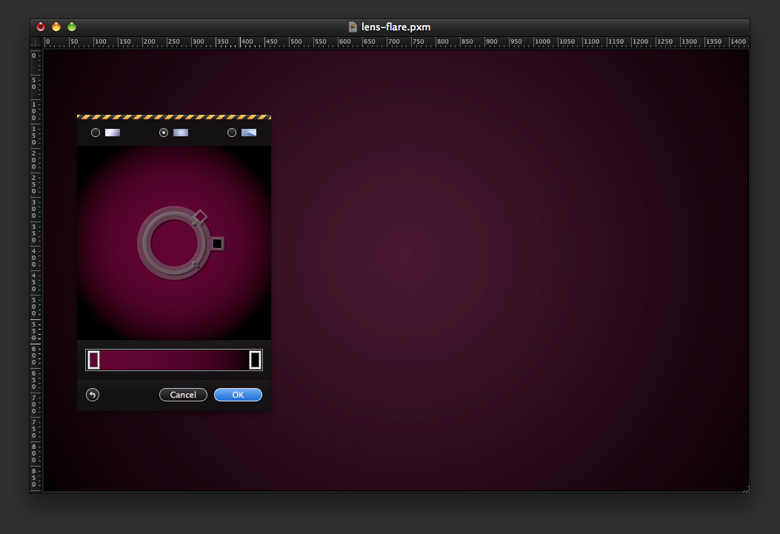
Step 8
Add a new layer and change the Blending to Color Dodge, then create a new gradient preset using black, white, and black for the colors. This way you will create a white ellipse. Fill the layer with this gradient. Use the image below for reference.
Step 9
Go to Layer > Add Layer Mask. Fill the layer mask with black using the Paint Bucket Tool (N). With the Brush Tool (B) and white for the color, paint over the areas you want to make visible. Use a very soft brush.
Step 10
Using the same technique as in the previous effect, add another ellipse as in the image below.
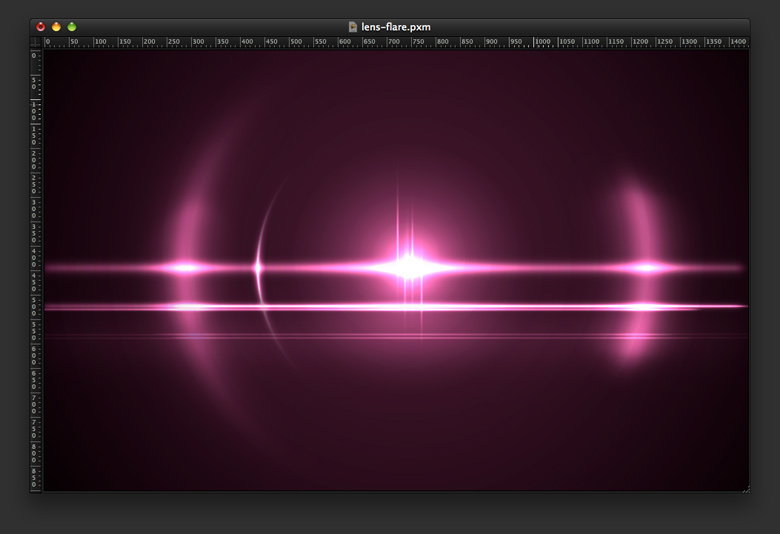
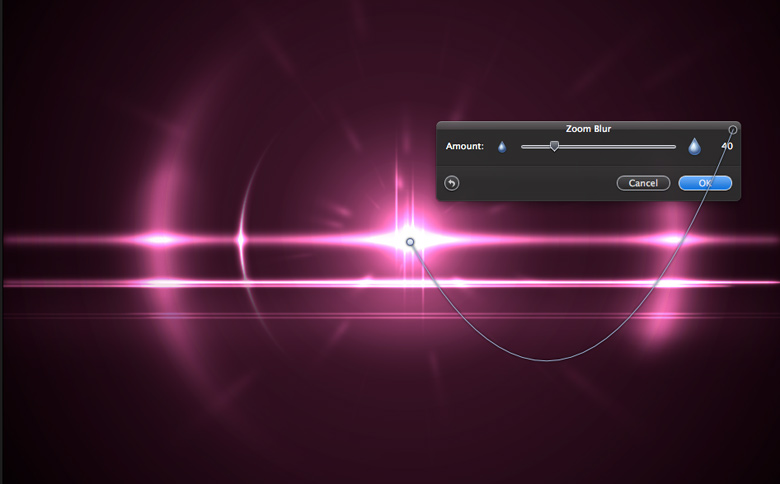
Step 11
Add a new layer and fill it with black using the Paint Bucket Tool (N). With the Brush Tool (B) and white, create a few white spots like sparkles, then go to Filter > Blur > Zoom Blur. Use 40 for the Amount.
Step 12
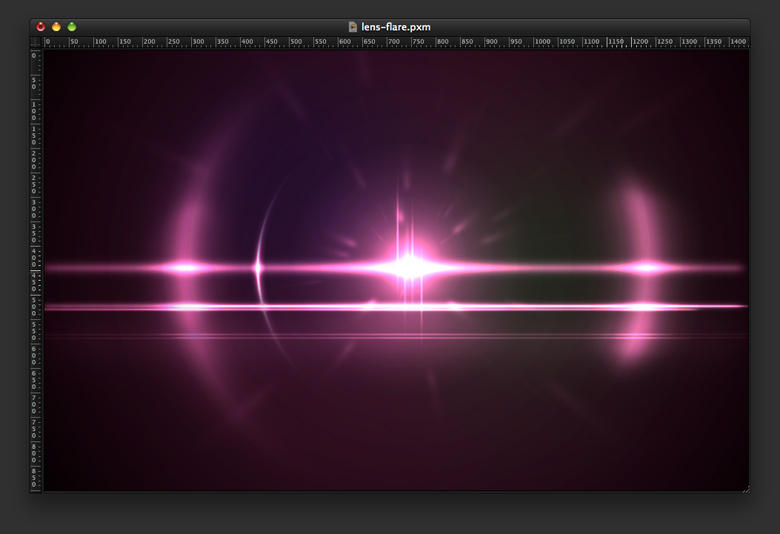
With the Brush Tool (B) paint a few spots with blue and green. Change the Blending to Soft Light with 50% Opacity.
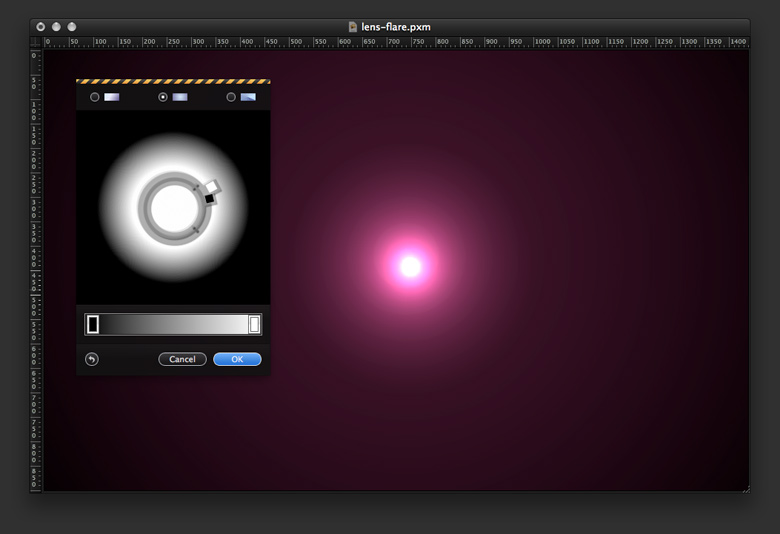
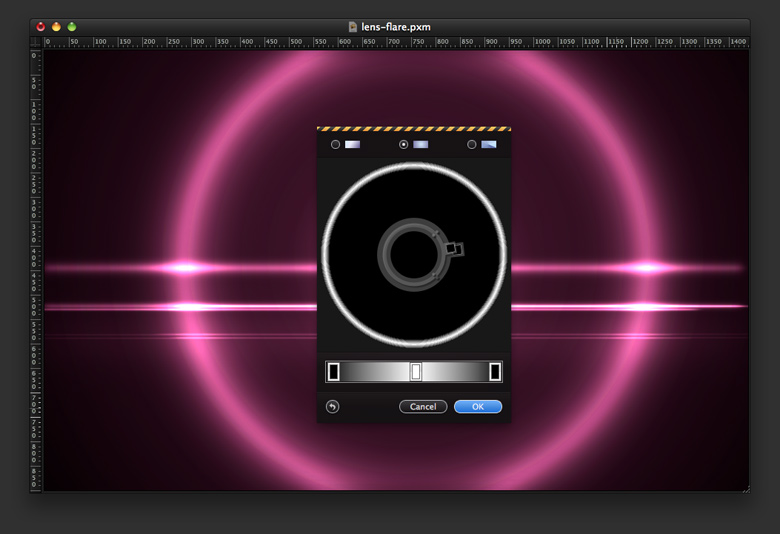
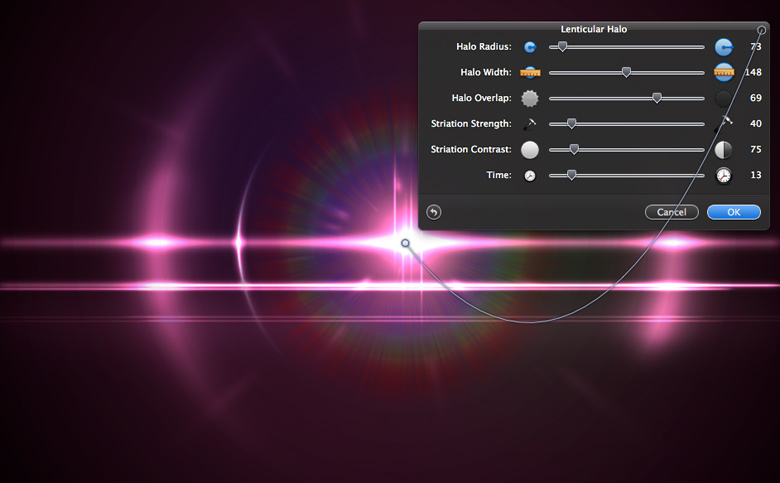
Step 13
Add a new layer and go to Filter > Generator > Lenticular Halo. Use the image below for values, then change the Blending to Soft Light.
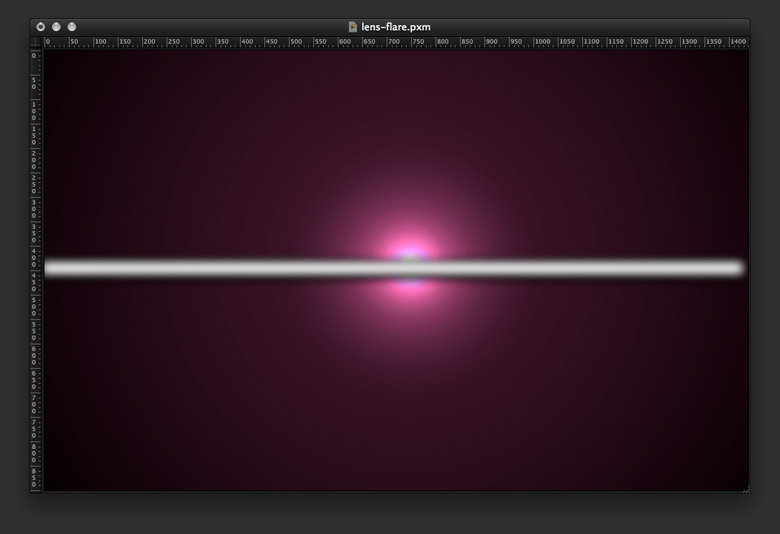
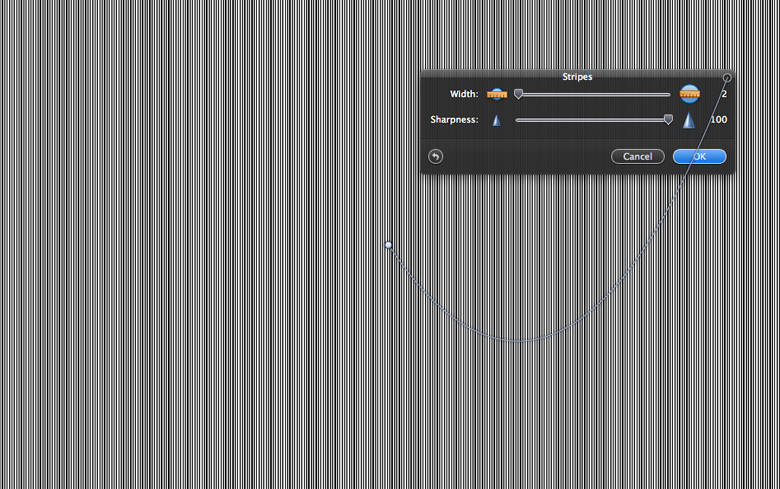
Step 14
Add a new layer on the top of the others, make sure you have black and white for the colors, and go to Filter > Generator > Stripes. Use 2 for the Width and 0 for the Sharpness. Change the Blending to Color Dodge with 20% Opacity.
Step 15
Go to Edit > Rotate 90º Right. Then resize to fill the entire width of the document.
Step 16
Still with the stripes layer selected, go to Layer > Add Layer Mask. With the layer mask selected, go to Filter > Generator > Clouds. In this way you will make lines visible only when the clouds are white. If you want to hide the lines more, just go to Image > Levels and increase the black.
Step 17
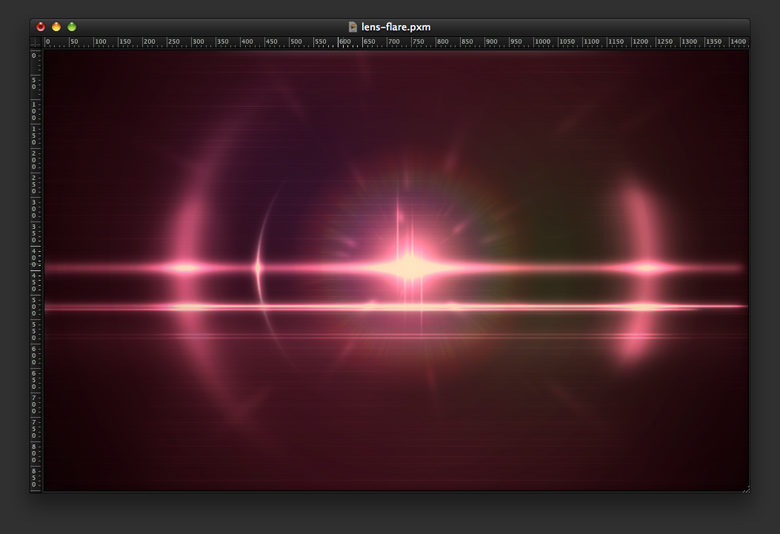
Add a new layer on top of the others and fill it with yellow. Then change the Blending to Multiply at 35% to give that sort of Lomo/vintage look.
Step 18
Select all layers and duplicate them. With all duplicated layers selected, go to Layer > Merge Layers, then to Filter > Blur > Gaussian Blur. Use 20 for the Radius, then change the Blending to Overlay and the Opacity to 20%.
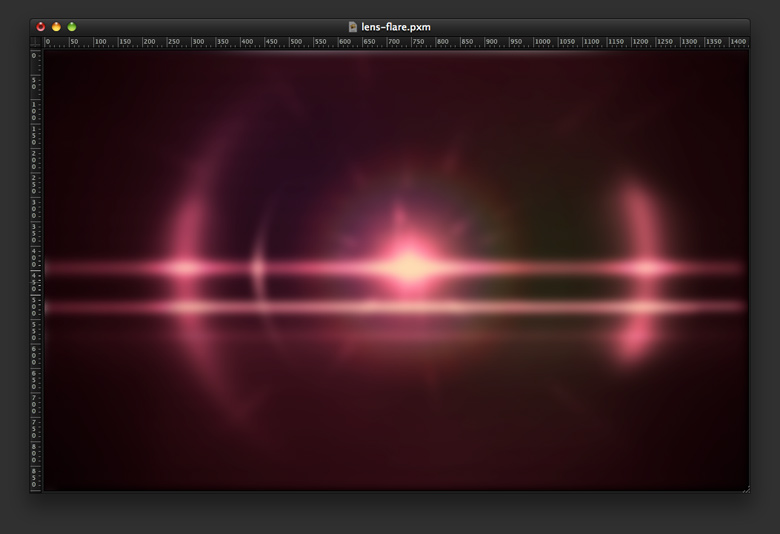
Step 19
Duplicate the blurry layer and change the Blending to Screen.
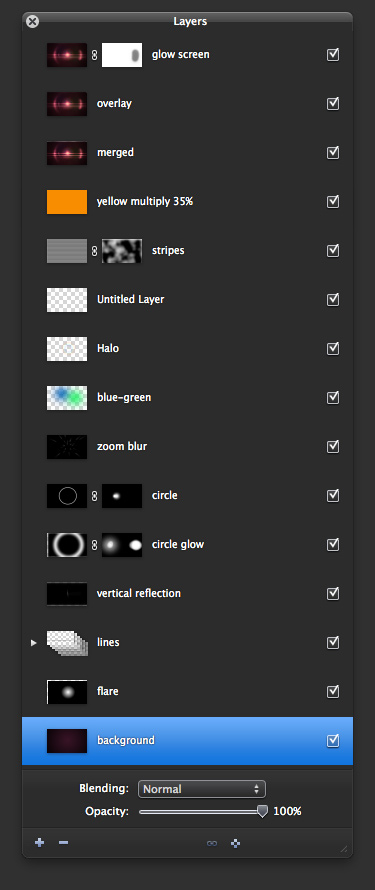
Order of Layers
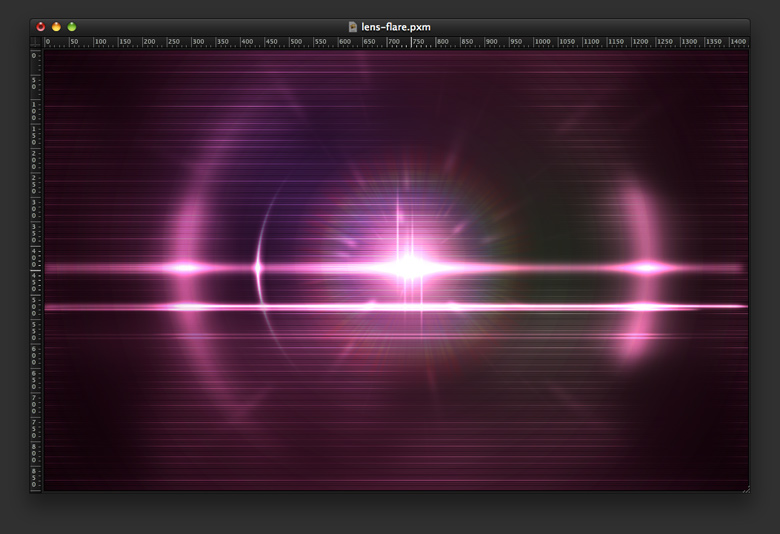
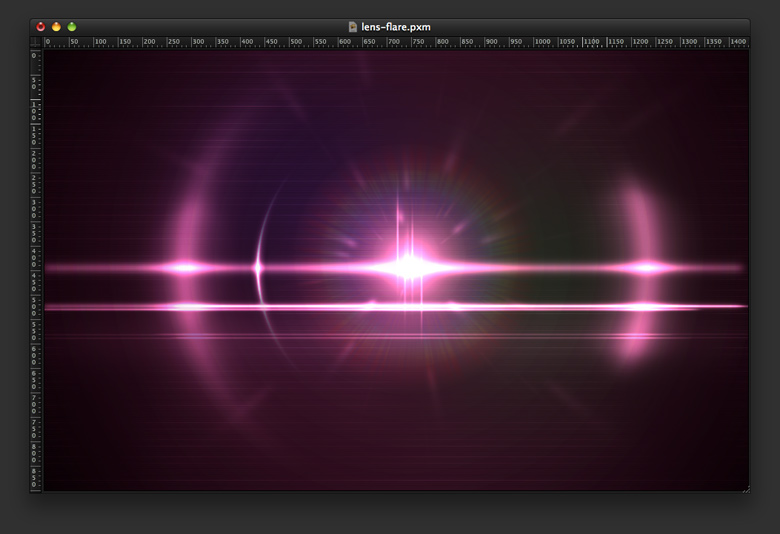
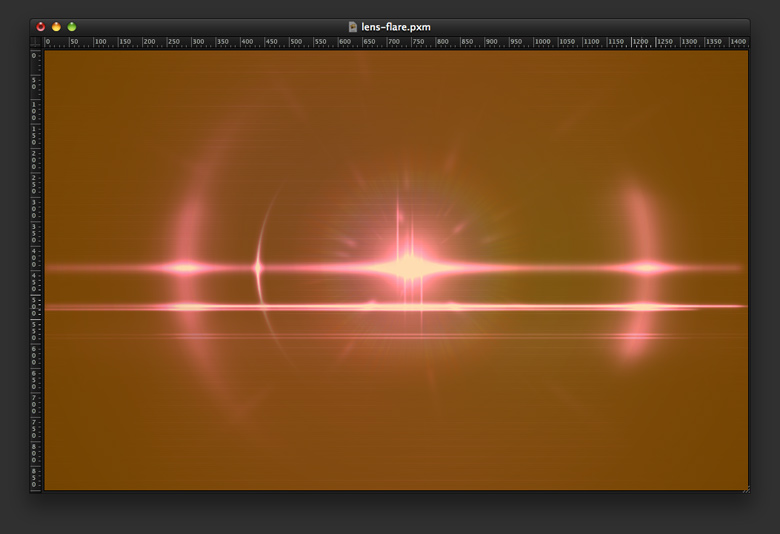
Conclusion
When you finish these steps, you should pretty much have the effect below. As you can see, there’s nothing super difficult or new about it but applying blending and blurs. With this technique you can create all sorts of light effects. You can also play with different color overlays as we did with yellow, and you can use blue, green, or even red for different effects.