by abduzeedo
We always think in ways to find great inspiration to be featured on the blog as well as help people to promote their work. It's quite hard sometimes to curate the amount of work we receive via email and social network links. That was the context that we had in mind when we created RAWZ. We wanted a simple way for people share their work and inspiration with us, it would be a raw version of Abduzeedo. No curation.
The idea for the logo also was inspired by the concept of being raw. No symbol just the word and a very customized typoface. So in this sort of tutorial, case study we will show you the steps that took to us to come up with the logo.
Step 1 - References
The word RAWZ is very short and it has some nice characters to play with like A, W and Z. The idea was come up with a very simple font with no much details, as the name suggested, very raw style. Looking for some inspiration we found some nice examples of how to play with characters, especially the well known Avant Garde and of course the classic from the 80s Over the Top.

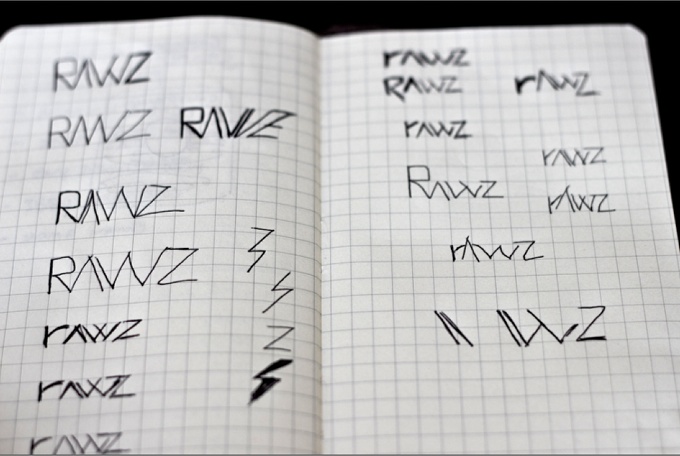
Step 2 - Sketches
With some references and ideas in mind it was time to sketch them out. That is without any doubt one of the most important parts of the process because you can try lots of variations very quickly. You can also see if the idea you had was as nice in real life as it was in your head.
Step 3 - Computer
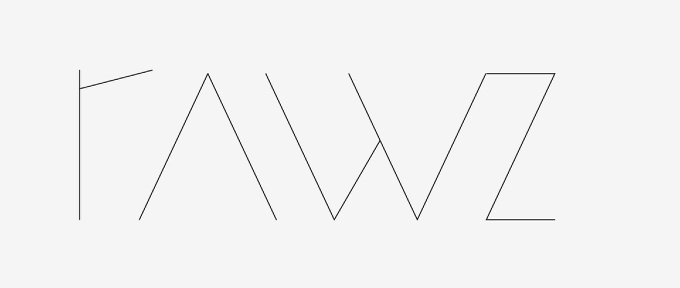
After a few sketches we got a quite interest idea to explore in terms of typography so it was time to open Illustrator and make it happen. Using the Line Segment Tool and the Pen Tool we created the letters. As you can see, we started with the A then with that symbol we created the W by flipping it vertically and duplicating it. There are some other interesting details like deleting part of the middle area of the W, connecting the Z and the R.
Step 4
Once we finishing creating the paths we started playing with stroke sizes and edge styles. In this case we tried rounded edges but it wasn't that raw hah! Also the R wasn't right because of the angle of the top part.

Step 5
The first thing to do here was to created a simplified version of the R. Also we went back to sharp edges. But the angle wasn't right.

Step 6
Time to keep the lines straight. The A and W break the baseline and the to alignment creating a really nice effect. Also we tried lighter and bolder versions here until we decided that this one was the best.

Step 7
In order to give a stylish look we decided to add a hairline inner stroke in the center of the word. It created a really nice effect sort of mixing vintage with a very modern fontface.

Conclusion
To make it a little bit friendlier we added some rounded corners, very subtle but it definitely gives a nice touch.
As you can see in this quick case study, creating a logo is much more than playing with Illustrator, there's always some goals to reach and message to pass along. Tutorials don't exactly show the whole creative process but they give you an idea of the workflow. I hope that might help you to come up with your own workflow in the future.

For more information and to submit your inspiration and work to us visit http://raw.abduzeedo.com/
