by abduzeedo
I love some apps that recreate amplifiers with leather and those controllers. I have been thinking about doing a tutorial on that for quite long time, so today I decided to learn how to do that and then try to explain how I did it to you guys.
So in this tutorial I will show you how to create an awesome amp controls using only Photoshop.
Step 1
Open Photoshop and create a new document. I am using 2560x1440 pixels. After that fill the background layer with grey using the Paint Bucket Tool (G)

Step 2
Go to Filter>Texture>Craquelure. Use 9 for the Crack Spacing, 2 for Crack Depth and 10 for Crack Brightness.

Step 3
Go to Layer>Layer Styles>Color Overlay. Use black for the color and Multiply at 70% Opacity.

Step 4
Go to Image>Adjustments>Levels. Use 120 for the black input, 1.00 for the grey and 181 for the white input.

Step 5
With the Ellipse Tool (U) create a circle in the center of your design.

Step 6
Select the Gradient Tool (G) then click on the color preset. Change the colors so you have something like the image below.

Step 7
Add a new layer and the with the Gradient Tool (G) select the Angle Gradient type and fill the layer with the gradient preset we created in the previous step. After that create a marquee selection of the circle we created in the step 5, to do that is super simple, just click holding Command (mac)/Control (PC) on the thumb of the circle layer.

Step 8
Go to Layer>Layer Mask>Reveal Selection.

Step 9
Duplicate the circle layer and fill it with white. Change the order so it is on top of the other layers. After that change the Fill Opacity to 0%.

Step 11
Go to Layer>Layer Styles>Inner Shadow. Use Color Dodge for the Blend Mode, white for the Color, 90 for the Angle and 70% for Opacity. After that use 8 pixels for the Distance, 11% for the Choke and 7 pixels for the Size. For the Quality change the Contour for the one we used in the image below.

Step 12
Select Inner Glow. For the Blend Mode use Overlay, for the Opacity 36% and for the Color use White. Also change the Source to Center, Choke to 12% and 65 pixels for the Size. Also change the Contour to the one I used below.

Step 13
Select Bevel and Emboss. Use Emboss for the Style, Smooth for the Technique, 1000% for the Depth, Up for the Direction, 50 pixels for the Size, 0 pixels for the Soften. For the Shading, change the Angle to 90º at 30 º Altitude. Also change the Gloss Contour to the one I am using below. For the Highlight Mode change the Opacity to 0 while for the Shadow Mode use black with Multiply at 100%.

Step 14
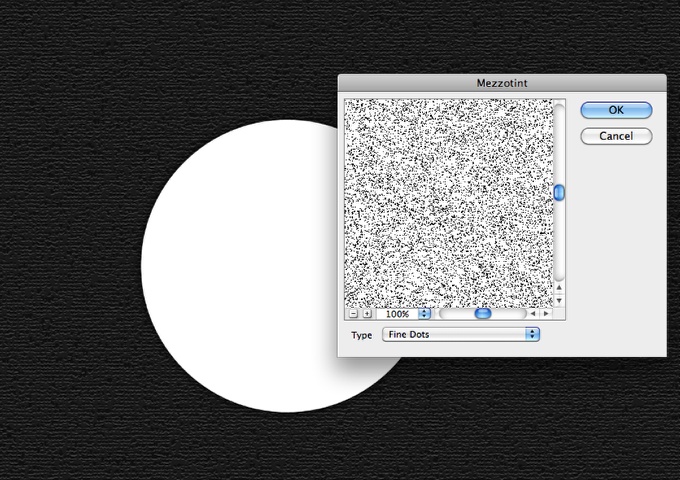
Duplicate the circle layer and move to the top, make sure it is white. After that go to Filter>Pixelate>Mezzotint. Use Fine Dots.
Step 15
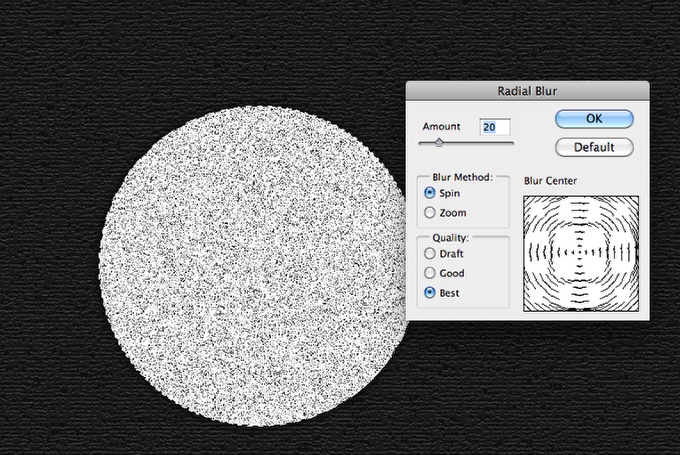
Create a marquee selection of the circle and then go to Filter>Blur>Radial Blur. Use 20 for the Amount, Spin for the Blur Method and Best for the Quality.
Step 16
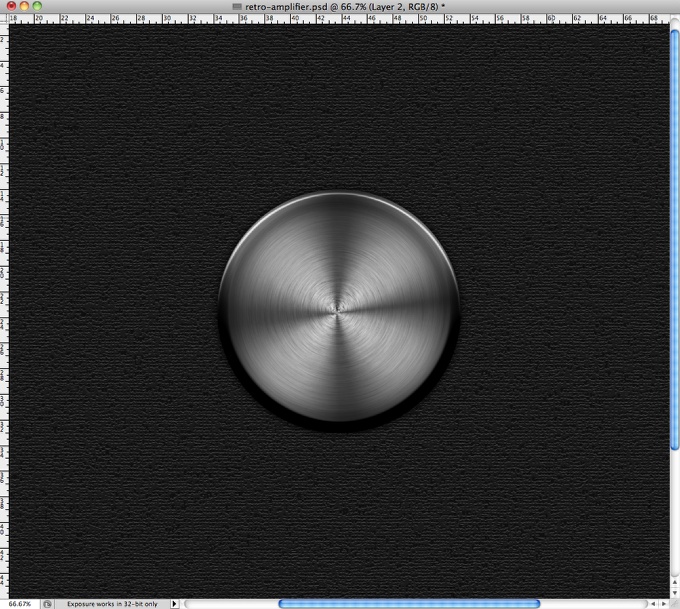
Change the Blend Mode to Multiply.
Step 17
Select all layers used to create the button/tuner, then go to Layer>Group Layers. After that duplicate the group and resize it like the image below.
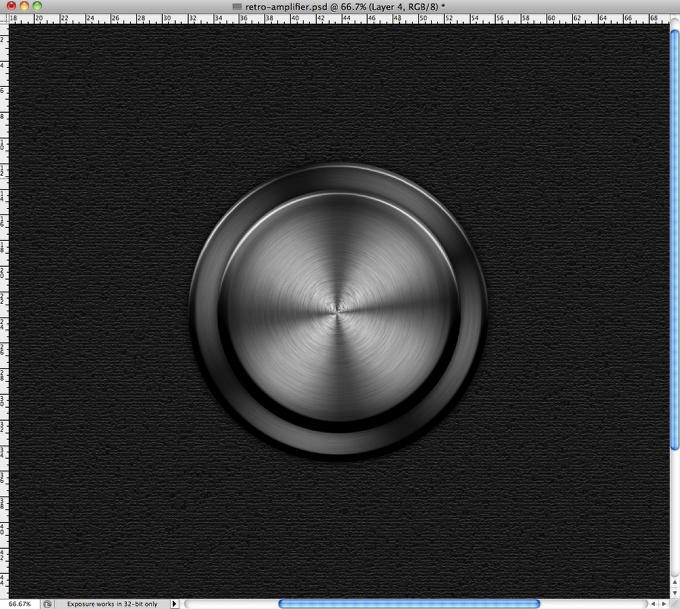
Step 18
Select the layer with the layer styles inside the group and then change the Color Overlay to Black with black for the Blend Mode at 45%.
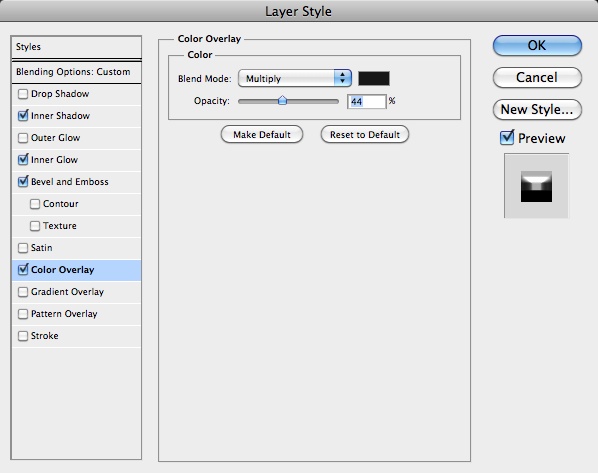
Step 19
Add drop shadow to both circles the bigger and the smaller. Like the first circle in the stack of layers that were used to create the effect.
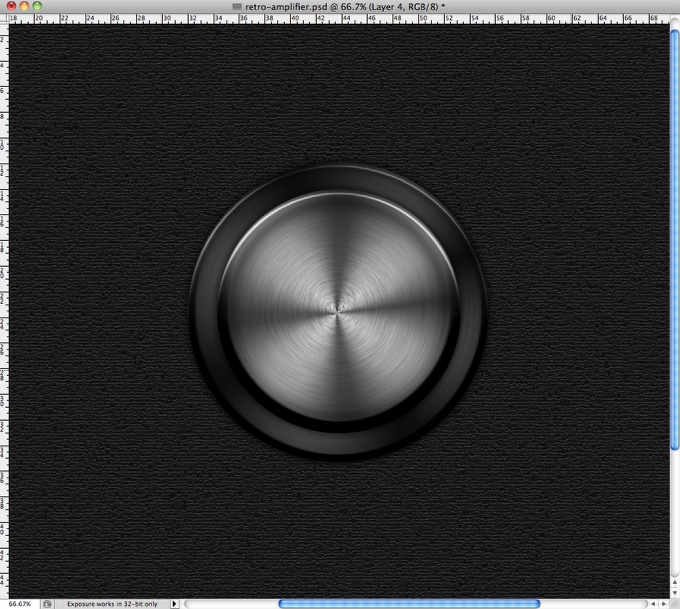
Step 20
With the Rectangle Tool (U) create a square holding Shift. After that rotate the square 45º; and position it like the image below.
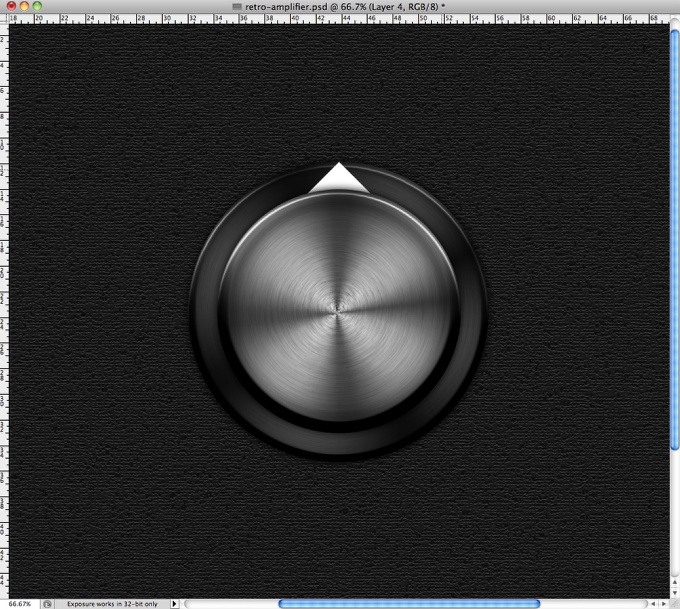
Step 21
Go to Layer>Layer Style>Drop Shadow. Use Normal for the Blend Mode and Black for the Color at 100%. For the Angle use 120º, 5 pixels for the Distance and 5 pixels for the Size.
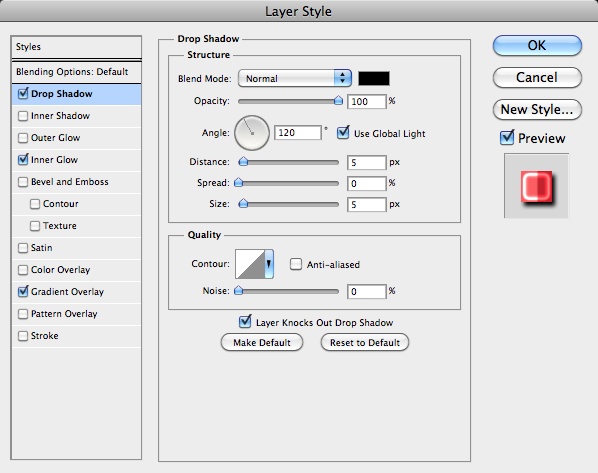
Step 22
Select Inner Glow. For the Blend Mode use Color Dodge, for the Opacity use 70%. Change the Choke to 10% and the SIze to 9 pixels. For the Quality use the preset I used in the image below.
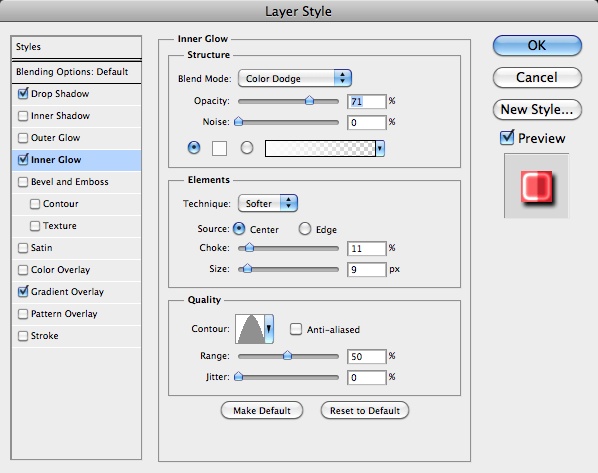
Step 23
Select Gradient Overlay. Use dark red and light red for the gradient colors like the image below. Also change the Style to Linear and the Angle to 180º.
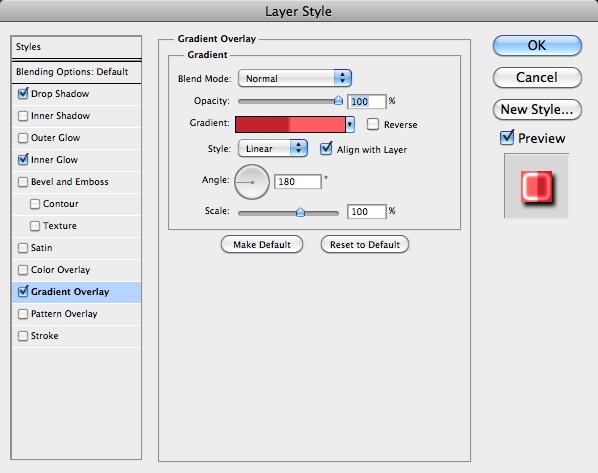
Step 24
This is the effect you will get after all the layer styles. It's pretty good but it is still to uniform and with the computer look.
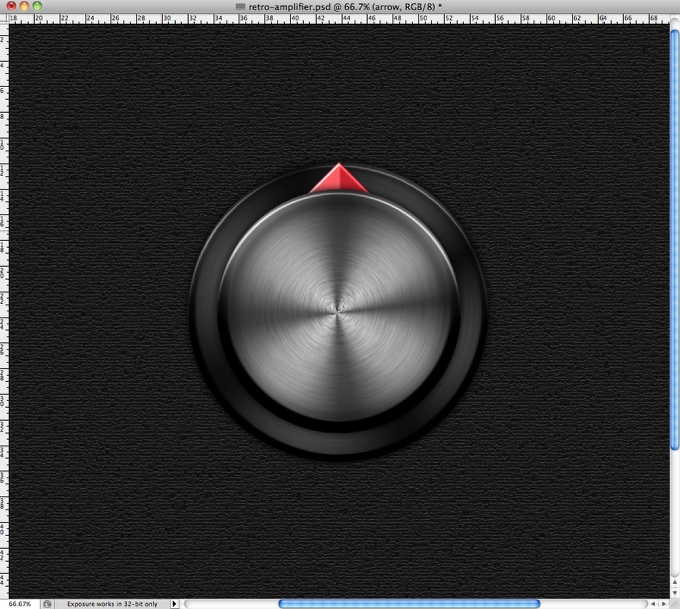
Step 25
To change that lets use a metal texture. The one I am using is courtesy of Shutterstock and you can find it at: http://www.shutterstock.com/pic-20761540/stock-photo-metal-plate-backgr…
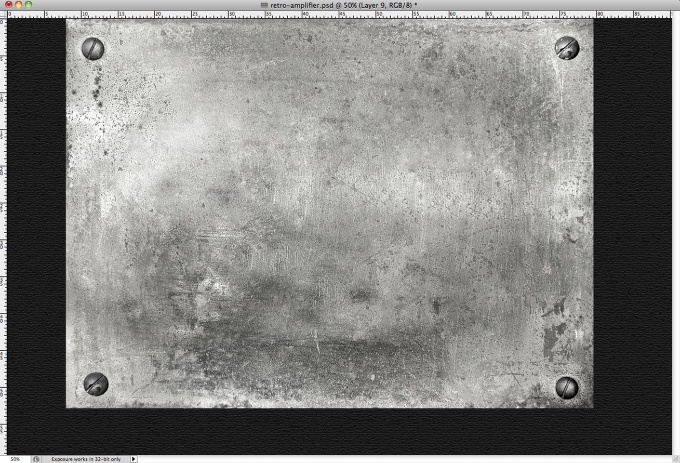
Step 26
Change the Blend Mode of the metal texture to Overlay at 30% and mask it using the big circle as reference, this way the texture will be on top of the other layers.
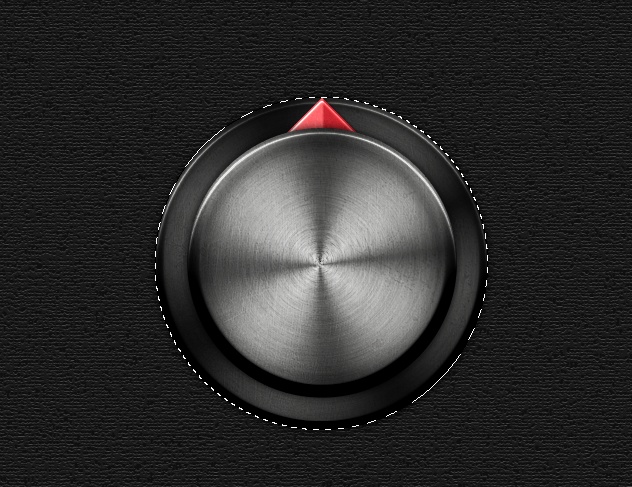
Step 27
Lets add some leather texture to make the effect more real. The image I am using is courtesy of shutterstock and you can find it at http://www.shutterstock.com/pic-77457889/stock-photo-texture-black-leat…. Place it at the bottom like the image below. Note: You wil have to duplicate it in order to fill the screen.
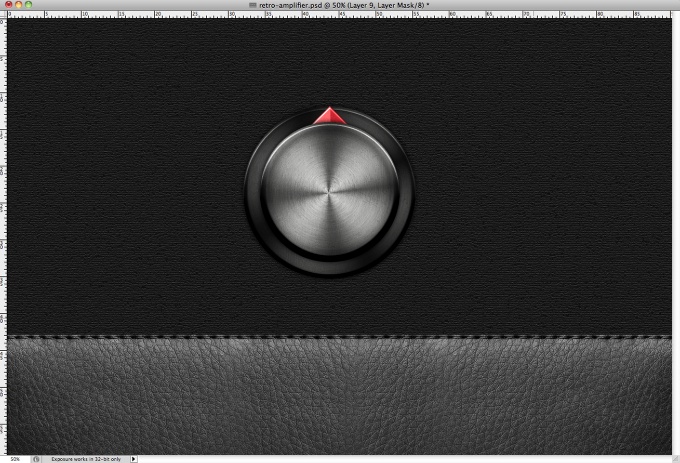
Step 28
With the Rectangle Tool (U) create some rectangles and rotate them until you get something like the image below. Tip: Start with the one at the top, then duplicate and move to the bottom, after that duplicate both and rotate 90º, the select all 40 and duplicate them. After that rotate them 45º and so on.
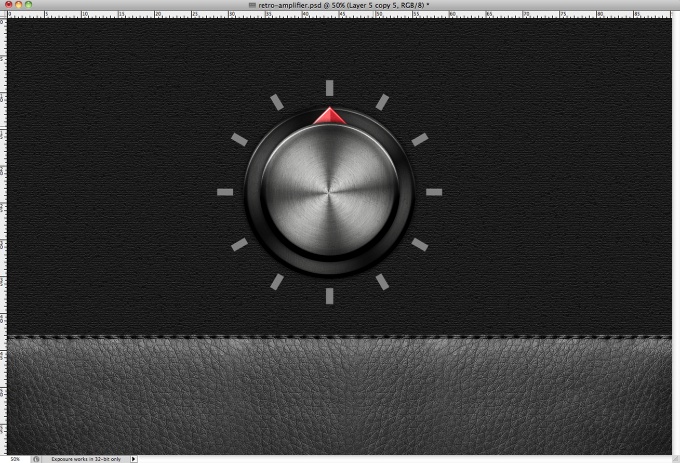
Step 29
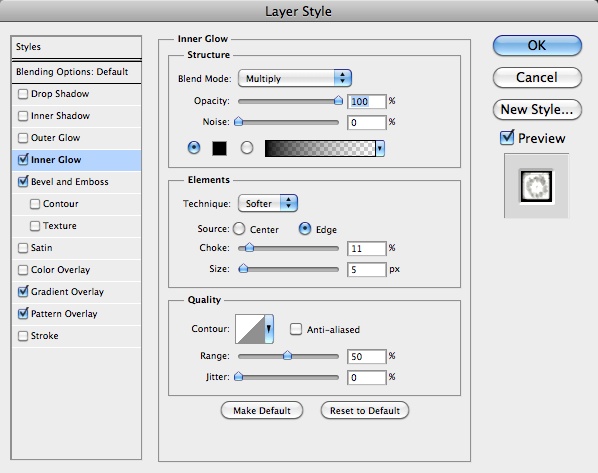
Merge all layers from the previous step, then go to Layer>Layer Styles>Inner Glow. Use Multiply for the Blend Mode, Black for the Color, Edge for the Source, 10% for the Choke, 5 pixels for the Size.
Step 30
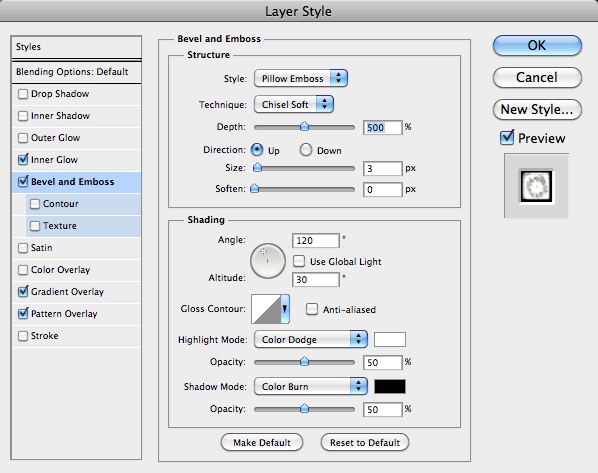
Select Bevel and Emboss. Use Pillow Emboss for the Style, Chisel Soft for the Depth and 500% for the Depth. Also change the Size to 3 pixels and for the Highlight Mode use Color Dodge with white at 50%. For the Shadow Mode use Color Burn with Black at 50%.
Step 31
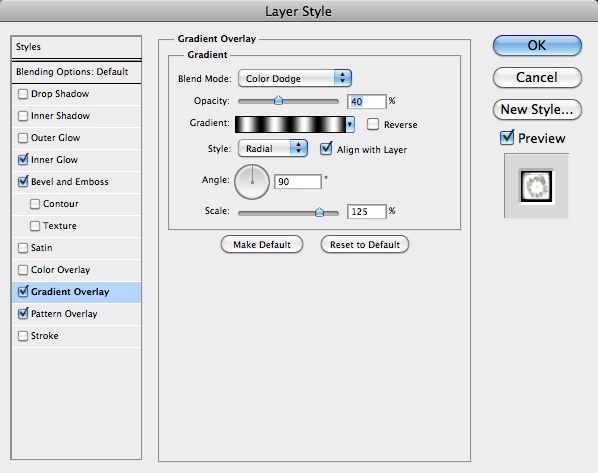
Select Gradient Overlay and use the same gradient we used before for the circle. Also use Color Dodge at 40% for the Blend Mode and Opacity.
Step 32
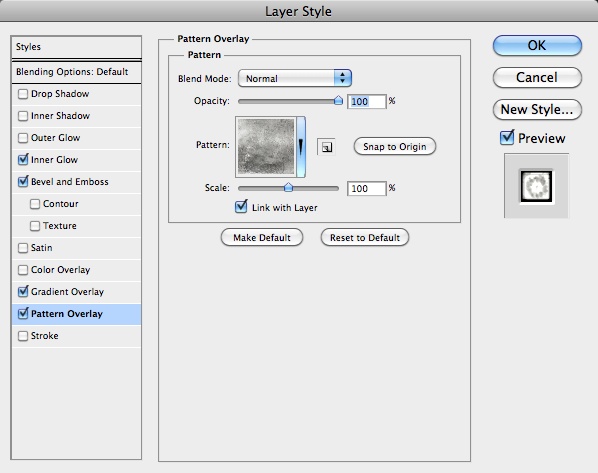
Select Patter Overlay and use the metal image for the Pattern. To do this is pretty simple. Before opening the Layer Style box, select the texture and go to Edit>Define Pattern.
Step 33
Also add a new layer on top of the previous one and go to Layer>Create Clipping Mask. Then with the Brush Tool (B) and red paint some rectangles with red like the image below.
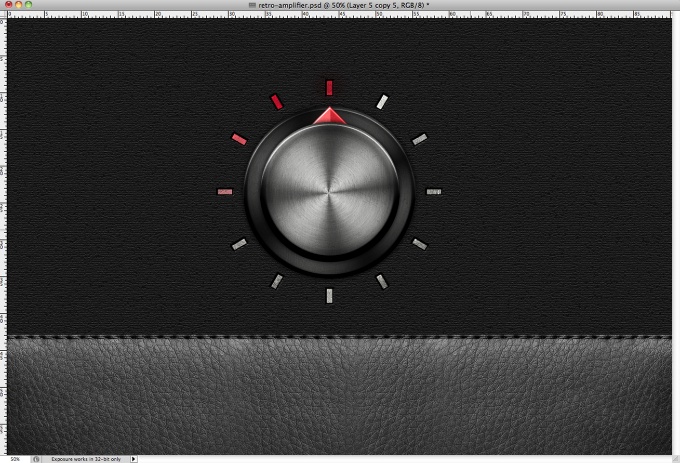
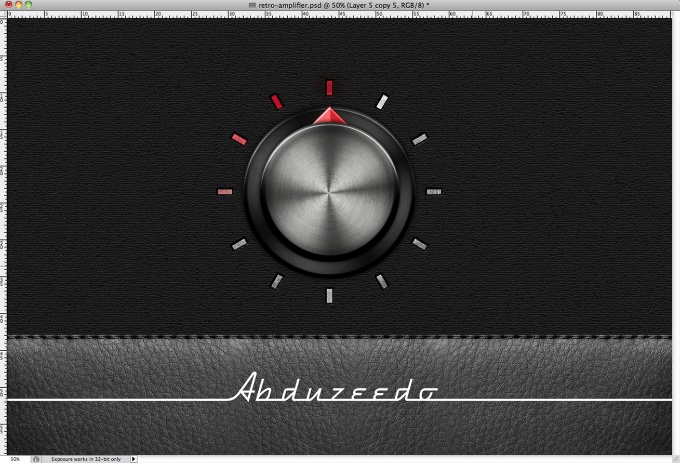
Step 34
Add a text using for the font DymaxionScript, you can download it at http://www.dafont.com/dymaxion-script.font. I added Abduzeedo and then with rasterized the layer and stretched the end of the A and the O to fill the screen.
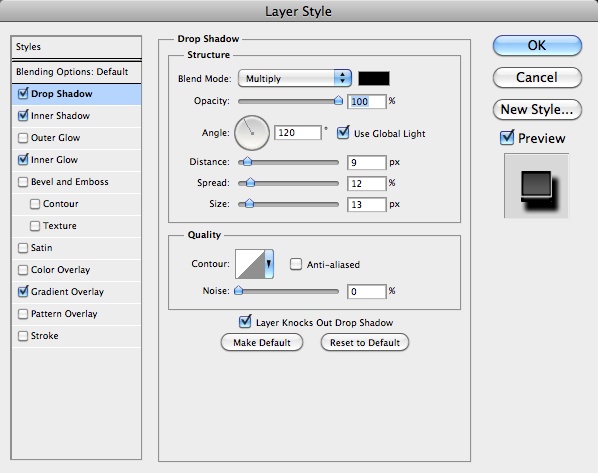
Step 35
Go to Layer>Layer Styles>Drop Shadow. Use Multiply for the Blend Mode with Black for the Color at 100% Opacity. For the Distance use 9 pixels, for the Spread use 12% and for the Size use 13 pixels.
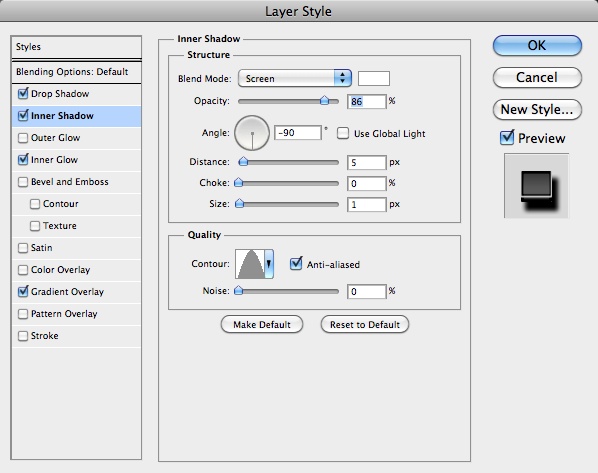
Step 36
Select Inner Shadow and use Screen for the Blend Mode with white for the color at 85%. For the Angle use -90º, 5 pixels for the Distance, 0 for the Choke and 1 pixel for the Size. Over the Quality Options use the image below for reference.
Step 37
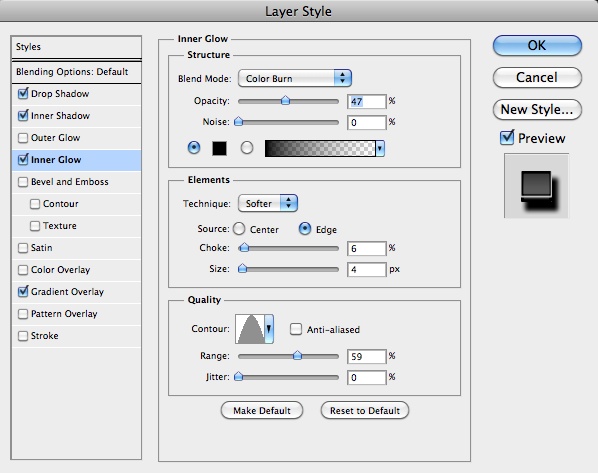
Select Inner Glow. Use Color Burn for the Blend Mode at 50% with black for the Color. Change the Source to Edge, Choke to 5% and SIze to 4 pixels.
Step 38
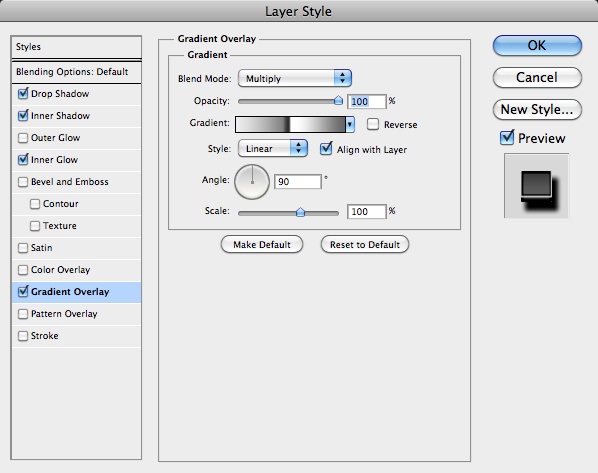
Select Gradient Overlay and use Multiply for the Blend Mode and the Gradient preset like the image below. It's basically white grey, dark grey, black, white and dark grey for the colors.
Step 39
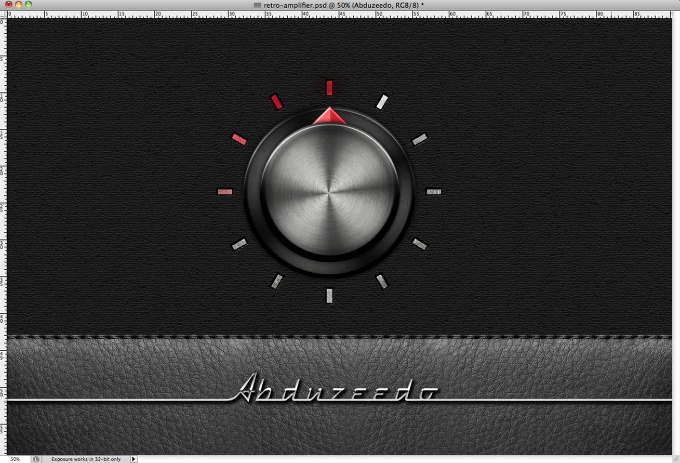
You can use the metal texture on top of the text layer as well. The image below is the effect you will get after all these 40 steps.
Conclusion
In this tutorial we created a nice retro amplifier style interface using basic layer styles and a metal texture, as you could see, it's all about finding some references and trying to replicate in Photoshop. In this image below I added a few more light effects, but that is for another tutorial ;)



![Neon light effect in Photoshop [revisited] Neon light effect in Photoshop [revisited]](/sites/default/files/styles/square_1x1/public/originals/hero_neon.png?itok=lP4mbIak)
