by abduzeedo
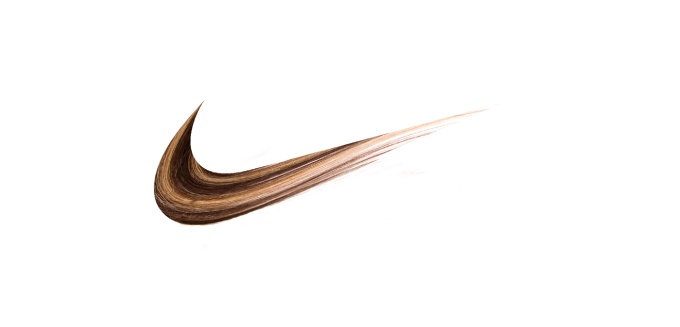
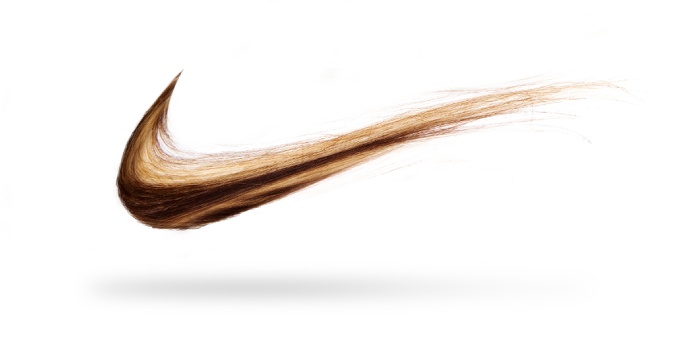
A couple of weeks ago I was playing in Photoshop on a Saturday afternoon and decided to create something using hair texture and photos. I was thinking about just text with that but then I had this crazy idea of playing with the Nike Air brand to create the Nike Hair Ad in Photoshop. This idea is heavily inspired on the work of Glenn Jones AKA Glennz, always playing with real brands :)
So in this tutorial, I will show you how to create a funny photo manipulation to create the Nike Hair ad. The tutorial is very simple and won't take you more than 30 minutes.
Photoshop tutorial
Step 1
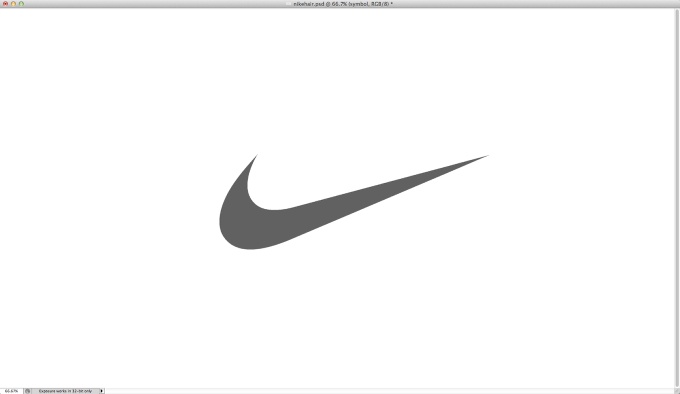
Open Photoshop and create a new document. I am using 2560x1440 pixels and a white background. After that get the Nike logo online. It's pretty easy to find, just do a Google Image Search
Step 2
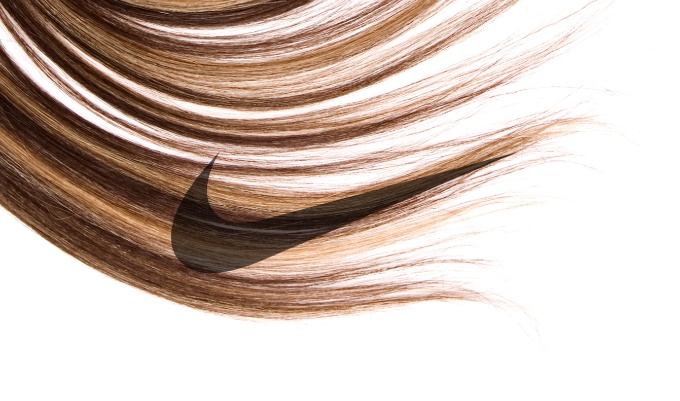
Once you have the Nike symbol it's time to use some hair photos. The one I am using is by 1809056 Ontario Ltd and it's called long brown hair style on white. Courtesy of Shutterstock.
Place the image on your document and make sure that the Nike logo is on top of it. We will use it for reference.
Step 3
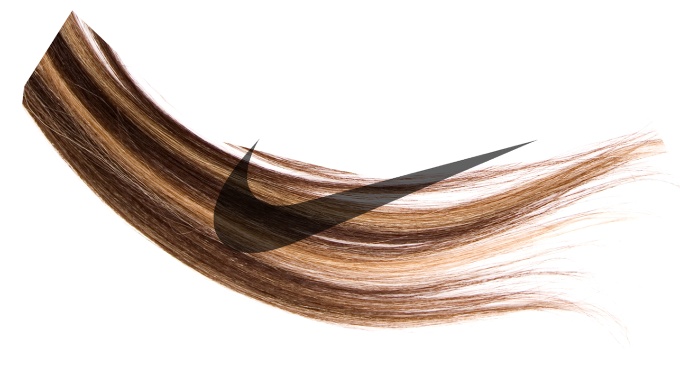
With the Polygonal Lasso Tool (L) select the area of the hair image you want to use only. Delete the rest of the hair.
Step 4
Go to Edit>Transform>Warp. Start deforming the image so you can sort of make the hair follow the nike symbol.
Step 5
With the Magic Wand Tool (W) select the nike symbol. Then select the layer with the hair photo and group it (Layer>Group Layers). With the group selected go to Layer>Layer Mask>Reveal Selection.
Step 6
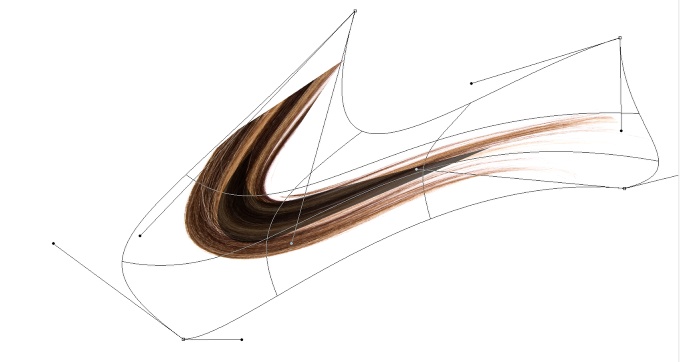
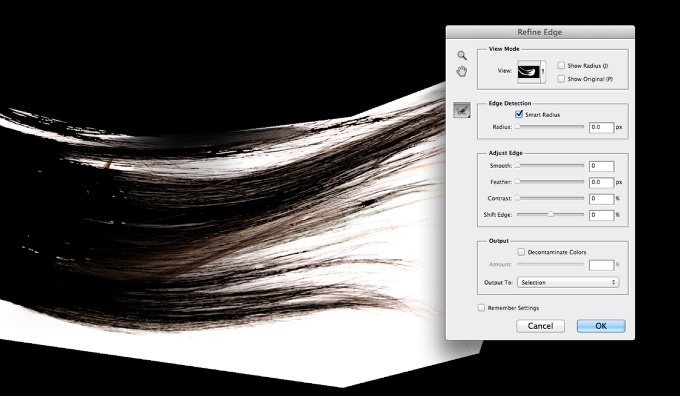
Now that you have the base for the nike hair idea you will have to make it look more real. The secret here is start adding some hair on the edges of the symbol to make it less uniform. To do that is easy. First select the hair image again and delete the white background. Use the Magic Wand Tool (W) again and select the white part. Go to Select>Refine Edges. Enable the Smart Radius and select the brush icon. Paint over the hair and then press okay. After that just delete the selection and you will have extracted the white background of the layer.
Step 7
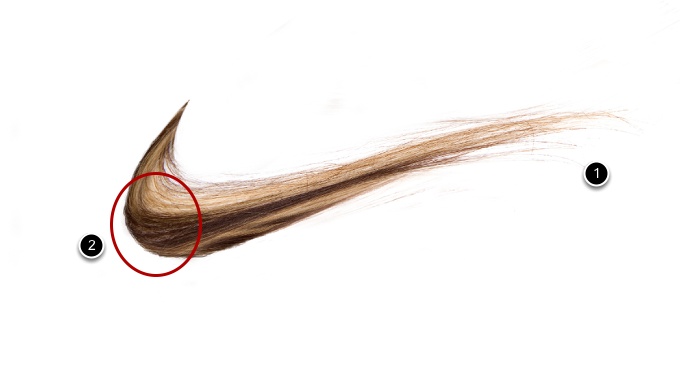
Start mixing some parts of the image with your logo especially the edges. The sort of tail is pretty easy (1) just add a part of the image and adjust with the warp tool again. Now the curve on the left requires more work. Notice that the edges are not perfect. So to do that just select the Brush Tool (B) with a very small and rounded brush. Then select the group with the hair and click on the mask. Now start painting on the mask with white color like as you were creating some hair.
Step 8
Select all layers and duplicate them. After that with all the duplicated layers selected go to Layer>Merge Layers. You can use the keyboard shortcut for that: Command(mac)/Control(pc) + Alt + Shift + E. With the new layer selected go to Filter>Blur>Gaussian Blur. Use 10 pixels for the Radius. Change the Blend Mode of this layer to Soft Light.
Step 9
Add a new layer and then with the Brush Tool (B) and black for the color paint a little shadow underneath the symbol. You can use gaussian blur to make it very soft like the image below.
Conclusion
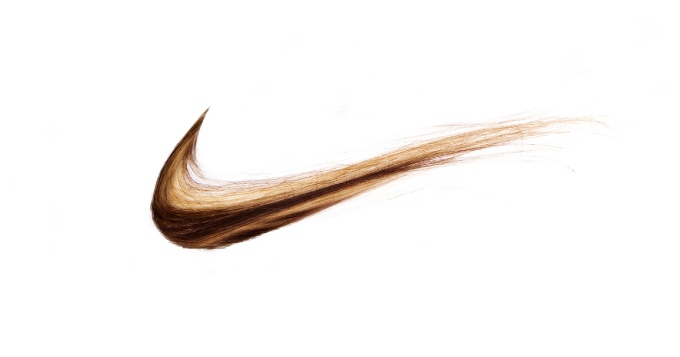
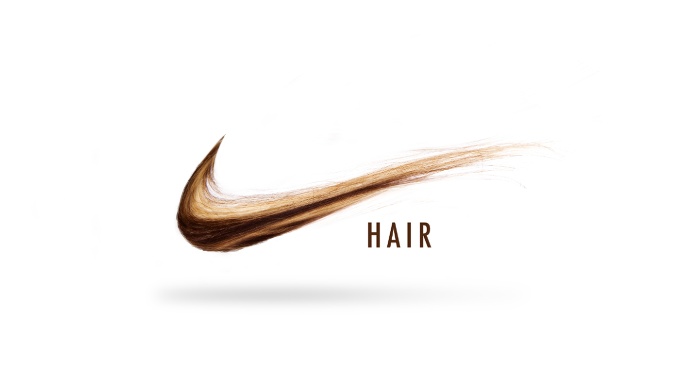
Just add the word Hair using Futura Condensed for the font and our funny Nike Hair image is done. As you could see the process was extremely easy. The most important thing is always the ideas. Creating funny representations of brands is a good exercise and we can always learn a lot from that. Now it's up to you, I would love to see what you can come up with :)


![Neon light effect in Photoshop [revisited]](/sites/default/files/styles/square_1x1/public/originals/hero_neon.png?itok=lP4mbIak "Neon light effect in Photoshop [revisited]")


