by abduzeedo
One of the best tools in Illustrator in my opinion is the Blend Tool. There are so many things we can do with the blend tool, mixing shapes, replacing the Spine path to create crazy forms. Also I try to learn how the real masters like Andy Gilmore create those fantastic pieces. I don't even know if he uses Illustrator but some of his artwork can be done with the Adobe vector app mixing with a bit of Adobe Photoshop.
In this tutorial I will show you how to create a abstract sort of flower using the Blend Tool in Illustrator then playing with it in Photoshop to produce a very colorful wallpaper.
Step 1
Open Illustrator and create a new document, then with the Arc Tool create an arc. Duplicate the arc and rotate it to create a sort of leaf. With the Direct Select Tool (A) select the to 2 top vertices and Join them, go to Object>Path>Join. Repeat the same thing for the 2 bottom vertices and you will have a nice shape.

Step 2
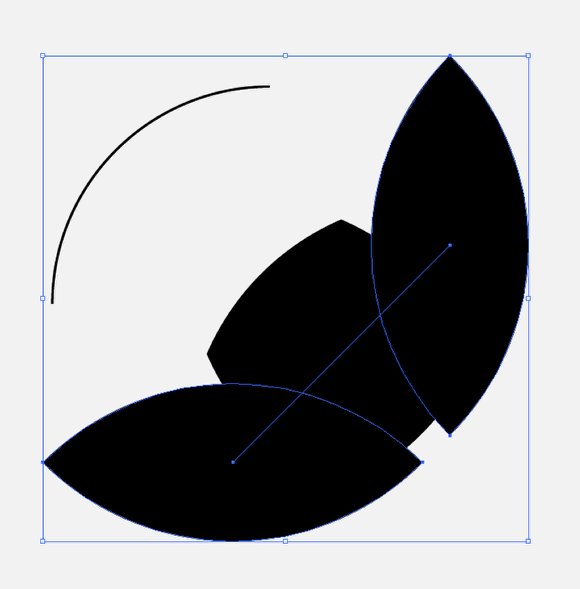
Duplicate the shape and rotate it 90º. Then select the Blend Tool (W). Click on one shape then on the other one to create the blend. After that with the Ellipse Tool (L) create a ellipse holding shift. Then with the Direct Select Tool (A) delete 3 segments of the circle.
Step 3
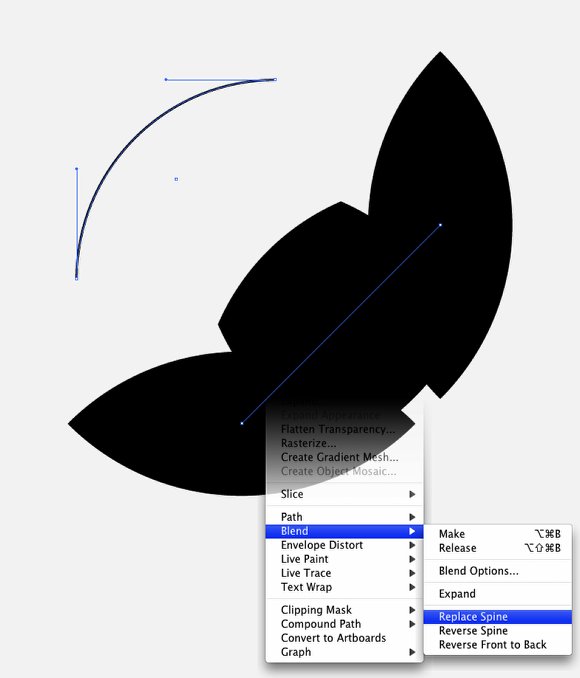
Select the path of the Blend Object and the arc you created and go to Object>Blend>Replace Spine. That command will replace the line SPINE, that is the Blend Object default path with any path you want.
Step 4
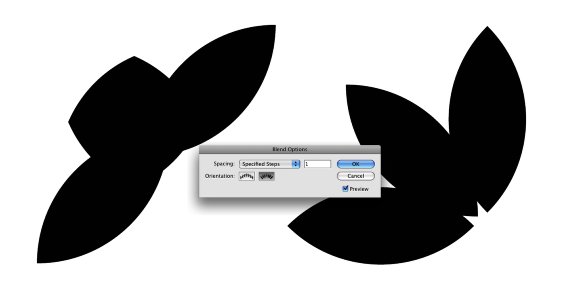
To edit the Blend Object just double click on the Blend Tool icon or go to Object>Blend>Blend Options... Change the Spacing to Specified Steps and use the number of steps you want. Also for the Orientation use Align to Path. You will have to rotate the 2 shapes because the Blend Options will automatic rotate the shapes. So double click on the Blend Object to edit the Blend and rotate the 2 shapes. Use the image below for reference.
Step 5
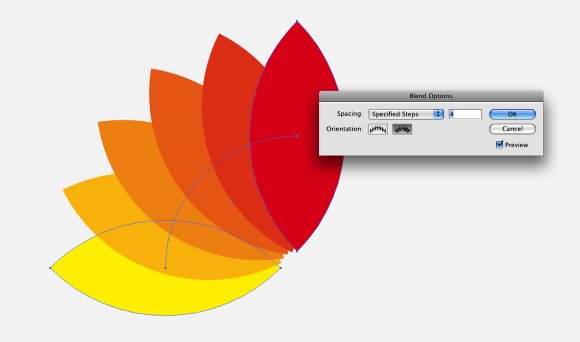
Change the color of the 2 shapes you used for the blend. I used red and yellow. The go again to the Blend Options and increase the number of steps. Use 4 or 5. You will notice that the Blend Tool will create the tone colors from red to yellow.
Step 6
Duplicate the blend object, rotate, and align it with the first blend object. Also replace the colors to yellow and green and send ir to back, go to Object>Arrange>Send it to Back.

Step 7
Duplicate the blend object, rotate, and align it again, now with the second blend object. Replace the colors to green and blue. Also send ir to back, go to Object>Arrange>Send it to Back.

Step 8
Duplicate one object one more time and close the flower using blue and red. Again send it to back.
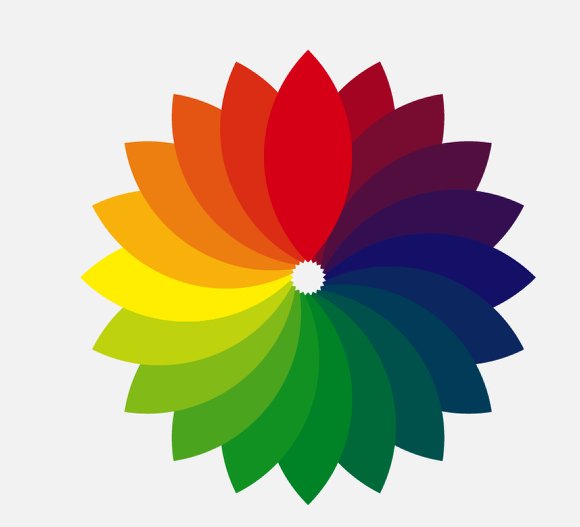
Step 9
Go to Object>Expand. Then with the Direct Select Tool (A) select the red, yellow, green, and blue shapes. Delete them because they are duplicated from the blend.
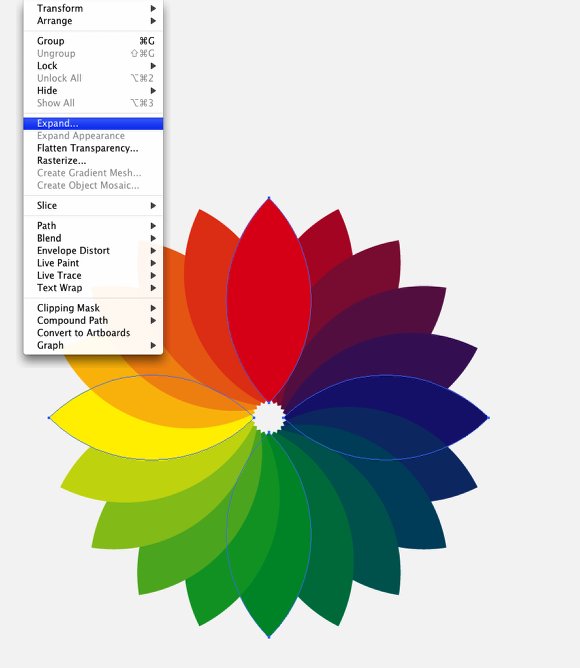
Step 10
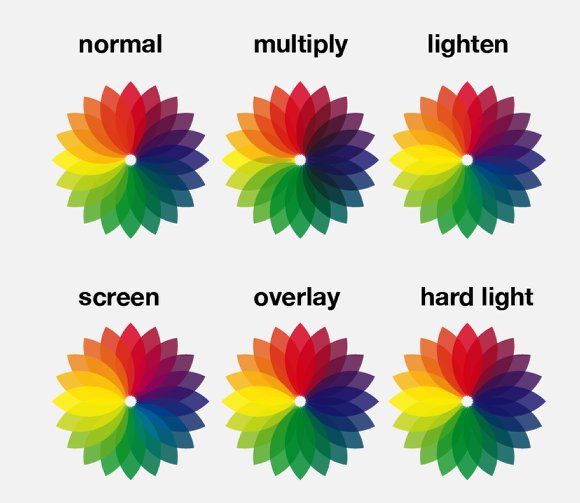
Ungroup the objects, go to Object>Ungroup. Then select all elements and go to Window>Transparency. Change the Opacity to 75% and play with the Blend Modes. Below you can se some of the Blends I tested.
Step 11
Just an experiment trying to create a typeface, my cousin said it looks like a caterpillar, so I named it catypellar.

Step 12
Copy the flower from Illustrator and paste it in a new document in Photoshop as Smart Object. I used 1900x1200 pixels. Also the background has to be black. Position the flower at the bottom of the document like the image below.
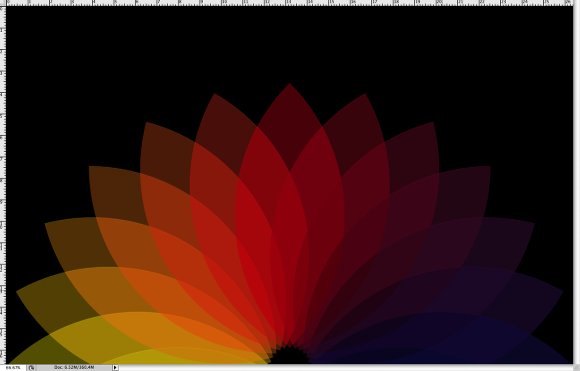
Step 13
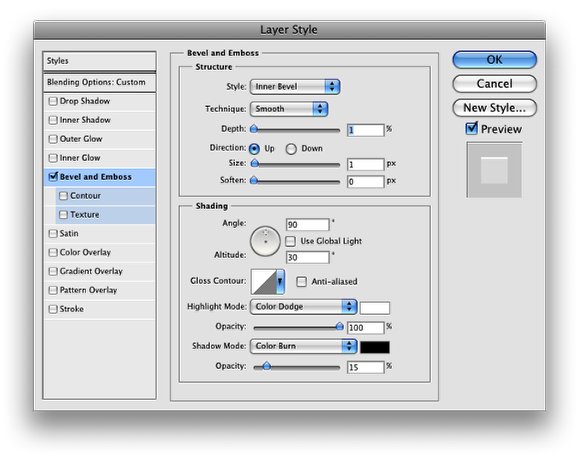
Go to Layer>Layer Style>Bevel and Emboss. Use Inner Bevel for the Style, 1% Depth, Direction Up, Size 1px and soften 0px. For the Shading use 90º for the Angle. For the Highlight Mode use Color Dodge in white and 100% opacity. For the Shadow Mode use Color Burn in Black and 15% Opacity. Also change the Blend Mode of the layer to Screen.
Step 14
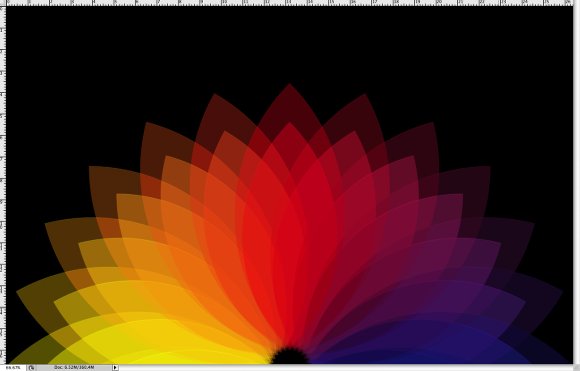
Duplicate the layer and resize it, make it a bit smaller, like the image below.
Step 15
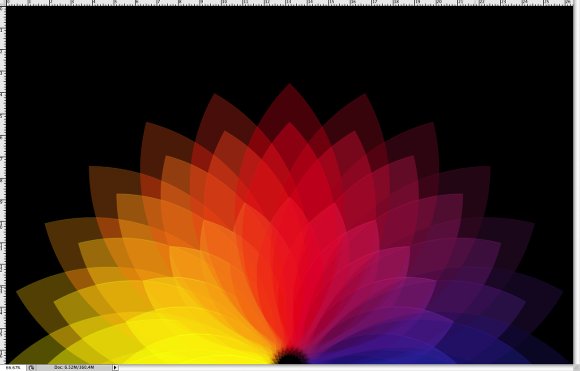
Again duplicate the layer and resize it, make it a bit smaller than the previous layer. Use the image below for reference.
Step 16
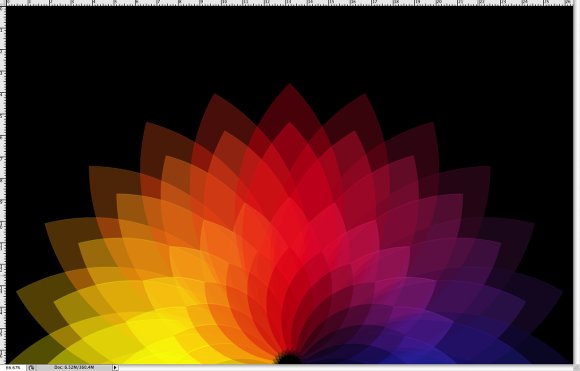
Repeat the same thing as the previous step, this time however change the Blend Mode of the layer to Darker Color.
Step 17
Again, duplicate the layer and resize it. Use Multiply for the Blend Mode and also add a Color Overlay. Use black for the Color and 100% Opacity.
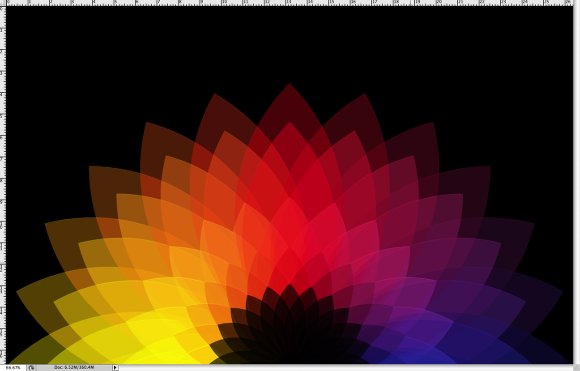
Step 18
Once again duplicate the flower, not the one with the black color overlay. Resize it and change the Blend Mode to Normal. Then duplicate the layer again and just change the Blend Mode to Color Dodge.
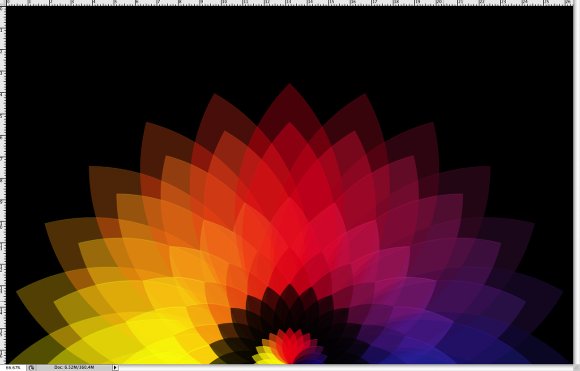
Step 19
Add another layer on top of the others and with the Gradient Tool (G), select Radial for the type and black and white for the color. Then fill the layer with the gradient, start from the center and bottom of the page exactly where the flower starts to grow. After that change the Blend Mode of the layer to Multiply.
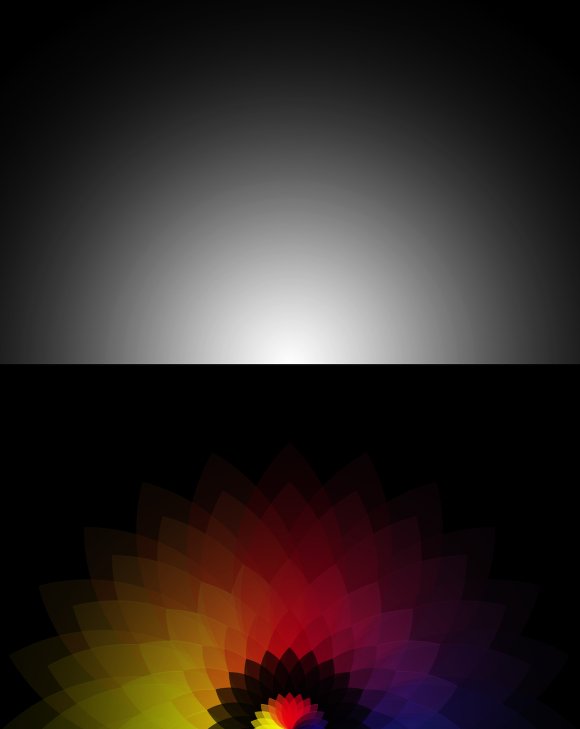
Step 20
Add another layer again and go to Filter>Render>Clouds, make sure that you had black and white for the colors. Then go to Filter>Blur>Gaussian Blur. Use 5 pixels for the Radius. Change the layer's Blend Mode to Multiply as well.
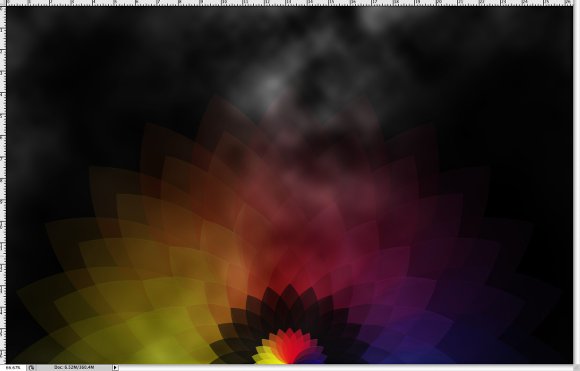
Conclusion
You can add a bit of noise or more elements if you want. The idea is play with the blend modes and of course Illustrator, where all the magic was done. If you want to create a version with a lighter background you will have to change the blend modes. Instead of Screen, use Multiply and play with the opacities like I did in the lighter version in the image below. It's just a nice tecnique, inspired, again, by the incredible Andy Gilmore.
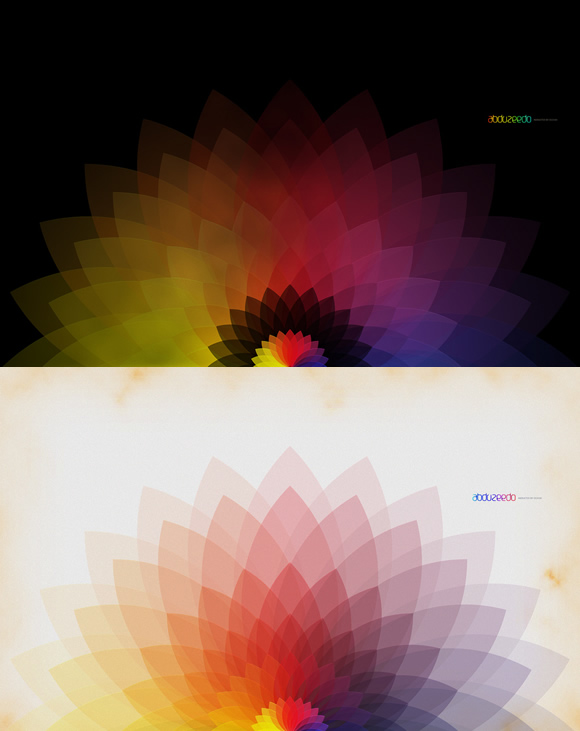
Click here to view the Light version and here for the Dark version.
Download the Photoshop File
Click here to download the Photoshop file used for this tutorial
